

× Do you know these Musicians from their Movies?

How to Loop a Powerpoint Presentation on a TV
How to Loop a PowerPoint Presentation on a TV
PowerPoint presentations are widely used in various settings, from business meetings to educational conferences. When it comes to displaying a PowerPoint presentation on a television, looping the presentation can be an effective way to continuously showcase your content without any interruptions. In this article, we will guide you through the steps of looping a PowerPoint presentation on a TV.
1. Connect your computer to the TV: To begin, connect your computer to the TV using an HDMI or VGA cable. Make sure the TV is set to the appropriate input channel.
2. Open your PowerPoint presentation: Launch PowerPoint on your computer and open the presentation you want to loop on the TV.
3. Set up slide timings: To loop a presentation seamlessly, it is essential to set up slide timings. Go to the Slide Show tab in the PowerPoint toolbar and click on “Rehearse Timings.” This will allow you to determine how long each slide should be displayed before moving to the next one.
4. Rehearse your timings: Once you click on “Rehearse Timings,” your presentation will start running. Advance through the slides at your desired pace, allowing PowerPoint to record the timings.
5. Review and adjust timings: After rehearsing your timings, you will have the option to review and adjust each slide’s timing individually. This step is crucial to ensure a smooth and continuous loop.
6. Enable the loop: Once you are satisfied with the slide timings, go to the Slide Show tab and click on “Set Up Slide Show.” In the dialog box that appears, check the box that says “Loop continuously until ‘Esc'” and click on “OK.”
7. Start the presentation: Now, start your presentation by clicking on the Slide Show tab and selecting “From Beginning.” The presentation will automatically loop once it reaches the end.
Frequently Asked Questions (FAQs):
1. Can I loop a PowerPoint presentation on any TV? Yes, as long as you can connect your computer to the TV, you can loop a PowerPoint presentation.
2. Can I set up slide timings without rehearsing them? Yes, you can manually set up slide timings by going to the Transitions tab, selecting the desired duration, and applying it to each slide.
3. How do I stop the loop during the presentation? Press the “Esc” key on your keyboard to stop the loop and exit the presentation.
4. Can I loop only a specific section of the presentation? Yes, you can loop a specific section by going to the Slide Sorter view, selecting the slides you want to loop, and following the steps mentioned above.
5. Can I add music or audio to a looped presentation? Yes, you can add music or audio by going to the Insert tab, selecting “Audio,” and choosing the desired audio file to play throughout the loop.
6. Can I customize the loop transition effects? Yes, you can customize the loop transition effects by going to the Transitions tab and selecting the desired transition effect for each slide.
7. Can I control the loop from a remote control? Yes, if your computer supports a remote control, you can use it to control the looped presentation.
8. How do I adjust the screen resolution for optimal display on the TV? Right-click on your desktop, select “Display settings,” and adjust the resolution to match the TV’s native resolution for the best display quality.
9. Can I loop a presentation on a smart TV? Yes, you can connect your computer to a smart TV and follow the same steps mentioned above to loop the presentation.
10. Can I loop a presentation on a USB drive? Yes, you can save your PowerPoint presentation on a USB drive and connect it directly to a TV with a USB port. However, make sure the TV supports PowerPoint playback.
11. Can I loop a presentation on multiple TVs simultaneously? Yes, if you have multiple TVs connected to your computer, you can extend the display and loop the presentation on all connected TVs.
12. Can I make changes to the looped presentation while it is running? No, you cannot make changes to the presentation while it is running in loop mode. You need to exit the loop and make the necessary changes before starting the loop again.
13. Can I add hyperlinks or interactive elements to a looped presentation? Yes, you can add hyperlinks or interactive elements to a looped presentation. However, make sure to test them thoroughly before starting the loop.
In conclusion, looping a PowerPoint presentation on a TV can enhance its impact and ensure continuous playback. By following the steps outlined in this article and considering the FAQs, you can seamlessly loop your presentation on a TV, providing a captivating visual experience for your audience.
Related Posts
A nashville legacy the movie cast, why is hitman agent 47 rated r, what dream smp character am i, where was train robbers filmed, cast for 13 hours, where to eat page az, how much unpopped popcorn makes 3 cups, what movie theaters take apple pay, book of the month december 2023, what channel is full house on, honeymoon honeymurder the movie cast, zoom the movie cast and crew, what is girl in room 13 about, the house of wolves book review, list of books in the ethiopian bible, what if i ate popcorn 2 days before my colonoscopy, how to reset seiki tv, yellow rose the movie cast, how to make your own pizza book, murder by contract (1958).
- Start the presentation and see your notes in Presenter view Article
- Add speaker notes to your slides Article
- Rehearse and time the delivery of a presentation Article
- Record a slide show with narration and slide timings Article
- Print your PowerPoint slides, handouts, or notes Article
- Create a self-running presentation Article

Create a self-running presentation
You can use a self-running presentation to run unattended in a booth or kiosk at a trade show or convention, or you can save it as a video and send it to a client.

On the Slide Show tab, select Set Up Slide Show .
Under Show type , pick one of the following:
Presented by a speaker (full screen) Allows the people watching your slide show to have control over when they advance the slides.
Browsed by an individual (window) Presents your slide show in a window, where control over advancing the slides is not available to the people watching.
Browsed at a kiosk (full screen) Loops your slide show until the person watching presses Esc.

Rehearse and record slide timings
When you choose the following show types: Presented by a speaker (full screen) or Browsed at a kiosk (full screen) , you’ll want to rehearse and record timings for effects and slides.
On the Slide Show tab, select Rehearse Timings .
Note: The presentation timer begins immediately when you click Rehearse Timings .
The Rehearsal toolbar appears and the Slide Time box begins timing the presentation.

Figure: The Rehearsal toolbar
While timing your presentation, you can do one or more of the following on the Rehearsal toolbar:
To move to the next slide, click Next .
To temporarily stop recording the time, click Pause .
To restart recording the time after pausing, click Pause .
To set an exact length of time for a slide to appear, type the length of time in the Slide Time box.
To restart recording the time for the current slide, click Repeat .
After you set the time for the last slide, a message box displays the total time for the presentation and prompts you to do one of the following:
To keep the recorded slide timings, click Yes .
To discard the recorded slide timings, click No .
Slide Sorter view appears and displays the time of each slide in your presentation.
Add narration or sound
To record a narration, your computer requires a sound card and a microphone, and a microphone connector if the microphone is not a part of your computer.
On the Slide Show tab, in the Set Up group, click the arrow on the Record Slide Show button.

Select one of the following:
Start Recording from Beginning
Start Recording from Current Slide
In the Record Slide Show dialog box, select the Narrations and laser pointer check box, and if appropriate, select or deselect the Slide and animation timings check box.
Click Start Recording .
To pause the narration, in the Recording shortcut menu in Slide Show view, click Pause . And to resume your narration, click Resume Recording .

To end your slide show recording, right-click the slide, and then click End Show .
The recorded slide show timings are automatically saved and the slide show appears in Slide Sorter view with timings beneath each slide.
You can record a narration before you run a presentation, or you can record it during the presentation and include audience comments. If you do not want narration throughout your entire presentation, you can record separate sounds or comments on selected slides or objects. For more details, see Record a slide show with narration and slide timings .
Browsed by an individual (window) Presents your slide show in a window, where control over advancing the slides is available to the people watching.
Browsed at a kiosk (full screen) Loops your slide show until the person watching presses Esc. (Selecting this option automatically selects the Loop continuously until 'Esc' check box and causes your slide show to run in a loop.)

A Rehearsal toolbar appears, and the Slide Time box begins timing the presentation. The toolbar includes a timer, a pause/play button, and Repeat button
To restart recording the time after pausing, click Play .

On the view tab, you can then switch to Slide Sorter view to see the time allotted for each slide in your presentation.
Set up slide transitions
If you want a slide show to run automatically at a kiosk, you can control when and how the slides advance. To do this, you can apply the same transition to all slides in the presentation and set the transition to automatically advance after a certain time interval.
On the Transitions tab, click the transition that you want.

Do the following on the Transitions tab:
To set the amount of time that each slide is displayed, select After and enter the number of seconds you want.
To set the duration of each transition between slides, enter the amount of time in the Duration box.
Click Apply to All .

Export a presentation to video
You can export a presentation as a movie file. See Save a presentation as a movie file for more details.

Need more help?
Want more options.
Explore subscription benefits, browse training courses, learn how to secure your device, and more.

Microsoft 365 subscription benefits

Microsoft 365 training

Microsoft security

Accessibility center
Communities help you ask and answer questions, give feedback, and hear from experts with rich knowledge.

Ask the Microsoft Community

Microsoft Tech Community

Windows Insiders
Microsoft 365 Insiders
Was this information helpful?
Thank you for your feedback.
- Privacy Policy
- Terms of Use
How to Display PowerPoint on TV: A Simple Step-by-Step Guide
- by Trish Dixon
- August 15, 2024
Displaying a PowerPoint presentation on a TV screen can significantly enhance the experience for your audience. Whether you’re conducting a business meeting, teaching a class, or showcasing a project, showing your presentation on a larger screen can make your content more impactful and engaging. In this guide, we’ll walk you through various methods to seamlessly display your PowerPoint on a TV.
Why Displaying PowerPoint on TV is Beneficial?
Before we jump into the methods, let’s quickly touch on why you might want to display your PowerPoint on a TV :
- Larger Screen : A bigger display helps your audience see the content more clearly.
- Improved Engagement : A larger screen can make your presentation more dynamic and captivating.
- Versatility : Using a TV gives you more flexibility with where and how you present.
Now, let’s explore the different methods to display your PowerPoint on a TV .
Methods to Display PowerPoint on TV
Method 1: using an hdmi cable.
One of the simplest and most reliable ways to display your PowerPoint presentation on a TV is by using an HDMI cable .
Steps to Connect PowerPoint to TV via HDMI
- Check Compatibility : Ensure your laptop or desktop has an HDMI port . Most modern devices come with an HDMI output.
- Connect the HDMI Cable : Plug one end of the HDMI cable into your laptop and the other end into the TV’s HDMI input .
- Select the HDMI Input on TV : Use your TV remote to select the corresponding HDMI input . This will display your laptop screen on the TV.
- Start the PowerPoint Presentation : Open your PowerPoint file and start the Slide Show . Your slides will appear on the TV screen.
Method 2: Using a Wireless Display Adapter
If you prefer a wireless setup, using a wireless display adapter is an excellent choice.
Steps to Connect PowerPoint to TV via Wireless Display Adapter
- Purchase a Wireless Display Adapter : There are several adapters available, such as the Microsoft Wireless Display Adapter or Google Chromecast .
- Connect the Adapter to TV : Plug the adapter into the HDMI port of your TV and connect the USB cable to a power source.
- Connect Your Device to the Adapter : On your laptop, go to Settings > Devices > Bluetooth & other devices and select Add Bluetooth or other device . Choose Wireless display or dock and select your adapter.
- Display PowerPoint on TV : Once connected, your laptop screen will be mirrored on the TV. Open your PowerPoint and start presenting.
Method 3: Using a Smart TV App
If you have a Smart TV , you might not need any additional hardware. You can use your TV’s built-in screen mirroring feature or apps like AirPlay for Apple devices.
Steps to Connect PowerPoint to TV via Smart TV App
- Ensure the TV and Device are on the Same Network : Both your TV and laptop must be connected to the same Wi-Fi network.
- Use Screen Mirroring or Casting : Depending on your TV brand (Samsung, LG, Sony), look for the Screen Mirroring option in the TV’s menu.
- Connect via Laptop : On your laptop, go to Settings > Display , and select Connect to a wireless display . Choose your TV from the list of available devices.
- Start the Presentation : Open your PowerPoint presentation and start the Slide Show . Your TV will display your presentation wirelessly.
Method 4: Using a USB Drive
This method is particularly useful if you don’t have your laptop with you.
Steps to Display PowerPoint on TV via USB Drive
- Save PowerPoint as a Video : Open your PowerPoint presentation and go to File > Export > Create a Video . Save the presentation as an MP4 file.
- Transfer to USB Drive : Copy the video file to a USB drive .
- Insert USB Drive into TV : Plug the USB drive into the USB port on your TV.
- Play the Video : Use your TV remote to navigate to the USB drive and play the video file.
Method 5: Using a Laptop or Mobile Device with an HDMI Adapter
If your device doesn’t have an HDMI port, you can use an HDMI adapter .
Steps to Connect via HDMI Adapter
- Get an HDMI Adapter : Purchase an adapter compatible with your device (e.g., USB-C to HDMI , Lightning to HDMI for iPhone/iPad).
- Connect the Adapter to Your Device : Plug the adapter into your device’s charging port.
- Connect HDMI Cable to Adapter : Connect the HDMI cable to the adapter and then to the TV.
- Display the Presentation : Follow the steps mentioned in Method 1 to display your PowerPoint.
Troubleshooting Common Issues
Sometimes, you may face issues when trying to display a PowerPoint on your TV. Here’s how to resolve them:
No Signal on TV
- Check Connections : Ensure all cables are securely connected.
- Select Correct HDMI Input : Use your TV remote to choose the right HDMI input.
- Restart Devices : Restart both your TV and laptop to refresh the connection.
Poor Display Quality
- Adjust Resolution : Go to Settings > Display on your laptop and adjust the resolution to match your TV.
- Use High-Quality Cables : Ensure you are using a high-quality HDMI cable that supports your TV’s resolution.
Audio Not Playing
- Check Audio Settings : Go to Sound settings on your laptop and ensure the TV is selected as the output device.
- Use External Speakers : If your TV’s speakers are not sufficient, consider using external speakers.
Best Practices for Displaying PowerPoint on TV
- Use High-Resolution Images : Ensure that your PowerPoint slides contain high-resolution images that won’t pixelate on a larger screen.
- Keep Text Large and Clear : Use large fonts and clear text so that your audience can read easily from a distance.
- Test Before Presenting : Always test your setup before the actual presentation to ensure everything works smoothly.
- Consider the Room Lighting : Bright rooms can wash out the TV screen. Adjust the room’s lighting or TV brightness for the best visibility.
Comparison of Methods to Display PowerPoint on TV
| Method | Ease of Use | Cost | Wireless Option | Quality |
|---|---|---|---|---|
| HDMI Cable | Very Easy | Low | No | High |
| Wireless Display Adapter | Easy | Medium | Yes | High |
| Smart TV App | Easy | Low | Yes | Medium |
| USB Drive | Easy | Low | No | Medium |
| HDMI Adapter | Moderate | Medium | No | High |
Final Thoughts
Displaying your PowerPoint presentation on a TV is a straightforward process that can significantly enhance your audience’s experience. Whether you choose to connect using an HDMI cable , a wireless display adapter , or even a USB drive , each method offers its unique advantages. By following the steps outlined in this guide, you can ensure a smooth and successful presentation.
Frequently Asked Questions
Can i display powerpoint on tv without an hdmi cable.
Yes, you can display PowerPoint on TV without an HDMI cable using methods like a wireless display adapter, a Smart TV app, or even by saving your presentation as a video and using a USB drive.
How do I connect my laptop to a TV wirelessly?
To connect your laptop to a TV wirelessly, you can use a wireless display adapter or your Smart TV’s screen mirroring feature. Both require your devices to be on the same Wi-Fi network.
What should I do if the TV shows “No Signal” when connected?
If your TV shows “No Signal,” check all cable connections, ensure the correct HDMI input is selected, and restart both the TV and your laptop to refresh the connection.
Can I use my smartphone to display PowerPoint on TV?
Yes, you can use your smartphone to display PowerPoint on a TV by using an HDMI adapter, a wireless display adapter, or a Smart TV app like AirPlay (for iPhone) or Chromecast.
Is it possible to play a PowerPoint presentation on TV directly from a USB drive?
Yes, you can save your PowerPoint presentation as a video file (e.g., MP4) and play it directly on your TV from a USB drive.
How can I improve the display quality of my PowerPoint on TV?
To improve the display quality, ensure you’re using high-resolution images, adjust your laptop’s resolution to match the TV, and use a high-quality HDMI cable or wireless adapter.
- Recent Posts

- How to Insert a YouTube Video into PowerPoint the Right Way! - September 19, 2024
- 10 Free PowerPoint Templates for Project Presentation - September 17, 2024
- How to Jump to Another Slide in PowerPoint: Quick Guide - September 17, 2024
Leave a Reply Cancel reply
Your email address will not be published. Required fields are marked *
Save my name, email, and website in this browser for the next time I comment.
Related Posts
How to insert a youtube video into powerpoint the right way.
- September 19, 2024
Learn how to easily insert a YouTube video into PowerPoint with step-by-step instructions to enhance your presentations. Suitable for all PowerPoint versions.
How to Jump to Another Slide in PowerPoint: Quick Guide
- August 23, 2024
Master seamless transitions in presentations with our guide on how to jump to another slide in PowerPoint efficiently. Perfect your slides today!
How to Center a Picture in PowerPoint: Easy Steps
Learn to quickly align images like a pro. Our guide on how to center a picture in PowerPoint simplifies the task with straightforward steps.
© 2024 pptbliss.com - All rights reserved.
How-To Geek
How to loop a powerpoint presentation.

Your changes have been saved
Email is sent
Email has already been sent
Please verify your email address.
You’ve reached your account maximum for followed topics.
Quick Links
Set up your slideshow to be looped, apply automatic slide transitions.
Slideshows are sometimes used to display images at events, such as weddings or trade shows. Whatever the occasion might be, you’ll want to loop your PowerPoint presentation so your guests aren’t staring at a blank screen. Here’s how it’s done.
First, open your PowerPoint presentation in which you would like to loop. Once open, navigate to the “Set Up” group of the “Slide Show” tab and then select the “Set Up Slide Show” button.

The “Set Up Show” window will appear. In the “Show options” group, check the box next to “Loop Continuously until Esc.” Once selected, click “OK” in the bottom-right corner of the window.

Now, when you play your slideshow, it will end only when you press the “Esc” key instead of when you've finished the last slide.
Related: How to Make YouTube Videos Loop Continuously
One caveat: With the way we currently have it set up, the slideshow will proceed only when someone clicks the mouse button. That’s fine if there will be a speaker present at all times. Otherwise, you’ll need to set up automatic slide transitions.
Head back to the “Set Up Show” window by selecting “Set Up Slide Show” in the “Set Up” group of the “Slide Show” tab.
There are a couple of options you need to select, but one important note is that you must first select “Using Timings, If Present” under the “Advance Slides” group.

The next option we select will lock a few things in place (which is why you need to select “Using Timings, If Present” first).
Under the “Show Type” group, select “Browsed at a Kiosk (Full Screen)." The “Loop Continuously until Esc” option will be enabled automatically if you haven’t already turned it on, and the option you’ve selected under “Advance Slides” will remain unchanged.
Select “OK” when ready to proceed.

Without the “Browsed at a Kiosk” option enabled, the automatic slide progressions would be disabled if someone were to press the Back key. With it enabled, the Forward and Back keys are locked, allowing the slideshow to automatically progress unattended without fear of someone breaking it.
Now it’s time to set the timings of the slides. Head over to the “Transitions” tab. In the “Timing” group, check the box next to “After” and set the timing at which you’d like each slide to progress. Note that it doesn’t matter if the box next to “On Mouse Click” is checked or not---it won’t work.
After that, select the “Apply to All” option in the same group.

Now, when you play your slideshow, it will continuously loop without interruption. To exit the slideshow, press the “Esc” button.
- Microsoft Office

How to Loop a PowerPoint Slide Show to Repeat Automatically

Set up a PowerPoint Presentation That Loops or Repeats Continuously
by Avantix Learning Team | Updated November 12, 2021
Applies to: Microsoft ® PowerPoint ® 2013, 2016, 2019 and 365 (Windows)
You can set up a PowerPoint slide show to loop or repeat automatically. A looping presentation can be used at events, trade shows or even in a reception area in an office. The easiest way to set up a slide show to loop or replay continuously is to apply automatic transitions and then configure Slide Show settings.
Recommended article: 5 PowerPoint Keyboard Shortcuts to Run a Slide Show
Do you want to learn more about PowerPoint? Check out our virtual classroom or in-person PowerPoint courses >
Screenshots in this article are from PowerPoint 365 but are similar in older versions of PowerPoint.
Step 1: Apply transitions to automatically advance slides during a slide show
Transitions occur between slides when you run a slide show.
To apply transitions to automatically advance slides during a slide show:
- In Normal View or Slide Sorter View, display or select a slide.
- Click the Transitions tab in the Ribbon.
- Select a transition in the Transitions gallery (such as Fade).
- Click Effect Options and choose the desired option. Effect Options change depending on the transition you selected.
- In the Timing group, click the arrows beside Duration to set the timing you want (in seconds) for the transition. You may also type a duration.
- In the Timing group, under Advance Slides, deselect or uncheck On mouse click and beside After, select or click the up and down arrows to set the timing to transition to the next slide. You may also type a duration.
- In the Timing group, click Apply to All.
In the Transitions tab in PowerPoint, you can select the type of transition (such as Fade) as well as timing options:

Step 2: Set up a presentation to loop during a slide show
To set up a PowerPoint presentation to loop during a slide show:
- Click the Slide Show tab in the Ribbon and then click Set Up Slide Show. A dialog box appears.
- Under Show type, if you select Presented by a speaker (full screen), the speaker or those watching the slide show will have control over when they advance slides. This is the default setting for slide shows. If you select Browsed by an individual (window), those watching the slide show do NOT have control over when slides advance. If you select Browsed at kiosk (full screen), those watching the slide show do NOT have control over when slides advance and the presentation automatically loops until those watching press Escape (Esc).
- Under Show options, select Loop continuously until 'Esc'. You will be able to select this option if you selected one of the first two options under Show type.
Below is the Set Up Show dialog box with Presented by speaker selected and looping enabled:

If you want to set specific timings for slides to advance or to add narration, check out the article How to Run a PowerPoint Slide Show Automatically (Set Up a Self-Running Presentation) . If you have audio or video in the presentation, you'll need to set the media to play automatically (on the Playback tab in the Ribbon) and animations will also need to be set to run automatically.
Subscribe to get more articles like this one
Did you find this article helpful? If you would like to receive new articles, JOIN our email list.
More resources
How to Embed a YouTube Video in PowerPoint
How to Hide and Unhide Slides in PowerPoint (with Shortcuts)
How to Insert Video in PowerPoint (from a File on Your PC or a Shared Drive)
PowerPoint Keyboard Shortcuts to Play and Control Video During a Slide Show
How to Add Animation in PowerPoint (Animate Images, Text and Other Objects)
Related courses
Microsoft PowerPoint: Intermediate / Advanced
Microsoft PowerPoint: Design for Non-Designers
Microsoft PowerPoint: Animations Bootcamp
Microsoft Excel: Intermediate / Advanced
VIEW MORE COURSES >
Our instructor-led courses are delivered in virtual classroom format or at our downtown Toronto location at 18 King Street East, Suite 1400, Toronto, Ontario, Canada (some in-person classroom courses may also be delivered at an alternate downtown Toronto location). Contact us at [email protected] if you'd like to arrange custom instructor-led virtual classroom or onsite training on a date that's convenient for you.
Copyright 2024 Avantix ® Learning
You may also like

How to Insert or Type E with an Accent Mark in PowerPoint (È, É, Ê, Ë, è, é, ê, or ë)
You can insert or type e with an accent mark in PowerPoint using built-in tools or keyboard shortcuts (including Alt code shortcuts). The letter e can be inserted with an accent in both upper or lower case in text boxes or placeholders on slides, the slide master or layouts. The following are common accents in upper or lower case – È, É, Ê, Ë, è, é, ê, or ë.

How to Fade a Picture or Part of a Picture in PowerPoint (Using a Gradient)
You can fade a picture in PowerPoint by drawing a rectangle shape on top of the picture and then filling the rectangle with a gradient from opaque to transparent. This technique is often used to fade an image into the background of a slide. Since the rectangle is placed on top of the image and then text may be placed on top of the rectangle, you may need to reorder the objects.

How to Lock an Image, Shape or Other Object in PowerPoint
You can now lock an image, shape or other object in PowerPoint. Objects can be locked in Normal View or Slide Master View. Only PowerPoint 365 users can lock objects to prevent moving and resizing. This is helpful if you want to select and move other objects on the slide or prevent others from moving or resizing an object. You can lock items using the context menu or the Selection Pane.
Microsoft, the Microsoft logo, Microsoft Office and related Microsoft applications and logos are registered trademarks of Microsoft Corporation in Canada, US and other countries. All other trademarks are the property of the registered owners.
Avantix Learning |18 King Street East, Suite 1400, Toronto, Ontario, Canada M5C 1C4 | Contact us at [email protected]
Our Courses
Avantix Learning courses are offered online in virtual classroom format or as in-person classroom training. Our hands-on, instructor-led courses are available both as public scheduled courses or on demand as a custom training solution.
All Avantix Learning courses include a comprehensive course manual including tips, tricks and shortcuts as well as sample and exercise files.
VIEW COURSES >
Contact us at [email protected] for more information about any of our courses or to arrange custom training.
Privacy Overview
Pin it on pinterest.
- Print Friendly
How to Loop a Powerpoint Presentation: Step-by-Step Guide
Looping a PowerPoint presentation is an easy way to keep your slides on repeat for an audience or a display. It’s perfect for trade shows, informational kiosks, and even personal use when you don’t want to manually control the presentation. In just a few clicks, you can automate your PowerPoint to loop continuously until you decide to stop it.
Step by Step Tutorial on How to Loop a PowerPoint Presentation
Before we dive into the nitty-gritty of looping your presentation, let’s understand what we’re about to do. By following these steps, we’ll set your PowerPoint to play over and over without any manual intervention. It’s like putting your favorite song on repeat, but with slides!
Step 1: Open your PowerPoint presentation
Open the PowerPoint presentation you want to loop.
When you open your presentation, make sure you’re on the slideshow tab. This is where all the magic happens for presentation playback.
Step 2: Select ‘Set Up Slide Show’
Click on the ‘Slide Show’ tab and then select ‘Set Up Slide Show’.
This is where you can tweak the settings for how your presentation is displayed. It’s like the control center for your slideshow.
Step 3: Choose ‘Loop continuously until ‘Esc”
In the ‘Set Up Show’ options, check the box for ‘Loop continuously until ‘Esc”.
By checking this option, you’re telling PowerPoint to keep cycling through your slides until you press the Escape key to stop it.
Step 4: Set the slides to advance automatically
Under ‘Advance slides’, select ‘Using timings, if present’ or set the ‘After’ option to the number of seconds you want each slide to be displayed.
This step is crucial if you want your presentation to move through slides without you clicking anything. It’s like setting an automatic timer for each slide.
Step 5: Save your settings and test the presentation
Click ‘Ok’ to save your settings and start your presentation to test the loop.
After you’ve saved your settings, give your looped presentation a dry run to make sure everything flows smoothly. If it does, you’re all set!
After completing these steps, your PowerPoint presentation will loop continuously. Whether you’re away from your computer or engaged with an audience, your presentation will keep running in the background, providing a seamless flow of information.
Tips for Looping a PowerPoint Presentation
- Make sure your slides are self-explanatory since you might not be there to explain each one.
- Keep an eye on the timings if your slides have animations or transitions.
- Use high-quality images and readable text to ensure your presentation looks good on repeat.
- Consider adding background music to keep the loop engaging.
- Always do a full run-through to check for any glitches that might disrupt the loop.
Frequently Asked Questions
How do i loop a powerpoint presentation with sound.
To loop a PowerPoint presentation with sound, embed the audio file in your presentation and set it to play across slides. Then, follow the steps above to loop the presentation itself.
Can I loop a PowerPoint presentation on a TV or monitor?
Yes, you can loop a PowerPoint presentation on a TV or monitor by connecting your computer and setting up the presentation to loop as instructed above.
Is it possible to loop only specific slides in a presentation?
To loop specific slides, you can create a custom slide show within PowerPoint that includes only the slides you want to loop, and then set that custom show to loop.
Can I loop a PowerPoint presentation on a loop without using PowerPoint?
To loop a presentation without PowerPoint, you can convert it to a video format that supports looping, such as MP4, and use a media player to loop it.
How can I stop a looped PowerPoint presentation?
To stop a looped PowerPoint presentation, simply press the ‘Esc’ key on your keyboard, and it will return to normal view.
- Open your PowerPoint presentation.
- Select ‘Set Up Slide Show’.
- Choose ‘Loop continuously until ‘Esc”.
- Set the slides to advance automatically.
- Save your settings and test the presentation.
Looping a PowerPoint presentation can be incredibly useful in various situations, from professional trade shows to casual photo slideshows. With the simple steps outlined above, anyone can set up their presentation to run on a continuous loop, freeing up time and ensuring the information is always on display. Remember to check your timings, especially if you have animations or transitions, and test your loop thoroughly to avoid any hiccups. Now, you’re ready to create smooth, endlessly looping presentations that can captivate and inform your audience without a hitch. Keep experimenting with PowerPoint’s features to make your presentations even more powerful, and always look for ways to improve and streamline your work. Happy presenting!

Matt Jacobs has been working as an IT consultant for small businesses since receiving his Master’s degree in 2003. While he still does some consulting work, his primary focus now is on creating technology support content for SupportYourTech.com.
His work can be found on many websites and focuses on topics such as Microsoft Office, Apple devices, Android devices, Photoshop, and more.
Share this:
- Click to share on Twitter (Opens in new window)
- Click to share on Facebook (Opens in new window)
Related Posts
- How to Loop a Slideshow on Powerpoint 2013: Step-by-Step Guide
- How to Loop a Powerpoint Office 365 Slideshow
- How to Download a Google Slides Presentation as a Powerpoint File
- How to Rotate a Powerpoint Slide Presentation
- How to Do a Powerpoint Google Slides Presentation Conversion
- How to End Powerpoint on Last Slide in Powerpoint 2010: A Step-by-Step Guide
- How to Make Google Slides Vertical (5 Quick Steps)
- How to Delete a Slide in Powerpoint 2010: Step-by-Step Guide
- How to Hide a Slide in Powerpoint 2010: A Step-by-Step Guide
- How to Insert Slides from Another Presentation: Powerpoint 2024 Guide
- How to Add a New Slide in Google Slides: A Step-by-Step Guide
- How to Delete Multiple Slides in Google Slides: A Step-by-Step Guide
- How to Make a Powerpoint Slide Vertical in Powerpoint 2013: A Step-by-Step Guide
- How to Convert Powerpoint to Google Slides: A Tech Solution
- How to Duplicate a Slide in Powerpoint: A Step-by-Step Guide
- How to Merge Files in Powerpoint: A Step-by-Step Guide
- How to Remove Slide Numbers in Powerpoint 2019: Easy Steps
- How to Add a Hyperlink on Google Slides
- How to Change Slide Size in Powerpoint 2016
- Determining the Size of a PowerPoint Slide in Pixels: A Guide
Get Our Free Newsletter
How-to guides and tech deals
You may opt out at any time. Read our Privacy Policy
How To Loop a PowerPoint Presentation

Learn how to loop a PowerPoint in 3 easy steps! Usually, once you’re finished with your presentation, PowerPoint goes back to the slide editor. But if you want your presentation to go back to the start, this quick tutorial will show you how to loop any PowerPoint presentation and set it to run automatically.
Why Learn How to Loop a PowerPoint
It can be very awkward to have your audience looking at the black screen after going through all your slides. Or even worse, at the slide editor. If you’re planning on going back on some of your previous points, learning how to loop your PowerPoint presentation can be a useful tool. Sure, you can go back using the Back key. But this way can make it easier and more polished, especially if you have a long presentation with many slides.
Learning how to loop a PowerPoint can also be extremely useful for those making a pictured-based presentation. Slides don’t necessarily have to have a lot of information on them. PowerPoint can also be used just to present images and examples or to provide a background for the speaker. Looping your presentation will make sure that you’re never left with an empty screen.
In short, it’s a nice detail to make your presentation look more clean and polished. So, are you ready to learn how to loop a PowerPoint presentation?
How to Loop a PowerPoint Presentation
Luckily, learning how to loop a PowerPoint is very easy! Just follow these 3 steps:
1. Open your presentation and go to the Slide Show tab.

2. Select the Set Up Slide Show option for the Set-Up Options window to appear.

3. In this window, go to the “Show options group” and tick the Loop continuously until ‘Esc’ (the first option). Don’t forget to click OK to apply the new set-up!

And that’s all! Try putting your presentation on Slide Show mode. You’ll see that your presentation keeps going on until you press the ESC key in your keyboard.
How To Make a Self-Running PowerPoint Presentation
If you’re making a PowerPoint presentation to be used only as a background, then this information might be useful too. Usually, PowerPoint presentations only advance to the next slide when a mouse click occurs. But you can set your presentation to run automatically. This way, you don’t have to keep worrying about moving to the next slide since your presentation will do it on itself!
This is a great option for presentations that are only images on a loop, like in a Pecha Kucha presentation . You will be able to focus much better on what you have to say rather than in clicking on your slides to avoid boring your audience with only one picture.
1. Go to the Transitions tab.
2. In the “Timing” group (in the far right), tick the After option. In the timer on its side, enter how much time you want between slide and slide.

3. Select the Apply To All option so every slide follows the same set-up.
If you want different times for each slide, you can also customize it like so. You just have to go one at a time changing how much time you want to spend on each slide and ignore the last step. Don’t forget to practice before your presentation! Only then you’ll know if the times you set for each slide are right. Good luck!
Create professional presentations online
Other people also read

Tutorial: Save your PowerPoint as a Video
How To Convert Google Slides To PowerPoint and Vice Versa

How To Add Animations To PowerPoint
How to: Effortlessly Create PowerPoint Looping Presentations
Looping presentations in PowerPoint can be a game-changer for those needing to display information continuously. It’s a straightforward process: Set up your slides, head to the ‘Slide Show’ tab, click on ‘Set Up Slide Show’, tick the ‘Loop continuously until ‘Esc” box, and voila – your presentation is set to loop.
After completing this action, your PowerPoint presentation will automatically replay from the beginning once it reaches the end. This is particularly useful for presentations displayed at kiosks, trade shows, or in waiting areas, ensuring your audience doesn’t miss any content.
Introduction
Ever been to a trade show and noticed how some booths have screens with presentations that seem to run endlessly? That’s the magic of looping presentations, a feature that’s built into PowerPoint but not always used to its fullest potential.
Having a presentation loop can serve multiple purposes. For those in marketing, it means your message is continually being broadcast without the need for manual intervention. For educators, it could mean students have more time to absorb information. And for those in the corporate world, it ensures that important data is consistently on display for stakeholders and team members to see.
Looping presentations are not only efficient but also incredibly simple to set up in PowerPoint. Knowing how to do this is a great skill to have in your back pocket. Whether you’re prepping for an exhibition, setting up a self-running informational display, or just want to make sure your audience can see your presentation in its entirety, no matter when they walk in the room – this article is for you.
PowerPoint Looping Presentations Tutorial
Before diving into the steps, it’s important to understand what we’re aiming to achieve. By the end of this tutorial, your PowerPoint presentation will be capable of running on its own, looping endlessly until manually stopped. It’s an excellent way to keep an audience engaged with your content, even if you’re not actively presenting.
Step 1: Open your PowerPoint presentation
Open the PowerPoint presentation you wish to loop.
When you have your presentation open, you’ll want to ensure that all your slides are in the correct order and that any timings, animations, or transitions are set up as you want them. This is crucial because once the presentation starts looping, these aspects will play over and over again.
Step 2: Click on the ‘Slide Show’ tab
Navigate to the ‘Slide Show’ tab located on the ribbon at the top of PowerPoint.
The ‘Slide Show’ tab is where you’ll find all the settings related to the presentation’s display. It’s your control center for how the presentation will run.
Step 3: Select ‘Set Up Slide Show’
Click on the ‘Set Up Slide Show’ button within the ‘Slide Show’ tab.
This action opens a new window with various options for running your presentation. It’s like the backstage area before a performance, where you make all the necessary tweaks.
Step 4: Choose ‘Loop continuously until ‘Esc”
In the ‘Set Up Show’ window, check the box that says ‘Loop continuously until ‘Esc”.
This is the setting that transforms your presentation from a one-time run-through to an endlessly looping display. It’s the crucial step in ensuring your content gets maximum exposure.
Step 5: Save your settings
Click ‘OK’ to save your settings and close the ‘Set Up Show’ window.
Once you’ve clicked ‘OK’, your presentation is all set to loop. You can start the slideshow to test it out and see your handiwork in action.
| Benefit | Explanation |
|---|---|
| Continuous Display | Having a looping presentation means your content is always on show, which is excellent for situations where you have a constant flow of viewers who are viewing at different times. |
| Time-Saving | Instead of manually restarting the presentation, it does the work for you, allowing you to focus on other tasks or engage with your audience. |
| Professionalism | A looping presentation adds a layer of professionalism to your setup, demonstrating forethought and technical savvy. |
Continuous Display
By looping your PowerPoint presentation, you ensure that no matter when someone walks by or starts watching, they’ll be able to see the whole thing. It’s ideal for environments where you have a rotating audience, like at conferences or informational booths.
Time-Saving
Once set up, you don’t need to stick around to restart the presentation. It loops automatically, freeing you up to do other things – like interacting with your audience or managing other aspects of your event or meeting.
Professionalism
A self-running, looping presentation can make a statement about your professionalism. It shows that you’ve put thought into how your information is presented and that you’re adept at using technology to enhance your message.
| Drawback | Explanation |
|---|---|
| Can be Ignored | If viewers know the presentation loops, they may pay less attention, thinking they can catch the information later. |
| Technical Issues | If there’s a hiccup with the device or software, the looping can stop, which might go unnoticed if you’re not present. |
| Repetitiveness | The same information cycling over and over can become repetitive for those in the vicinity for an extended period. |
Can be Ignored
When people know a presentation is looping, they might not give it their full attention, thinking they’ll catch the next round. This could mean your message isn’t hitting home as strongly as you’d like.
Technical Issues
Technology isn’t foolproof. If your PowerPoint or the device it’s running on experiences issues, your looping presentation could grind to a halt – often at the most inopportune times.
Repetitiveness
For those who are around for a while, a looping presentation can become like that one song on the radio that’s played too often – annoying. Finding the balance between informative and overkill is key.
Additional Information
PowerPoint’s looping feature might seem simple, but it can be incredibly powerful when used correctly. Think about the last time you walked past a looping video or presentation – it probably caught your eye, at least for a moment. That’s the draw of a looping display; it’s always there, always ready to catch the attention of someone new.
One tip is to ensure your presentation is designed with looping in mind. This means avoiding content that could become quickly dated or using language that implies the presentation is a one-time event. Instead, use evergreen content that will be relevant no matter how many times it’s viewed.
Another consideration is the length of your presentation. If it’s too long, viewers might not stick around for the whole loop, missing out on key information. If it’s too short, it could become annoyingly repetitive. Striking the right balance is essential.
When setting up your looping presentation, think about the context in which it will be viewed. Is it in a noisy trade show hall? Consider adding subtitles or visual cues that can be understood without sound. Is it in a quiet waiting area? Maybe a softer, less attention-grabbing approach is needed.
Remember, the goal of a PowerPoint looping presentation is to inform and engage, not to overwhelm or annoy. Keep your audience’s experience in mind, and you’ll be sure to create a looping presentation that adds value and captures interest.
- Open your PowerPoint presentation.
- Click on the ‘Slide Show’ tab.
- Select ‘Set Up Slide Show’.
- Choose ‘Loop continuously until ‘Esc”.
- Save your settings.
Frequently Asked Questions
What if my presentation has videos.
If your presentation contains videos, make sure they’re set to play automatically and check the box ‘Rewind after playing’ to ensure they loop with the rest of the slides.
Can I loop just one section of my presentation?
Yes, you can loop specific sections by using custom shows within PowerPoint. It’s a bit more complex but entirely possible.
Will looping work if I have transition timings set up?
Absolutely. Your slides will transition according to the timings you’ve set, looping back to the beginning when they reach the end.
How do I stop a looping presentation?
Simply press the ‘Esc’ key, and the presentation will stop looping and exit the slideshow view.
Can I loop a presentation on a Mac?
Yes, the steps are the same for PowerPoint on a Mac as they are for Windows.
Mastering PowerPoint looping presentations is like unlocking a new level in your presentation skills. It’s not just about making your slides look pretty; it’s about ensuring your message is always out there, always engaging, and always ready to inform. Whether you’re in the boardroom, at a booth, or in an educational setting, a well-crafted looping PowerPoint can make all the difference.
So go ahead, give it a try – your audience will thank you for it. And remember, the best presentations are those that not only deliver information but do so in a way that’s seamless and ever-present, just like the perfect loop.

Matthew Burleigh has been writing tech tutorials since 2008. His writing has appeared on dozens of different websites and been read over 50 million times.
After receiving his Bachelor’s and Master’s degrees in Computer Science he spent several years working in IT management for small businesses. However, he now works full time writing content online and creating websites.
His main writing topics include iPhones, Microsoft Office, Google Apps, Android, and Photoshop, but he has also written about many other tech topics as well.
Read his full bio here.
Share this:
Join our free newsletter.
Featured guides and deals
You may opt out at any time. Read our Privacy Policy
Related posts:
- How to Loop a Slideshow on Powerpoint 2013
- How to Set Time for Slides in Powerpoint
- How to Use Looping Backgrounds in PowerPoint: A Step-by-Step Guide
- How to Save Powerpoint as PDF with Notes
- Can I Convert My Powerpoint to Google Slides?
- How to Drag Slides From One PowerPoint to Another: A Step-by-Step Guide
- How to Unhide a Slide in Powerpoint 2013
- How to Add Page Numbers in Powerpoint 2010
- How to Make a Powerpoint Slide Vertical in Powerpoint 2013
- How to Delete a Slide in Powerpoint 2010
- How to Hide a Slide in Powerpoint 2010
- How to Create a PowerPoint Presentation Step by Step: 2024 Guide
- How to Delete Multiple Slides in Google Slides
- How to Insert Slides from Another Presentation in Powerpoint 2010
- How to Change the Font on All Slides in Google Slides
- How to Rotate a Slide in PowerPoint: A Step-by-Step Guide
- How to End Powerpoint on Last Slide in Powerpoint 2010
- How to Run Powerpoint in Kiosk Mode: A Step-by-Step Guide
- How to Change Line Spacing in Powerpoint for Every Slide at Once
- How to Loop a Video on iPhone: A Step-by-Step Guide
Stack Exchange Network
Stack Exchange network consists of 183 Q&A communities including Stack Overflow , the largest, most trusted online community for developers to learn, share their knowledge, and build their careers.
Q&A for work
Connect and share knowledge within a single location that is structured and easy to search.
How to run PowerPoint off OneDrive in browser in loop?
I created a PowerPoint slideshow. I want it to run it on a TV screen that has a built-in web browser, auto-loop, and I also want users to be able to view it from their laptops. I currently can do this using google docs / google drive, but I'm trying to do this using mainly Office 365 technologies, and avoid google docs.
I want the following:
- website link to view a PowerPoint presentation.
- store the PowerPoint in OneDrive (for Business)
- automatically view each slide for 10 seconds (currently doing this successfully via the "transitions" settings)
- automatically loop to the beginning when reached the end (I configured this in "slide show setup" but it doesn't seem to work when presented online)
- full screen (hide any toolbars, bottom bars, etc.)
- I don't want it converted to a movie (I want it to act like a presentation when users are viewing it on their laptops).
Currently, I can manually load it up, and get it full screen, and the only show stopper is that it doesn't loop. Preferably, the link would force it full screen without manually clicking to run the slideshow.
Google has nice URL parameters to tweak how the PowerPoint is presented. It is unclear what Microsoft's URL parameters are and maybe my solution lies within understanding these...
Microsoft URL parameters that I see that I don't have complete understanding of:
- action: edit, view, embedview - documented at https://wopi.readthedocs.io/en/latest/discovery.html#wopi-actions
- wdAr: ? (I'm guessing this means "aspect ratio")
- wdEaa: 1 or 0; 1 means "use default autoadvance settings from the file"
- wdModeSwitchTime: ?
- wdSlideId: ?
- microsoft-powerpoint
- presentations
- 1 Wouldn't it be simpler to turn the presentation into a video ? If the TV browser supports HTML5, you may use the <video> loop Attribute , or make it loop manually in the browser. – harrymc Commented Mar 12, 2018 at 14:40
- I think that loading a video makes more sense than loading PowerPoint and dynamically displaying each slide over and over again. Much more efficient and can be displayed anywhere. – HackSlash Commented Mar 12, 2018 at 15:33
- Since you are supposed to pass wd* query string values untouched, unlikely you really need them. You can set FULLSCREEN = true to get fullscreen. See wopi.readthedocs.io/en/latest/discovery.html#term-fullscreen Dont see looping built in, consider using javascript timer and refresh. – ThatOneDude Commented Mar 13, 2018 at 4:05
- Turning it into a video makes some sense for the TV, but not so much for viewing on an intranet webpage. I guess it could be setup as a video for the tv and as a powerpoint for the webpage. It works great in Google Slides though. It would be nice if Microsoft would include the same feature as Google Slides. – Mafu Josh Commented Mar 16, 2018 at 20:17
- The question was for the TV and I answered accordingly. Other and better solutions do exist for other devices, – harrymc Commented Mar 17, 2018 at 7:54
3 Answers 3
Thought I might share my finding, as I tried to achieve something similar:
According to Microsoft , "the feature is not available in PowerPoint web app to play slideshow in loop."
- Sadly this is true. I was hoping someone had a clever simple solution to this. (I probably should have awarded you the points for directly answering the question, but I was busy and it auto awarded. And anyways, the other answer had some good alternatives.) – Mafu Josh Commented Mar 21, 2018 at 12:42
Running PowerPoint on a TV is problematic.
If the TV is running Android and can install applications, you may use the Microsoft PowerPoint app .
If the TV browser supports HTML5, there are various utilities that might help, such as :
- Zamzar PPT to HTML5
- Converting Microsoft PowerPoint presentations to HTML5 using Adobe Captivate.
However, as TV browsers are usually quite limited, I believe there is a much simpler solution, as follows :
- Turn the presentation into a video of a format that is supported by your TV
- You may display the video by the TV if it supports looping.
- Create an HTML5 page embedding the video and using the loop Attribute
- Otherwise, you may manually right-click the embedded video in the browser and choose Loop, or program it using JavaScript.
A video solution is basically run-anywhere and any-device.
i found a hacky work around. This will work if you know the timing of your powerpoint.
so if you put an id="slideFrame" on the iframe of your embedded powerpoint and the wdEaa=1 as mentioned in the original question in the URL, your slide show will auto play to the settings on the slides... the iframe will then reload after 20,000 milliseconds (so in my example, it took 20 seconds for my slideshow to complete. ) its not ideal but it works for a kiosk type show where you are looping a slideshow over and over on a web page.
- 1 not sure - but there may be a limit on the number of times sharepoint will load this file, it seems to get to a point where the show isn't showing any more - just a powerpoint logo. – Jeff Martin Commented Jan 29, 2020 at 21:41
You must log in to answer this question.
Not the answer you're looking for browse other questions tagged microsoft-powerpoint onedrive office365 presentations ..
- The Overflow Blog
- Looking under the hood at the tech stack that powers multimodal AI
- Featured on Meta
- User activation: Learnings and opportunities
- Preventing unauthorized automated access to the network
Hot Network Questions
- My team is not responsive to group messages and other group initiatives. What should be the appropriate solution?
- General solution that have the rectangular function as amplitude of the Fourier transform?
- Sent money to rent an apartment, landlord delaying refund with excuses. Is this a scam?
- How to do smooth merging of two points using tikzpicture
- Which law(s) bans medical exams without a prescription?
- How many days does the original Evil Dead trilogy take place over?
- Box tensor product in the correspondence category
- What does keep you "doing what you do"?
- Gold and Shofaros
- How is AC and DC defined?
- Why Doesn't the cooling system on a rocket engine burn the fuel?
- Combustion gas of gas generator right through nozzle?
- Is it possible to make sand from bones ? Would it have the same properties as regular sand?
- Is it ok if I was wearing lip balm and my bow touched my lips by accident and then that part of the bow touched the wood on my viola?
- Understanding Goldstein examples of violations of weak and strong Newton 3
- "First et al.", many authors with same surname, and IEEE citations
- Does it ever make sense to have a one-to-one obligatory relationship in a relational database?
- Does "Speak with animals" allow you to improve the attitude of an animal like "wild empathy"?
- Some hard objects!
- CC BY-SA 2.5 License marked as denied license in the FOOSA tool after upgrading to React Native 0.74 version
- Play the Final Fantasy Prelude
- Cheapest / Most efficient way for a human Wizard to not age?
- string quartet + chamber orchestra + symphonic orchestra. Why?
- Are 8086 family microprocessors accumulator based?
How to loop a PowerPoint slideshow so that it automatically starts over as soon as it ends
- To loop a PowerPoint slideshow, you'll need to enable looping in the "Set Up Slide Show" menu.
- Once you set your PowerPoint to loop, it'll start over from the beginning automatically after playing the last slide.
- Visit Business Insider's Tech Reference library for more stories .
If you've designed a Microsoft PowerPoint presentation that's meant to be viewed repeatedly, such as on a kiosk or in a museum installation, you can adjust the settings in PowerPoint so that your slideshow "loops" instead of ending after one viewing.
Getting a PowerPoint to loop is easy. Read on to find out how, using PowerPoint for both Mac and PC.
Check out the products mentioned in this article:
Microsoft office (from $149.99 at best buy), apple macbook pro (from $1,299.00 at apple), acer chromebook 15 (from $179.99 at walmart), how to loop a powerpoint presentation.
1. Open the Microsoft PowerPoint presentation that you want to loop.
2. With your PowerPoint presentation open, click on the "Slide Show" tab, then click on "Set Up Slide Show."
3. In the pop-up window that appears, click on the box next to "Loop continuously until 'Esc'" so that a small checkmark appears inside the box. Feel free to adjust any other settings in this menu as well. Click "OK" when you're finished.
4. To test whether your PowerPoint can loop successfully, click on the "From Beginning" or "Play From Start" button in the Slide Show tab. Click through the slideshow until you reach the end. When your PowerPoint reaches its final slide, it should start over from the beginning automatically. When you're confident that looping is enabled, and you're ready to close the slide show, press the Esc key.
Related coverage from Tech Reference :
How to add a border to slides in powerpoint, and give your slideshow a sleek design, how to embed a youtube video into your microsoft powerpoint presentations using a mac or pc, how to convert google slides to a powerpoint presentation in 4 easy steps, how to create a custom powerpoint template to use or share with others, how to copy or duplicate a powerpoint slide and put it anywhere in your slideshow.
Insider Inc. receives a commission when you buy through our links.
Watch: We compared the $1,200 MacBook Air with the $500 Surface Go, and the results were a mess
- Main content
- Customer Help
- X (Twitter)
How to Loop a PowerPoint Presentation: A Simple Step-by-Step Guide
Looping a PowerPoint presentation so it repeats continuously can be very useful for trade shows, lobbies, or other situations where you want your presentation to play on recur. The process is relatively simple and only takes a few steps. In this article, we’ll walk through how to set up a Microsoft PowerPoint presentation to loop automatically. First we’ll discuss why you may want a looping presentation. Then we’ll cover the steps to configure the loop in PowerPoint.
How to Loop a PowerPoint Presentation
Follow these easy steps to set up a looping PowerPoint slideshow in Microsoft PowerPoint 2022 or 365:

- It will repeat, moving from the first slide to the last slide and back to the beginning until you press “Esc”.
With a few mouse clicks, you can easily set up continuous looping for your PowerPoint slide – perfect for unattended presenting.
Tips for How to Loop Slides in PowerPoint
When creating a looping PowerPoint slideshow, keep these tips in mind:
- Time your slides appropriately – 10-20 seconds per slide is ideal. Don’t make them too short or long.
- Use transitions like fades and wipes. Avoid distracting transitions that could disrupt the flow.
- Focus on visuals more than heavy text, which viewers won’t fully read.
- Create a narrative flow from beginning to end, even if it loops.
- Check audio levels if using sound to ensure proper volume.
- Consider adding interactive elements like hyperlinks.
- Preview and test thoroughly to polish schedule and flow.
- Adjust slide timing in the “Set Up Slide Show” menu if needed.
Properly schedule and planning your looping PowerPoint ppt helps create a professional, seamless presentation. See Microsoft’s guide for more tips on perfecting your looping slideshow.
Alternatives to Looping a PowerPoint Presentation
If you want more flexibility than simply looping your PowerPoint slideshow, consider these other approaches:
- Export as a video – Convert your PowerPoint to an MP4 video file that can play on replay on a TV or monitor. This gives you more options for transitions and schedule plan.
- Use presentation software like ProShow Producer to create self-running shows with advanced options for automatically displaying slides.
- Make a self-running PowerPoint using animations and slide timers to move from one slide to the next automatically without needing to loop it.
- Use digital signage platforms like BrightSign to remotely publish and manage your looping presentation.
- Connect your computer to a TV or large monitor and use a media player to display your Presentation on recur.
- Have a presenter show the PowerPoint live if available during your event, rather than pre-recording it.
Consider your specific display needs and venue setup to pick the best approach for looping your content.
In summary, looping your PowerPoint slideshow is an easy way to create a repeating, unattended presentation. Using the “Set Up Slide Show options” in PowerPoint, you can set it to endlessly loop for a certain number of times.
When creating your looping PowerPoint, properly schedule your slides, use transitions wisely, and follow best practices for a professional, polished look. With the right settings, your looping slideshow can run smoothly at events without supervision.
While PowerPoint makes looping easy, you can also export to video or use other software for more advanced presentation options. In the end, looping gives an effortless way to display your slides on continuous repeat.
We encourage you to try looping your next PowerPoint. By following this guide, you’ll be ready to create a seamless, professional replay slideshow for your event.
You must be logged in to post a comment.
- Business articles (22)
- Google Slides (57)
- Keynote (27)
- PowerPoint (83)
- Support (2)
Home Blog PowerPoint Tutorials How to Loop a PowerPoint
How to Loop a PowerPoint
When a PowerPoint slideshow ends, the screen turns blank after the last slide. However, you can opt to restart the presentation from the first slide by running the slide deck in loop. You might want to loop a slide if you have created a PowerPoint slideshow that needs to run on a screen in loop, such as a self-running slideshow for a kiosk, a PowerPoint template indicating a break at an event, or when you need to go back to one or more of the previous slides from the start for a quick review of the presentation.
How to Make PowerPoint Loop
To loop PowerPoint, go to Slide Show -> Setup Show .

From the dialog box that appears, select Loop continuously until ‘Esc’ to enable looping your slides. By default, all slides are looped in a sequence.

How to Loop PowerPoint from Selected Slides
To loop specific slides, go to Slide Show -> Setup Show , enable loop, and select the slides to run in a loop via Show Slides .

How to Loop PowerPoint Slides Manually and Automatically
You might want to create a slideshow from break or countdown-themed PowerPoint templates or Google Slides templates to indicate a break during an event.
You can select the time each slide remains on screen via the Transitions tab. The Timings menu provides the option to select the duration for each slide and whether you intend the slides to move automatically or on mouse-click.

To loop PowerPoint slides manually or automatically, go to Slide Show -> Setup Show , enable the loop option, and go to Advance slides . Select Manually for moving slides on mouse click, arrow keys, or PowerPoint remote. Alternatively, select Use timings .

Final Words
Whether you need to loop a PowerPoint presentation manually or automatically for an event or to create a self-running slideshow that loops PPT, you can use the instructions mentioned above to customize the settings for your slide deck according to need.
Like this article? Please share
Microsoft PowerPoint, PowerPoint Tools Filed under PowerPoint Tutorials
Related Articles

Filed under PowerPoint Tutorials • September 9th, 2024
How to Convert Illustrator to PowerPoint
Extract powerful graphics and integrate them into your presentation slides. Learn how to convert Illustrator to PowerPoint with this guide.

How to Convert InDesign to PowerPoint
Repurpose your indd files as presentations by learning how to convert InDesign to PowerPoint. Step-by-step guide for Windows and Mac users.

Filed under PowerPoint Tutorials • August 16th, 2024
How to Add Slide Numbers in PowerPoint and Google Slides
In this Tutorial we will teach you how to add slide numbers in PowerPoint and Google Slides through different techniques.
Leave a Reply
How to Create a Looping Slideshow in PowerPoint
You can easily create a looping slideshow using PowerPoint. A looping slideshow displays each slide automatically for a certain amount of time. Once that time has elapsed, the slide automatically continues to the next slide. Once the slideshow reaches the end, it repeats from the beginning.
- Open your PowerPoint presentation.
- Click the [Slide Show] tab > From the "Set Up" group, click "Set Up Slide Show".
- From the resulting dialogue box, check "Loop continuously until 'Esc'" under the "Show options" section > Click [OK].
- From the "Slides" preview side panel, click your first slide > Press and hold [Shift] and click your last slide. This will select all of your slides.
- Click the [Transitions] tab > From the "Timing" group, uncheck "On Mouse Click" and check "After".
- To adjust the time you would like each slide to display, click the up and down arrows in the "After:" field within the "Timing" group. When your slideshow reaches the last slide, it will automatically loop back to the beginning.
Posted in Computer Help
Share This Post
- PRO Courses Guides New Tech Help Pro Expert Videos About wikiHow Pro Upgrade Sign In
- EDIT Edit this Article
- EXPLORE Tech Help Pro About Us Random Article Quizzes Request a New Article Community Dashboard This Or That Game Happiness Hub Popular Categories Arts and Entertainment Artwork Books Movies Computers and Electronics Computers Phone Skills Technology Hacks Health Men's Health Mental Health Women's Health Relationships Dating Love Relationship Issues Hobbies and Crafts Crafts Drawing Games Education & Communication Communication Skills Personal Development Studying Personal Care and Style Fashion Hair Care Personal Hygiene Youth Personal Care School Stuff Dating All Categories Arts and Entertainment Finance and Business Home and Garden Relationship Quizzes Cars & Other Vehicles Food and Entertaining Personal Care and Style Sports and Fitness Computers and Electronics Health Pets and Animals Travel Education & Communication Hobbies and Crafts Philosophy and Religion Work World Family Life Holidays and Traditions Relationships Youth
- Browse Articles
- Learn Something New
- Quizzes Hot
- Happiness Hub
- This Or That Game
- Train Your Brain
- Explore More
- Support wikiHow
- About wikiHow
- Log in / Sign up
- Computers and Electronics
- Presentation Software
- PowerPoint Presentations
How to Loop in PowerPoint on PC or Mac
Last Updated: November 24, 2021
This article was co-authored by wikiHow Staff . Our trained team of editors and researchers validate articles for accuracy and comprehensiveness. wikiHow's Content Management Team carefully monitors the work from our editorial staff to ensure that each article is backed by trusted research and meets our high quality standards. This article has been viewed 23,165 times. Learn more...
Want to create a self-running PowerPoint presentation for your kiosk, trade-show, performance, or event? It's easy to adjust the options in PowerPoint to make your presentation play back in a continuous loop. When you turn on Slide Show Loop in PowerPoint, your presentation will start over again every time it ends, which means you won't need to be present to restart it. This wikiHow article will show you how to make your PowerPoint presentation loop indefinitely.

- If you haven't yet created your presentation, make one and save it as a file before proceeding.

- For example, to change the amount of time spent on each slide to 10 seconds, you would change the 00:00.00 text box to read 00:10.00 .

- Click File in the upper-left side of the window.
- Click Save As on the left side of the page.
- Double-click the This PC tab in the middle of the page.
- Click the "Save as type" drop-down box, then click PowerPoint Show in the drop-down menu.
- Enter a file name and select a save location.
- Click Save .

- If you're unhappy with a slide's display time, you can change the time by opening the presentation, going back to the Transitions tab, and adjusting the "After" text box.
- You can open a Show file in PowerPoint by dragging the Show file into the PowerPoint window.

- For example, to change the amount of time spent on each slide to 10 seconds, you would type 10.00 into the text box.

- Click File .
- Click Save As... .
- Click the "Format" drop-down box.
- Click PowerPoint Show (.ppsx) in the drop-down menu.

Expert Q&A
- If you use Microsoft Office 365, you can save your PowerPoint presentation as a video instead of a PowerPoint file and then loop the video using your computer's video player's "Loop" function. Thanks Helpful 0 Not Helpful 0

You Might Also Like

- ↑ https://support.office.com/en-us/article/create-a-self-running-presentation-57fc41ae-f36a-4fb5-94a3-52d5bc466037#OfficeVersion=Mac
- ↑ https://support.office.com/en-us/article/file-formats-for-saving-and-exporting-presentations-in-powerpoint-for-mac-a4b76110-697c-496f-b9c5-e318f2bd6eba
About This Article

- Send fan mail to authors
Is this article up to date?

Featured Articles

Trending Articles

Watch Articles

- Terms of Use
- Privacy Policy
- Do Not Sell or Share My Info
- Not Selling Info
wikiHow Tech Help Pro:
Level up your tech skills and stay ahead of the curve
- 製品 個人向けパソコン ノートパソコン デスクトップ ゲーミング モニター アクセサリ 法人向けパソコン ノートパソコン デスクトップ ワークステーション ヘッドセット・オンライン会議・IP電話(Poly) シンクライアント & Chromebook POSシステム モニター アクセサリ 仕事関係指数 プリンター 個人向けプリンター 法人向けプリンター 大判プリンター インク&トナー デジタル印刷機 マネージドプリントサービス(MPS) 3Dプリンター ビジネスソリューション 最新テクノロジー情報 (Tech & Device TV) セキュリティ (HP Wolf Security) サステナブル調達 コラボレーション ハイブリッドワーク 契約型サービス VR / AI・データサイエンス 3Dプリンターの活用 特殊用途デバイス 教育ICT
- オンラインストア HP Directplus 個人向けストア 法人向けストア 教育/自治体/医療機関(公共機関)向けストア おすすめ製品 ノートパソコン デスクトップ ゲーミング ワークステーション プリンター モニター Poly製品(ヘッドセット/スピーカー) キャンペーン 個人向けキャンペーン 法人向けキャンペーン 学割キャンペーン 5営業日納品キャンペーン アウトレットキャンペーン ガイド お買い物ガイド 注文状況確認 パソコン選び方ガイド
- サポート サポート情報 HP LIVEサポートナビ サポート&トラブル シューティング 製品から探す ドライバーの ダウンロード セキュリティ情報 製品サポート HPパソコン HPプリンター サービス HPサービス (HP Service) 個人のお客様向け Care Pack 法人のお客様向け Care Pack お問い合わせ HPへのお問い合わせ 保証確認 パーツストア

Copilotで変わるPowerPoint活用

MKTインターナショナル株式会社CEO/代表取締役社長:赤井 誠
PowerPointは、プレゼンテーション用のスライドを作成するアプリです。スライドには、画像や動画、グラフなどを挿入できます。ビジネスパーソンにとっては、欠かすことのできないツールの1つでしょう。しかし、プレゼンテーション資料を作るには、時間がかかってしまうことが多いのではないでしょうか。AIを活用した新しい機能 Copilot in PowerPointが提供するスライドのデザイン作成や最適化、コンテンツの下書きや補完、表現の改善、要約などの機能を使ってみましょう。より効率的にプレゼンテーション資料を作成できます。
Copilot in PowerPointの基本的な機能 :要約
PowerPointでプレゼンテーション資料を作成する作業の中で、Copilot in PowerPointが提供する機能を紹介しましょう。マイクロソフトが提供する生成AIソリューションであるCopilot には、基本機能として要約があります。もちろん、Copilot in PowerPointも、同様にドキュメント (PowerPointファイル) の要約を行えます。
では、PowerPointファイルの要約機能から使ってみましょう。
以下のスクリーンショットは、私が行っているMicrosoft 365の研修テキストを開いて、上部にあるCopilotメニューをクリックしたところです。

「このプレゼンテーションを要約する」をクリックする、あるいは、Copilotウィンドウ下のボックスに「要約してください」などとプロンプト入力をしてください。すると、ウィンドウに次のような要約が表示されます。
(要約の内容が正しいかは、私しか判断できませんが、正しい)要約が実行できました。
150ページを超えるドキュメントですので、一瞬で読み通すことは大変です。しかし、要約に目を通すことで、その内容をおおよそ理解することが可能になります。
Copilot in PowerPointの基本的な機能 :作成 (スライドと画像)
Copilot in PowerPointにおける1番の注目機能は、なんといっても、プレゼンテーション資料の作成です。「ラグビーワールドカップの歴史についてのスライドを作成してください」とプロンプト入力をします。

すると、ページ数は指定していませんでしたが、12ページのプレゼンテーションが作成されました。

最後のページに画像は、残念ながら、陸上のハードル競技の写真になっています。Copilot in PowerPointはプレゼンテーションで使用可能なストック画像をスライドに追加することが可能です。ハードル競技の画像を削除し、このスライドにラグビーに関する画像を追加するプロンプト入力を行います。

現在のラグビーボールよりも古いボールが使われていますが、ラグビー関連画像に置き換えできました。消費者向けの製品であるCopilot Proを利用すると、CopilotはDALL-E 3を使用してプレゼンテーションに挿入可能なAI生成画像を作成します。まもなくCopilot for Microsoft 365ユーザーにも展開される予定ですので、ストック画像ではぴったりこない場合は、この機能を活用して、さらにコンテンツを改善できます。
Copilot in PowerPointの基本的な機能 :Word とテンプレートからスライドを作成
上の例では、特に詳細についての指定はなく、スライドの作成を指示しました。しかし、企業においては、通常何かしらの企画書や提案書のアイデアがあり、そこからプレゼンテーション資料を作成します。
前回の連載 で紹介したように、欧米では、ドキュメント作成には、Wordを利用することが多いです。さらに、他のオフィスアプリとの連携も、同様にドキュメント作成の中核がWordであることを理解しておくと、作業をより効率化できます。今回の例でいえば、Wordで作成したドキュメントをPowerPoint に読み込んでプレゼンテーション資料を作成するということになります。ここでは、以下のような『日本企業におけるDX導入の課題とその解決策』というレポートを利用します(このレポート作成にも、Copilot in Wordを使っています)。

もう1つ、企業でプレゼンテーション資料を作成する場合、気を付けないといけないことは、企業のロゴや使用フォントが指定されたPowerPointのテンプレートが提供されていることが多いことです。 Copilot in PowerPointに特定の指示をしない場合、「デザイナー」を利用して修正するといった最終の仕上げが必要です。さらに洗練されたビジュアルにするためには、基本的なレイアウトに企業が定義するテンプレートを利用することが、ブランディングの観点からもおすすめです。
ここでは、PowerPointテンプレートとして、次のようなファイルを利用します。企業ロゴが下部に配置され、フォントは、BIZ UDPゴシックを利用しています。

読み込むファイルは、OneDriveやSharePointなどで保存されている必要があります。「ファイルからプレゼンテーションを作成」をクリックすると、いくつかのファイルがリストされます。あるいは、Copilotウィンドウ下のボックスに、「ファイルからプレゼンテーションを作成/URL」とプロンプト入力します。URL部分には、Wordの右上にある【共有】をクリックして、URLをコピーします。実行すると、まず、Wordファイルのアウトラインの分析が始まり、その後でスライドが作成されます。
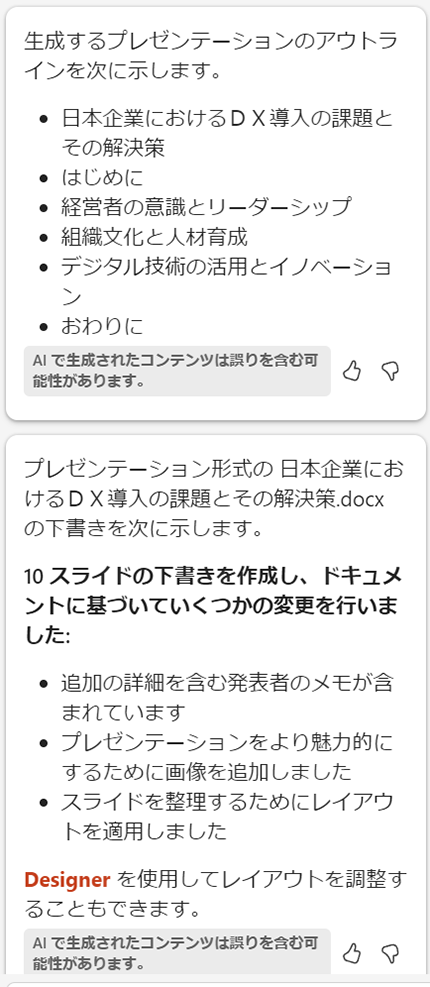
できあがったスライドには、Wordファイルに入れていた画像に加えて、内容に合わせたイラストが挿入されています。また、Wordの中から、発表者メモも追加されます。
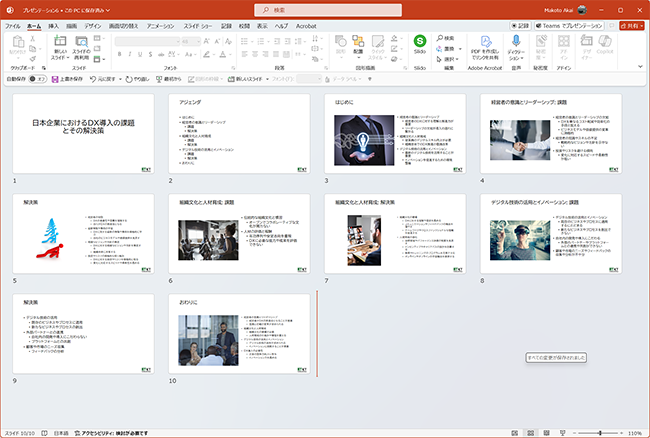
このように、ある程度のプレゼンテーション資料の下書きを作成することができました。ただし、表やExcelで作ったグラフなどを挿入して、完成に近づけていくことが必要です。
このように、便利なCopilot in PowerPointですが、2024年8月現在で、Copilot in PowerPointでは、特に指定しない限り、英語のスライドが作成されることに注意してください。日本語のスライドが必要な場合は、プロンプトに「日本語で」と指定するようにしてください。
Copilot in PowerPointを使ってプレゼンテーション資料を作成する機能は、文書作成の時間や労力を節約し、品質を向上させることができます。ただし、見栄えの調整などは、プロンプト入力に慣れないと、使いこなせません。習うより慣れろという言葉があるように、生成AIを仕事でいかすには、どんどんと使って、スキルアップすることがお勧めです。
Windows 11 は、AIを活用するための理想的なプラットフォームを提供し、作業の迅速化や創造性の向上をサポートします。ユーザーは、 Windows 11 のCopilotや様々な機能を活用することで、アプリケーションやドキュメントを横断してワークフローを効率化し、生産性を高めることができます。
組織において Windows 11 を導入することで、セキュリティが強化され、生産性とコラボレーションが向上し、より直感的でパーソナライズされた体験が可能になります。セキュリティインシデントの削減、ワークフローとコラボレーションの加速、セキュリティチームとITチームの生産性向上などが期待できる Windows 11 へのアップグレードは、長期的に経済的な選択です。旧 Windows OSをご利用の場合は、AIの力を活用しビジネスをさらに前進させるために、Windows 11 の導入をご検討ください。
※このコンテンツには日本HPの公式見解を示さないものが一部含まれます。また、日本HPのサポート範囲に含まれない内容や、日本HPが推奨する使い方ではないケースが含まれている可能性があります。また、コンテンツ中の固有名詞は、一般に各社の商標または登録商標ですが、必ずしも「™」や「®」といった商標表示が付記されていません。
※2024年9月18日時点の情報です。内容は変更となる場合があります。

ハイブリッドワークに最適化された、 Windows 11 Pro+HP ビジネスPC
ハイブリッドなワークプレイス向けに設計された Windows 11 Pro は、さらに効率的、シームレス、安全に働くために必要なビジネス機能と管理機能を搭載しております。HPのビジネスPCに搭載しているHP独自機能はWindows 11で強化された機能を補完し、利便性と生産性を高めます。

AIとビジネス活用関連の人気記事

AIとビジネス活用関連の新着記事
AMDも55TOPSのNPUでCopilot+ PCをキャッチアップ
Copilotで変わるWord活用
マイクロソフトの生成AI戦略②(2024年8月版)
マイクロソフトの生成AI戦略(2024年8月版)

- 重要なお知らせ・新着情報
- イベント・セミナー・ショールーム
- サステナブルインパクト
- オンラインストア (個人のお客様)
- オンラインストア (法人のお客様)
- インクジェットプリンター取扱い店舗
- ドライバーのダウンロード
- サポート & トラブルシューティング
- HPパートナーナビ(販売パートナー様向け情報)
- HP Amplifyパートナープログラム
- プライバシーへの取り組み
- クッキー/広告表示に関する選択
© Copyright 2024 HP Development Company, L.P.
IMAGES
VIDEO
COMMENTS
1. Start the video. 2. While it is playing, press the "INFO" button on the remote. 3. You will see player controls at the top of the screen along with a gear icon to access settings. 4. Click the gear icon and you will see settings for "REPEAT". I have it loop all day and set a timer to turn off the TV every day at 5pm.
1. Connect your computer to the TV: To begin, connect your computer to the TV using an HDMI or VGA cable. Make sure the TV is set to the appropriate input channel. 2. Open your PowerPoint presentation: Launch PowerPoint on your computer and open the presentation you want to loop on the TV. 3.
On the Slide Show tab, in the Set Up group, click the arrow on the Record Slide Show button. In the Record Slide Show dialog box, select the Narrations and laser pointer check box, and if appropriate, select or deselect the Slide and animation timings check box. Click Start Recording.
Discover a step-by-step guide on how to loop PowerPoint on TV for seamless presentations and dynamic displays. Ideal for business and education settings.
Method 1: Using an HDMI Cable. Steps to Connect PowerPoint to TV via HDMI. Method 2: Using a Wireless Display Adapter. Steps to Connect PowerPoint to TV via Wireless Display Adapter. Method 3: Using a Smart TV App. Steps to Connect PowerPoint to TV via Smart TV App. Method 4: Using a USB Drive.
The below image shows the Organizational Charts PowerPoint Template running on an LED TV connected to a laptop via HDMI cable. 2. Play Slides as Image Slideshow or Video from a USB. This is another fine method for playing a PowerPoint slideshow on a TV. However, you will require converting your PowerPoint presentation to a supported format.
First, open your PowerPoint presentation in which you would like to loop. Once open, navigate to the "Set Up" group of the "Slide Show" tab and then select the "Set Up Slide Show" button. The "Set Up Show" window will appear. In the "Show options" group, check the box next to "Loop Continuously until Esc.".
In the Transitions tab in PowerPoint, you can select the type of transition (such as Fade) as well as timing options: Step 2: Set up a presentation to loop during a slide show. To set up a PowerPoint presentation to loop during a slide show: Click the Slide Show tab in the Ribbon and then click Set Up Slide Show. A dialog box appears.
Step 3: Choose 'Loop continuously until 'Esc". In the 'Set Up Show' options, check the box for 'Loop continuously until 'Esc". By checking this option, you're telling PowerPoint to keep cycling through your slides until you press the Escape key to stop it.
Good, because the first is easy. On PowerPoint's Slide Show menu choose Set Up Show (bottom option) Under Show Type choose Browsed at a Kiosk (full scree n) Under Show Option s choose Loop Continuously until 'Esc'. All done. With these settings, when you play the slide show it will run continuously until the Escape key on the keyboard is pressed.
Luckily, learning how to loop a PowerPoint is very easy! Just follow these 3 steps: 1. Open your presentation and go to the Slide Show tab. 2. Select the Set Up Slide Show option for the Set-Up Options window to appear. 3. In this window, go to the "Show options group" and tick the Loop continuously until 'Esc' (the first option).
Step 4: Choose 'Loop continuously until 'Esc". In the 'Set Up Show' window, check the box that says 'Loop continuously until 'Esc". This is the setting that transforms your presentation from a one-time run-through to an endlessly looping display. It's the crucial step in ensuring your content gets maximum exposure.
Converting Microsoft PowerPoint presentations to HTML5 using Adobe Captivate. However, as TV browsers are usually quite limited, I believe there is a much simpler solution, as follows : Turn the presentation into a video of a format that is supported by your TV. You may display the video by the TV if it supports looping.
How to loop a PowerPoint presentation. 1. Open the Microsoft PowerPoint presentation that you want to loop. 2. With your PowerPoint presentation open, click on the "Slide Show" tab, then click on ...
Open your PowerPoint presentation and click the "Slide Show" tab. Click the "Set Up Slide Show" button. A pop-up window will appear. Under "Show Type", select "Loop continuously until 'Esc'" to make it loop endlessly. To customize slide schedule, check "Automatically advance", then use the arrow key to adjust the display ...
Created on August 7, 2016. Want to Loop a PPT endless only on TV, while being able to turn the TV off and on each night w/o breaking the loop. I have a TV that I'd like to endlessly loop a PowerPoint Presentation (M Office 2011, Mac Mini). All is well until I turn off the TV each night (the computer never is turned off and does not sleep ...
PC at one end connected to a WyreStorm transmitter, which is then sent via Ethernet to a port behind the TV's, then a receiver connected to the TV using HDMI. This setup means we can put whatever we want on the screens (powerpoint, streaming tv, music, etc) and then remote in to the PC to change stuff whenever we need to.
To loop PowerPoint slides manually or automatically, go to Slide Show -> Setup Show, enable the loop option, and go to Advance slides. Select Manually for moving slides on mouse click, arrow keys, or PowerPoint remote. Alternatively, select Use timings. PowerPoint loop slideshow.
Click the [Slide Show] tab > From the "Set Up" group, click "Set Up Slide Show". From the resulting dialogue box, check "Loop continuously until 'Esc'" under the "Show options" section > Click [OK]. From the "Slides" preview side panel, click your first slide > Press and hold [Shift] and click your last slide. This will select all of your slides.
For a Windows solution, you could use a player like the Intel Compute Stick or another stick PC to run the PowerPoint and loop it. check out https://cast-hub.com. they have apps for several smart tvs where you can remotely add a presentation and have it play on the tv. I want to loop a presentation for customers to look at when they walk in, so ...
Save your PowerPoint as a "Show" file. While you can simply save your changes to the existing PowerPoint presentation by pressing Ctrl+S, saving the PowerPoint as a Show file will launch the slide show as soon as you double-click the file: . Click File in the upper-left side of the window.; Click Save As on the left side of the page.; Double-click the This PC tab in the middle of the page.
このように、便利なCopilot in PowerPointですが、2024年8月現在で、Copilot in PowerPointでは、特に指定しない限り、英語のスライドが作成されることに注意してください。日本語のスライドが必要な場合は、プロンプトに「日本語で」と指定するようにしてください。