- Slidesgo School
- PowerPoint Tutorials

How to Add Animations and Transitions in PowerPoint

In this tutorial, you’ll learn the basics of adding animations and transitions to your presentations in Microsoft PowerPoint. These visual effects will help you make your slides more dynamic and will keep your audience engage.
Adding an Animation to a Text, an Image, a Shape or Other Elements of a Presentation
Adding transitions to a slide.
- Select the object that you want to animate.
- Click the Animations tab.
- Select the animation that you want from the list.
- If you want to see which animations are applied to an object, click Animation Pane. You can also rearrange the animations as you see fit.
- Use the timing options to set the timing of the animation. You can choose when you want the animation to start: on click, with previous or after previous. You can also set the duration and even set a delay before the animation begins.

- Select the slide you want to apply a transition to.
- Click the Transitions tab.
- After you select any transition from the list, you’ll see a preview of the resulting effect.
- If you want to adjust the direction of the effect, among other settings, click the Effect Options drop-down arrow.

- To remove a transition, on the Transitions tab, click None.

- You can change the animations or transitions at any time. To do so, select the animated object or the slide with a transition applied to it and choose a different option from the list.
Do you find this article useful?
Related tutorials.

How to Insert Embed GIFs in a PowerPoint Presentation
Do you want to boost your presentation? One of the best ways of doing so is using GIFs! They are fun, easy to add and provide an amusing way of supporting your own information. Would you like to learn more about how to add a GIF in to your slides in PowerPoint? Keep reading!

How to Insert GIFs in a Google Slides Presentation
There are many and varied ways of captivating your audience with your presentation. One of them is using visually appealing materials so people cannot take their eyes off the slides. In fact, a clever use of GIFs and other images will help you when defining concepts in a cool and modern way. In this post we’ll teach you how to add GIFs to Google Slides themes easily.

Storyset by Freepik: Awesome illustrations for creative presentations
With inspiration and the adequate resources, a PowerPoint or Google Slides presentation can be the most creative slide deck your audience has ever been, regardless of topic. In this Slidesgo School article, we’re going to introduce Storyset, a new Freepik project where you’ll find illustrated concepts to visually reinforce the message you want to convey, turning your work into a memorable experience.

How to Add Animations and Transitions in Google Slides
In this new Slidesgo School tutorial, you’ll learn how to apply animations to the elements of a slide and how to add transitions between slides. This way, your presentation will be more dynamic and you’ll be able to impress your audience.
How To Add Animations To PowerPoint
With PowerPoint, you can make awesome presentations just by using static slides and non-animated elements. However, if you want to literally make your audience go ‘wow’ during your presentation, you’d need to think of a way to really get their attention. The best way to do this is by using animations. And in this tutorial, I’m going to show you exactly how to add animations to PowerPoint so you can use it to your advantage.
Before you proceed with this tutorial, have a look at these 6 PowerPoint Secrets from Profesional Presentation Designers . The design is another important aspect of your slide deck, and adding animations to your PowerPoint without working on an overall design of the presentation will not cut it.
The Different Types of Animations In PowerPoint
Animations are visual effects which make your texts, images, shapes, or charts come ‘alive.’ They catch your audience’s attention and helps them engage with you and your presentation.
Moreover, there are generally two types of animations you can use to make your presentation come alive. These are:
Transitions
The first type of animation is called transition animation ; these are animations added in between slides. When you transition from slide 1 to slide 2, you can add an animation in between the slides. You can view the different transition options by going to the Transitions pane on the PowerPoint ribbon.

(Caption: The Transitions pane in PowerPoint)
The default view shows 10 transitions, but if you click on the little arrow like you see in the screenshot above, then you’ll see many more options like you see here:

(Caption: More Transition options in PowerPoint – choose from Subtle, Exciting and Dynamic Content transition animations)
Transition animations have additional effect options. You will notice this when you click on the transition you want to use. The Effect Options button won’t be grayed out, and you can select additional settings.
For example, I selected ‘Reveal’ as my transition animation. Available effect options would be:
- Smoothly from right
- Smoothly from left
- Through black from right
- Through black from left
Here’s a screenshot of what it looks like:

(Caption: Effect Options are available for some transition animations in PowerPoint)
You can also adjust the timing and duration of each transition as well as set how you want the slides to advance so that the transition can take place.

(Caption: More settings can be adjusted in the Timing section as well as the Animation Pane)
Feel free to play around with the transition animations and effect options that work best with your presentation.
The second type of animations bring the objects or elements within your slide to life. If you want to animate text, an image, shape, graph or chart, this is the type of animation you select.
You first to have to click on the object you want to animate , then click on the Animations tab .

(Caption: The Animations pane in PowerPoint)
The default view shows 8 animations, but if you click on the little arrow like you see on the screenshot above, then you’ll see many more options like you see here:

(Caption: More Animation options in PowerPoint – choose from Entrance, Exit, Emphasis and Motion Paths animations)
You can choose from the following types of animations:
- Entrance animations. The icons for this type of animation are colored green . If you use this type of animation for an object, that object will enter the slide according to your timing preferences.
- Exit animations. The icons for this type of animation are colored red . The object you’ve added this animation to will exit the slide .
- Emphasis animations. The icons for this kind of animation are colored yellow . The object won’t enter or exit the slide (unless you’ve added that particular animation to the same object) but will emphasize and draw attention to that object.
- Motion path animations. This type of animation will allow you to move an object from one spot to another. You can specify or draw the path you want the object to take.
In the next sections, we’ll go over how to add the 4 different types of animations to your slides.
How To Add Animations to PowerPoint In 2 Simple Steps
To add entrance animations to any object in PowerPoint, here’s what you need to do:
- Click on the object you want to animate. In this example, we will use a blue smiley face.

(Caption: The blue smiley face we will be animating for this tutorial)
2. Select the animation you want to use. For this example, we used the entrance animation – fade animation. We set the duration to 2.75 seconds. You will notice in the screenshot below that the fade animation has no effect options (the button is greyed out).

(Caption: The different options available for Fade animation in PowerPoint)
Here’s what those numbers in the screenshot mean:
1 – We chose the Fade animation.
2 – There are no Effect Options for Fade Animation (the button is grayed out and not clickable)
3 – You can adjust settings via the Advanced Animation, Timing, and Animation Pane sections
4 – The number (1) refers to the fact that we’ve added 1 animation to our object (this is the Fade animation).
5 – You can click on the Preview button to preview the animation.
As you can see, adding animations to an object is no rocket science. You can even add entrance, exit, emphasis and motion path animations to a single object!
Important Points To Remember When Adding Animations
It’s so easy adding animations to presentation slides that you can easily lose control. Therefore, you’ll find yourself animating all objects on your slides and adding slide transitions as well. Nevertheless, it might look fun to you, but in reality, it can distract your audience’s attention from the message you’re trying to convey in your presentation.
So here are some guidelines you should following when adding animations to PowerPoint:
- Simplicity is key. Simple animations like fade and appear may not be as impressive as other animations available, but these add a touch of elegance to well-timed slides. It makes your slides look clean and simple.
- Limit the number of animations on a slide. One or two animations per slide should suffice. There’s really no need to animate every single object on each slide.
- Time your presentation well. Make sure your objects appear right after you introduce it. This keeps your audience’s interest piqued.
- Don’t forget to practice. Practicing your timings and your animations are key to a successful presentation.
We hope you learned something new in today’s article. Remember, animations are fun and great when used sparingly and tastefully, but when overdone, you could potentially lose face in front of your audience and look like a total amateur instead.
At 24slides , we’re designing beautiful PowerPoint, Prezi and Keynote presentations using the latest design techniques and loads of creativity. We create professional presentations from scratch and redesign existing ones. Take a look at some examples of our work and let’s get in touch .
You might also find this interesting: PowerPoint’s Morph And Zoom: Everything You Need To Know
Create professional presentations online
Other people also read

Tutorial: Save your PowerPoint as a Video

How To Convert Google Slides To PowerPoint and Vice Versa

How To Create The Best PowerPoint Presentation Background
- Getting Started
- Best Practices
PowerPoint Animation Tutorial (2022) – Step-by-Step
July 27, 2022
Introduction
Animation in your slide deck is a great way to add visual interest. And when done well it can WOW your audience. This in-depth, step-by-step tutorial covers how to animate in PowerPoint showing the fundamentals of adding and modifying animations and then demonstrates advanced strategies like customizing timings, adding triggers, using morph, and creating animations with 3D objects.
Types of Animation Effects
Before you begin applying animation in PowerPoint, it helps to know how they are categorized and how these categories affect the function of the animation. These categories or types are also referred to as effects.
The first effect category is Enter. With this animation objects are not visible initially and appear based on a specific action by the presenter like a click of a mouse.
The second effect category is Emphasis. Here an object is visible on the slide and will animate to draw attention to it such as pulse.
The third effect category is Exit. Here an object is visible on the slide and then will exit from view based on an action like a mouse click.
Adding an animation
To apply an animation on a slide you need at least one object on the slide. An object is any type of content that can be added to a slide such as a shape, text, icon, picture, etc. In this example, I’ll use a shape on blank slide. The location of the object will be where the animation either ends or begins. You want to select the object. Click the Animations tab and click the animation you want to apply. You can scroll through the gallery or click the small drop-down arrow to display more options all at once. When you select an animation, the object will show what the animation looks like. You can also use the Preview button on the Animations tab to see what the animation looks like. You will notice that the object now has a small box with a number next to it. That is a visual indicator noting an animation has been applied to the object. The number indicates the order the animations occur if you have more than one object animating on the slide. In Windows if you select a new animation from the gallery, it will override the previous selection. For instance, if I apply an Emphasis animation the Enter fly-in is replaced. The same with applying an Exit Fly-out the Emphasis effect is replaced. To remove an animation, just choose None in the Gallery.
Some animations like the Fly In are pre-set to animate from a specific direction. To change the direction, click the Effects Option button after applying the animation. From the drop-down options choose the direction you want. If the Effects Option isn’t active, then that effect you selected can’t be changed in any way.
Motion Path animation
The next effect I want to touch on is the Motion Path option. You can choose a basic effect like moving in a straight line. Or something highly custom like drawing your own path. With the Motion Path, the small green dot is the starting point, and the red dot is the ending location. To extend the path, you can drag and drop the red dot to a new spot on the slide. With motion path the animation possibilities are quite extensive, especially if you use it with other effects.
Applying an animation to similar objects
If you have several objects that you want to add animation to, here are some strategies I use to save time. If you want to animation multiples of the same object in the same way first add the shape then add the animation to that shape and then press Control D to duplicate that shape.
Rearrange as needed and you will notice that all of the objects have a number indicator next to them. The different numbers indicate the order the objects will animate. Let's click the Preview button to see what it looks like.
Copying the shape and pasting is another option Either on the same slide or another slide. To copy either use Control C, Right-click and copy, or click the Copy button on the Home tab. Then paste either using Control V, Right-click and paste, or click the Paste button on the Home tab. Just like with Duplicate, there is an indication number.
If you want the same object to animation on a different slide, you can duplicate the slide Select the slide in the Thumbnail Pressing Control D or Right-click and choose Duplicate
Looking at the second slide, you can see the object has an animation indicator I will change the object's color so you can see what it looks like. I'll go into Presentation Mode and here is what the animation looks like.
If you have several different objects and you want them all to have the same animation, you have a couple of options. You can select them all. And click the animation type in the Animations tab. You will see they all have the same animation indicator next to them. As the Preview shows, this option sets the animation for all objects to start at the same time.
You can also use the Animation Painter. Once you’ve added an animation to an object, select it. Click the Animation Painter button. Then click on the object you want to apply the animation to.
With this option, it sets the animations to start one after the other. If you double click the Painter option, you can apply the animation to multiple objects without having to click the Painter button for each object.
Adjusting Start, Duration, and Delay
Once you’ve added an animation to an object, often the next step is modifying the timing of the animation. To the far right on the animation tab, there are three timing settings: Start, Duration, and Delay.
Modifying Start
The Start timing determines how the animation will start. The default is On Click. So when you click your mouse the animation begins.
The next option is With Previous. The object with this setting will animate at the same time as the previous animation. In this example the Triangle animates with the circle.
The third start setting is After Previous. Here an object animates after the previous animation is complete. In this example the triangle animates once the circle animation is done.
Changing Duration
The next timing is the Duration or speed of the animation. The default setting is typically Very Fast at half a second (0.5). You can use the up and down arrows to speed up or slow down the animation by quarter intervals. Or you can type in the duration.
In this example, you can see the Triangle fly in is much slower than the previous examples. As a side note, the duration can’t be changed for some animations.
Adding Delay
The last timing is Delay. This a slightly more advanced setting and this setting delays the start of an animation. The default setting is zero. Meaning there is no delay. In the example, the Triangle is set to start after previous with a one second delay.
Applying Multiple Animations
Now that you know how to modify a single animation, we can move on to apply multiple animations to one object. As I mentioned in Video 1 of this 3-part series, clicking a different animation in the gallery replaces the previous animation.
In this example, I will set the object to fly-in, pulse, and then fly-out. Do do this, I select the object. I choose the Fly in animation. Then I click the Add Animation button. Choose Pulse as an emphasis. I'll add the third animation, clicking the Add animation button and then choosing Fly-out. And the Preview shows what that will look like.
In Video 1 of this series, I demonstrated the Animation Painter, when you have multiple animations, this option comes in handy.
Using the Animation Pane
Once you start adding multiple animations to objects, using the Animation Pane can help you keep track. To display the pane either click the Animations Pane button or click one of the animation indicators by an object.
From the animation pane, you can see the order of the animations. They are listed from beginning to end. A mouse means it is an On Click start animation. No icon means that it is set to With Previous. And a clock indicates that the Start is After Previous.
The color of the star indicates the type of effect: green for enter, yellow for emphasis, and red for exit. If you can’t see color very well, the lines Indicate whether it is an Enter, an Emphasis, or an Exit.
If you want to change the order of the animations, you can use the up and down arrows. Or just drag and drop. You can select more than one by holding down the Shift key and then moving them all at the same time.
Deleting animations from the Animation Pane is quite easy. Select the animation and press the Delete key.
The animation pane also shows the timeline of the animations. The placement of the bar on the timeline indicates when the animation begins and end. You can drag and drop the bar to change the delay. You can resize the bar to change the duration of the animation.
Effects and Timing Dialog Box
When you mouse over or select an animation, To the far right of each animation is a small down arrow. Clicking the arrow provides options to show more settings for the effects and timings. Let’s take a look.
You will notice there are three tabs Effect, Timing, and Text Animation The added options in the Effects tab, is that you can add a Dim after animation setting. I usually apply this to content that I have as part of a list. So, when I am done discussing one bullet point, I dim that option and then display the next option.
If you don’t want to apply an exit animation, you can also make content disappear right after the animation or hide on the next mouse click.
The Timing tab, provides the same options as on the Animation tab for Start, Duration, and Delay.
You can also add a repeat loop. You can set specific times or until the next animation or until the end of the slide show. The speed of the animation will determine how the effect looks such as a rapid pulse or slow flash.
The trigger setting lets you set an On Click to a specific object. When you click the object with your mouse, it activates the animation for a different object. This differs from a typical On Click animation because the object itself must be clicked for the animation to work.
To do this, apply each animation to the specific object Then select the animation in animation pane Click the trigger button in the Animations tab and choose the object from the menu options Repeat this process for each object.
Renaming objects in the Selection Pane helps if you have several objects to trigger. One reason I like this option, is because it allows me to animate in any order.
Text Animation Strategies
With all of the examples so far, I’ve worked with shapes and other objects. Text can be animated just like any other object on the slide. But here are some things to keep in mind.
Selecting the text box will animate each line separately Selecting all of the text in the text box will animate all of the text at once. To change the setting, highlight the line or lines and change the Start to On Click. Selecting each paragraph or line in a bullet and then choosing your effect, will animate each line separately.
Morph Transition
A more advanced animation people like to use is called morphing. Within PowerPoint, morphing is a transition and not an animation. That means you apply the effect to the entire slide and not an individual object. Morphing as its name implies is an object that is changed into something different. This can be a simple effect like moving and changing in color.
For this effect, I will duplicate the slide with the circle. On the second slide I’ll move the circle to the right side and changed the color fill. With the second slide selected in the thumbnail pane, I click the Transitions tab and select Morph.
The Preview shows you what it'll look like. As you can see, unlike a fly in type of animation, the object appears to be changing with a slight fade.
Advanced Morph Transition
An advanced morph transition can be used to make an object change into a different object. Like this example of a circle morphing into a star. To apply an advanced morph, create the two slides with the different objects.
Before applying the transition to the second slide, open the Selection Pane. Select the object on the first slide, then click the Selection Pane button either on the Home tab or in the Shape Format tab.
Within the Selection Pane, you can rename objects to help keep track of multiple objects. For this animation to work, the objects on each slide need to have the same name starting with 2 exclamation points. I will rename this object to !!morph1. And copy the name. And then press Enter to set the new name of the object.
Now I need to select the second slide. In the Selection Pane, double click in the name of the star object. And paste in the name of the first object. Then I will press Enter to set the new name.
Now with the second slide selected, I can apply the Morph transition. And it will show what the morph will looks like. This is one of my favorite tricks to add some pizazz to a slide deck.
Animating 3D objects
The last animation I want to show you is animating a 3D object, like this example. Many people aren’t aware that they have access to 3D objects within their 365 subscription.
To add a 3D object, click the Insert tab. Then click the 3D object button and choose from Stock 3D Models. Or if you have a model on your device, choose that option. Search and select the object you want. In this example, I will insert a Monarch Butterfly.
To view the different sides of the model, click the center button with the multiple arrows. And then just drag your mouse to view the object. With the model selected, click the Animations Tab. And you'll notice that the Gallery now has 3D animations added.
These will be cubes with arrows around them. For this example, I will use the turntable effect. With the Effects option button, I can make some adjustments like the direction and amount of spine as well as the spin axis.
Using the Morph transition with a 3D object can add an extra visual element. Using the butterfly again, I will duplicate the slide. For the first slide, I will delete the turntable animation and change it to top view.
On the second slide I will keep the side view and the turntable animation. Then I will apply the Morph transition to the second slide. The preview shows the butterfly smoothly transitions from the top view to the side view. and then the turntable animation begins.

About the Author
Jennifer Sharkey is known as the Virtual Presentation Specialist. Being passionate about seeing people shine and be heard, she leans into her 20+ years of public speaking experience and uses what she has learned from presenting, both in-person and virtually, to small groups all the way up to 5000 people. Jennifer draws from her experience as an associate professor, academic librarian, and coach to help holistic coaches master virtual presentations to grow their business. Her unique immersive program provides practical strategies and methods to build confidence, engage audiences, and generate authenticity and authority.
Privacy Overview
| Cookie | Duration | Description |
|---|---|---|
| cookielawinfo-checkbox-analytics | 11 months | This cookie is set by GDPR Cookie Consent plugin. The cookie is used to store the user consent for the cookies in the category "Analytics". |
| cookielawinfo-checkbox-functional | 11 months | The cookie is set by GDPR cookie consent to record the user consent for the cookies in the category "Functional". |
| cookielawinfo-checkbox-necessary | 11 months | This cookie is set by GDPR Cookie Consent plugin. The cookies is used to store the user consent for the cookies in the category "Necessary". |
| cookielawinfo-checkbox-others | 11 months | This cookie is set by GDPR Cookie Consent plugin. The cookie is used to store the user consent for the cookies in the category "Other. |
| cookielawinfo-checkbox-performance | 11 months | This cookie is set by GDPR Cookie Consent plugin. The cookie is used to store the user consent for the cookies in the category "Performance". |
| viewed_cookie_policy | 11 months | The cookie is set by the GDPR Cookie Consent plugin and is used to store whether or not user has consented to the use of cookies. It does not store any personal data. |
Ultimate Guide to PowerPoint Animations: Tutorials, Templates, Tips & Tricks
Animations in powerpoint.
We have put together a massive collection of resources for PowerPoint Animations. This includes free & premium tips, tricks, tutorials and templates that you can access online to polish your slides and engage your audience.
We will cover both Custom Animations and Transitions feature in PowerPoint. This includes the new Morph Transition introduced in PowerPoint for Office 365
About PowerPoint Custom Animations
Custom Animation is a useful feature in PowerPoint. You can use it to add interaction to your slides and make the presentation more engaging for your audience. Almost any element in your slide - text, photos, graphs, shapes, audio and video can be animated.
You can add PowerPoint animations to any of these elements in just three steps: (1) Select the object to animate (2) apply an animation, and (3) customize the effects.
Let us see how to apply animation to different parts of a presentation.
Custom animation, when used correctly can enhance the effectiveness of your message in your business presentations. #PowerPoint #Tips
4 Types of Animations
PowerPoint offers 4 types of Animations:
- Entrance animation: Animations to make elements enter the slide.
- Exit Animation : Animations to make elements exit the slide.
- Emphasis Animation : Animations to highlight elements on the slide and direct attention
- Motion Path Animation : Animations that make elements on the slide move from one place to another along predefined paths.
You can add more than one animation to the same object. With this feature, it is possible to create a variety of custom animations to suit your specific requirement.
Animation can help make a PowerPoint presentation more dynamic, and the information more memorable. The most common types of animation effects include entrances and exits.
Learn how to set up basic animations with these tutorials on Microsoft website.
[Basic] Add Animations in PowerPoint 2016
In this easy to follow video, learn how to add animation in PowerPoint 2016. This video shows how to get started and is a primer.
Customizing Animation Effects
Once you add an animation to an object, PowerPoint offers further options to customize the animation. Each Animation effect can be controlled using the following additional settings:
Option 1: Preview Animations
Animations in PowerPoint can be normally viewed only in Slideshow mode. So if you want to preview the animations you added on a slide, PowerPoint allows you to view them using the Preview option.
Option 2: Effect Options
Some effects in PowerPoint like Fly In have additional options available. For example, Fly In animation can be set to Flyin from Left, Right, Top or Bottom of the slide.
In addition to this, text animation can be further set to: As One Object, All at One or By Paragraph.
Option 3: Advanced Animation Effects
These options help you fine tune your animation further. You can:
Add Animation: Add more animation effects to an object
Animation Pane: View Animation Pane to view list of animations applied on the slide and modify them.
Trigger: Start animation on a trigger like on click of a button/text etc. to make your slide more interactive.
Animation Painter: This lesser known tool can be used to copy all the animations applied to one object and "paint" or replicate the animation to another object. This is a very useful tool to reduce the time taken to create animation effects.
Option 4: Animation Timing
The Animation timing tools allow you to control when and how the animations play.
Start: Animations can start On Click, With Previous and After Previous
Duration: Controls how long the animation should play for.
Delay: This feature controls how long after the previous animation the current animation should be played.
Reorder Animation: When the Animation Pane is open, you can reorder the animations and move them up or down with these tools.
5. About Animation Pane
The Animation Pane provides the list of all the animations applied to a slide in once place. You can do the following actions in the Pane:
- Change the Start option
- Edit the Effect options
- Change the Timings
- Remove the animations
- Preview the animations
You can find out more about Animation Panes in this post from Tutsplus .
How To Preview Animations
When you put together a slide with multiple animation effects, you need to preview the animation periodically. Going to Slideshow mode every time takes a lot of time. In this video, you will find some quick ways to preview animations. All the options shared in this video allow you to preview the animation in the slide itself.
Text Animation Effects
PowerPoint animations are useful for text or bullet lists. You can make each point in your list appear one at a time as you present it. In this section we'll explore some basic and advanced ways to present text.
Animations to Bullet Lists
When you present a list of bullet points, you can add animations to make each point exit the slide, after you finish covering it. This post from Techrepublic shows how to add an exit strategy to bullet points in a slide.
[Easy] Useful Animation Tricks for Bullet Points
Learn 3 useful PowerPoint Text animation tricks in the video below. The tricks you will learn are: 1. How to animate a bullet point list one by one 2. How to dim a bullet point after it is animated 3. How to make a bullet point disappear after the animation PLUS How to animate bullet points in reverse order These PowerPoint animation effects should help you make your next presentation more effective.
[Advanced] Animation Effect for Text
Learn how to create a realistic looking effect of a hand writing text in PowerPoint. The animation looks like it was created by whiteboard animation software like Videoscribe. This popular video by Presentation Process has over 1200 Likes and 134K views.
Find these videos useful? Please subscribe to Presentation Process YouTube channel for more:
Most people use animation only to make the bullet points appear one after another. Some advanced users make the points dim after animation. There is so much more to animation than this basic feature. In the following sections we'll see some advanced and creative uses of Animations in PowerPoint.
Picture Animation Effects
In this section you will find some creative ways to animate slides with photos. This includes photos in jpeg or png format as well as vector images in EMF, WMF or SVG format.
You can find video tutorials on how to animate Pictures and Shapes on Microsoft website.
[Advanced] PowerPoint Zoom Animation
Sometimes when you present large pictures in your business presentation, you may be required to zoom in to your pictures to show the details. In such a situation this PowerPoint zoom effect comes in handy. You can use the animation effect to zoom into a certain step in a large multi step process, or you can use this custom animation trick to zoom in on an individual in a large group photo or zoom in on a country in a large world map etc.
[Advanced] PowerPoint Animation to Create Videoscribe Effect
Learn to create an interesting Videoscribe effect with PowerPoint Animation within a few seconds. The effect you will learn is to have a base image and to animate it so that it looks like someone is completing a drawing on the slide. This is a great way to add engagement to your training slides.
If you would like to follow this tutorial, you can download a similar image here .
This kind of animation can be done with any wmf or emf file and can be used to explain business concepts like planning and execution or explanation of a step by step process.
Shapes & SmartArt Animations
Autoshapes in PowerPoint can be used to create visuals for your presentation. In this section, we will see how to animate Autoshapes as well as SmartArt.
[Easy] PowerPoint Timeline Animation
Learn to create a beautiful Animated PowerPoint Timeline Infographic with this step by step tutorial. Grab your audience attention with this easy to design slide with custom animation effect.
[Easy] PowerPoint Animation for SmartArt Objects
When you add animation to a SmartArt graphic in PowerPoint , initially the entire graphic gets animated. But PowerPoint does provide some control over animating SmartArt shapes. To learn how to animate a SmartArt graphic with more control read this post on Indezine .
You can also see the process of animating a SmartArt diagram with the tutorial video below. The diagram we will be using is a core diagram with a circle relationship from the inbuilt PowerPoint SmartArt
The type of diagrams you can create and the animations you can apply, are only limited by your imagination.
Watch the video above to know more
Creative Slide Design & Animation
Design 25 beautiful Slides to impress your boss & clients – using PowerPoint Tips & Tricks. Save time and improve your workflow efficiency. Suited for Beginner and Intermediate PowerPoint users.
Chart Animations
Most business presentations have charts included in them. Many times PowerPoint charts can be overwhelming for the audience. The reason for their overwhelm is - too much information hitting them too soon. If you learn to sequence the way you present your numbers, you make it easy for your business audience to understand your PowerPoint presentation.
This video in Microsoft support site shows how to add animations to Charts and SmartArt.
[Easy] Guide to PowerPoint Chart Animation
Learn to animate your charts like a pro. In this short video tutorial, you will find how to apply custom animation to your PowerPoint charts and present information at your own pace.
[Easy] Animate Excel in PowerPoint
Many presenters have the habit of creating charts in Excel first and then again in PowerPoint. This video shows how you can simply copy an existing chart from Excel and animate it to present your information clearly and in sequence.
Adding Interactivity
PowerPoint animations has a trigger feature which can be used to add interactivity to your slides. These are specially useful for training and e-learning presentations.
Hyperlinks and Triggers
Triggers are like an internal hyperlink on your slide. The person viewing the presentation can control what happens next. This is useful for building multiple choice quizzes. This post from Brightcarbon provides an overview of setting up triggers & hyperlinks.
Creating Simple & Interactive PowerPoint Animated Slide
Engage your audience in training and information presentation with this beautiful slide. The slide has 4 images. On clicking on an image, the description or details relevant to that image appears next to it.
Creating Interactive Buzzers with Sound in PowerPoint
Make your training more engaging and interesting with this creative PowerPoint idea. Follow this step by step tutorial video to create an interactive PowerPoint buzzer with sound effects. You can use this buzzer to run a quiz in your classroom.
45 PowerPoint Quiz Templates Pack
Create excitement & make learning fun with games in your classroom! Gamify your classroom & generate excitement with Ready To Use PowerPoint Quiz Templates.
Quiz templates for any type of training: Corporate Training, Universities, Schools or Freelance Training. Includes complete instructions for customizing & playing each game
Video Animation Effects
You can insert and play videos in PowerPoint. You can insert these videos from YouTube, from your PC or Storage location like OneDrive. This tutorial in Microsoft website covers how to insert video and audio in PowerPoint.
[Easy] Insert YouTube Video in PowerPoint
Learn how to embed an online video into your next presentation. It is a fairly straightforward option in PowerPoint 2016.
[Advanced] PowerPoint Movie Magic with Videos, Text and Animations
Create PowerPoint Movie Magic by using the combo of videos, text and animations. Use this technique to create slides that engage your audience. The presentation shows a car moving along a road. The windshield wiper moves across the screen. Text appears and fades away in sync with the movement of the windshield wiper. We will use the Video Bookmark option, Text Entrance and Exit Animations, and Trigger animations options to create this effect.
Using Transitions Effectively
Slide transitions are the visual movements where one slide changes into another during a presentation. They add to the professional appearance of the slideshow in general and can draw attention to specific important slides. To know how to apply and remove transitions, read this post on Lifewire.
[Easy] 5 Tricks to Use Transition Effects in PowerPoint
Learn how to use PowerPoint slide transition effects in an interesting way to make your presentations creative.
[Advanced] The Power of Dynamic Pan Transition Effect
Sometimes the information you want to present spreads beyond one slide. For example, an excel spreadsheet you stuck on the slide has too many columns to fit into one slide. A map you placed on the slide is too big to be shown on one slide. If you force yourself to show the image in one page (by shrinking the size of the map), the details get too small to be clearly visible to the audience in the last row.
Learn an easy trick to overcome this situation with the video below:
Using Morph Transition
PowerPoint Morph is a revolutionary feature available for Office 365 users. It eliminates the need for complex animation. Technically speaking, PowerPoint Morph is a transition, but in reality it can be widely used a substitute/enhancement for complex animation. Read this post from Efficiency365 for a quick overview of this feature.
[Easy] Animated Roadmap with Morph Transition
Learn to create an interesting animated roadmap that looks like a video. We use the PowerPoint 2016 ( Office 365 ) Morph Transition feature to create this effect. You can use this type of roadmap or timeline in almost any kind of presentation. Engage your audience by explaining and revealing the steps one by one. Link for Roadmap Image
[Advanced] How Morph Transition Can Replace Animation
In this video you will find how to use PowerPoint Morph Transition to replace Custom Animations. See how this can be done with this example of a slide with multiple pictures with text. You'll find how to mimic PowerPoint animation with Morph Transition and create the slides very quickly.
If you would like to learn about Morph Transition, PowerPoint Designer and other such features available in PowerPoint for Office 365, checkout the course below...
Complete PowerPoint Foundation Course
Master Fundamentals of PowerPoint from scratch. From Basics to Advanced. Includes special section on features of PowerPoint 365:
- 13.5 hours on-demand video
- For beginner & advanced users
- Online Access: Full lifetime access
- Practice Activities: Assignments & Quizzes
Animated PowerPoint Templates
Animations take time to visualize and create. You can save time by using ready to use PowerPoint Templates. In this section you will find resources and links for Animated PowerPoint Templates.
PowerPoint comes with some animated 3D templates. This includes sparkling picture frames, lively photograph albums, 3-D rotating photos, and elegant transitions between images.
This page on Microsoft support site provides the link and details.
You can find more free animated PowerPoint Templates including for physics presentations at Presentation Magazine website.
While these free templates are a good resource for student and non-critical presentations, business & training presentations require professional and creative animation effects.
Ready-to-Use Professional Animation Templates
The 750+ Advanced PowerPoint Animation Templates Pack is specifically created for use in training and business presentations. It includes advanced animations for text, lists, pictures, concepts and metaphors. You can preview some of the templates from this pack below:
Animations for Bullet Points, Agenda, Terms & Definitions
Animations for Timelines, Roadmaps & Process Flows
Source: 750+ Advanced PowerPoint Animation Templates Pack
Animations for Pictures and Lists
Animations for Concepts, Metaphors, Business Ideas
And More Professionally Animated Templates to Engage Your Audience...
Make Your Presentations More Engaging without Spending Hours struggling with PowerPoint Animations...
Download 750+ Advanced PowerPoint Animation Templates Pack. Tell your story with 750+ Ready to Use & Easy to Customize Powerful Animations in PowerPoint.
Pramod Naik
Ceo, tianjin tianshi india pvt ltd.
These ready to use animated slides are very classy and ready to use , these are very thoughtfully done .
When I have to put a point across to the team or to a larger audience , these slides greatly benefit me to make my slides sharper and to the point … one just has to visualize as to what is that you need to share to the audience and how , if you can visualize , you are bound to find that slide in this pack , if not similar , better . Secondly when you scan through the slides , the way they are made you also get ideas as to what to share to the team and audience .
Tips for Professional Animation
Here are some quick tips when using PowerPoint Animations. These will help you save time and create your animations more professionally.
[Tip] How to remove Custom Animations from All Slides in 1 click
When you don't want any custom animation at all in your presentation - how do you go about it? Usually you will have to go to every single slide and remove the animations. However if you wish to have on-click control on whether animations are present or now - then use this trick and get complete control over your slides!
5 Irritating Ways to Use Custom Animation
Some presenters have the habit of applying animations the wrong way. Such animations have no purpose and end up irritating the audience. Watch the video below to learn the common mistake presenters make when using custom animations feature.
Time-Saving Tip: Using Animation Painter
Animations take a lot of time to create. Learn how to easily reuse animations applied to an object using Animation Painter tool. This video is part of the bonus tutorial videos provided with purchase of Advanced Animations Pack.
Good PowerPoint animation makes your audience focus on the message not the animation.
Turn Presentations Into Videos
When you make a recording of a presentation, all its elements (narration, animation, pointer movements, timings, and so on) are saved in the presentation itself. In essence, the presentation becomes a video that your audience can watch in PowerPoint. Learn the step by step process in this Microsoft support article .
[Easy] Convert PowerPoint to Video
In this tutorial, you will find how to use save your PowerPoint file as a video. When you save the file as a video, all the animations and transitions you have used will get saved along with the file. You would use this option of saving your presentation as videos to: - Showcase photos in a video format online/ offline - Summary or review of keys points in a presentation or training - Create a booth or kiosk presentation etc.
Free Ultimate Guide to PowerPoint Animations for tutorials, tips & more. #PowerPoint #Presentations
More Ideas for PowerPoint Animation
How to create sparkling text effect for pictures.
Learn to create a Sparkling Text Effect in PowerPoint with this step by step tutorial. You can use this effect for title animation or to highlight an important quote in a presentation.
How to create Clock Needle Animation effect
Learn how to Create Clock Needle Animation Effect in PowerPoint 2013 This is a useful animation effect to show a list, agenda items, steps in a process and more.
Create Motion Graphics with Animation
Learn how to convert Static Pictures into Animated images in PowerPoint. Tell your story with creatively animated PowerPoint slides. The effect looks like motion graphics created in an advanced software. However, this effect uses simple custom animation effects that you can follow in any version of PowerPoint.
Related Posts
Liked this article? Please share:
Note: All trademarks are property of their respective owners. Images are screen grabs from respective sites.

- Privacy Policy
- Terms of Service
- DMCA Protected
© Copyright 2024 Metamorph Training Pvt Ltd. All rights reserved.
C/O SiteSell Inc, 1315 de Maisonneuve Blvd. West, , Suite 1302, Montreal, QC H3G 2W9, Canada
- Animate pictures, art, and more Video
- Animate text Video
- Animate pictures and shapes Video
- Animate charts and SmartArt Video
- Create custom animations Video

Create custom animations

If you are the adventurous type, you can create some pretty amazing presentations with lots of motion path animations. It's not all that difficult once you get the hang of it.
Customize with motion paths
You can create some pretty amazing presentations with lots of motion path animations:
On the ANIMATIONS tab, click More in the Animation Gallery, and under Motion Paths , do one of the following:
Click Lines , Arcs , Turns , Shapes or Loops . The path chosen appears as a dotted line on the selected object or text. The green arrow indicates the path’s beginning and the red arrow indicates its end. Drag either end to put the endpoints where you want them.
Click Custom Path . When you click where you want the motion path to start, the pointer appears as a cross-hair.
To draw a path of connected straight lines , click where you want the motion path to start. Move the pointer and click to create a line between the two click points. Move and click again to draw another line. Double-click to stop drawing lines.
To draw a freehand path , click where you want the motion to start. Hold the left mouse button and move the pointer on the path that you want the object to follow. Double-click at the motion’s final endpoint.
If you are the adventurous type, you can create some pretty amazing presentations with lots of motion path animations.
You'll see that it is not all that difficult, once you get the hang of it. But let's start out small.
Click the shape called Behind Shape 1 .
Now if we add an Entrance animation like Fly In , we can control where the shape ends up, and the Direction and Sequence with Effect Options .
But we can't control where the shape begins, or the path it takes.
To do that we need to use motion paths. Go down to Motion Paths and select Lines .
This is the motion path: the line describes the path; the green arrow indicates where the shape starts; and the red arrow indicates where the shape ends.
Select the path. This half-transparent shape shows the shape at its endpoint.
Drag the red arrow and position the endpoint over the in-front shape.
Then, preview the animation. And the first shape moves behind the second one.
Motion paths can be a lot of fun.
Try some other ones, like Arcs and Loops .
Also, click Custom Path , if you want to draw your own motion path.
Let's go back to the previous slide and add a motion path to Behind Shape 2 .
Use the Animation Painter to copy the animation.
Then, select the motion path, and move its endpoint on top of the in-front shape.
Preview the animation.
The animation works alright, but the second behind shape ends up covering up the shape we want to keep on top.
This is a problem you'll run into more often when you are creating custom animations. But it's easy to fix.
Right-click the shape and click Send to Back , Send Backward .
Now preview the animation.
That's the way we want it.
You see, all the objects on the slide are organized into layers.
By sending the shape backward, we moved it to a layer behind the in-front shape.
Here's another thing you can do to create custom animations.
This ball shape actually contains two animations: a motion path that moves the shape horizontally and a Spin animation that makes the ball appear to roll as it moves.
To add multiple animations to an object, select the first animation in this gallery.
Then, click Add Animation to add the others.
Also, don’t forget about those additional effect and timing options.
Here's another way to open that dialog box in the Animation Pane .
Click the arrow next to the animation, and click Effect Options .
I added Auto-reverse to the animations, so the objects return to their original positions.
So now, you have everything you need to get started with the animations in PowerPoint.
The best way to understand animations is to experiment on your own.
For more information, check out the links in the course summary.

Need more help?
Want more options.
Explore subscription benefits, browse training courses, learn how to secure your device, and more.

Microsoft 365 subscription benefits

Microsoft 365 training

Microsoft security

Accessibility center
Communities help you ask and answer questions, give feedback, and hear from experts with rich knowledge.

Ask the Microsoft Community

Microsoft Tech Community

Windows Insiders
Microsoft 365 Insiders
Was this information helpful?
Thank you for your feedback.
Unsupported browser
This site was designed for modern browsers and tested with Internet Explorer version 10 and later.
It may not look or work correctly on your browser.
- Presentations
How to Make Animated PowerPoint Presentations With PPT Templates
- Bahasa Indonesia
In this tutorial, we'll look at how to make animated PowerPoint presentation designs from a template. This includes how to create animated slides in PowerPoint, as well as other animation in PowerPoint presentation designs.
Animations in PowerPoint can really draw your audience's attention to elements of a presentation. You don't have to use separate apps to create animation effects. PowerPoint offers some of the easiest, point and click tools to add animation to your presentations.
There are two key types of animation in Microsoft PowerPoint that you'll learn to use in this tutorial:
- Object animations , which are individual items like, text or shapes going in motion on a slide.
- Animated transitions , the effects that play when you move from one slide to the next in PowerPoint.
In this tutorial, we'll learn how to create an animated PowerPoint presentation with a template. You'll learn how to add both key types of animations to a presentation. We'll also look at how to make animated slides in PowerPoint from a template.
You can find more great animated PowerPoint templates on Envato Elements. Or browse through this curated selection:

Inspiration: Working With the Best Animated PowerPoint Templates (Video)
It's important to use PowerPoint animations the right way in your presentation. In this video, learn how to use pro templates to add powerful animated slide designs to PowerPoint quickly. Also, see some premium animated PowerPoint templates from Envato Elements in action.

Guide to Making Great Presentations (Free eBook Download)
Also, before you read on, be sure to grab our free eBook: The Complete Guide to Making Great Presentations . It will help you master the presentation process, from: initial idea, through to writing, design, and delivering with impact.

Now let's get into how to create an animated PowerPoint presentation, beginning with helpful tips:
Tips and Tricks for Making Animations in PowerPoint
Not sure which animations are best for your project? When making animations in PowerPoint, it's important to know when to add them and when to keep it simple. Check out these simple tips and tricks for your next PowerPoint presentation.
1. General Tips for Using Animation in PowerPoint
Just because you can animate everything in PowerPoint doesn't mean that you should. We've all sat through presentations with distracting animations. When making animations in PowerPoint, be strategic.
Animations serve to complement the content and draw the user's eye to key elements. The PowerPoint animation effects shouldn't be the focus of a slide. Your content should be. Here are key tips to add animations to your PowerPoint presentations tastefully:
- Limit yourself to one to two key PowerPoint animations on each slide to avoid distracting the audience.
- Use animations to draw attention to key points on the slide instead of applying them to random elements.
- Use simple PowerPoint animation effects like fade or dissolve animations that are less distracting than flashier options.

With that in mind, let's dive into adding PowerPoint animations in a presentation:
2. Add PowerPoint Object Animations
Object animations bring elements onto or off a PowerPoint slide. They're a big part of making animations in PowerPoint. You can use these effects to reveal key points or draw attention to a specific part of the slide. Imagine leaving the conclusion for each slide hidden until you press a button on your remote, for example.
Let's explore how to make animated PPT presentation designs stand out with object animations.
To experiment with how to create animated PPT object animations, we'll use this PowerPoint template. Download it now if you'd like to follow along. Otherwise, these steps will apply to any existing PowerPoint presentation or template.

To get started with object animations, start off by clicking on an element on your slide. You can choose an element like a text box, image, or even a shape you've drawn on the slide.
Now, click on the Animations tab. This menu makes it easy to choose an animation to add to an object.

Click on the part of the slide that you want to animate. Again, this could be a text box, image, chart, or any object that you can select on the slide.
Once you've got an object selected, simply click on one of the animation thumbnails. PowerPoint will play a preview of the selected animation and you'll see the object come onto the slide.

Now, simply click on the PowerPoint animation that you want to add to an object. I recommend choosing a simple animation effect like Fade or Appear. Keeping an animation simple will bring it onto a slide naturally and not distract the audience.
3. Sequence Object Animations in PowerPoint
If you've added many PowerPoint animations to the same slide, you might want to re-order the object animations. For instance, your images might come onto a slide before the title appears.
In this case, it helps to resequence animations . To reorder animations, switch to the Animations tab on PowerPoint's ribbon. Then, find the Animation Pane button and click on it to open a panel that shows all the animations on the slide.
On the right side, you'll see the Animation Pane open. In it you'll see a list of animations that'll play on the slide.
In the example below, you can see two animations on the side, each of which represents an object's animation.
To reorder the animations, simply drag and drop them in the list on the Animation Pane . Click Play All to preview the animations once they're reordered.
4. Add PowerPoint Slide Transitions
Now, let's talk about how to create animated slides in PowerPoint. Slide transitions show as effects when you move from one slide to the next. These are another form of PowerPoint animation you can apply with relative ease.
To apply a slide transition, start off by selecting a slide and clicking on Transitions on PowerPoint's ribbon. With a slide selected, simply click on one of the animation thumbnails on the ribbon to apply it to the current slide. You'll see a preview of the active transition animation play.

Notice that slides that have animations show a small icon in the sidebar. So, you can easily identify the slides that you've applied transitions to.

There are three other key options that you can set on the ribbon for each slide's transition:
- Sound . Choose a drop-down option to play a sound when the slide advances.
- Duration . This describes the duration (speed) that the animation plays. You can set a longer duration in seconds for the animation to play more slowly or shorten it for a faster transition.
- Advance Slide . Instead of advancing the slide by clicking through the presentation, tick the After option to automatically change slides after a certain amount of time.
The principles of limiting PowerPoint animation and effects are the same for slide transitions. Use them sparingly and stick to the simple dissolve or fade effects.
How to Remove Animation From PowerPoint
Now that you’ve learned how to add animation in PowerPoint let’s learn how to remove animation from PowerPoint:
1. Open the Animation Pane

The first step in how to remove all animations from PowerPoint is to open the Animation Pane . First, click on the Animations tab. Next, click on the Animation Pane button in the toolbar.
2. Animation Pane

You’ll see a list of your current animations in the animation pane under the Animations section. Click on one of your animations and press the red X button above the list.
After you click the X button, you’ll have removed the animation from your slide. Keep repeating this step until you’ve deleted all the animations you want to remove.
3. Remove All Animations from Your Presentation at Once

Here’s how to quickly remove all animations from PowerPoint.
- Click on the Slide Show tab in the menu bar.
- Click on the Set Up Slide Show button.
4. Set Up Show Window

A Set Up Show window appear once you click on the Set Up Slide Show button. This window is how to remove all animations from PowerPoint.
Under the Show Options , click on the box next to the Show without animation option. Next, click on the OK button in the bottom right corner.
Make Better PowerPoint Animations and Presentations
So far, we've tackled the basics of PowerPoint animation and how to create animated PPT elements. Let's take these ideas and explore them in a customizable PowerPoint presentation. Here's the template design we'll use in this walkthrough:

You can download this template and follow along. Or apply these techniques to any PowerPoint template design you prefer.
1. Start With a Strong Introduction
Above all, you'll want to start off by showcasing your organization. For example, if you're going to recruit employees to join your company, it helps to give them background on what it is that you do. Trying to sell an idea to investors? They'll need to know what you're about and why to trust you.
Take a look at this sample slide from this professional PowerPoint design template . Where do you think animation would be an appropriate addition?
A simple fade in could be a classy addition here. Think about this in contrast to something overly busy, like every element here flying in from a different direction. That would be really distracting!

2. Introduce Your Topic Clearly and Concisely
Organization and clarity often go hand in hand. When considering how to make animated PowerPoint presentation designs, start with a simple layout. Less is often more. Once your content has been laid out in a clear and easy to understand way, you can consider making animations in PowerPoint.
Here's another example slide from this PowerPoint presentation. We could try some object animations here. For example, perhaps each of the three points here could fade or pan in, one by one. That could make sense and support the idea of progression here.

3. Describe Your Progress Visually
Visuals can be very communicative. Consider trying an infographic or other visual element to help convey ideas.
For example, a 50% increase sounds like a big deal, but it's going to visually look like a big deal when we see a visualization of this information.
So, how about making animations in PowerPoint for this scenario?
We could use animations to reinforce the infographic, for example. Or maybe we could have the percentages fade in last, to emphasize their importance. When in doubt, pick one part to emphasize. Less is usually more.

4. Remember to List Your Contact Details
A strong PowerPoint presentation is typically designed to inform and engage an audience. We want our audience to connect with us, so make sure they're clear on how to do so. It's great to take questions during or after your presentation, but what about later?
Again, when thinking about making animations in PowerPoint, keep these tips in mind:
- Where do you want to add emphasis? Use animation to enhance, not distract.
- Not sure? Then keep it simple with a clean transition into the slide.
So, in this slide, we could stick to a simple fade in, that could work just fine. No need to keep viewers waiting on any information here.

You'll notice that not all these slide examples contain complex animations. When each slide is loaded with many animated objects, your audience is likely to become distracted and tune out. This is why we recommend that you be selective with including animations in your PowerPoint presentations.
To try out other premium PowerPoint templates, check out Envato Elements popular PowerPoint themes. Subscribe to Elements and download unlimited creative files.
5. Tips on How to Create Animation in PowerPoint
Looking for a run through of some of the basics of how to make animated PPT presentation designs? Check out this helpful, free tutorial. It's a great primer for how to create animation in PowerPoint.

Download Customizable PowerPoint Templates (With Unlimited Use)
A PowerPoint template can help you get your project done quickly and efficiently. Remember, you can put animation in PowerPoint presentation design templates too. They're fully customizable.
So, what if you could have access to thousands of PowerPoint templates for one low price? Sounds like an awesome deal, right? Well, that's exactly what you get with Envato Elements.
Find PowerPoint Templates

And you also get access to a library of fonts, graphics, illustrations, audio, and much more too! Download a new business card template or even a template for your website. It's an ultimate resource for creative professionals.
5 Trending PowerPoint Templates (From Envato Elements for 2021)
Check out some of the awesome PowerPoint design templates you can download right now, on Envato Elements. They're all included with unlimited downloads. Enjoy the design inspiration, or consider customizing one today:
1. Reyna PowerPoint Template

This template is clean and trendy, with fun pops of color. Prefer a different color scheme? This PowerPoint template is completely customizable. Try it out with any colors you prefer.
2. Hurley PowerPoint Template

A dark PowerPoint theme, like this one, can give your presentation an entirely different mood. It's got a lot of contrast too. Try this one out with your photos and content.
3. Process PowerPoint & Google Slides Template

Check out the fun, custom shaped used in this PowerPoint template design. Easily customize the content, add your own photos, and more. This one also comes with support for Google Slides.
4. Kemal – Business PowerPoint Template

Isn't this design classy? Sticking with a black and white aesthetic, as your overall look, can make for a classy design. This one could be a great choice for showcasing eye-catching photos.
5. Clover Fashion - PowerPoint Design Template

A blocky look like this one could be pushed in so many directions. Love it colorful? Then simply insert your content. Prefer something softer? Jump right in and edit this PowerPoint presentation. It's yours to mix up as you like.
Looking for Even More PowerPoint Templates?
There's even more design inspiration to check out on Envato Tuts+. If you're looking for more PowerPoint template designs, check out these collections. There are many different aesthetics and even some freebies to download right now:

Keep Learning More About PowerPoint & Making Great Presentations
This tutorial showcased how easy it is to add animations in Microsoft PowerPoint. Whether you use the built-in object animations or opt for a top PowerPoint presentation template, animation can draw attention at the right moment to your key points.
For a more comprehensive guide to building presentations, make sure and check out our Ultimate Guide to the Best PPT round-up.
Also, don't miss out on these specific Microsoft PowerPoint tutorials that'll help you learn animation in PowerPoint:
Need More Help? Grab Our Making Great Presentations eBook (Free)
We've got the perfect complement to this tutorial. You can find more information in our eBook on making great presentations . Download this PDF eBook now for FREE with your subscription to the Tuts+ Business Newsletter.

It'll help you master the presentation process from initial creative ideas, through to writing, design, and delivering with impact.
Download a Template to Use Animation in Your Next PowerPoint Presentation
Now that you know how to make animated PowerPoint (PPT) presentations, download your favorite template. You can start making animations in PowerPoint today .
Remember, many premium PowerPoint templates already have built-in animation effects.
Editorial Note : This post was originally published in October of 2017. It's been comprehensively updated with special help from Daisy Ein and Sarah Joy .


How to Move an Object Across a PowerPoint Slide During a Slide Show

Move an Object Across a PowerPoint Slide Using Motion Path or Entrance Animations
by Avantix Learning Team | Updated May 28, 2021
Applies to: Microsoft ® PowerPoint ® 2013, 2016, 2019 and 365 (Windows)
You can move a shape, image or other object across a PowerPoint slide during a slide show using motion path or entrance animations. When you run a slide show, the object will move across the screen (on click or automatically).
Recommended article: How to Print PowerPoint Presentations with Notes
Do you want to learn more about PowerPoint? Check out our virtual classroom or live classroom PowerPoint courses >
To apply animations, use the Animations tab in the Ribbon:

You can use entrance or motion path animations to move an object across a slide but you'll need to expand the Animations Gallery to access motion path animations.
If you want to apply more than one animation to an object, you will need to use Add Animation in the Advanced Animation group.
Animations are typically added to objects in Normal View but can be applied in Slide Master View.
Adding a motion path animation to make an object move across a slide
To apply a motion path animation to make an object move across a slide on click:
- Select an object. For text objects, click in the text box or placeholder or click its edge.
- Click the Animations tab in the Ribbon.
- In the Animations group, click the More down arrow on the bottom right of the Animations Gallery.
- Click the Line motion path animation in the Motion Paths group. If you click More Motion Paths, you can choose another motion path animation such as Funnel. For some motion paths, such as Custom Path, drag on the slide to create the path and then double-click to end it (see below for more information on custom paths).
- Click Effect Options on the Animations tab and select a direction such as Up, Down, Left or Right. Effect Options change depending on the type of animation.
- Click the motion path and drag the starting point (green dot or green arrow) or ending point (red dot or red arrow) to change the beginning or end of the path. The starting point begins in the middle of the object and the ending point ends in the middle of the object. In 2013 and later versions, a "ghost copy" of the object at its ending location appears on screen. You can drag the "ghost copy" to change the end point of the path.
- Drag the sizing handles (white circles) to resize the path.
The expanded Animations Gallery appears when you click the More down arrow in the Animations group (note the Entrance and Motion Paths categories):

If you select More Motion Paths in the Animation Gallery, the following dialog box appears (scroll down for more options):

You can also apply a motion path animation by clicking Add Animation on the Animations tab in the Advanced Animation group.
Custom paths behave differently from simple line motion paths. Intially, if you click Custom Path, you can drag on the screen to create the path. However, to make straight lines, simply click once at each desired point in the path rather than dragging. If you later want to change to a freeform path, click once again to switch to freeform mode and drag to continue the path. Click once to return to drawing straight lines. When you are finished drawing the path, double-click to end it.
By default, the object will appear on click during a slide show and follow the path.
You can select other motion path options in Effect Options on the Animations tab in the Ribbon:
- Sequence options can be used with some objects such as text boxes or placeholders with multiple bullet points or paragraphs. For example, you can choose to move paragraphs or bullets one at a time or as one object.
- Locked, in the Origin category, can be selected when a motion path is unlocked (which is the default). If the path is unlocked, it will move with the object. If you lock the path or origin, when you move the object, the motion path will remain in the same location. You can unlock a motion path that is locked.
- Edit Points is available for all motion paths except Line. If you select Edit Points, points will appear along the motion path and you can drag them to change the path. You can Ctrl-click a point to delete it or Ctrl-click on the path to add a new point.
- Reverse Path Direction will switch the start and end point of the motion path.
You can also combine motion path animations with other animations like Grow / Shrink using Add Animation.
Adding an entrance animation to make an object move across a slide
To apply an entrance animation to make an object move across a slide on click:
- Click the Fly In entrance animation in the Entrance group. If you click More Entrance Effects, you can choose another animation such as Spiral In or Bounce.
- Click Effect Options on the Animations tab and select a direction such as From Top or From Left.
You can also apply an entrance animation by clicking Add Animation on the Animations tab in the Advanced Animation group.
By default, the object will appear on click during a slide show.
Using the Animation Pane
If you're going to work with animations, it's helpful to display the Animation Pane so you can easily select and edit the animations.
To use the Animation Pane:
- Click Animation Pane in the Advanced Animations group. The Animation Pane appears on the right side of the screen.
- Click the animation in the Animation Pane and then select other options on the Animations tab. You can also click the drop-down menu that appears and select Effect Options.
Changing the way an object starts during a slide show
Animations are set by default to start on click during a slide show. If you want an animation to start automatically, you will need to change the start setting.
To start an animation automatically, you can start:
- After Previous – the animation sequence will begin once a previous animation effect or effects is completed. The start of a slide show is also a previous effect.
- With Previous – the animation sequence will begin at the same time as a previous animation effect or effects. The start of a slide show is also a previous effect.
To change the way an animation starts during a slide show:
- Select the animation effect in the Animation Pane.
- In the Timing group, select an option from the Start drop-down menu.
Setting timing
When you apply an animation, a timing is automatically set for the animation (in seconds). The default duration is different for each animation effect.
To set a speed or duration of an animation:
- In the Animations group, enter a time (in seconds) for the animation in the Duration area of the Timing group. You can click the up and down arrows to change the duration or type a duration.
Note the Duration on the Animations tab in the Ribbon below:

Viewing animations by running a slide show
You will need to run a slide show in order to see your object(s) move across the slide. Click the Slide Show button on the bottom right of the screen to run a show or press F5 (some users may need to press Fn + F5) to run the slide show from the beginning. Use the right and left arrows to move from slide to slide or start the animations.
In this article, we are using animations to make objects move across a slide. Check out the article How to Use Morph in PowerPoint to Design Engaging Presentations for other ways to make objects move on a slide during a slide show.
Subscribe to get more articles like this one
Did you find this article helpful? If you would like to receive new articles, join our email list.
More resources
PowerPoint Slide Show Shortcuts (50+ Shortcuts)
How to Get Design Ideas in PowerPoint Using Designer
How to Insert a Check Mark in PowerPoint (4 Ways with Shortcuts)
How to Use Morph in PowerPoint to Design Engaging Presentations
How to Crop an Image into a Circle in PowerPoint (Crop to Shape Method)
Related courses
Microsoft PowerPoint: Intermediate / Advanced
Microsoft PowerPoint: Design for Non-Designers
Microsoft PowerPoint: Animations Bootcamp
Microsoft Excel: Intermediate / Advanced
VIEW MORE COURSES >
Our instructor-led courses are delivered in virtual classroom format or at our downtown Toronto location at 18 King Street East, Suite 1400, Toronto, Ontario, Canada (some in-person classroom courses may also be delivered at an alternate downtown Toronto location). Contact us at [email protected] if you'd like to arrange custom instructor-led virtual classroom or onsite training on a date that's convenient for you.
Copyright 2024 Avantix ® Learning
You may also like

How to Insert or Type E with an Accent Mark in PowerPoint (È, É, Ê, Ë, è, é, ê, or ë)
You can insert or type e with an accent mark in PowerPoint using built-in tools or keyboard shortcuts (including Alt code shortcuts). The letter e can be inserted with an accent in both upper or lower case in text boxes or placeholders on slides, the slide master or layouts. The following are common accents in upper or lower case – È, É, Ê, Ë, è, é, ê, or ë.

How to Fade a Picture or Part of a Picture in PowerPoint (Using a Gradient)
You can fade a picture in PowerPoint by drawing a rectangle shape on top of the picture and then filling the rectangle with a gradient from opaque to transparent. This technique is often used to fade an image into the background of a slide. Since the rectangle is placed on top of the image and then text may be placed on top of the rectangle, you may need to reorder the objects.

How to Lock an Image, Shape or Other Object in PowerPoint
You can now lock an image, shape or other object in PowerPoint. Objects can be locked in Normal View or Slide Master View. Only PowerPoint 365 users can lock objects to prevent moving and resizing. This is helpful if you want to select and move other objects on the slide or prevent others from moving or resizing an object. You can lock items using the context menu or the Selection Pane.
Microsoft, the Microsoft logo, Microsoft Office and related Microsoft applications and logos are registered trademarks of Microsoft Corporation in Canada, US and other countries. All other trademarks are the property of the registered owners.
Avantix Learning |18 King Street East, Suite 1400, Toronto, Ontario, Canada M5C 1C4 | Contact us at [email protected]
Our Courses
Avantix Learning courses are offered online in virtual classroom format or as in-person classroom training. Our hands-on, instructor-led courses are available both as public scheduled courses or on demand as a custom training solution.
All Avantix Learning courses include a comprehensive course manual including tips, tricks and shortcuts as well as sample and exercise files.
VIEW COURSES >
Contact us at [email protected] for more information about any of our courses or to arrange custom training.
Privacy Overview
Pin it on pinterest.
- Print Friendly
- PRO Courses Guides New Tech Help Pro Expert Videos About wikiHow Pro Upgrade Sign In
- EDIT Edit this Article
- EXPLORE Tech Help Pro About Us Random Article Quizzes Request a New Article Community Dashboard This Or That Game Happiness Hub Popular Categories Arts and Entertainment Artwork Books Movies Computers and Electronics Computers Phone Skills Technology Hacks Health Men's Health Mental Health Women's Health Relationships Dating Love Relationship Issues Hobbies and Crafts Crafts Drawing Games Education & Communication Communication Skills Personal Development Studying Personal Care and Style Fashion Hair Care Personal Hygiene Youth Personal Care School Stuff Dating All Categories Arts and Entertainment Finance and Business Home and Garden Relationship Quizzes Cars & Other Vehicles Food and Entertaining Personal Care and Style Sports and Fitness Computers and Electronics Health Pets and Animals Travel Education & Communication Hobbies and Crafts Philosophy and Religion Work World Family Life Holidays and Traditions Relationships Youth
- Browse Articles
- Learn Something New
- Quizzes Hot
- Happiness Hub
- This Or That Game
- Train Your Brain
- Explore More
- Support wikiHow
- About wikiHow
- Log in / Sign up
- Computers and Electronics
- Presentation Software
- PowerPoint Presentations
How to Make Animation or Movies with Microsoft PowerPoint
Last Updated: May 4, 2023
This article was co-authored by wikiHow staff writer, Jack Lloyd . Jack Lloyd is a Technology Writer and Editor for wikiHow. He has over two years of experience writing and editing technology-related articles. He is technology enthusiast and an English teacher. This article has been viewed 495,600 times. Learn more...
This wikiHow teaches you how to animate items in PowerPoint. By animating several items or text in a sequence, you can create a movie-like presentation.

- If you want to open an existing PowerPoint file, double-click the file in question and skip the next step.

- Images — Click Insert , click Pictures , select a photo, and click Insert .
- Text — Click Insert , click Text Box , click and drag your mouse across the area in which you want to create the text box, and enter text.

- If the selected animation doesn't have any available options, Effect Options will be greyed out.
- For example, many animations (such as the "Fly In" animation) can be edited to enter the presentation from a different side of the frame.

- Select the item you want to animate.
- Click Add Animation
- Scroll down and click one of the "Motion Paths" options.
- Click and drag the line which appears to reposition it, or click and drag one of the points on the line to change its shape.

- Clicking a number will demonstrate the animation to which it pertains.
- You can change an animation by clicking the number next to an animated item and then selecting a new animation.

- The "Duration" text box dictates how long the animation lasts, while the "Delay" text box determines how much time will pass between the animation's trigger and the animation beginning.
- You can also change what triggers the animation by clicking the "Start" drop-down menu in the upper-right corner and then selecting On Click , With Previous , or After Previous .

- If the Animation Painter button is greyed out or unavailable, first make sure that you've fully selected an animated item to copy.

- Windows — Click File , click the Export tab, click Create Video in the middle of the page, enter a file name, select a save location, and click Save .
- Mac — Click File , click Save As Movie... , enter a file name, select a save location, and click Save .
Community Q&A
- You can save your PowerPoint presentation by pressing either Ctrl + S (Windows) or ⌘ Command + S (Mac) and, if you started with a blank presentation, entering the file details when prompted. Thanks Helpful 1 Not Helpful 1
- To add audio to your PowerPoint presentation, click the Insert tab, click Audio , select a location on your computer, and click an audio file to add. You can also select the Record option after clicking Audio to record a narration with your computer's microphone. Thanks Helpful 0 Not Helpful 0
- Consider testing your presentation in slideshow mode before saving. You can do this by clicking the T -shaped "Slideshow" icon in the lower-right side of the window and pressing the right arrow key to prompt each of your animations. Thanks Helpful 0 Not Helpful 0

- Clip Art is not available in Microsoft PowerPoint 2016. Thanks Helpful 1 Not Helpful 0
You Might Also Like

- ↑ https://www.youtube.com/watch?v=Jp9EYXErle4
- ↑ https://support.office.com/en-us/article/animate-text-or-objects-305a1c94-83b1-4778-8df5-fcf7a9b7b7c6
- ↑ https://24slides.com/presentbetter/tutorial-save-your-powerpoint-as-a-video/
About This Article

1. Open PowerPoint with images or text you want to animate. 2. Click the object you want to animate. 3. Click the Animations tab and select an animation. 4. Change animation options in the toolbar. Did this summary help you? Yes No
- Send fan mail to authors
Is this article up to date?

Featured Articles

Trending Articles

Watch Articles

- Terms of Use
- Privacy Policy
- Do Not Sell or Share My Info
- Not Selling Info
wikiHow Tech Help:
Tech troubles got you down? We've got the tips you need
How to Add Cool Free Animation to PowerPoint Presentations

Your changes have been saved
Email is sent
Email has already been sent
Please verify your email address.
You’ve reached your account maximum for followed topics.
5 AI-Powered Language Learning Apps Worth Trying
The 7 best obsidian plugins for mobile, power up your pdfs: these 9 apps turn them into fillable forms.
When used wisely, animation adds emphasis and visual appeal to PowerPoint presentations. It can transform a dull presentation into a lively and engaging one. However, you should be careful not to overdo it.
Too much animation can be distracting, reduce comprehension, and make a presentation appear flimsy. In this article, we'll see how you can add free animation to your PowerPoint presentations.
PowerPoint Animation Basics
It is useful to understand the four basic types of free animations for PowerPoint:
- Entrance : used to introduce animated objects on a slide.
- Emphasis : used for emphasizing elements already present on a slide.
- Exit : how objects move off the slide.
- Motion Paths : move objects in a specified path on the slide.

Use Preset Animation for Text or Objects in PowerPoint
To animate any object and make your PowerPoint presentation more engaging, go through the following steps:
- Select the object you wish to animate.
- On the ribbon, select the Animations tab.
- Choose an animation from the Animation menu or head to the Advanced animation menu and click Add animation .

Use Custom Animation for Text or Objects in PowerPoint
If you want to change the default settings for your animations, select the animated object and head to the Advanced animation pane. You can adjust the trigger or add another animation to the same object. Also, use the Timing menu to adjust when the animation should start, its duration, and delay.
For more options, click open the Animation pane . There, you can readjust the order of the animations with the re-order buttons at the top and preview them individually. For additional options, click the More icon next to the animation. If you click Effect options , you can change the animation direction, add sound effects, or rewind it when done playing, among other options.

Add Motion Path Animation in PowerPoint
To make a graphic object move in a certain path on the slide, use Motion Path animation. This works best for graphic images with transparent backgrounds, as the graphic moves across other elements on the slide. To add Motion Path animation to an object, do the following:
- Drag the object you wish to animate to its starting position.
- Click to select the object.
- Open the Add animation menu and select open of the options from Motion Paths .
- Edit the object trajectory by clicking the path.

If you double-click on the animation, you can adjust more of its settings.

To create a custom path for your animated object, go to Add animation > Motion Paths > Custom paths . PowerPoint will allow you to draw a custom trajectory. To set the end point of the trajectory, double-click.

How to Delete an Animation From Your Slides in PowerPoint
If you want to remove one of the animations, select the slide containing it and click Animation Pane . There, open the drop-down menu next to the animation and select Remove . Or, you can choose the animation and press Del .
Add Transitions Between Slides in PowerPoint
Animations between two slides are called Transitions. To add a transition effect to your PowerPoint presentation, open the Transitions tab and choose one of the options. Keep in mind, PowerPoint will add a transition only to the selected slide.
You can add a different effect to different slides, but if you want to have the same transition throughout your entire presentation, select all the slides before adding a transition effect. This way, you don’t have to set the transition effect for each slide, so you can save time while working in PowerPoint .

Go to the Timing menu to configure the transition settings. You can add a sound, change the duration, and choose if it should start on mouse click or after a specified time.
If you have selected different transition effects for different slides, click the Apply to all button to have a uniform-looking PowerPoint presentation. If you want to remove the transition for a certain slide, open the Animations tab and select None from the available transitions.
Add Animated Clip Art
You can check out free animated clip art graphics on the web. This way, you can get some cool free animations that are ready to be added to your presentations. Also, you can include free animated PowerPoint templates in your presentation.
Quickly Animate PowerPoint Objects
With the above tips, you can now insert and configure animations and transitions into your slides. Before doing so, make sure you don’t have to replace any of the objects that you want to animate.
Now that you’ve gotten the PowerPoint animation basics, there are a few tips you could use to take your presentation to the next level.
- Productivity
- Presentations
- Microsoft PowerPoint
How-To Geek
How to use motion path animations in microsoft powerpoint.

Your changes have been saved
Email is sent
Email has already been sent
Please verify your email address.
You’ve reached your account maximum for followed topics.
The Upgrade Argument for Desktops Doesn't Stand Up Anymore
How i turned a raspberry pi into a bluetooth smart speaker, 5 ways to get your money's worth out of apple tv+, quick links, add a motion path animation, customize the motion path.
Microsoft PowerPoint offers many types of animations . You can add effects to text , images, and shapes. But if you want to create your own, you can select a motion path animation to move your object wherever you like.
With motion path animations in PowerPoint, you can make your object zigzag, loop, spiral, or swoosh. Once you select the motion path you want to use, you can customize the points to create the exact path you want your object to take.
Open your PowerPoint presentation and select the slide where you want to create the animation. Either insert the object you want to animate or select it if you've already added it to the slide.
Related: How to Hide an Object Before Animation in PowerPoint
Go to the Animations tab and click the arrow at the bottom of the Animation selection box. This opens the full collection.

Scroll toward the bottom and you'll see a few options in the Motion Paths section. If you want to use one of these, simply select it to apply it to your object. Notice you can choose Custom Path which allows you to draw the path yourself.

For additional options, click "More Motion Paths" at the bottom of the window.

In the Change Motion Path box, you'll see Basic, Lines and Curves, and Special paths. To see a preview before you apply it, check the box for Preview Effect at the bottom. Then, choose one to see it in action.

When you find the path you want to use, select it and click "OK."

If you want to combine motion paths so that your object ends in a certain spot, check out our how-to.
Related: How to Combine Motion Paths in Microsoft PowerPoint
After you apply the motion path, you may have options to change the direction. Select the animated object and go to the Animations tab. Click the Effect Options drop-down arrow to view your choices. Note that not all paths offer extra effects, but most let you reverse the path direction.

Along with changing the direction of your motion path, you can edit the points. Click the Effect Options drop-down arrow and pick "Edit Points."

You'll then see the motion path with the points as squares. Select and drag a point to move it.

You can also right-click a point for options like making it a smooth, straight, or corner point. Additionally, you can add more points or remove one.

If you want to change the start action or duration , or add a delay, select the animation and use the tools on the Animations tab.

Remember, you can preview your animation as you make edits to it using the Preview button on the left side of the ribbon on the Animations tab. This helps to see if you need more adjustments or want to reorder the animations .
Animations can spruce up your slideshow . So if a motion path animation is what you need, you have plenty of options in PowerPoint.
Related: 8 Tips to Make the Best PowerPoint Presentations
- Microsoft Office
- Microsoft PowerPoint
How To Make Your PowerPoint Interactive: A Complete Guide

Are your audience being idle throughout your presentation? Do you want to know how to make a PowerPoint interactive? An interactive presentation will help you to make the inactive audience into active participants. You can use interactive elements to keep your audience engaged. Above all, an interactive PowerPoint presentation will give a dynamic and interesting experience for both the presenter and the audience. Whether you’re presenting in a classroom, a boardroom, or a conference hall, interactive presentations will help to get a better experience.
This guide will explain the different aspects of making your PowerPoint presentation interactive. You can learn what makes a PowerPoint presentation interactive, and tips to make the presentation more interactive and engaging. We have covered everything you need to know to make your next presentation a success.
Table of Contents
- What is an Interactive PowerPoint?
Advantages of Interactive PowerPoints
- Enhancing Understanding
- Participation
- Know Your Audience
- Setting Clear Goals
- Use Animations
- 3D Elements
- Triggered Animations
- Non-Linear Slide Navigation
- PowerPoint Morph Transition
Live Quizzes
- Running Polls
Brainstorming Sessions
- Draggable Objects
Creating Interactive Games
- Gathering Feedback
- Data Visualization
- Key Takeaways
- Tips for Continuous Improvement
What is an Interactive PowerPoint?
An interactive PowerPoint is a presentation that includes elements that allow audience participation and engagement. It can be animations, live polls, interactive charts, and other features that make the audience an active part of the presentation. Moreover, static presentations and interactive PowerPoints utilize non-linear navigation, allowing the presenter to adapt the flow of the presentation based on audience input and interaction.
Why Make Your Presentation Interactive?
Interactive presentations help to engage your audience more effectively than traditional presentations. By using interactive elements that promote audience participation, you can keep the audience focused, make the presentation memorable, and create a dynamic and engaging experience.
How do I make my PowerPoint engaging? To make your PowerPoint engaging, use interactive elements like animations, quizzes, polls, and multimedia to actively involve your audience and maintain their interest throughout the presentation.
Interactive PowerPoints will help you to improve audience engagement in your presentation. You can use polls, quizzes to engage your audience as active rather than passive listeners. This interaction and engagement will lead to better retention and presentation experience.
Enhancing Understanding
Audience interaction with the presentation will help you make the complex information more understandable. You can use interactive elements like animations and 3D models to illustrate your message more clearly.
Participation
An interactive PowerPoint presentation also encourages audience participation. You can use discussion prompts which can lead your audience to ask questions to make the environment more collaborative.
How To Create Interactive PowerPoint – Things to Remember
To make your PowerPoint interactive, include elements such as clickable links, live polls, quizzes, and non-linear navigation that could help in improving audience participation and engagement. Also try the use of animations, 3D models, and games to make your presentation dynamic.
Know Your Audience
Understanding your audience is the first and most important part of creating an interactive PowerPoint. Customize elements to retain their interest, knowledge levels, and preferences. And that could make your presentation to be the most relevant and engaging for your audience.
Setting Clear Goals
Next, set the exact goal of the presentation that you need to achieve. No matter what the presentation is about. It could be to educate or entertain, but having a clear goal and objective will help in selecting the most appropriate elements to use in the presentation design to engage your audience.
How Do You Make an Interactive PowerPoint – Pre-Presentation Tips
How do you add an interactive element to a presentation? To add an interactive element to a presentation, use the help of features like clickable links quizzes, polls, animations with triggers, or non-linear slide navigation in your PowerPoint slides. These elementsengage your audience and enhance their participation throughout the presentation.
Use Animations
Animations can bring your slides to life, but it’s essential to use them wisely. Overusing animations can be distracting and reduce the effectiveness of your presentation. Instead, use animations to highlight key points, illustrate concepts, and maintain audience interest.
Animations will help you to make your slides more impressive but don’t overload them. Overusing animations will distract the audience. Use animations to highlight key points and showcase concepts, to keep audience retention.
3D Elements
The use of 3D elements helps to make your presentation visually impressive and interesting, and it could also explain complex ideas in digestive form. It is possible to insert editable 3D models in PowerPoint to provide a more interesting experience for your audience. PowerPoint offers stock 3D elements and also you could use elements from external sources.
Triggered Animations
Another interesting feature is triggered animations which occur when anyone interacts with a specific element in the presentation. It could be a button, image, or any other. These triggered animations will help you to pop up additional pieces of information, get feedback on quizzes, or navigate into the different sections of the presentation.
Non-Linear Slide Navigation
Non-linear slide navigation helps you to jump to different slides based on audience input. This could help to make your presentation more flexible and responsive to the audience. Use hyperlinks or action buttons to create a non-linear navigational flow.
PowerPoint Morph Transition
The Morph transition in PowerPoint helps to create a seamless animation from one slide to another, making it look like objects moving within the same slide itself. This could be used to create engaging visuals and smooth transitions, keeping your audience’s attention.
How to Create an Interactive PowerPoint Presentation – During Presentation Tips

Live quizzes can be a fun and engaging way to make your presentation more interactive. It can also be used to test your audience’s knowledge and reinforce key points. You can use tools like Kahoot and Mentimeter which can be integrated into your Microsoft PowerPoint to conduct real-time quizzes and display results instantly.
Running Polls

Polls can gauge audience opinions, collect feedback, and make your presentation more and more interactive. Tools like Slido or Poll Everywhere help to run polls during your presentation and show live results on your slides.
Brainstorming sessions by using tools like virtual whiteboards and collaborative documents will make your PowerPoint presentation interactive and engaging. Encourage your audience to contribute ideas, discuss topics, and participate in problem-solving activities with the help of these brainstorming sessions.
Draggable Objects
As PowerPoint doesn’t have a prebuilt feature supporting draggable elements, you can use third-party tools like iSpring Suite to create drag and drop feature in your presentation.
Games will surely help to make your presentation more engaging and fun. You can add simple games like trivia, puzzles, or interactive stories to keep your audience entertained and involved.
How To Create an Interactive Presentation – Post-Presentation Tips
Gathering feedback.
Getting feedback after your presentation will help you understand what worked well and what you need to improve. You can use polls and surveys to collect audience opinions and suggestions that could help in delivering your next presentation.
Data Visualization
Interactive data visualizations allow the audience to explore data and information in more detail. Interactive charts and graphs are the best tools to present your data in a more engaging and informative way. Try them.
Summary and Best Practices
Key takeaways.
Now you have learned how to make PowerPoint Interactive. Interactive PowerPoint presentations will enhance the audience’s engagement, understanding, and participation. Use interactive elements to create a more dynamic and memorable presentation.
Tips for Continuous Improvement
- Experiment with Different Tools : Try new interactive tools and features to find what works best for the audience and your presentation.
- Practice : Always practice well and make sure you are comfortable with all interactive elements and tools before your presentation.
- Gather Feedback : Collect feedback and use them to continually improve your presentations and make them more effective.
At SlideBazaar, we help you create engaging and memorable presentations. Choose from our collection of professional templates or opt for our custom design services for a personalized touch. Your presentations deserve to be elevated to new heights, and we’re here to help you achieve just that!
BROWSE BY CATEGORY
- PowerPoint Templates
- Keynote Presentations
- Infographic
- Free slides
QUICK LINKS
- Frequently Asked Questions
- Terms & Conditions
- Privacy Policy
- DMCA Policy
EMAIL NEWSLETTER
Get updates of our PowerPoint templates and slide designs before anyone else.
Home Blog Design Creating Custom Themes for PowerPoint and Google Slides
Creating Custom Themes for PowerPoint and Google Slides

In any visual communication medium, first impressions are crucial. In the presentation niche, the aesthetics of a slide deck often sets the tone before a single word is spoken, making it essential to work with a polished and professional appearance. On this behalf, PowerPoint templates and Google Slides templates are excellent tools to help designers convey their message in designer-approved slide layouts. Yet, one problem arises from this: having too many similar slide decks.
Rather than panicking or outsourcing graphic design services to create unique results, we invite you to discover how to create custom themes for any PowerPoint and Google Slides presentation. From basics to advanced techniques, this guide will help you master the tools at your disposal and create unique slide decks.
Table of Contents
What Is a Presentation Theme?
Benefits of custom themes for business presentations, the role of fonts, colors, and layouts, differences between powerpoint and google slides themes, accessing the slide master, customizing colors, setting up fonts, designing layouts, saving and applying custom slides in powerpoint, accessing the master slide, customizing theme colors, choosing and setting fonts, creating and modifying layouts, saving and reusing custom slides in google slides, incorporating logos and branding elements, using graphics and backgrounds, animation and transition customizations, ensuring accessibility in themes.
When discussing presentation software, we refer to a theme as a collection of design elements defining your presentation slides’ overall look and feel. Themes typically include a coordinated set of colors, fonts, slide layouts, background styles, and effects. These elements work together to ensure design consistency throughout the slide deck, helping the audience understand the presentation much faster.
Consistency and Professionalism
One of the primary benefits of working with custom themes in business presentations is maintaining brand consistency. A well-designed custom theme ensures that every slide adheres to your company’s brand guidelines, including colors, fonts, logos, and overall design aesthetic. This implies that your brand identity is consistently represented, which is especially important for targeting potential customers or investors, helping build brand awareness.
Communication and Flexibility
Not all pre-made templates offer the complete set of tools we need for a specific presentation type. Sometimes, we have to mix and match slides from templates to create that much-needed slide deck. If, on the other hand, we take the time to tailor a theme to include all the tools we require with the same aesthetic, the end result will look natural.
As a result of the previous point, custom slides give us the adaptability to accommodate a slide deck for multiple purposes depending on the topic and the audience, all this while ensuring that it aligns with your company’s core values.
Consistency Across Teams
A common mistake large organizations make is lacking common ground for visual communication standards. In-team meetings are done with any kind of template, so if we intend to repurpose the content for an external meeting, the slides must be created practically from scratch, as the content from one team doesn’t match others.
By implementing a custom theme, you standardize the presentation process across your organization. This ensures that every presentation, whether created by financials, HR, marketing, or operations, adheres to the same visual guidelines.
The choice of fonts, colors, and layout schemes in presentation themes is not accidental. Each element plays a vital role in shaping the presentation’s identity.
Fonts contribute to readability and mood. When we think about a business or formal presentation, a combination of serif and sans-serif typefaces immediately comes to mind. Sans serif fonts give a clean and modern aesthetic, while serif fonts speak of traditionalism.
Consistent use of fonts is fundamental in any slide deck. To avoid amateurish results, stick to a maximum of 3 fonts (or variations of the same). You can learn more in our guide on fonts for presentations .
Colors evoke emotions. An incorrect color palette can distract your audience from the content you intend to share, whereas a well-chosen color palette helps to convey the message more effectively.
We created a very detailed guide on color theory for presentations . In it, you can learn about the emotions that colors can transmit, how to pair colors and plenty of other useful content to customize the color in your presentation themes.
Think of layouts as the skeleton of your slides. They ensure the content is structured, making it easier for the audience to process the information.
Multiple design rules guide presentation layouts, such as the rule of thirds, the golden ratio, the grid system, working with negative space, and the Z-pattern and F-pattern layouts.
Although both presentation design tools are excellent for creating custom themes, there are some differences in the management and creation of themes for each platform:
- Flexibility : PowerPoint offers extensive customization options compared to Google Slides, especially in shapes, transitions, animation effects, and shadows. Custom gradients, advanced typography settings, and other interesting tools are unavailable to Google Slides users.
- User Interface : Although Google Slides lacks the full range of tools of PowerPoint’s Slide Master function, it is more user-friendly for customizing slides. PowerPoint’s Slide Master allows advanced users granular control over every aspect of the theme, but it can be challenging for newcomers.
- Cross-Platform Compatibility : Compatibility issues are well-known when migrating presentation slides from PowerPoint to Google Slides or Keynote. This is present when the slides contain complex shadow effects, animation effects that are only PowerPoint available, or if the illustrations contain curved texts. Although they can be “fixed,” the results are nowhere near as neat as PowerPoint can offer.
Therefore, presenters must consider these aspects when picking their preferred design tool and invest time and effort into creating custom presentation themes.
Creating Custom Themes in PowerPoint
Locating Slide Master is the first element you must learn to create a custom theme in PowerPoint. This tool controls the slide layout elements for different kinds of pre-established slides, which means you can add footers, branding elements, page numbers, graphic effects, etc.

Follow our guide on how to work with Slide Master for PowerPoint for more detailed information.
Now that we know where some of the elements of a PPT template are located, it’s time to discuss customizing the colors for our slides. This can be done in two ways: customizing color element by element or changing the color theme.
Select any element you want to recolorize and go to the Shape Format tab. You can use Shape Styles , or work your way with Shape Fill and Shape Outline .

On the other hand, if you want to alter the entire color theme, which is a much faster procedure as it affects all slides alike, check our guide on how to use theme colors in PowerPoint .
As with the colors, you have two methods for editing the fonts in your PowerPoint theme. The first method is done inside Slide Master; you need to access Fonts and click on Customize Fonts .

This will open up a font customization dialog to select the preferred fonts for headings and body text.

The second way is to manually edit the fonts by selecting each text element and changing the font. It’s more time-consuming, but it may be the method that works best when we only need to alter certain text elements in the slide deck.

Keep in mind the compatibility issues if you work with non-common fonts. Since fonts are only displayed if installed on the streamer PC, keep a copy of your font families used or stick to pre-installed fonts.
Presenters can alter the existing layouts by entering Slide Master and repositioning placeholders, changing their sizes, or adding new placeholder elements (text, image, chart, etc.). The changes will be reflected on all slides that use this same layout.
Alternatively, we can create new layouts by selecting Insert Layout in Slide Master. This newly generated layout works as a blank canvas to which you can add whichever elements you prefer.

Say you created a PowerPoint custom template with all the elements that adapt to your presentation style and requirements. Now, it’s time to save it for backup purposes or to share it with your organization. First of all, inside Slide Master, select Close Master View to exit the Slide Master mode.

Next, switch to the Design tab and click on More in the Themes group. Select the option Save Current Theme . Give your created theme a name and save it to the default location (important!) to make it easy to access it for future presentations.

A quick tip to export a copy of your created theme is to repeat the steps to save the theme after Save Current Theme but instead of overwriting the file, right-click on it and select Copy .
Now go to your desired backup folder location, right-click inside it, and select Paste . A copy of the original PowerPoint theme will be stored.
Creating Custom Themes in Google Slides
Google Slides’ version of PowerPoint Slide Master is quite simplified in terms of tools and user interface; it is known as Master Slide, and it can be easily accessed from Slide > Edit Theme .

Check our article on how to edit master slide in Google Slides for further information.
Theme colors in Google Slides are managed at the theme level and can be edited from the Master view. Click on Color in the toolbar available in the Master view, and this will open the Theme Colors panel, where we can customize the colors used for text, background, accents, and links.

Google Slides allows us to modify the colors by clicking on the color box next to each element. This can be done by using color picking, selecting a color from the provided color palette, or adding a HEX code. Since the Master slide contains all the information for the slide deck, changes will be made globally once saved. If you need to edit an individual element, you can select it from the slide containing it and change the colors.
Font customization in Google Slides is pretty much similar to PowerPoint as it’s managed from the Master view. The main advantage here is Google Slides’ integration with Google Fonts. This means that you don’t have to worry about compatibility issues in your presentation.

The font compatibility issues do not apply if you work with third-party extensions. In that case, you have to double-check if the recipient’s computer has that extension linked to the account to be used; otherwise, they won’t display.
Learn more about how to add fonts to Google Slide with our article.
You can create or modify existing layouts in the same fashion as you did with PowerPoint. Access the Master view, select any layout slide, and edit its content.
If you need to create a brand new layout, click on the layout above the one you need to create and use the CTRL+M shortcut.
Since Google Slides doesn’t include a “Save Theme” option, the customized theme becomes part of a specific presentation. This means you have to make a copy of the presentation to reuse it or go to the Import Theme option to select a theme from a previous presentation or a slide deck you uploaded.

Learn our article on how to import Google Slides themes to master this procedure.
Advanced Customization Techniques
We have already explored the basics of creating a custom theme in PowerPoint and Google Slides. However, some advanced techniques can give you an extra edge, making your slides look more professional and boosting your brand identity.
A must-have for any professional presentation is to count on branding elements, such as logo and branding colors. Follow the steps mentioned above to apply your brand’s color palette to your custom presentation theme – and, as a tip, it’s best to stick with HEX values for assigning colors so you won’t have mismatches.
Check out these articles for further reference on how to work with branding elements.
- How to create a logo presentation
- How to make a branded presentation
- How to present your brand identity
You can add custom backgrounds, like patterns created in Adobe Illustrator, by right-clicking on the slide in Slide Master and select Format Background . PowerPoint allows you to use solid colors, gradients, textures, and images as backgrounds.

In case you work with Google Slides, the procedure is almost the same: selecting the Background option in the toolbar shown in Master view, or access it for a single slide as shown below. The possibilities are limited compared to PowerPoint, especially regarding complex gradients and shadow effects, so keep it simple.
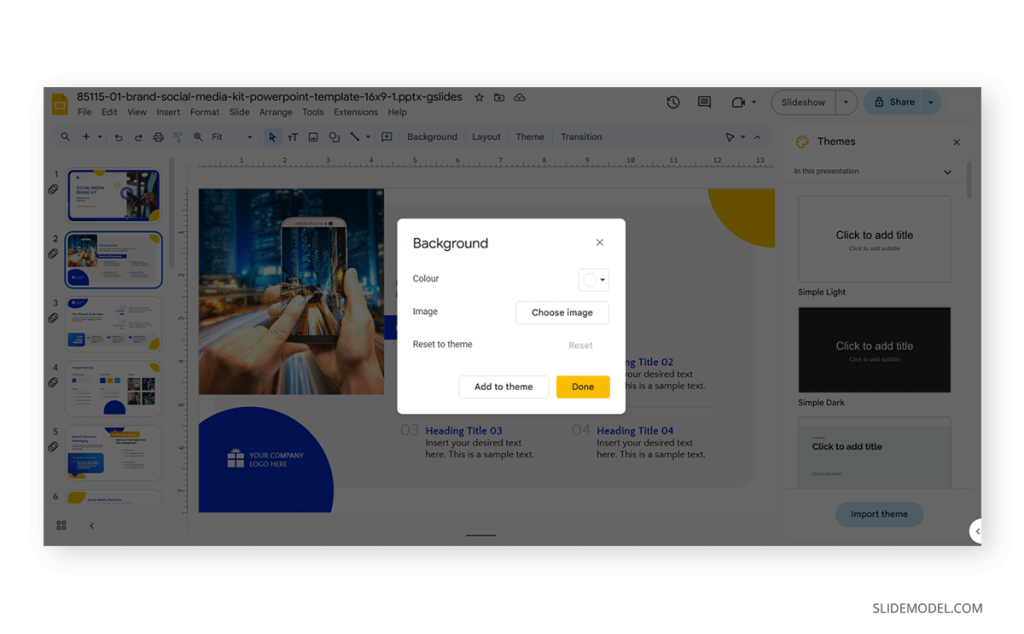
Remember to work with images or textures that won’t pixelate on your slide. As a reference, always opt for 1920×1080 px when in doubt, but use optimized files to avoid making heavy-sized presentation files.
The two presentation software options we managed in this article offer significantly different animation and transition options. The first is PowerPoint, which has a more extensive offering and complex effects. Access the Transitions tab to add transitions to your slides or the Animations tab to add animated effects to make an entrance, add emphasis, or an exit animation for your slides.

Google Slides offers a limited selection of effects available via Insert>Animation or Slide>Transition .
Check the following articles for in-detail information about both animations and transitions:
- How to Animate on Google Slides
- How to Create PowerPoint Animations
- How to Remove Animations from PowerPoint and Google Slides
- How to Add Transitions in PowerPoint
Accessibility in presentations is a key element we must consider when designing custom themes. We can identify three main points that presenters ought to check:
- Color Contrast : There must be sufficient contrast between the text and background color, as otherwise, it compromises readability (especially for individuals with visual impairments).
- Font Size : Choose a font large enough to be read easily from a distance. Typically, we use a minimum of 16 pt for body text. As we mentioned above, avoid using script or overly-decorated fonts.
- Alt Text for Images : Alt text is not limited to SEO purposes. In presentations, using alt text can help people with visual impairments understand your slides as screen readers go through alt text.
Let’s take, for example, a well-known case in mass media content: Netflix. If we think about Netflix, we immediately associate its branding identity with the sans-serif caps logo and a red-and-black contrasting color scheme. The rest of its user interface works with the same sans-serif font in two weight options (bold and regular), using different sizes to distinguish between headings and body copy.

From an accessibility point of view, the Netflix website’s contrast ratio is 4.8:1, and according to WebAIM , text and text images ought to have at least a 4.5:1 contrast ratio. Regarding text, they use a 48px sans serif bold font for the headings and a 24px sans serif regular font for the body text: a 2:1 ratio.
Applying these rules to a presentation slide, here’s a fine example of what an accessible slide looks like.

Creating custom PowerPoint and Google Slides themes is a powerful way to ensure your presentations are visually consistent, professional, and aligned with your brand identity. By understanding the key elements of a theme—such as colors, fonts, and layouts—and how to customize them in each platform, you can create polished presentations that effectively communicate your message.
Remember that consistency is the key to a successful presentation theme. By adhering to best practices in design and accessibility, testing your themes across different platforms and devices, and keeping your design elements simple yet impactful, you can create presentations that resonate with your audience and elevate your brand.
Like this article? Please share
Design, Presentation Approaches, Templates Filed under Design
Related Articles

Filed under Google Slides Tutorials • August 13th, 2024
How to Curve Text in Google Slides
Despite Google Slides not offering a native tool for this, there are multiple ways to curve text in Google Slides. Check them out here!

Filed under Business • July 24th, 2024
How to Create a Demo Presentation
Discover the secrets behind successful demo presentations and what they should contain with this article. Recommended PPT templates included.

Filed under Presentation Ideas • July 17th, 2024
How to Convert a Text Document into a Presentation with AI
One of the biggest challenges for presenters is to summarize content from lengthy reports, academic papers, or any other kind of written media in an informative and concise way. Rather than losing countless hours going over and over the same text, we can speed up the process thanks to the virtues of artificial intelligence. In […]
Leave a Reply
Presentations
- Most Recent
- Infographics
- Data Visualizations
- Forms and Surveys
- Video & Animation
- Case Studies
- Design for Business
- Digital Marketing
- Design Inspiration
- Visual Thinking
- Product Updates
- Visme Webinars
- Artificial Intelligence
How To Create a Slide Deck: Templates & Tips

Written by: Unenabasi Ekeruke
Wondering how to create slide decks that hit the mark? Look no further; you've come to the right place.
Whether you're pitching investors or making a keynote presentation, the quality of your slide deck matters a great deal.
Well-designed slide decks can pique your audience's interest and win them over.
In fact, about 91% of presenters swear beautiful slide decks boost their confidence during presentations.
In this article, we'll discuss what a slide deck is and how to create one. We've also included templates and helpful tips for creating powerful slide decks that leave a lasting impression.
In this video, we've also put together 13 presentation design tips for creating awesome slide decks.
Let's dive in!
Table of Contents
- What Is a Slide Deck
How To Make a Slide Deck in 5 Steps
10 slide deck templates for creating successful presentations, slide deck faqs, create attractive slide decks with visme, what is a slide deck.
A slide deck is a collection of slides used as visual aids during a pitch or presentation. Think of each slide as a single card in a deck with unique content, meanings, value and structure.
Like a deck of cards, you can queue up your slides to tell a story about a topic. Depending on your story's angle, tone and mood , you can shuffle your slides or eliminate some of them.
How you build your slide deck depends on these three things:
- The type of presentation you're making
- Who your audiences are
- What you want to accomplish or the message you're passing across
Slide decks like the one below are a valuable resource for entrepreneurs, marketers and businesspeople.

When used to pitch a startup or idea , a slide deck is also called a pitch deck . But you could call it a presentation deck when you're using it for other purposes like presenting a proposal in a professional or academic setting.
Slide decks help you present ideas in an organized format and aid delivery during presentations. Many presentation programs like Visme and PowerPoint let you add as many slides as you want to your deck. The best part is that you can design and customize your deck, making it look professional and attractive.
Create a stunning presentation in less time
- Hundreds of premade slides available
- Add animation and interactivity to your slides
- Choose from various presentation options
Sign up. It’s free.

How you craft your slide deck can play a big role in the success of your presentation. Here's a step-by-step guide on how to create an effective slide deck.
Step 1: Build Your Deck Around Your Story
Want to up the value of your presentation? Start by focusing on your core message. Regardless of your presentation type, your slide deck outline should answer these key questions:
- What is the purpose of your presentation?
- What do you want your audience to understand or remember?
- What actions do you want them to take after listening to you?
Many people, including experienced presenters, tend to fill their slides with points that don't add value. This leaves the audience confused about whether to listen or read the slide.
Remember, the pitch deck should visually enhance your audience's learning experience. Once you weave your narrative around your main story, you can organize your supporting points around it. You're sure to engage your audience and drive your message across.
Dealing with busy execs who won't sit through your presentation? Use a startup one pager instead. It'll get their attention quicker and more efficiently. You can then secure a meeting to present your pitch deck.
Step 2: Use Premade Templates
Templates give you a creative head start. They provide consistency in design, layout and ideas. Visme has thousands of editable slide deck templates to help you create presentations quickly.
Here's how to customize your slide deck in Visme.
1. Select and Edit a Template
Each slide deck template in Visme has two or more slides. Feel free to add, remove or reorder slides to your deck as you proceed. Once your presentation structure is ready, pick out slides to edit and input your own content.
If you have an existing presentation in PowerPoint, you can import it and continue editing your slides in Visme.
2. Input and Edit Text
After you've selected your slides, add custom text to them. Our templates have built-in text placeholders. Click and drag the placeholder to change the text position. Or click each placeholder and highlight the block of text to edit it.
Type your text or paste the text you copied from elsewhere. Repeat the process throughout the rest of the slide deck.
Want to add more fun and personality to your text? Visme editor makes it easy for you to change font style, text color, size, style, direction and much more. Animate your text and add other special effects to make your text alluring.
3. Use High-quality Stock Images
High-quality images capture and convey abstract concepts like color and emotions. Upload images stored on your computer and use them in your design. Or select from Visme's rich library of free high-resolution images to find the perfect one for your slide deck.
4. Add Shapes, Icons and Animated Graphics
Use these elements to bring boring presentations to life. They are effective for creating minimalistic designs and explaining complex ideas.
Visme has a comprehensive library of more than one million shapes, icons , illustrations and animations . Click the graphics tab, select the asset, and add it to the slide. You can change the color, position and size of your design assets.
5. Add Data Visualizations
Use data visualizations to share statistics, financial and other numerical data in your presentation. You'll find bar charts, pie charts , graphs , timelines , flowcharts , maps and more in Visme.
Select the chart or graph and customize the title, color, data, legends and more.
6. Eliminate Unwanted Elements
Pre-built slide decks contain lots of placeholder content. They serve as a guide to help you create the perfect presentation. You don't have to use all of it.
Feel free to eliminate anything that isn't useful to your deck. Watch this video to learn more about creating beautiful slide deck presentations in Visme.
Step 3. Make Your Design Count
When preparing for your big day, invest as much time into your slide design as your content. What's in it for you? An engaging slide deck can draw in your audience and get them excited about what you have to offer.
Be Consistent
If your company has a brand guideline, apply your brand elements to the slides. But if you haven't got one, Visme helps create a strong and memorable brand identity .
Use the brand style guide template below to define your brand personality and ensure consistency.

After creating your logo, fonts and colors, you can save them in Visme's brand design tool . Your team members can easily create presentations in Visme and your brand theme will automatically appear on their designs.
Watch the video below to learn how to set up your branding kit in Visme.
Use the Right Font Pairing
Choosing the right font pairing and sizes can be a big deal, especially for non-designers. But getting it right can turn a boring slide deck into an appealing one.
Stick to two or three typefaces and assign distinct roles to each font —the more contrast between your fonts, the better.
For instance, you can use the same font for headings, another for the intro, another for the body and the fourth for quotes.
Use typefaces that connote your personality and style. If you're pitching art or design themes, incorporate classic and contemporary typefaces that connote creativity and elegance.
Not sure how to pair fonts? We've created this detailed guide to help you choose the right font combination for your designs.
Step 4: Incorporate the Right Visuals
Without a doubt, the human brain is wired for visuals . The mental capacity to process visual content far exceeds that of written and spoken words.
Attractive visual aids help you tell more compelling stories than text. Incorporating images, video animations and sleek transitions to break up static slides will get people's attention.
Bar charts that show patterns or trends can boost investors' confidence and convey excitement. The same goes for pie charts, which are great for comparing growth areas.
Use infographics to condense lengthy text into visuals that people can easily relate to. Luckily, Visme has the right tools for every job. With our infographic maker , you can easily translate your ideas into digestible graphics.
Step 5: Make Your Slide Deck Clear and Brief
One big mistake people make is that they want to keep adding content to their slide deck. They end up filling it up with tedious details irrelevant to their audience.
Remember, your slides are supposed to aid your presentation rather than contain every word you say. If you fill it with text, you could quickly lose your audience. They'll keep longing for the end and leave the room with little or no information.
To make your slide deck impactful, eliminate fluff. Keep it brief yet filled with key action points. Fit your information into three key blocks- a persuasive intro, a strong body and an actionable conclusion. You will have a more focused, shorter, and memorable presentation .
Whether you want to create slide decks for business, education, or nonprofits, Visme has everything you need. We have thousands of templates to help you create stunning slide decks you can be proud of. Here are our top 10 templates from each of these categories.
Template #1: HybCab Pitch Deck Presentation Template
Got a new business idea? Or do you want to scale your business? Get your investors pumped up with this Uber-inspired professional pitch deck template.
The editable 20-slide deck template covers every element of a winning pitch. It features a striking slide layout, a beautiful color scheme, and high-resolution photos and icons. The interactive data visualizations allow you to share compelling numbers that attract investors' interest.

Template #2: Buyer Presentation Template
Use this attractive slide deck template to win over clients for your real estate business. The simple and classy design makes it unique and impactful.
You'll find a lot of space to play around with colors, fonts and other design elements. Feel free to tweak the layout design, add compelling images of your properties, key stats and much more.

Template #3: BuffIT Pitch Deck Presentation Template
This template is a perfect pick for companies looking to pitch to customers or investors. Use this Buffer-inspired slide deck to share your key information like goals, traction, milestones, financial projection and more.
The consistent blue color theme and elegant styling provide a refreshing visual experience. Notice how charts, timelines and images are used to draw attention to critical data. You can add or remove slides, edit the content, and use your brand colors, fonts and logo to keep it on brand.

Template #4: Training Course Presentation Template
Bridge the skills gap in your organization with this training slide deck template. The template has a minimalistic design and seamlessly blends different shades of blue across all 13 slides.
The slides feature valuable elements and sections to help your audience retain the information better. You'll find quality icons, images, a chart, timeline, checklist and evaluation matrix.
Use this template to onboard new hires and get them in the mood for work. You can also use it to prepare training courses or introduce new policies and procedures.

Template #5: Coffee Lover Statistics Presentation
Here's another cutting-edge slide deck template for education, training and informational purposes. The coffee-themed presentation has a rich blend of white, brown and black color themes.
You can use it to highlight the benefits of a product with relevant statistics, charts and graphs to make it digestible. The text, icons and images are evenly spaced, making it easier for your audience to grasp key information.
Create the perfect slide deck with Visme's design collaboration feature. Team members can view, edit and leave feedback on your presentation in real-time. You can reply, resolve and delete comments till the design is top-notch.

Template #6: Nonprofit Report Presentation
Are you starting a nonprofit or growing an existing one? This editable slide deck presentation can serve multiple purposes.
You can use it to share what you and your volunteers have been up to in the past year. It's also helpful in building support for your charitable projects.
It features sections like executive summary, introduction, map of projects, number of incidences, cases, casualties and more. Use images, data visualizations and widgets from Visme's library to tell stories that pique your audience's interests.

#Template 7: Lesson Plan Presentation
With this slide deck template, you can build a learning trajectory for your students. It outlines what students need to learn, how lessons will be delivered, and how learning will be evaluated. You can also list resources needed by teachers and students, methods and assignment types.
Change the color, font and logo to fit your brand and your deck is ready for use.

Template #8: Creative Product Presentation
Weave a captivating narrative about your product with this slide deck template. The template has a dynamic layout, creating room for you to present any information.
It highlights key information like the product mockup, milestones and timelines, revenue projections, product pricing and more. Use this template to visualize the creation process for SaaS-based platforms, cloud solutions and tech products.
Template #9: Financial Report Presentation
Looking to communicate financial activities and performance within your company? This visual-rich slide deck template fits the bill. It contains bars, charts, and graphs, making your data easier to comprehend.
The dark background and bright-colored fonts and elements create the perfect visual contrast. Liven up your presentation with animated icons, illustrations and special effects. Also, incorporate hover effects and clickable pop-ups to make your slides interactive.
Template #10: Parenting Keynote Presentation
Use this appealing keynote presentation template to deliver a powerful presentation on parenting. This colorful slide deck can help you connect with other parents, teachers and child caregivers.
Utilize our crisp stock photos, icons and illustrations to make your audience engagement more rewarding.

Why Is It Called a Slide Deck?
The term slide decks date back to an old technology where slides were physically inserted into a carousel projector and projected on the wall or screen. These slides were shuffled like a deck of cards to create a presentation. Hence, the name "slide deck" has stuck with the modern age.
Today slide decks are created and projected digitally using software like Visme , PowerPoint, Google Slides and more.
What Is the Difference Between a Slide Deck vs. Powerpoint vs Presentation vs Pitch Deck?
A slide deck is a group of slides put together to tell a story. PowerPoint is a software application used to create slide decks or presentations. A pitch deck is a distinct type of slide deck used to pitch a solution, idea, or product when seeking financing from investors.
How Do You Make a Beautiful Slide Deck?
Whether you're sharing strategies or performance updates, you don't need to build your slide deck from scratch. Visme has a rich library of beautifully-designed slide decks that leaves a lasting impression on your audience.
Now you know what makes a slide deck great. It's time to create one for your business.
Visme presentation software and templates provide everything you need to create beautiful slide decks for any purpose. Our software has helped thousands of businesses and professionals nail their presentations.
Each template comes with pre-designed slides. You can replace your content and customize other design elements according to your preference. With Dynamic Fields , you're sure your personal, company and other critical information will be accurate and updated throughout your presentation in real-time.
Visme lets you download your slide deck in multiple formats or share online using a link . You can generate an embed code and paste it on your website or blog. From your analytics page , you can see who has viewed your presentation and other metrics.
Easily put together winning slide decks in Visme

Trusted by leading brands
Recommended content for you:

Create Stunning Content!
Design visual brand experiences for your business whether you are a seasoned designer or a total novice.
About the Author
Unenabasi is a content expert with many years of experience in digital marketing, business development, and strategy. He loves to help brands tell stories that drive engagement, growth, and competitive advantage. He’s adept at creating compelling content on lifestyle, marketing, business, e-commerce, and technology. When he’s not taking the content world by storm, Unenabasi enjoys playing or watching soccer.
Recommended content for you
Top 12 powerpoint alternatives compared.
Victoria Taylor Aug 06, 2024

15 Successful Startup Pitch Deck Examples, Tips & Templates
Olujinmi Oluwatoni Aug 02, 2024

30+ Pitch Deck Templates for Startups, Real Estate & More
Idorenyin Uko Jul 26, 2024

How to Write an Impressive Sponsorship Deck + Best Templates to Use
Victoria Taylor Feb 19, 2024
IMAGES
COMMENTS
15 Easy PowerPoint PPT Animation Tips, Effects, & Tricks for Beginners in 2023. Let's cover 15 of the best animation in PowerPoint templates. These PowerPoint slide animation techniques are a shortcut to mastery. Before we dive in, it helps to know: PowerPoint animations are controlled with the Animation Pane. 1.
Add animation and effects to text, pictures, shapes, and objects in your PowerPoint presentation. Add animations and effects. Select the object or text you want to animate. Select Animations and choose an animation. ... Move Earlier - Make an animation appear earlier in the sequence. Move Later - Make an animation occur later in the sequence.
Welcome to our step-by-step tutorial on creating dynamic and fully customizable PowerPoint slides! 🌟 In this easy-to-follow animated PowerPoint tutorial, yo...
In this step-by-step tutorial, learn how to use animations in Microsoft PowerPoint. Learn animation fundamentals, layer on multiple animations, adjust the du...
Adding Transitions to a Slide. Adding an Animation to a Text, an Image, a Shape or Other Elements of a Presentation. Select the object that you want to animate. Click the Animations tab. Animations tab in PowerPoint. Select the animation that you want from the list. If you want to see which animations are applied to an object, click Animation Pane.
11. Add a sound effect to an animation. In the Animation Pane, click the down arrow next to an animation and select "Effect Options" from the context menu. Go to the "Effect" tab in the window that appears and choose from the menu under "Enhancements" to select a sound effect from a list or add one manually.
To add entrance animations to any object in PowerPoint, here's what you need to do: Click on the object you want to animate. In this example, we will use a blue smiley face. (Caption: The blue smiley face we will be animating for this tutorial) 2. Select the animation you want to use.
Click the Animation Painter button. Then click on the object you want to apply the animation to. With this option, it sets the animations to start one after the other. If you double click the Painter option, you can apply the animation to multiple objects without having to click the Painter button for each object.
Exit animations—The opposite to entrance animations, exit animations make objects disappear from your slide through different effects. Motion paths animations—You can make an element on your slide move to a different place, with your audience seeing this movement from where it started to where it ends up.
Select the object or text you want to animate. Select Animations and choose an animation. Select Effect Options and choose an effect. Manage animations and effects. There are different ways to start animations in your presentation: On Click: Start an animation when you click a slide.
In this video, you'll learn the basics of animating text and objects in PowerPoint 2019, PowerPoint 2016, and Office 365. Visit https://edu.gcfglobal.org/en/...
To start with animations in PowerPoint, select an object you wish to animate and go to the Animations tab to choose an animation to add to the slide element. When adding animations to multiple objects in a slide, you should consider the sequence you wish to use to animate objects. Applying Animation in PowerPoint.
Almost any element in your slide - text, photos, graphs, shapes, audio and video can be animated. You can add PowerPoint animations to any of these elements in just three steps: (1) Select the object to animate (2) apply an animation, and (3) customize the effects. Let us see how to apply animation to different parts of a presentation.
Drag either end to put the endpoints where you want them. Click Custom Path. When you click where you want the motion path to start, the pointer appears as a cross-hair. To draw a path of connected straight lines , click where you want the motion path to start. Move the pointer and click to create a line between the two click points.
It's easy to add an animation to your PowerPoint presentation. After you've finished inputting all your content into a PowerPoint file, begin adding your animations: Click on an object to select it on any slide. This could be an image, chart, or block of text. Now, find the Animations tab on the ribbon.
To apply a slide transition, start off by selecting a slide and clicking on Transitions on PowerPoint's ribbon. With a slide selected, simply click on one of the animation thumbnails on the ribbon to apply it to the current slide. You'll see a preview of the active transition animation play.
We've put together a quick list of animation tips to help you create a dynamic PowerPoint presentation. PowerPoint Animation Types You can use PowerPoint tools to animate pictures, text, tables, shapes, and other objects to build an engaging presentation. Let's take a quick look at the animation type, so you have an idea of which type ...
To apply a motion path animation to make an object move across a slide on click: Select an object. For text objects, click in the text box or placeholder or click its edge. Click the Animations tab in the Ribbon. In the Animations group, click the More down arrow on the bottom right of the Animations Gallery.
Images — Click Insert, click Pictures, select a photo, and click Insert. Text — Click Insert, click Text Box, click and drag your mouse across the area in which you want to create the text box, and enter text. 4. Select an item to animate. Click the image or text to which you want to add an animation. 5.
Open the Add animation menu and select open of the options from Motion Paths . Edit the object trajectory by clicking the path. If you double-click on the animation, you can adjust more of its settings. To create a custom path for your animated object, go to Add animation > Motion Paths > Custom paths.
In this PowerPoint tutorial, you are going to learn and see something new and different. Here, I will show you how to make an attractive and eye catchy anima...
Click the Effect Options drop-down arrow and pick "Edit Points." You'll then see the motion path with the points as squares. Select and drag a point to move it. You can also right-click a point for options like making it a smooth, straight, or corner point. Additionally, you can add more points or remove one.
To make your PowerPoint engaging, use interactive elements like animations, quizzes, polls, and multimedia to actively involve your audience and maintain their interest throughout the presentation. Interactive PowerPoints will help you to improve audience engagement in your presentation.
In this PowerPoint tutorial, I have showed how to design an animated PowerPoint presentation slide. Here, I have used only a single slide to represent four ...
Access the Transitions tab to add transitions to your slides or the Animations tab to add animated effects to make an entrance, add emphasis, or an exit animation for your slides. Both animations and transitions have to be handled individually. Google Slides offers a limited selection of effects available via Insert>Animation or Slide>Transition.
A slide deck is a group of slides put together to tell a story. PowerPoint is a software application used to create slide decks or presentations. A pitch deck is a distinct type of slide deck used to pitch a solution, idea, or product when seeking financing from investors. How Do You Make a Beautiful Slide Deck?
To Create something similar in 3D check out the tutorial below https://youtu.be/VWdaxQ-RFukDownload PowerPoint templates, music and order resources from Env...
Infographics in PowerPoint are a powerful way to visually convey information and data. They combine graphics, charts, and minimal text to make complex inform...