- Skip to primary navigation
- Skip to main content
- Skip to primary sidebar
- Skip to footer
Legal Templates
Home Assignment Agreement

Assignment Agreement Template
Use our assignment agreement to transfer contractual obligations.

Updated February 1, 2024 Written by Josh Sainsbury | Reviewed by Brooke Davis
An assignment agreement is a legal document that transfers rights, responsibilities, and benefits from one party (the “assignor”) to another (the “assignee”). You can use it to reassign debt, real estate, intellectual property, leases, insurance policies, and government contracts.
What Is an Assignment Agreement?
What to include in an assignment agreement, how to assign a contract, how to write an assignment agreement, assignment agreement sample.

Partnership Interest
An assignment agreement effectively transfers the rights and obligations of a person or entity under an initial contract to another. The original party is the assignor, and the assignee takes on the contract’s duties and benefits.
It’s often a requirement to let the other party in the original deal know the contract is being transferred. It’s essential to create this form thoughtfully, as a poorly written assignment agreement may leave the assignor obligated to certain aspects of the deal.
The most common use of an assignment agreement occurs when the assignor no longer can or wants to continue with a contract. Instead of leaving the initial party or breaking the agreement, the assignor can transfer the contract to another individual or entity.
For example, imagine a small residential trash collection service plans to close its operations. Before it closes, the business brokers a deal to send its accounts to a curbside pickup company providing similar services. After notifying account holders, the latter company continues the service while receiving payment.
Create a thorough assignment agreement by including the following information:
- Effective Date: The document must indicate when the transfer of rights and obligations occurs.
- Parties: Include the full name and address of the assignor, assignee, and obligor (if required).
- Assignment: Provide details that identify the original contract being assigned.
- Third-Party Approval: If the initial contract requires the approval of the obligor, note the date the approval was received.
- Signatures: Both parties must sign and date the printed assignment contract template once completed. If a notary is required, wait until you are in the presence of the official and present identification before signing. Failure to do so may result in having to redo the assignment contract.
Review the Contract Terms
Carefully review the terms of the existing contract. Some contracts may have specific provisions regarding assignment. Check for any restrictions or requirements related to assigning the contract.
Check for Anti-Assignment Clauses
Some contracts include anti-assignment clauses that prohibit or restrict the ability to assign the contract without the consent of the other party. If there’s such a clause, you may need the consent of the original parties to proceed.
Determine Assignability
Ensure that the contract is assignable. Some contracts, especially those involving personal services or unique skills, may not be assignable without the other party’s agreement.
Get Consent from the Other Party (if Required)
If the contract includes an anti-assignment clause or requires consent for assignment, seek written consent from the other party. This can often be done through a formal amendment to the contract.
Prepare an Assignment Agreement
Draft an assignment agreement that clearly outlines the transfer of rights and obligations from the assignor (the party assigning the contract) to the assignee (the party receiving the assignment). Include details such as the names of the parties, the effective date of the assignment, and the specific rights and obligations being transferred.
Include Original Contract Information
Attach a copy of the original contract or reference its key terms in the assignment agreement. This helps in clearly identifying the contract being assigned.
Execution of the Assignment Agreement
Both the assignor and assignee should sign the assignment agreement. Signatures should be notarized if required by the contract or local laws.
Notice to the Other Party
Provide notice of the assignment to the non-assigning party. This can be done formally through a letter or as specified in the contract.
File the Assignment
File the assignment agreement with the appropriate parties or entities as required. This may include filing with the original contracting party or relevant government authorities.
Communicate with Third Parties
Inform any relevant third parties, such as suppliers, customers, or service providers, about the assignment to ensure a smooth transition.
Keep Copies for Records
Keep copies of the assignment agreement, original contract, and any related communications for your records.
Here’s a list of steps on how to write an assignment agreement:
Step 1 – List the Assignor’s and Assignee’s Details
List all of the pertinent information regarding the parties involved in the transfer. This information includes their full names, addresses, phone numbers, and other relevant contact information.
This step clarifies who’s transferring the initial contract and who will take on its responsibilities.
Step 2 – Provide Original Contract Information
Describing and identifying the contract that is effectively being reassigned is essential. This step avoids any confusion after the transfer has been completed.
Step 3 – State the Consideration
Provide accurate information regarding the amount the assignee pays to assume the contract. This figure should include taxes and any relevant peripheral expenses. If the assignee will pay the consideration over a period, indicate the method and installments.
Step 4 – Provide Any Terms and Conditions
The terms and conditions of any agreement are crucial to a smooth transaction. You must cover issues such as dispute resolution, governing law, obligor approval, and any relevant clauses.
Step 5 – Obtain Signatures
Both parties must sign the agreement to ensure it is legally binding and that they have read and understood the contract. If a notary is required, wait to sign off in their presence.

Related Documents
- Sales and Purchase Agreement : Outlines the terms and conditions of an item sale.
- Business Contract : An agreement in which each party agrees to an exchange, typically involving money, goods, or services.
- Lease/Rental Agreement : A lease agreement is a written document that officially recognizes a legally binding relationship between two parties -- a landlord and a tenant.
- Legal Resources
- Partner With Us
- Terms of Use
- Privacy Policy
- Cookie Policy
- Do Not Sell My Personal Information

The document above is a sample. Please note that the language you see here may change depending on your answers to the document questionnaire.
Thank you for downloading!
How would you rate your free template?
Click on a star to rate
- Mailing List
- Search Search
Username or Email Address
Remember Me
Resources for Teachers: Creating Writing Assignments
This page contains four specific areas:
Creating Effective Assignments
Checking the assignment, sequencing writing assignments, selecting an effective writing assignment format.
Research has shown that the more detailed a writing assignment is, the better the student papers are in response to that assignment. Instructors can often help students write more effective papers by giving students written instructions about that assignment. Explicit descriptions of assignments on the syllabus or on an “assignment sheet” tend to produce the best results. These instructions might make explicit the process or steps necessary to complete the assignment. Assignment sheets should detail:
- the kind of writing expected
- the scope of acceptable subject matter
- the length requirements
- formatting requirements
- documentation format
- the amount and type of research expected (if any)
- the writer’s role
- deadlines for the first draft and its revision
Providing questions or needed data in the assignment helps students get started. For instance, some questions can suggest a mode of organization to the students. Other questions might suggest a procedure to follow. The questions posed should require that students assert a thesis.
The following areas should help you create effective writing assignments.
Examining your goals for the assignment
- How exactly does this assignment fit with the objectives of your course?
- Should this assignment relate only to the class and the texts for the class, or should it also relate to the world beyond the classroom?
- What do you want the students to learn or experience from this writing assignment?
- Should this assignment be an individual or a collaborative effort?
- What do you want students to show you in this assignment? To demonstrate mastery of concepts or texts? To demonstrate logical and critical thinking? To develop an original idea? To learn and demonstrate the procedures, practices, and tools of your field of study?
Defining the writing task
- Is the assignment sequenced so that students: (1) write a draft, (2) receive feedback (from you, fellow students, or staff members at the Writing and Communication Center), and (3) then revise it? Such a procedure has been proven to accomplish at least two goals: it improves the student’s writing and it discourages plagiarism.
- Does the assignment include so many sub-questions that students will be confused about the major issue they should examine? Can you give more guidance about what the paper’s main focus should be? Can you reduce the number of sub-questions?
- What is the purpose of the assignment (e.g., review knowledge already learned, find additional information, synthesize research, examine a new hypothesis)? Making the purpose(s) of the assignment explicit helps students write the kind of paper you want.
- What is the required form (e.g., expository essay, lab report, memo, business report)?
- What mode is required for the assignment (e.g., description, narration, analysis, persuasion, a combination of two or more of these)?
Defining the audience for the paper
- Can you define a hypothetical audience to help students determine which concepts to define and explain? When students write only to the instructor, they may assume that little, if anything, requires explanation. Defining the whole class as the intended audience will clarify this issue for students.
- What is the probable attitude of the intended readers toward the topic itself? Toward the student writer’s thesis? Toward the student writer?
- What is the probable educational and economic background of the intended readers?
Defining the writer’s role
- Can you make explicit what persona you wish the students to assume? For example, a very effective role for student writers is that of a “professional in training” who uses the assumptions, the perspective, and the conceptual tools of the discipline.
Defining your evaluative criteria
1. If possible, explain the relative weight in grading assigned to the quality of writing and the assignment’s content:
- depth of coverage
- organization
- critical thinking
- original thinking
- use of research
- logical demonstration
- appropriate mode of structure and analysis (e.g., comparison, argument)
- correct use of sources
- grammar and mechanics
- professional tone
- correct use of course-specific concepts and terms.
Here’s a checklist for writing assignments:
- Have you used explicit command words in your instructions (e.g., “compare and contrast” and “explain” are more explicit than “explore” or “consider”)? The more explicit the command words, the better chance the students will write the type of paper you wish.
- Does the assignment suggest a topic, thesis, and format? Should it?
- Have you told students the kind of audience they are addressing — the level of knowledge they can assume the readers have and your particular preferences (e.g., “avoid slang, use the first-person sparingly”)?
- If the assignment has several stages of completion, have you made the various deadlines clear? Is your policy on due dates clear?
- Have you presented the assignment in a manageable form? For instance, a 5-page assignment sheet for a 1-page paper may overwhelm students. Similarly, a 1-sentence assignment for a 25-page paper may offer insufficient guidance.
There are several benefits of sequencing writing assignments:
- Sequencing provides a sense of coherence for the course.
- This approach helps students see progress and purpose in their work rather than seeing the writing assignments as separate exercises.
- It encourages complexity through sustained attention, revision, and consideration of multiple perspectives.
- If you have only one large paper due near the end of the course, you might create a sequence of smaller assignments leading up to and providing a foundation for that larger paper (e.g., proposal of the topic, an annotated bibliography, a progress report, a summary of the paper’s key argument, a first draft of the paper itself). This approach allows you to give students guidance and also discourages plagiarism.
- It mirrors the approach to written work in many professions.
The concept of sequencing writing assignments also allows for a wide range of options in creating the assignment. It is often beneficial to have students submit the components suggested below to your course’s STELLAR web site.
Use the writing process itself. In its simplest form, “sequencing an assignment” can mean establishing some sort of “official” check of the prewriting and drafting steps in the writing process. This step guarantees that students will not write the whole paper in one sitting and also gives students more time to let their ideas develop. This check might be something as informal as having students work on their prewriting or draft for a few minutes at the end of class. Or it might be something more formal such as collecting the prewriting and giving a few suggestions and comments.
Have students submit drafts. You might ask students to submit a first draft in order to receive your quick responses to its content, or have them submit written questions about the content and scope of their projects after they have completed their first draft.
Establish small groups. Set up small writing groups of three-five students from the class. Allow them to meet for a few minutes in class or have them arrange a meeting outside of class to comment constructively on each other’s drafts. The students do not need to be writing on the same topic.
Require consultations. Have students consult with someone in the Writing and Communication Center about their prewriting and/or drafts. The Center has yellow forms that we can give to students to inform you that such a visit was made.
Explore a subject in increasingly complex ways. A series of reading and writing assignments may be linked by the same subject matter or topic. Students encounter new perspectives and competing ideas with each new reading, and thus must evaluate and balance various views and adopt a position that considers the various points of view.
Change modes of discourse. In this approach, students’ assignments move from less complex to more complex modes of discourse (e.g., from expressive to analytic to argumentative; or from lab report to position paper to research article).
Change audiences. In this approach, students create drafts for different audiences, moving from personal to public (e.g., from self-reflection to an audience of peers to an audience of specialists). Each change would require different tasks and more extensive knowledge.
Change perspective through time. In this approach, students might write a statement of their understanding of a subject or issue at the beginning of a course and then return at the end of the semester to write an analysis of that original stance in the light of the experiences and knowledge gained in the course.
Use a natural sequence. A different approach to sequencing is to create a series of assignments culminating in a final writing project. In scientific and technical writing, for example, students could write a proposal requesting approval of a particular topic. The next assignment might be a progress report (or a series of progress reports), and the final assignment could be the report or document itself. For humanities and social science courses, students might write a proposal requesting approval of a particular topic, then hand in an annotated bibliography, and then a draft, and then the final version of the paper.
Have students submit sections. A variation of the previous approach is to have students submit various sections of their final document throughout the semester (e.g., their bibliography, review of the literature, methods section).
In addition to the standard essay and report formats, several other formats exist that might give students a different slant on the course material or allow them to use slightly different writing skills. Here are some suggestions:
Journals. Journals have become a popular format in recent years for courses that require some writing. In-class journal entries can spark discussions and reveal gaps in students’ understanding of the material. Having students write an in-class entry summarizing the material covered that day can aid the learning process and also reveal concepts that require more elaboration. Out-of-class entries involve short summaries or analyses of texts, or are a testing ground for ideas for student papers and reports. Although journals may seem to add a huge burden for instructors to correct, in fact many instructors either spot-check journals (looking at a few particular key entries) or grade them based on the number of entries completed. Journals are usually not graded for their prose style. STELLAR forums work well for out-of-class entries.
Letters. Students can define and defend a position on an issue in a letter written to someone in authority. They can also explain a concept or a process to someone in need of that particular information. They can write a letter to a friend explaining their concerns about an upcoming paper assignment or explaining their ideas for an upcoming paper assignment. If you wish to add a creative element to the writing assignment, you might have students adopt the persona of an important person discussed in your course (e.g., an historical figure) and write a letter explaining his/her actions, process, or theory to an interested person (e.g., “pretend that you are John Wilkes Booth and write a letter to the Congress justifying your assassination of Abraham Lincoln,” or “pretend you are Henry VIII writing to Thomas More explaining your break from the Catholic Church”).
Editorials . Students can define and defend a position on a controversial issue in the format of an editorial for the campus or local newspaper or for a national journal.
Cases . Students might create a case study particular to the course’s subject matter.
Position Papers . Students can define and defend a position, perhaps as a preliminary step in the creation of a formal research paper or essay.
Imitation of a Text . Students can create a new document “in the style of” a particular writer (e.g., “Create a government document the way Woody Allen might write it” or “Write your own ‘Modest Proposal’ about a modern issue”).
Instruction Manuals . Students write a step-by-step explanation of a process.
Dialogues . Students create a dialogue between two major figures studied in which they not only reveal those people’s theories or thoughts but also explore areas of possible disagreement (e.g., “Write a dialogue between Claude Monet and Jackson Pollock about the nature and uses of art”).
Collaborative projects . Students work together to create such works as reports, questions, and critiques.

How does it work?
1. choose this template.
Start by clicking on "Fill out the template"
2. Complete the document
Answer a few questions and your document is created automatically.
3. Save - Print
Your document is ready! You will receive it in Word and PDF formats. You will be able to modify it.
Contract Assignment Agreement
Rating: 4.8 - 105 votes
This Contract Assignment Agreement document is used to transfer rights and responsibilities under an original contract from one Party, known as the Assignor, to another, known as the Assignee. The Assignor who was a Party to the original contract can use this document to assign their rights under the original contract to the Assignee, as well as delegating their duties under the original contract to that Assignee. For example, a nanny who as contracted with a family to watch their children but is no longer able to due to a move could assign their rights and responsibilities under the original service contract to a new childcare provider.
How to use this document
Prior to using this document, the original contract is consulted to be sure that an assignment is not prohibited and that any necessary permissions from the other Party to the original contract, known as the Obligor, have been obtained. Once this has been done, the document can be used. The Agreement contains important information such as the identities of all parties to the Agreement, the expiration date (if any) of the original contract, whether the original contract requires the Obligor's consent before assigning rights and, if so, the form of consent that the Assignor obtained and when, and which state's laws will govern the interpretation of the Agreement.
If the Agreement involves the transfer of land from one Party to another , the document will include information about where the property is located, as well as space for the document to be recorded in the county's official records, and a notary page customized for the land's location so that the document can be notarized.
Once the document has been completed, it is signed, dated, and copies are given to all concerned parties , including the Assignor, the Assignee, and the Obligor. If the Agreement concerns the transfer of land, the Agreement is then notarized and taken to be recorded so that there is an official record that the property was transferred.
Applicable law
The assignment of contracts that involve the provision of services is governed by common law in the " Second Restatement of Contracts " (the "Restatement"). The Restatement is a non-binding authority in all of U.S common law in the area of contracts and commercial transactions. Though the Restatement is non-binding, it is frequently cited by courts in explaining their reasoning in interpreting contractual disputes.
The assignment of contracts for sale of goods is governed by the Uniform Commercial Code (the "UCC") in § 2-209 Modification, Rescission and Waiver .
How to modify the template
You fill out a form. The document is created before your eyes as you respond to the questions.
At the end, you receive it in Word and PDF formats. You can modify it and reuse it.
Contract Assignment Agreement - FREE - Sample, template
Country: United States
General Business Documents - Other downloadable templates of legal documents
- Amendment to Agreement
- Loan Agreement
- Loan Agreement Modification
- Release of Loan Agreement
- Non-Compete Agreement
- Partnership Dissolution Agreement
- Notice of Withdrawal from Partnership
- Power Of Attorney
- Debt Acknowledgment Form
- Meeting Minutes
- Request to Alter Contract
- Release Agreement
- Guaranty Agreement
- Joint Venture Agreement
- Debt Settlement Agreement
- Breach of Contract Notice
- Corporate Proxy
- Mutual Rescission and Release Agreement
- Notice for Non-Renewal of Contract
- Meeting Notice
- Other downloadable templates of legal documents

Assignment Agreement
Jump to section.
An assignment agreement is a contract that authorizes a person to transfer their rights, obligations, or interests in a contract or property to another person. It serves as a means for the assignor to delegate duties and advantages to a third party while the assignee assumes those privileges and obligations. This blog post will discuss assignment agreement, its purpose, essential elements, and implementation practices.
Key Functions of an Assignment Agreement
Below are some key functions of an assignment agreement.
- Facilitating Clear Transfer of Rights and Obligations: Assignment agreement plays a vital role in diverse industries and business transactions by facilitating a transparent transfer of rights and obligations between parties. These agreements encompass intellectual property rights, contractual duties, asset ownership, and other legal entitlements. By clearly defining the assignment's scope and nature, both parties can ensure a smooth transition without any uncertainties.
- Ensuring Protection of Interest: Another important objective of the assignment agreement is safeguarding the assignor and assignee's interests. These agreements provide a legal framework that protects the assignee's rights while relieving the assignor of responsibilities and liabilities associated with the assigned asset or contract. This protection ensures that neither party faces unexpected consequences or disputes during or after the assignment.
- Outlining Consensus on Terms and Conditions : Assignments often involve intricate terms and conditions, necessitating mutual understanding between the assignor and assignee. Assignment agreement serves as binding documents that outline the assignment's terms and conditions, including payment terms, timelines, performance expectations, and specific requirements. By reaching a consensus on these details, both parties can minimize potential conflicts and align their expectations.
- Complying with Legal Laws: Ensuring legal compliance and enforceability is an important objective of the assignment agreement. Also, it is prudent to create these documents according to the relevant rules, regulations, and industry requirements. By adhering to legal guidelines, the assignment agreement becomes a robust legal instrument that provides a solid foundation for potential legal action in case of breaches or disputes.
- Maintaining Confidentiality and Non-Disclosure: Many assignments involve confidential information, proprietary knowledge, or trade secrets that require protection. An objective of the assignment agreement is to establish clear guidelines regarding the confidentiality and non-disclosure of such information. These guidelines define the scope of confidential information, specify restrictions on its use or disclosure, and outline the consequences of any breaches. By ensuring clarity in these aspects, the agreement protects the interests of both parties and fosters a sense of trust .
Best Practices for Crafting an Assignment Agreement
Assignment agreements are vital in different business transactions, transferring rights and obligations from one person to another. Whether it's a merger, acquisition, or contract assignment, implementing an assignment agreement needs thorough consideration and adherence to best practices to ensure a seamless and lawfully sound process. Below are some key practices to follow when implementing an assignment agreement.
- Identifying the Parties Involved: The initial step in implementing an assignment agreement is to identify the parties participating in the assignment agreement. It is vital to accurately define the assignor, who will transfer the rights, and the assignee, who will receive them. The assignment agreement should include precise details of both parties' names and contact information.
- Defining the Scope and Extent of Assignment: It is imperative to define the assignment's scope and extent clearly to prevent potential disputes or ambiguity in the future. It specifies the rights, benefits, and obligations transferred from the assignor to the assignee. In addition, specific details such as intellectual property rights, contractual obligations, and any relevant limitations or conditions should be explicitly outlined.
- Reviewing and Understanding Existing Contracts or Agreements: Assignment agreements often transfer rights and obligations from preexisting contracts or agreements. It is essential to thoroughly review and comprehend these existing contracts to facilitate a seamless transfer. Identifying any provisions restricting or prohibiting assignment is important and should be addressed accordingly. Seeking legal advice is advisable to ensure compliance with contractual obligations.
- Obtaining Consent from Relevant Parties: In some cases, obtaining consent from third parties directly affected by the transfer of rights and obligations may be necessary. Also, it is important to identify these parties and obtain their consent in writing if required. Failure to get permission may lead to legal complications and a potential breach of contract .
- Crafting a Comprehensive Assignment Agreement: Upon collecting all relevant data, it is time to create a comprehensive assignment agreement. This agreement should utilize unambiguous language to define the rights and obligations transferred, specify the effective date of the assignment, and outline any other relevant terms and conditions. Engaging legal professionals specializing in contract law is highly recommended to ensure the agreement's legal validity and enforceability.
- Seeking Legal Advice and Performing Review: It is important to seek legal advice and conduct a thorough review before finalizing the assignment agreement. Experienced attorneys can provide valuable insights, identify potential risks, and ensure compliance with applicable laws and regulations. The legal review helps minimize the likelihood of errors or oversights that could result in future disputes or legal challenges.
- Executing and Recording the Assignment Agreement: Once the assignment agreement has been reviewed and approved, both parties should implement the document by signing it. Also, to enhance its enforceability, it is advisable to have the assignment agreement witnessed or notarized, depending on the jurisdiction's legal requirements. Additionally, maintaining a record of the executed contract is essential for future reference and as evidence of the assignment.
- Communicating the Assignment: Effective communication of the assignment to all relevant parties is important after executing the assignment agreement. Stakeholders, such as employees, clients, suppliers, and contractors, should be notified about the transfer of rights and obligations. It ensures a smooth transition and minimizes potential disruptions or misunderstandings.
- Documenting and Ensuring Compliance: Lastly, it is imperative to maintain proper documentation and ensure ongoing compliance with the assignment agreement's terms. Keeping copies of all relevant documents, including the assignment agreement, consent, and communications related to the assignment, is important. Regularly reviewing and monitoring compliance with the assignment agreement allows for prompt resolution of any issues and helps maintain a transparent and accountable process.
Key Terms for Assignment Agreements
- Assignor: The individual or entity that transfers their rights, responsibilities, or interests to another party using an assignment agreement. And by doing so, the assignor relinquishes any claims and duties associated with the assigned property, contract, or legal entitlements.
- Assignee: The individual or entity that receives the rights, interests, or obligations through an assignment agreement. The assignee assumes the transferred rights and responsibilities, essentially taking on the role of the assignor.
- Obligor: Refers to the party bound by a duty or obligation under a contractual or legal agreement. In an assignment agreement, the obligor is the party whose performance or obligations are assigned to the assignee.
- Assignable Rights: These are the specific rights or interests that can be transferred from the assignor to the assignee via an assignment agreement. These include intellectual property rights, contractual rights, real estate interests, royalties, and other lawful entitlements.
- Consideration: The value or benefit exchanged between the parties in an assignment agreement. Also, consideration is commonly paid in monetary payment, goods, services, or promises. It represents what each party gains or sacrifices as part of the assignment.
- Notice of Assignment: A formal written notification provided by the assignor to the obligor, serving as a communication of the assignment of rights, interests, or obligations to the assignee. This notice establishes the assignee's rights and enables the obligor to fulfill their duties to the correct party.
Final Thoughts on Assignment Agreements
In a nutshell, assignment agreement plays an important role in business transactions, allowing for transferring of rights, duties, and interests between parties. Moreover, by understanding these objectives and addressing them through well-drafted assignment agreement, businesses and individuals can engage in assignments with confidence and clarity. Also, since an assignment agreement includes several legal complexities, it is rational to consult a professional attorney who can guide you through the process.
If you want free pricing proposals from vetted lawyers that are 60% less than typical law firms, Click here to get started. By comparing multiple proposals for free, you can save the time and stress of finding a quality lawyer for your business needs.
ContractsCounsel is not a law firm, and this post should not be considered and does not contain legal advice. To ensure the information and advice in this post are correct, sufficient, and appropriate for your situation, please consult a licensed attorney. Also, using or accessing ContractsCounsel's site does not create an attorney-client relationship between you and ContractsCounsel.
Meet some of our Assignment Agreement Lawyers
Corporate attorney with 14+ years of in-house counsel, people leadership and client management experience. Provides legal expertise and a business-oriented approach to problem solving and building lines of business. Consistently works under pressure, prioritizing and managing workload and simultaneous tasks to meet deadlines in a changing, fast-paced environment.
As a corporate lawyer, I have dealt with international transactions, complex litigation and arbitration, regulatory compliance, and multijurisdictional tax planning. In March 2021, I started my firm and shifted my professional focus to working with start-ups, small businesses, entrepreneurs, and families. I help my clients structure and run their businesses and take care of their assets, including intellectual property issues and estate planning for their families. I try to bring big law quality and small firm personal attention to every client.
Seasoned professional with experience in wide variety of contract negotiation and review.
I have been in practice for over 19 years. I have substantial experience across the spectrum of civil practice areas both as a litigator and transactional counsel. This includes: negotiating commercial and real estate transactions, corporate organization, commercial agreements, and resolving commercial disputes, and litigating numerous civil, administrative, and criminal cases through all phases of litigation from trial through appeal, as well as judgment enforcement. My vast experience as a litigator is an asset to my transactional clients. My background in Investigating and proving the breakdown of business relationships in court allows me a unique advantage in drafting, negotiating, and closing business transactions.
I primarily work with small businesses and the self-employed. I help my clients build sustainable businesses, navigate risk, and resolve conflicts. Most of my cases involve contract review, drafting, negotiation, and disputes; I also work on business entity formation, employment and independent contractor issues, copyright licenses, trademark registration, and more.
Attorney that has worked in both litigation and transactional fields. Motivated and personable professional. Speaks fluent Spanish and very basic Portuguese.
Seven years experience reviewing and drafting corporate and transactional documents, including NDAs, LLC operating agreements, MSAs, employment agreements, etc.
Find the best lawyer for your project

Quick, user friendly and one of the better ways I've come across to get ahold of lawyers willing to take new clients.
How It Works
Post Your Project
Get Free Bids to Compare
Hire Your Lawyer
Business lawyers by top cities
- Austin Business Lawyers
- Boston Business Lawyers
- Chicago Business Lawyers
- Dallas Business Lawyers
- Denver Business Lawyers
- Houston Business Lawyers
- Los Angeles Business Lawyers
- New York Business Lawyers
- Phoenix Business Lawyers
- San Diego Business Lawyers
- Tampa Business Lawyers
Assignment Agreement lawyers by city
- Austin Assignment Agreement Lawyers
- Boston Assignment Agreement Lawyers
- Chicago Assignment Agreement Lawyers
- Dallas Assignment Agreement Lawyers
- Denver Assignment Agreement Lawyers
- Houston Assignment Agreement Lawyers
- Los Angeles Assignment Agreement Lawyers
- New York Assignment Agreement Lawyers
- Phoenix Assignment Agreement Lawyers
- San Diego Assignment Agreement Lawyers
- Tampa Assignment Agreement Lawyers
Contracts Counsel was incredibly helpful and easy to use. I submitted a project for a lawyer's help within a day I had received over 6 proposals from qualified lawyers. I submitted a bid that works best for my business and we went forward with the project.
I never knew how difficult it was to obtain representation or a lawyer, and ContractsCounsel was EXACTLY the type of service I was hoping for when I was in a pinch. Working with their service was efficient, effective and made me feel in control. Thank you so much and should I ever need attorney services down the road, I'll certainly be a repeat customer.
I got 5 bids within 24h of posting my project. I choose the person who provided the most detailed and relevant intro letter, highlighting their experience relevant to my project. I am very satisfied with the outcome and quality of the two agreements that were produced, they actually far exceed my expectations.
Want to speak to someone?
Get in touch below and we will schedule a time to connect!
Find lawyers and attorneys by city
Service update: Some parts of the Library’s website will be down for maintenance on August 11.
Secondary menu
- Log in to your Library account
- Hours and Maps
- Connect from Off Campus
- UC Berkeley Home
Search form
How to write good documentation: home, documentation.

Why to Write Documentation
Documentation effectively connects humans and machines.
Why writing documentation is important:
- You will be using your code in 6 months
- You want people to use your code and give you credit
- You want to learn self-determination
- Others would be encouraged to contribute to your code
- Others can easily use your code and build upon it
- Advance the science
- Encourage open science
- Allow reproducibility and transparency
What should you document about your research? Everything! All the data, notes, code, and materials someone else would need to reproduce your work.
Consider the following questions:
- How is your data gathered?
- What variables did you use?
- Did you use any code to clean/analyze your data?
Best Practices for Documenting Your Project
Best Practices for Writing Documentation:
- A brief description of the project
- Installation instructions
- A short example/tutorial
- Allow issue tracker for others
- What a function does
- What are the function's parameters or arguments are
- What a function returns
- Document your code
- Apply coding conventions, such as file organization, comments, naming conventions, programming practices, etc.
- Include information for contributors
- Include citation information
- Include licensing information
- Link to your e-mail address at the end
- List all the versions of the files along with the major edits you did in each version
An important tip: Naming files should be descriptive and consistent!
- Date format (ISO 8601 Standard): YYYYMMDDThhmmss
- Project or experiment name
- Researcher name/initials
- Date or date range of collection version
An example for README file.

An example of code documentation.

Tools for Documentation
Tools for Documentation:
- Doctest
- R Markdown
- Doxygen - Doxygen can be used for C, C#, PHP, Java, Python, and Fortran.
- BoostBook
Software Documentation Hosting Options:
- Read The Docs
- 18 Software Documentation Tools
- BIDS Docathon Kickoff - A Video
- Docathon at BIDS
- Documenting Your Code
- First Steps with Sphinx
- Google Style Guides
- How to maintain an open source project
- A Quick Guide to Software Licensing for the Scientist-Programmer

Library Data Services Program
- Last Updated: Nov 6, 2023 2:10 PM
- URL: https://guides.lib.berkeley.edu/how-to-write-good-documentation
Templates for college and university assignments
Include customizable templates in your college toolbox. stay focused on your studies and leave the assignment structuring to tried and true layout templates for all kinds of papers, reports, and more..

Keep your college toolbox stocked with easy-to-use templates
Work smarter with higher-ed helpers from our college tools collection. Presentations are on point from start to finish when you start your project using a designer-created template; you'll be sure to catch and keep your professor's attention. Staying on track semester after semester takes work, but that work gets a little easier when you take control of your scheduling, list making, and planning by using trackers and planners that bring you joy. Learning good habits in college will serve you well into your professional life after graduation, so don't reinvent the wheel—use what is known to work!

Basic Documentation Guidelines
How to write effectively when using sources, basic documentation guidelines pdf, table of contents.
What is Documentation? Why is Documentation Important? What is Plagiarism? When Do We Document? Quoting Paraphrasing Summarizing In-Text Citations Reference List Entries Online Sources Tables and Figures Following Style Guidelines
What is Documentation?
Documentation is how we give credit to others for their contributions to our work. We must document the ideas, theories, definitions, data, images, and other information in our writing that originated with others. For example, our work must include documentation when we quote, paraphrase, or summarize another’s ideas or when using data from others’ research. Documentation means including select information about a source “in text” and including additional bibliographic information about that source in a reference list entry.
Why is Documentation Important?
Documenting sources
- is how we acknowledge and give credit to those individuals or groups whose information appears in our work. When we use an individual’s or group’s ideas, words, artwork, or anything else, we are to give credit to the source of that information.
- provides readers with the specifics needed to retrieve the same source and do more research on their own. The in-text citation shows readers where certain ideas or words in your paper came from, and from the reference entry, readers have all of the information they need to retrieve a source.
- guards against plagiarism, which is the act of using another’s intellectual property without proper attribution. Plagiarism deprives sources proper credit for their work, compromises a writer’s integrity and reputation, and usually results in serious consequences, both within the university and in the world of work.
What is Plagiarism?
Plagiarism is using another’s words, ideas, results, or images without giving appropriate credit to that person, therefore, giving the impression that it is your own work. Plagiarism can be intentional or unintentional. It can be the result of failing to give credit to someone for their ideas and/or failing to effectively summarize or paraphrase a quote. See the Code of Student Conduct for more information about academic integrity and plagiarism.
Self-Plagiarism
Self-plagiarism is recycling a paper (or large parts of a paper) from a previous class without both permission and revision to make it a new paper. According to the University Code of Student Conduct, students cannot use the same paper for credit for more than one assignment. If you would like to use and expand on an assignment from a previous class, you must first submit your original assignment to your instructor and ask for permission to continue your research and writing on the topic; however, your new assignment should be significantly different from the previous one.
In a professional sense, self-plagiarism is a serious offense because journals that publish your work want the most current research, not previously published research. If you do not let publishers know that your work was previously published, and they run your piece only to find out later that it was published in another journal, you will likely not ever be considered for publication again by either journal unless a publisher specifically says that multiple submissions or previously published manuscripts are acceptable.
Coursework Resubmission Policy
The Coursework Resubmission Policy allows students who are retaking a Purdue University Global Course after a failed attempt to reuse previous course work with proper citation and advance notice to the instructor. Read the Code of Student Conduct and Coursework Resubmission Policy Resource for details and stipulations. Note: This policy does not apply to Concord Law students.
When Do We Document?
Document your source whenever information does not originate in your own mind. This includes when you use someone’s words (quotations), ideas (paraphrases and summaries), and illustrations (graphics, tables, figures, and artwork).
Common Knowledge : There are situations when information is common knowledge and does not require documentation. Common knowledge refers to relevant and objective information that is widely known and accepted as true by a certain group of people. Common knowledge is context specific. If information is determined to be common knowledge for your writing context, it does not need to be cited. Ask your faculty member if you are unsure.
Criteria for Common Knowledge :
- The audience should already know this information (e.g., a red traffic light means “stop” or there are four seasons in a year).
- The same information can be found in multiple, general information sources (e.g., a state flower or a state bird will be the same across general information sources).
- The information comes from folklore, mythology, or well-known stories that your audience would be familiar with because of a shared education or culture.
- The facts are well known in your field of study and will be well known to your audience.
Professional Experience and Common Knowledge : You may have a great deal of experience in your field, and something may be common knowledge to you but not to the audience for whom you are writing. Always be sure you adequately cite appropriate information for your academic writing and follow assignment directions. If your assignment allows, you may cite your own experience, but it may be good to cite your experience using phrasing such as the following: In my 20 years as a nurse, I have seen . . .
Quoting or Paraphrasing Another’s Statement or Interpretation of Common Knowledge : If you take a well-known fact word for word from a source, a citation and reference list entry is required to attribute the wording to the source and to avoid plagiarism. If you use another writer’s interpretation of common knowledge, that writer needs to be credited in an in-text citation and reference list entry, as the interpretation is not common knowledge or original to your writing.
Statistics : Statistics are not common knowledge since statistical information is typically not equally represented across general information sources. The source of the statistic, either as a primary or secondary source, needs to be cited.
Quoting refers to using a source without altering it in any way; passages are used from a source word-for-word. In college writing, quotations are used sparingly since too many quotations can make a paper sound like a summary of another person’s work rather than your original work. Your own ideas can become diluted in a sea of other authors’ words with too many quotes. Quotations additionally include quotation marks and in-text citations, which can slow down the reading. Quotations also interject another author’s voice in your paper, and the switch from your voice to another’s can also slow down the reading.
Guidelines for When to Quote
- When you are critiquing or agreeing with someone’s exact words. For instance, if you wanted to argue that a movie reviewer’s comments were biased, you would want to quote the exact words of the reviewer, so your reader would understand your comment.
- When you want to include dialogue in your paper. For example, if you wanted to highlight a point someone made in an interview, you would want to quote the exact words spoken in the interview.
- When the original author’s words are so eloquent, profound, or unique (such as research results) that you cannot find a way to paraphrase and maintain the same meaning or impact of the original passage, you would want to quote those words.
Steps for Quoting
- Copy the words exactly as they are written in the original piece.
- Enclose the quote in quotation marks, which look like this: “quotation.”
- Include an in-text citation with the quotation and a reference entry on the reference list.
- Integrate the quote into the narrative of the paragraph by introducing it with a signal phrase.
Integrating Quotations
When quoting, use signal phrases in the narrative of the sentence to integrate the ideas of others in your writing instead of just dropping quotations into your text as in this example:
“Most conventional healthcare providers prescribe medicine that only alleviates a patient’s symptoms” (Jones, 2004, p. 3). “Alternative medicine seeks to help patients prevent illness by understanding underlying causes” (Smith, 2007, p. 99). Some people think there is a good way to balance the two for optimal health.
Although the last sentence in the paragraph suggests the two quotations are on the same topic, the relationship between the quotations is unclear as is how those points led to the concluding thought.
A revision of the previous paragraph that integrates the quotes might look something like this:
Conventional medicine is often viewed as providing immediate relief for illness. Jones (2020), a 13-year physician in New York City, contended that “Most conventional healthcare providers prescribe medicine that only alleviates a patient’s symptoms” (p. 3). This sentiment is echoed by Barter (2019) who explained that “Alternative medicine seeks to help patients prevent illness by understanding underlying causes” ( p. 99). It seems logical, therefore, that optimal health can be achieved by balancing conventional and alternative approaches to medicine because they both have benefits to patients.
The signal phrases help develop and synthesize the ideas. Signal phrases also make the purpose of using the quotation clearer by indicating the position of the author as well as your neutrality, agreement, or disagreement.
Common Signal Phrase Words
- Illustrated
- Pointed out
Shows Agreement
Shows Disagreement
Long or Block Quotations
Long or block quotations in APA format, are quotations of 40 or more words. Block quotations that must be set off from the rest of the paragraph in an indented “block.” The block format makes it easier for readers to differentiate the quote from the rest of the text.
To format a block quote, you do not use quotation marks. Instead, you indent the quotation ½ inch from the left margin. The period is inserted at the end of the quotation, and the in-text citation goes after the period. The opposite is done for a short quotation where the end punctuation follows the parenthetical citation to enclose it inside the sentence: “Quote” (citation).
The following paragraph includes a block quote, which begins “The United States is. . .”:
Example Paragraph With Blog Quote
Students do not necessarily have to be geographically placed all over the world in order to experience cross-cultural interactions because of the high rate of immigration worldwide. For instance,
The United States is in the midst of the largest wave of immigration in its history, with over a million new immigrants per year for a total foreign-born population of over 35 million people, equaling 12 percent of its total population. In Canada, Switzerland, and Australia the rates of immigration are nearly double the US rate. (Suárez-Orozco, 2017, p. 9)
Thus the mobility of the world’s population is providing opportunity for global instruction even within a country’s own boundaries.
Notice the paragraph continued after the quote. Quotes are more effectively integrated when the quoted information is followed by some analysis or commentary to help your reader understand its purpose or point in relationship to your own ideas.
Paraphrasing
Paraphrasing allows writers to express the meaning of an original passage in their own words. Paraphrasing is preferred when you want to incorporate research into your writing. Paraphrasing shows you understood what you read and therefore know what you are talking about, for you have taken what someone else said and rephrased it, so it sounds like you and so the idea fits seamlessly in your paper. When you paraphrase, you choose the vocabulary and writing style that would appeal to your intended readers (versus your source’s intended readers). Please note that replacing a few words in an original passage or sentence with synonyms is not effective paraphrasing and could result in unintentional plagiarism, even when correct documentation is included.
Steps for Avoiding Plagiarism when Paraphrasing
- When researching, record all or the information about a source in APA format at the top of your notebook page.
- Read the original passage several times to completely understand the idea being expressed and the context in which the material is being used before paraphrasing it.
- Write down in your own words the idea of the passage without looking back at the original.
- Ensure the wording in the paraphrase captures the exact meaning of the original.
- Ensure the paraphrase is being used in the same context and serves the same purpose as the original. Taking an idea out of context is faulty research as it changes the original intent, so you would no longer be paraphrasing what another person meant.
- Ask someone else to read the original and then read the paraphrase and compare the meaning and context between the two.
Acceptable and Unacceptable Paraphrases
Original Passage Quoted
“Educational leaders posed with the task of integrating ethics into undergraduate general education curriculum are faced with finding faculty who are interested in the topic instead of forcing faculty who are not interested into teaching a subject they are not committed to” (Stevenson, 2019, p. 5).
Acceptable Paraphrase
When it comes to teaching ethics in undergraduate programs, it is preferable to use faculty who have a profound interest in the subject to teach such courses (Stevenson, 2019).
Unacceptable Paraphrase
Educational leaders have to find faculty who are interested in ethics instead of forcing teachers who are not interested in teaching a subject they are not committed to (Stevenson, 2019).
The acceptable paraphrase rewords the main idea of Stevenson’s original passage about the effectiveness of using willing and interested faculty to teach ethics in undergraduate courses. The unacceptable paraphrase is plagiarized because too many words from the original passage are used without quotation marks around those words, so it does not give credit to the source for those words.
Summarizing
Summarizing allows writers to convey the main ideas of a text or passage in their own words. Summarizing is similar to paraphrasing in that you read information from a source and put it into your own words, but a summary differs from a paraphrase in the following ways:
- A summary is a condensed version of a long passage of writing.
- A summary captures only the main idea of a piece of writing.
- A summary helps you learn material through close reading in order to comprehend what the main points of a reading are and understand the material so well that you can express the main ideas in your own words instead of using someone else’s words.
Example of Summarizing
Collaboration with others is part of living and working in the professional world. A high portion of our daily communication occurs in groups, such as family, coworkers, and friends. Regardless of career choice, it is likely that individuals will spend a considerable part of their personal and professional lives working in collaboration with others. The changing environment of the workplace has caused an increase in the use of virtual teams for collaborative projects. The major difference between a virtual team and a team that meets face-to-face is the distance that lies between members. It is distance that affects the interaction between group members. Technologies, such as teleconferencing, email, web enabled chat, groupware, and shared file programs, have made communication at a distance and virtual collaboration possible. Through technology, virtual teams are able to interact, complete projects, and resolve conflicts. (Turner et al., 2020, p. 167)
Step 1: First annotate the main ideas of the paragraph as shown here in italics:
Collaboration with others is part of living and working in the professional world. A high portion of our daily communication occurs in groups, such as family, coworkers, and friends. Regardless of career choice, it is likely that individuals will spend a considerable part of their personal and professional lives working in collaboration with others. The changing environment of the workplace has caused an increase in the use of virtual teams for collaborative projects. The major difference between a virtual team and a team that meets face-to-face is the distance that lies between members. It is distance that affects the interaction between group members. Technologies, such as teleconferencing, email, Web-enabled chat, groupware, and shared file programs, have made communication at a distance and virtual collaboration possible . Through technology, virtual teams are able to interact, complete projects, and resolve conflicts. (Turner et al., 2020, p. 167)
Step 2: Rewrite the annotated ideas in your own words and identify the source:
Summarized Passage
Turner et al. (2020) made the point that today’s workplace is quite different than it was 20 years ago; more people are working remotely or companies are so large that they have different sites throughout the world. Turner et al. explained that this change in the workplace has increased the need for virtual teams; however, the need for collaboration has not changed. Distance can affect how well a group works together, but modern technologies have made communication with virtual team members possible and an effective means for getting the job done (Turner et al., 2020).
Notice in the example that throughout the summary, the author is identified, so it is clear that the ideas in each sentence, while written with original wording, are the ideas of that author. Summarized material in your paper needs to be cited, just as paraphrased material needs to be cited, so readers know where the ideas in the text came from and where to retrieve the same source.
In-Text Citations
In-text citation means to provide a shortened versions of source’s bibliographic information in the text where the cited information is located. A parenthetical in-text citation includes information placed in parenthesis typically at the end of a sentence to indicate to readers that the information in that sentence was borrowed from someone else. A narrative in-text citation includes the author’s name placed right in the narrative of the sentence like this: Bragdon (2020) argued that inertia when applied to human beings is the equivalent of lacking motivation.
The bibliographic information for both types of in-text citations is shortened because additional specifics needed to look up a source would interfere with reading your paper. In-text citation format varies depending on whether the citation is parenthetical or narrative as well as whether you are quoting or paraphrasing. The exact formatting of the citation may vary further if information such as the date of publication is missing. Most in-text citations in APA format will include the author’s last name and the publication year in some manner.
The following is an example of a parenthetical in-text citation for a paraphrase or summary:
(Hannah, 2020).
If the information being cited was a quote, in addition to quotation marks [“…”] being put around the quoted text, the parenthetical citation would also include the page number:
(Hannah, 2020, p. 4).
A narrative citation for a paraphrase would simply name the author in the sentence and place the date of publication in parenthesis after the author’s name as illustrated in this example:
According to Hannah (2020), . . .
A narrative citation for a direct quote would simply include the page number after the direct quote:
According to Hannah (2020), “the meaning of words evolves as culture changes” (p. 44).
If individual authors are not named, you would use the name of the sponsoring organization as the author. For example, if you were paraphrasing from this Basic Citation Guidelines writing guide, you would use the following format: (Purdue Global Writing Center, 2019).
If neither an author nor sponsoring organization is identified, you would instead enclose the title of the article in quotation marks along with year of publication as shown here:
(“The Good Student,” 2019).
This shortened version of a source’s bibliographic information in text is meant to be unobtrusive to the reader, whereas a reference entry is reserved for the reference list at the end of the paper.
Reference List Entries
A reference entry is a notation that provides all the information readers need if they want to retrieve an article, book, or other source cited in your paper. In APA format, these entries are listed on a separate page called references or reference list. Readers use in-text citations that align with reference entries at the end of the document. For instance, if an in-text citation looks like this: (Smith, 2018), a reader can turn to the reference list, scan down the entries s and look for the book or article written by an author with the last name Smith and published in the year 2018.
The information provided in a reference entry is based on the type of source it is because the way you find a book is different from the way you retrieve a website or an article from an online library database.
A sample reference entry in APA for a book looks like this:
Smith, T. (2018). A life well-lived. Insight Publications.
A sample reference entry for a webpage looks like this:
East Coast Gardeners Association. (2019). Winter gardens. http://www.eastcoastgardens.com/wintergardens.html
The examples show how books are retrieved by looking up an author’s name, the year the book was published, the title, and the publisher. This information is given to ensure the reader can find the same book that you used in your paper. A webpage, however, is an electronic source, so it is retrieved by knowing the URL (web address) and the name of the author or organization that sponsors the website along with the title of the specific webpage.
Online Sources
Writers commonly conduct research online using library databases, websites, videos, and podcasts. To cite online sources, you follow APA’s author-date citation format and then include additional information depending on the type of source. Here are some examples:
- Articles published online do not always have page numbers, so when quoting, you would provide the paragraph number instead: (Author, year, para. #).
- YouTube videos and podcasts do not have page or paragraph numbers, so when quoting from these sources, you include the timestamp, which indicates the time at which a direct quote appeared.
The references list at the end of the paper provides more complete information and that includes the author, publication year, title, and the retrieval information such as a DOI (digital object identifier) or the URL (uniform resource locator, i.e., website address).
The basic APA format for an article published on a webpage would like this this:
Author, A. A. (year). Title of article . Name of Site. http://www.webpageaddress
If your source is missing some of the information needed for an in-text citation and reference, the following serves as guidance on how to handle those situations.
No Author : Use the title in place of the author.
- For a paraphrase from an article with no author: (“Whales in the Ocean,” 2020)
- For a quotation from a book with no author: ( Plant-Based Cooking , 2020, para. 9)
- The reference list entry for an article with no author begins with the title in sentence case (capitalizing the first word only and any proper nouns):
Whales in the ocean. (2020). Ocean Life Magazine . https://www.oceanlife.com
- The reference list entry for a book or other whole work without an author begins with the title in sentence case and italics:
Plant-based cooking . (2020). https://www.plant-basedcookingebook.com
- Only use “Anonymous” as the author if the work specifically names the author as “Anonymous”: (Anonymous, n.d.).
No date : Use n.d. in the date spot for both in-text citations and reference list entries. For example, an in-text citation would look like this: (Hendrix, n.d.).
Tables and Figures
Format for Using a Table or Figure in Your Writing
- Provide the Table number or Figure number aligned left and in bold font.
- Provide the title for the table or figure aligned left and in italics one double-spaced line below the figure number.
- Provide the table or figure itself below the title.
- As needed, provide a note below the table to explain any terms, symbols, and provide the copyright statement. The word “note” is capitalized and in italics followed by a period and then the note as shown in Figure 1.
- Also, mention the figure in your text as done in number 4 of this list: “as shown in Figure 1”.
Tables that present compiled data or information from your research will need a copyright statement in the table “note” underneath the table that identifies the copyright owner of that information in addition to a reference list entry for that source.
Figures such as images and artwork that you borrow (copy) from a source and insert in your paper may or may not need a copyright statement in the figure “note” depending on the source where the image was retrieved. Free images from online sites such as Pixabay.com , Pexel.com , and Unsplash.com along with images you own will not need a copyright statement. However if you use an image with a Creative Commons license that requires attribution or an image from the public domain, or if you use a copyrighted image that you have permission from the copyright holder to use, you will need to include a copyright statement in the note underneath the image as shown in Figure 1.
How to Format Figures in a PowerPoint Presentation

Note. This screenshot shows how to format a figure in a PowerPoint. Adapted from APA Style in PowerPoint , by C. Cairns, 2020 ( https://youtu.be/qClChyFfTgc ). Copyright 2020 by Purdue Global Academic Success Center and Writing Center. Adapted with permission.
In the example figure, the note begins with a description of the image followed by the copyright statement. For more details about different kinds of table and figure notes, refer to Formatting Graphics and Visuals .
Copyright Statement Template
From (or “Adapted from” if the image has been modified or cropped) Title of Work [Photograph], by A. A. Artist, Year (DOI or URL). Copyright year by Copyright Holder or Copyright License Type or In the public domain. Reprinted or Adapted with permission (if a copyrighted image and permission was sought and granted to use it).
Omit any elements that are unknown. Omit “[Photograph]” if the work is not a photograph.
Following Style Guidelines
Most style guides are written for particular disciplines; therefore, documentation rules and formats are designed for the kind of information used within that field. For instance, Bluebook is a style guide used in the legal field. Bluebook’s style and format cater to displaying pertinent information for retrieving court cases, legislation, and briefs. On the other hand, American Psychological Association (APA) style is used in the social sciences and some health, business and technology fields. Readers in these fields are expecting writers to use the most current information from credible and verifiable sources, and APA is known as an author-date citation style.
Cross-Referencing The key to properly documenting your sources is to learn how to cross-reference. This means that you take your source, a journal article, for instance, and you look up in your style guide how to cite a journal article—what elements to include in the citation and in what order to put them. It will also indicate the capitalization, font, and punctuation rules to follow. Here’s an example:
Information available to you in a printed journal article Paige Turner, “Writing in an Online Environment” in the Journal of Online Writing published in May of 2020. The journal volume is 3, and the issue number is 2. The article is 17 pages long beginning on page 17 and ending on page 34. The journal article has a doi that is https://doi.org/12.1212/12-12121212 .
According to the Publication Manual of the American Psychological Association (7th ed.) (APA, 2020), you would put this information in the following format:
Author, Middle initial. First initial. (Year of publication). Title of article. Title of the Journal, volume(issue), page-page. DOI or URL
The APA reference entry would then look like this:
Turner, P. (2009). Writing in an online environment. Journal of Online Writing, 2 (3), 17-34. https://doi.org/12.1212/12-12121212
You do not need to memorize documentation formats. The key is to use your style guide or a resource such as the Common Citations in APA Format and match your sources with the rules in the guide.
Academic Success Center [Ask ASC]. (2020, August 15). APA style formatting in PowerPoint [Video]. YouTube. https://youtu.be/KDmCv6Ye1og
American Psychological Association. (2020). Publication manual of the American Psychological Association: The official guide to APA style (7th ed.). https://doi.org/10.1037/0000165-000
Purdue University Global. (2020). Code of student conduct. 2019-2020 Academic Catalog. https://catalog.purdueglobal.edu/policy-information/student-information-services/conduct/#text
Share this:
- Click to email a link to a friend (Opens in new window)
- Click to share on Facebook (Opens in new window)
- Click to share on Reddit (Opens in new window)
- Click to share on Twitter (Opens in new window)
- Click to share on LinkedIn (Opens in new window)
- Click to share on Pinterest (Opens in new window)
- Click to print (Opens in new window)
Follow Blog via Email
Enter your email address to follow this blog and receive email notifications of new posts.
Email Address
- RSS - Posts
- RSS - Comments
- COLLEGE WRITING
- USING SOURCES & APA STYLE
- EFFECTIVE WRITING PODCASTS
- LEARNING FOR SUCCESS
- PLAGIARISM INFORMATION
- FACULTY RESOURCES
- Student Webinar Calendar
- Academic Success Center
- Writing Center
- About the ASC Tutors
- DIVERSITY TRAINING
- PG Peer Tutors
- PG Student Access
Subscribe to Blog via Email
Enter your email address to subscribe to this blog and receive notifications of new posts by email.
- College Writing
- Using Sources & APA Style
- Learning for Success
- Effective Writing Podcasts
- Plagiarism Information
- Faculty Resources
- Tutor Training
Twitter feed
for Education
- Google Classroom
- Google Workspace Admin
- Google Cloud
Google Classroom is turning 10. Find out what we've learned and what we're doing next. 🎉
Easily distribute, analyze, and grade student work with assignments for your lms.
Assignments is an application for your learning management system (LMS). It helps educators save time grading and guides students to turn in their best work with originality reports — all through the collaborative power of Google Workspace for Education.
- Get started
- Explore originality reports

Bring your favorite tools together within your LMS
Make Google Docs and Google Drive compatible with your LMS
Simplify assignment management with user-friendly Google Workspace productivity tools
Built with the latest Learning Tools Interoperability (LTI) standards for robust security and easy installation in your LMS
Save time distributing and grading classwork
Distribute personalized copies of Google Drive templates and worksheets to students
Grade consistently and transparently with rubrics integrated into student work
Add rich feedback faster using the customizable comment bank
Examine student work to ensure authenticity
Compare student work against hundreds of billions of web pages and over 40 million books with originality reports
Make student-to-student comparisons on your domain-owned repository of past submissions when you sign up for the Teaching and Learning Upgrade or Google Workspace for Education Plus
Allow students to scan their own work for recommended citations up to three times
Trust in high security standards
Protect student privacy — data is owned and managed solely by you and your students
Provide an ad-free experience for all your users
Compatible with LTI version 1.1 or higher and meets rigorous compliance standards

Product demos
Experience google workspace for education in action. explore premium features in detail via step-by-step demos to get a feel for how they work in the classroom..
“Assignments enable faculty to save time on the mundane parts of grading and...spend more time on providing more personalized and relevant feedback to students.” Benjamin Hommerding , Technology Innovationist, St. Norbert College

Classroom users get the best of Assignments built-in
Find all of the same features of Assignments in your existing Classroom environment
- Learn more about Classroom
Explore resources to get up and running
Discover helpful resources to get up to speed on using Assignments and find answers to commonly asked questions.
- Visit Help Center

Get a quick overview of Assignments to help Educators learn how they can use it in their classrooms.
- Download overview

Get started guide
Start using Assignments in your courses with this step-by-step guide for instructors.
- Download guide

Teacher Center Assignments resources
Find educator tools and resources to get started with Assignments.
- Visit Teacher Center

How to use Assignments within your LMS
Watch this brief video on how Educators can use Assignments.
- Watch video

Turn on Assignments in your LMS
Contact your institution’s administrator to turn on Assignments within your LMS.
- Admin setup

Explore a suite of tools for your classroom with Google Workspace for Education
You're now viewing content for a different region..
For content more relevant to your region, we suggest:
Sign up here for updates, insights, resources, and more.
McGraw Center for Teaching and Learning
Digital assignment guides.
Adding a digital assignment to an existing curriculum can be challenging for both instructor and for students. Instructors may be concerned about the time needed for students to learn the tools necessary for the assignment or unsure as to how pedagogically beneficial a digital assignment is going to be. For students, multimedia assignments, or project-based assignments more generally, are often challenging because they may present a departure from the more familiar and comfortable lecture-study-test routine.
Engaging in course-based digital projects, however, can have tangential benefits and perhaps unexpected learning outcomes. Such assignments can encourage collaborative work, exploring multiple literacies, writing for public audiences, and learning to effectively present critical, creative, and community-engaged scholarship. These non-technical outcomes should form the basis of and motivation for the development of digital assignments. Digital work for digital’s sake is never a good idea and adding a tool to a process in which it is unnecessary can make coursework cumbersome and tedious.
When considering implementing a digital assignment, think about the process, the possible time spent learning the tool, and the skills involved. How do these relate to your desired learning outcomes for the course? Digital tools offer a wide spectrum of ways to present scholarly work and can be combined in many ways. A map, for example, may be annotated with written text that is also illustrated with images and video. Digital assignments can provide opportunities for curatorial decisions in the design process that might not be as necessary in a more traditional course assignment. Students should reflect upon how their scholarly work might most effectively be represented, whether it be a short video, podcast, drawing, writing or performing– whatever best suits the needs of the student to present an effective response to your clearly stated goal.

Tips For Designing a Digital Assignment
- Establish and clarify your teaching and learning goals for the project and use those to formulate a grading rubric. Include objective, gradable moments in the process of planning and producing the project. Even if students are all using the same tools, the finished products may be different enough that being able to grade systematically with a rubric will be a great time-saver. Be sure to clearly communicate those expectations to the students, and share the rubric in advance of the work.. A rubric however should address the process as well as the end product. Be sure to include objective, gradable moments in the process of planning and producing the project.
- Talk to your students to get a sense for their existing knowledge of digital work. This may help you decide on an assignment type and the appropriate tools, but also may inform the composition of student project groups and any anxiety students may be feeling.
- Multimedia projects often involve steps that do not include working directly with a digital tool. Script-writing, story-boarding, research, and data collection are all very common preliminary steps in the creation of a digital project. Establish milestones and set aside time for these activities.
- Don’t feel that you need to be proficient in or able to teach a particular tool before including it in a digital assignment. Having a firm grasp of what can be done with a tool is more important than necessarily knowing how to use it. Reach out to staff in the McGraw Center or the Library to find those who can offer training.
- Start small. If you haven’t done a digital assignment of a certain before, test the waters. You can revise the next time you teach the class.
- When possible, provide examples of finished projects that exemplify what you will be looking for in your students’ work.
- Digital projects are often multi-modal. This means that the development of the project usually involves a range of different types of activities. Allow students to decide their own roles in the development process. Some roles may better highlight the skills they bring to the project. For example, in the case of a video assignment: Who plans the story? Who conducts interviews? Who operates the camera? Who captures the sound? Who does the editing?. This may also encourage students who may feel uncomfortable about a new medium being able to see that they already have skills needed for parts of the work, and so be willing to learn more about other aspects of the assignment.
- Be flexible and understanding in how you allow students to approach the completion of their projects. For example, if a student who is not comfortable being recorded for a video project would like to use a classmate or friend as an on-camera stand-in, let them
- Connections to the ‘real world’ can have a great motivational impact. Projects that work with the community through partnerships or interviews can not only give students memorable and educative experiences, but also to feel more invested in their work. Within the campus, student work that contributes to scholarly research or to “Public Humanities” projects can have a strong motivational impact
- Engagement Theory offers very good, relevant, and concise framework for creating digital assignments. The framework centers on three main aspects: Relate, Create, and Donate. A well designed digital assignment or project should involve communication, planning, management, and social skills (relate). Students should have some creative control over their project (create). By choosing their own topics and perhaps also the way in which they present that topic, students will feel more of a sense of ownership over the content which can lead to a more rewarding experience. Finally, the 'donate' component stresses the importance of real-world, if possible public, projects that give back (donate) to the community in some way.

Contributing to a thematic archive allows students to adopt a curatorial mindset and the addition of descriptions as metadata will develop critical analysis skills.

A blog can serve as a simple website showcasing student work or can take advantage of characteristics unique to the blog medium, such as comments, tags, categories.

Digital formats such as EPUB and the ubiquity of digital reading devices make the creation of an eBook an attractive way to encapsulate a semester’s worth of work resulting in a tangible product.

The development of an online exhibit as coursework offers students the opportunity to engage with object- and media-centered learning. Exhibits provide authentic learning experiences that can potentially engage with a wide range of audiences.

Image annotation assignments give students experience with critical viewing , that is, looking at what images depict, but also considering the cultural, social, historical, or philosophical contexts around which the image was created and made available.

Mapping assignments tend to be either data visualizations or map annotations. These two are not necessarily mutually exclusive, but tend to involve different activities.

A photo essay is a series of photographs selected to tell a story

Podcasting assignments can encourage creativity, collaboration, and provide a sense of community in your course while at the same time, giving students opportunities to practice writing and presentation skills, and providing valuable experience expressing themselves through multimedia

In-class presentation assignments give students valuable opportunities to consolidate learning and research into coherent explanations or arguments.

Social annotation refers to the collective critical interpretation of media and often relates to the close reading of texts. Digital tools for social annotation make this familiar scholarly practice into a more dynamic, collaborative, and interactive experience.

A storymap is a digital expository work that may combine maps, text, and other media to convey or illustrate a narrative in attractive, dynamic, and interactive ways.

Digital tools for text analysis can provide students with a novel approach to bringing the underlying characteristics of texts to the surface. For example, text analysis tools can be used to create assignments that allow students to experiment with search terms, to juxtapose the style of one text against another, and to formulate questions that can inspire further research

Digital timeline assignments give students the opportunity to consolidate their learning into graphically-rich and interactive visualizations of chronologically sequenced information.

Video assignments comprise a wide range of possible assignment types from personal reflection videos to assignments in which students are responsible for capturing, editing, narrating, and producing a polished product
Rubric Best Practices, Examples, and Templates
A rubric is a scoring tool that identifies the different criteria relevant to an assignment, assessment, or learning outcome and states the possible levels of achievement in a specific, clear, and objective way. Use rubrics to assess project-based student work including essays, group projects, creative endeavors, and oral presentations.
Rubrics can help instructors communicate expectations to students and assess student work fairly, consistently and efficiently. Rubrics can provide students with informative feedback on their strengths and weaknesses so that they can reflect on their performance and work on areas that need improvement.
How to Get Started
Best practices, moodle how-to guides.
- Workshop Recording (Spring 2024)
- Workshop Registration
Step 1: Analyze the assignment
The first step in the rubric creation process is to analyze the assignment or assessment for which you are creating a rubric. To do this, consider the following questions:
- What is the purpose of the assignment and your feedback? What do you want students to demonstrate through the completion of this assignment (i.e. what are the learning objectives measured by it)? Is it a summative assessment, or will students use the feedback to create an improved product?
- Does the assignment break down into different or smaller tasks? Are these tasks equally important as the main assignment?
- What would an “excellent” assignment look like? An “acceptable” assignment? One that still needs major work?
- How detailed do you want the feedback you give students to be? Do you want/need to give them a grade?
Step 2: Decide what kind of rubric you will use
Types of rubrics: holistic, analytic/descriptive, single-point
Holistic Rubric. A holistic rubric includes all the criteria (such as clarity, organization, mechanics, etc.) to be considered together and included in a single evaluation. With a holistic rubric, the rater or grader assigns a single score based on an overall judgment of the student’s work, using descriptions of each performance level to assign the score.
Advantages of holistic rubrics:
- Can p lace an emphasis on what learners can demonstrate rather than what they cannot
- Save grader time by minimizing the number of evaluations to be made for each student
- Can be used consistently across raters, provided they have all been trained
Disadvantages of holistic rubrics:
- Provide less specific feedback than analytic/descriptive rubrics
- Can be difficult to choose a score when a student’s work is at varying levels across the criteria
- Any weighting of c riteria cannot be indicated in the rubric
Analytic/Descriptive Rubric . An analytic or descriptive rubric often takes the form of a table with the criteria listed in the left column and with levels of performance listed across the top row. Each cell contains a description of what the specified criterion looks like at a given level of performance. Each of the criteria is scored individually.
Advantages of analytic rubrics:
- Provide detailed feedback on areas of strength or weakness
- Each criterion can be weighted to reflect its relative importance
Disadvantages of analytic rubrics:
- More time-consuming to create and use than a holistic rubric
- May not be used consistently across raters unless the cells are well defined
- May result in giving less personalized feedback
Single-Point Rubric . A single-point rubric is breaks down the components of an assignment into different criteria, but instead of describing different levels of performance, only the “proficient” level is described. Feedback space is provided for instructors to give individualized comments to help students improve and/or show where they excelled beyond the proficiency descriptors.
Advantages of single-point rubrics:
- Easier to create than an analytic/descriptive rubric
- Perhaps more likely that students will read the descriptors
- Areas of concern and excellence are open-ended
- May removes a focus on the grade/points
- May increase student creativity in project-based assignments
Disadvantage of analytic rubrics: Requires more work for instructors writing feedback
Step 3 (Optional): Look for templates and examples.
You might Google, “Rubric for persuasive essay at the college level” and see if there are any publicly available examples to start from. Ask your colleagues if they have used a rubric for a similar assignment. Some examples are also available at the end of this article. These rubrics can be a great starting point for you, but consider steps 3, 4, and 5 below to ensure that the rubric matches your assignment description, learning objectives and expectations.
Step 4: Define the assignment criteria
Make a list of the knowledge and skills are you measuring with the assignment/assessment Refer to your stated learning objectives, the assignment instructions, past examples of student work, etc. for help.
Helpful strategies for defining grading criteria:
- Collaborate with co-instructors, teaching assistants, and other colleagues
- Brainstorm and discuss with students
- Can they be observed and measured?
- Are they important and essential?
- Are they distinct from other criteria?
- Are they phrased in precise, unambiguous language?
- Revise the criteria as needed
- Consider whether some are more important than others, and how you will weight them.
Step 5: Design the rating scale
Most ratings scales include between 3 and 5 levels. Consider the following questions when designing your rating scale:
- Given what students are able to demonstrate in this assignment/assessment, what are the possible levels of achievement?
- How many levels would you like to include (more levels means more detailed descriptions)
- Will you use numbers and/or descriptive labels for each level of performance? (for example 5, 4, 3, 2, 1 and/or Exceeds expectations, Accomplished, Proficient, Developing, Beginning, etc.)
- Don’t use too many columns, and recognize that some criteria can have more columns that others . The rubric needs to be comprehensible and organized. Pick the right amount of columns so that the criteria flow logically and naturally across levels.
Step 6: Write descriptions for each level of the rating scale
Artificial Intelligence tools like Chat GPT have proven to be useful tools for creating a rubric. You will want to engineer your prompt that you provide the AI assistant to ensure you get what you want. For example, you might provide the assignment description, the criteria you feel are important, and the number of levels of performance you want in your prompt. Use the results as a starting point, and adjust the descriptions as needed.
Building a rubric from scratch
For a single-point rubric , describe what would be considered “proficient,” i.e. B-level work, and provide that description. You might also include suggestions for students outside of the actual rubric about how they might surpass proficient-level work.
For analytic and holistic rubrics , c reate statements of expected performance at each level of the rubric.
- Consider what descriptor is appropriate for each criteria, e.g., presence vs absence, complete vs incomplete, many vs none, major vs minor, consistent vs inconsistent, always vs never. If you have an indicator described in one level, it will need to be described in each level.
- You might start with the top/exemplary level. What does it look like when a student has achieved excellence for each/every criterion? Then, look at the “bottom” level. What does it look like when a student has not achieved the learning goals in any way? Then, complete the in-between levels.
- For an analytic rubric , do this for each particular criterion of the rubric so that every cell in the table is filled. These descriptions help students understand your expectations and their performance in regard to those expectations.
Well-written descriptions:
- Describe observable and measurable behavior
- Use parallel language across the scale
- Indicate the degree to which the standards are met
Step 7: Create your rubric
Create your rubric in a table or spreadsheet in Word, Google Docs, Sheets, etc., and then transfer it by typing it into Moodle. You can also use online tools to create the rubric, but you will still have to type the criteria, indicators, levels, etc., into Moodle. Rubric creators: Rubistar , iRubric
Step 8: Pilot-test your rubric
Prior to implementing your rubric on a live course, obtain feedback from:
- Teacher assistants
Try out your new rubric on a sample of student work. After you pilot-test your rubric, analyze the results to consider its effectiveness and revise accordingly.
- Limit the rubric to a single page for reading and grading ease
- Use parallel language . Use similar language and syntax/wording from column to column. Make sure that the rubric can be easily read from left to right or vice versa.
- Use student-friendly language . Make sure the language is learning-level appropriate. If you use academic language or concepts, you will need to teach those concepts.
- Share and discuss the rubric with your students . Students should understand that the rubric is there to help them learn, reflect, and self-assess. If students use a rubric, they will understand the expectations and their relevance to learning.
- Consider scalability and reusability of rubrics. Create rubric templates that you can alter as needed for multiple assignments.
- Maximize the descriptiveness of your language. Avoid words like “good” and “excellent.” For example, instead of saying, “uses excellent sources,” you might describe what makes a resource excellent so that students will know. You might also consider reducing the reliance on quantity, such as a number of allowable misspelled words. Focus instead, for example, on how distracting any spelling errors are.
Example of an analytic rubric for a final paper
| Above Average (4) | Sufficient (3) | Developing (2) | Needs improvement (1) | |
|---|---|---|---|---|
| (Thesis supported by relevant information and ideas | The central purpose of the student work is clear and supporting ideas always are always well-focused. Details are relevant, enrich the work. | The central purpose of the student work is clear and ideas are almost always focused in a way that supports the thesis. Relevant details illustrate the author’s ideas. | The central purpose of the student work is identified. Ideas are mostly focused in a way that supports the thesis. | The purpose of the student work is not well-defined. A number of central ideas do not support the thesis. Thoughts appear disconnected. |
| (Sequencing of elements/ ideas) | Information and ideas are presented in a logical sequence which flows naturally and is engaging to the audience. | Information and ideas are presented in a logical sequence which is followed by the reader with little or no difficulty. | Information and ideas are presented in an order that the audience can mostly follow. | Information and ideas are poorly sequenced. The audience has difficulty following the thread of thought. |
| (Correctness of grammar and spelling) | Minimal to no distracting errors in grammar and spelling. | The readability of the work is only slightly interrupted by spelling and/or grammatical errors. | Grammatical and/or spelling errors distract from the work. | The readability of the work is seriously hampered by spelling and/or grammatical errors. |
Example of a holistic rubric for a final paper
| The audience is able to easily identify the central message of the work and is engaged by the paper’s clear focus and relevant details. Information is presented logically and naturally. There are minimal to no distracting errors in grammar and spelling. : The audience is easily able to identify the focus of the student work which is supported by relevant ideas and supporting details. Information is presented in a logical manner that is easily followed. The readability of the work is only slightly interrupted by errors. : The audience can identify the central purpose of the student work without little difficulty and supporting ideas are present and clear. The information is presented in an orderly fashion that can be followed with little difficulty. Grammatical and spelling errors distract from the work. : The audience cannot clearly or easily identify the central ideas or purpose of the student work. Information is presented in a disorganized fashion causing the audience to have difficulty following the author’s ideas. The readability of the work is seriously hampered by errors. |
Single-Point Rubric
| Advanced (evidence of exceeding standards) | Criteria described a proficient level | Concerns (things that need work) |
|---|---|---|
| Criteria #1: Description reflecting achievement of proficient level of performance | ||
| Criteria #2: Description reflecting achievement of proficient level of performance | ||
| Criteria #3: Description reflecting achievement of proficient level of performance | ||
| Criteria #4: Description reflecting achievement of proficient level of performance | ||
| 90-100 points | 80-90 points | <80 points |
More examples:
- Single Point Rubric Template ( variation )
- Analytic Rubric Template make a copy to edit
- A Rubric for Rubrics
- Bank of Online Discussion Rubrics in different formats
- Mathematical Presentations Descriptive Rubric
- Math Proof Assessment Rubric
- Kansas State Sample Rubrics
- Design Single Point Rubric
Technology Tools: Rubrics in Moodle
- Moodle Docs: Rubrics
- Moodle Docs: Grading Guide (use for single-point rubrics)
Tools with rubrics (other than Moodle)
- Google Assignments
- Turnitin Assignments: Rubric or Grading Form
Other resources
- DePaul University (n.d.). Rubrics .
- Gonzalez, J. (2014). Know your terms: Holistic, Analytic, and Single-Point Rubrics . Cult of Pedagogy.
- Goodrich, H. (1996). Understanding rubrics . Teaching for Authentic Student Performance, 54 (4), 14-17. Retrieved from
- Miller, A. (2012). Tame the beast: tips for designing and using rubrics.
- Ragupathi, K., Lee, A. (2020). Beyond Fairness and Consistency in Grading: The Role of Rubrics in Higher Education. In: Sanger, C., Gleason, N. (eds) Diversity and Inclusion in Global Higher Education. Palgrave Macmillan, Singapore.

An official website of the United States government Here’s how you know keyboard_arrow_down
An official website of the United States government
The .gov means it’s official. Federal government websites often end in .gov or .mil. Before sharing sensitive information, make sure you’re on a federal government site.
The site is secure. The https:// ensures that you are connecting to the official website and that any information you provide is encrypted and transmitted securely.
Jump to main content
Transferring ownership/ Assignments FAQs
Assignment Center has replaced the Electronic Patent Application System (EPAS) and Electronic Trademark Assignment System (ETAS). Assignment Center makes it easier to transfer ownership or change the name on your patent or trademark registration.
See our how-to guides on using Assignment Center for patents and trademarks . If you have questions, email [email protected] or call customer service at 800-972-6382.
Show all FAQs
- Browse FAQs
Transferring Ownership / Assignments
- Transferring Ownership / Assignments, Procedures
The Assignment Recordation Branch in the Public Records Division processes and records assignment documents for both patent and trademark properties.
Essentially the rules:
(1) specify the minimum information about the transaction that must be submitted;
(2) require submitters to submit this information of a separate cover sheet; and
(3) specify that submissions must be legible and of such quality to permit processing; and
(4) pay the proper recording fee.
The rules permit submission of true copies of assignment-related documents; original documents are not required nor desired, as they will not be returned.
You may contact the Assignment Center customer service desk at 571-272-3350 from 8:30 a.m. to 5 pm ET Mondays through Fridays, except on federal holidays. You may e-mail questions about electronic filing to [email protected] .
Payment may be made by use of a check, credit card, money order or USPTO deposit account if submitting documents in paper. Trademark assignments submitted electronically may be paid by credit card, USPTO deposit account or electronic fund transfer (EFT). The USPTO accepts VISA, MASTERCARD, AMERICAN EXPRESS and DISCOVER credit cards.
>> see How to Pay Fees for a current fee schedule and for more about fee payments
No. All documents that meet the minimum requirement in 37 CFR 3 are processed and recorded. Persons buying or selling properties should be sure that there is an accurate chain of title in place before submitting recordation requests.
No, these forms are not mandatory. However, the USPTO strongly encourages their use. Completing the forms in their entirety ensures that all the required information for recordation has been sent to the office. The forms are available in PDF-fillable format on the USPTO Forms page , thus making them quick and easy to prepare.
When these forms are received in the USPTO, they are scanned along with the supporting documentation. The bibliographic data from the cover sheet is then entered into the PTAS system and the documents are processed.
Additional information about this page
Documentation
- Using Assignment
- Assignment settings
- Assignment FAQ
This page explores the different types of assignment, how students submit assignments and how teachers can grade them.
- 1 What are the options for submitting work in Moodle?
- 2.1 You want students to type shorter or longer responses directly online
- 2.2 You want students to submit work you can download in a specified program
- 2.3 You want students to submit files at different times for a project
- 2.4 You want students to write a response to a video/sound file/image
- 2.5 You want students to answer a series of questions on a video/sound file/image
- 2.6 You want to grade work students have done offline
- 2.7 You want to view, comment on and send back students' assignments
- 2.8 You want students to send you a comment or note along with their uploaded work
- 2.9 You want to allow students to redraft and decide when to submit the work
- 2.10 You want students to keep an ongoing journal or do an iterative assignment
- 2.11 You want students to submit work in groups
- 2.12 You want to grade students' work anonymously
- 2.13 You want to read and grade student assignments offline
- 2.14 You want to hide students' grades until a time of your choosing.
- 2.15 You want to set a timed assignment
- 2.16 You want to moderate other colleagues' marking or allocate certain teachers to certain students
- 3.1 File submission
- 3.2 Access controlled links
- 3.3 Online text
- 3.4 Submission comments
- 4.1 Filtering submissions
- 4.2 Allocating submissions to markers
- 4.3 Submission status
- 4.4 Overriding assignment deadlines
- 4.5 Granting extensions
- 4.6 Quick grading
- 4.7.1 Annotating submissions
- 4.8.1 Notifying as you mark
- 4.8.2 Keeping grades hidden until a release date
- 4.8.3 Examples of Marking workflow
- 4.9.1 Before you start, enable the multiple file upload settings
- 4.9.2 Downloading student submissions
- 4.9.3 Download the Grading Worksheet to record grades
- 4.9.4 Grade and annotate (if applicable) the submitted work
- 4.9.5 Upload the completed grading worksheet
- 4.9.6 Upload feedback files (if applicable)
- 4.10 Give the same feedback file to multiple students
- 5 Keeping records (archiving, exporting, backing up)
- 6 Tips and Tricks
- 7.1 Examples from School demo site
What are the options for submitting work in Moodle?
The standard ways students can submit assignments are:
- File submissions (students submit a file for assessment)
- Online text (students can type their responses directly in Moodle)
- Audio or video (via the recording button in the Atto editor )
- It is also possible to use the assignment for grading an "offline assignment", ie, one where work is done outside of Moodle. This is done by simply unchecking the above three options.
- If you're not sure which assignment type best suits your needs, look at the section below #Which type of assignment submission suits you best?
Which type of assignment submission suits you best?
You want students to type shorter or longer responses directly online.
Set Online text to Yes. This works well for younger children who will only manage a sentence or two and works just as well for higher education students who write more.
- Advantage - quick for the student to get started; no need to use a word-processing program and upload the file. The text is saved on a regular basis so it will be preserved if the student loses the page for some reason.
- Disadvantage: if the word count is expected to be large, setting Online text to No and File submission to Yes might be a better option.
You want students to submit work you can download in a specified program
Set File submission to Yes, set the number of files you will allow using the Maximum number of uploaded files setting and the file sizes by using the Maximum submission size setting.
- Advantage - better than students emailing work as the whole class's work is collated in one space on your course. Markers can provide comments directly on the student work.
- Advantage - with "Attempts reopened" enabled, teachers can see the progression through various drafts of a student's work.
- Disadvantage - assignments must downloaded to be viewed (but they can be downloaded in bulk ) and the teacher needs the appropriate program to open them.
You want students to submit files at different times for a project
Set File submission to Yes, and use Maximum number of uploaded files to set the maximum number of separate files they can upload
- Advantage - all project files are in one assignment area for grading so they get a single grade.
- Disadvantage - all project files are in one assignment area for grading - so they can only have a single grade!
You want students to write a response to a video/sound file/image
Set up an assignment allowing online text submission and get students to use the Moodle media icon to add video/sound/image files.
You want students to answer a series of questions on a video/sound file/image
Investigate the Quiz module. Assignments are really just for a single question.
You want to grade work students have done offline
Uncheck the submission types when setting up the assignment. Students won't be required to do anything but you can use the assignment to grade them for work done outside of Moodle.
You want to view, comment on and send back students' assignments
Set up an assignment allowing file submissions .
- Advantage: useful for teachers who like using the "comment" options in word-processing programs for example. If you have Ghostscript enabled on your server and the students upload PDF files, you can annotate them inline. See the section Annotating PDF files below.
- Disadvantage: if students upload other file types, you have to download them, comment and then re-upload them.
You want students to send you a comment or note along with their uploaded work
If comments are enabled site-wide , students will be able to add submission comments; if comments are disabled site-wide, students will not be given the option to add submission comments.
You want to allow students to redraft and decide when to submit the work
In the settings set Require students click submit button to Yes. Students can then control when their draft work is submitted to the teacher.
You want students to keep an ongoing journal or do an iterative assignment
In the settings set Require students click submit button to No. Students can continue to make changes to their assignment and at no point do they 'submit'. If the work will be graded at some point it is recommended that either Prevent late submissions is set to Yes to ensure that no changes can be made after the due date, or all submissions are locked when grading commences to ensure that the work is not altered during grading.
- Advantage: the work remains in one place and is constantly improved, graded (if needed) and improved again.
- Disadvantage: there is no record/history of previous attempts (such as with the Wiki ). The online text assignment does not replicate the display of a journal or blog where each new entry is additional to the previous ones.
You want students to submit work in groups
In the settings, set "Students submit in groups" to Yes. If you just do this, then once one student has submitted, the assignment will be flagged as submitted even if the others haven't contributed. If you want to ensure everyone has an input, set "Require students click submit button" to Yes and then change "Require all group members to submit" to Yes. The assignment will only be classed as submitted when each member has contributed, and once one student has submitted, the remaining members's names will be displayed for the group to see who still needs to add their input.
You want to grade students' work anonymously
In the settings, choose 'Anonymous submissions'. When students submit assignments, their names will be replaced by randomly-generated participant numbers so you will not know who is who. Note that this is not totally anonymous because you can reveal their identities in the assignment settings and you can work out identities from the logs - so this might not be suitable if your establishment has very precise privacy requirements.
You want to read and grade student assignments offline
In the settings, choose "Offline grading worksheet". When students have submitted, click "View/grade all submissions" and you can download their assignments from the link "Download all submissions" and download the grading sheet from the link "Download grading worksheet". You can then edit grades and re-upload the grading worksheet. You can also upload multiple feedback files in a zip from this drop down menu. See Assignment settings for an explanation of how to use the "upload multiple feedback files as zip" feature.
You want to hide students' grades until a time of your choosing.
Use 'marking workflow' as explained in Assignment settings .
You want to set a timed assignment
Ask your administrator to enable the time limit feature from Site administration > Plugins > Assignment settings > Enable timed assignments and you will then have the option from the Availability section.
You want to moderate other colleagues' marking or allocate certain teachers to certain students
Use 'marking allocation' as explained in Assignment settings .
How do students submit their assignments?
The first page students will see when they click on the assignment activity link from the course page will display the assignment name, description and the submission status. The first time a student views the assignment it will look like this:
| Student view of assignment |
The submission status section includes:
Submission status
- Grading status
- Time remaining
- Last modified
- Submission details
As they progress through the assignment the Submission status and Grading status will update and the Last modified date will appear.
| Example of submitted and graded assignment |
If the student uploaded a file which the teacher has annotated, this will be made available in the feedback section. The student can search through the document and filter specific comments.
| Student view of graded pdf file | Searching and filtering comments in annotated pdf |
Submission statuses include:
- Nothing submitted for this assignment
- Draft (not submitted)
- Submitted for grading
Grading statuses include:
File submission
To submit a file submission, students complete the following steps:
- Click the ‘Add submission’ button to bring up the file upload page.
- Upload the relevant file into the submission. They are able to ‘drag and drop’ the file into the submission box.
- Click ‘Save Changes’.
There should now be a Last modified date and the file(s) uploaded will also be displayed. Depending on how the assignment is setup the status will either read ‘Submitted for grading’ - in which case no further action is need, or ‘Draft (not submitted)’.
- If changes are required, click ‘Edit submission’.
- Once ready to submit, click ‘Submit assignment’.
Note that once the assignment is 'submitted’ no further changes are allowed.
| Student view when adding a submission | Student view once file is uploaded | Student view when submitting assignment |
Note: Depending on how the assignment is setup students may see both a file submission page and an online text editor.
If file submissions and online text are enabled, and a word limit is set for the online text, it is possible for a student to end up with a submission status of 'No attempt' together with saved file submissions. This occurs when a student submits files, enters online text, clicks 'Save changes' then obtains a message informing them that the text exceeds the word limit. If they then click Cancel, the submission status is shown as 'No attempt' together with saved file submissions.
Access controlled links
If the administrator has enabled this feature for either the Google Drive repository or the OneDrive repository then students can upload a file as an 'access controlled link' from either of these repositories. The file is then copied to the site account and the student is no longer able to edit it.The student retains the original file in their own Google Drive or OneDrive. The teacher is given permission to edit the file for grading purposes, and the student is sent a copy of the edited file.
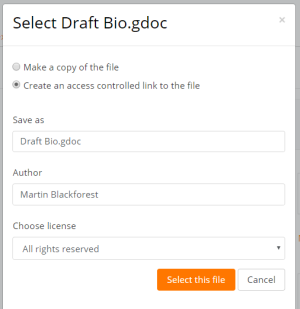
Online text
To submit online text, students complete the following steps:
- Click the ‘Add submission’ button to bring up the online text editor page.
- Type the relevant text into the text editor , or paste from a previously written file.
There should now be a Last modified date and the first 100 characters entered will also be displayed. Depending on how the assignment is setup the status will either read ‘Submitted for grading’ - in which case no further action is need, or ‘Draft (not submitted)’.
- If changes are required, click on ‘Edit my submission’.
| Online text entered | Submitting assignment |
Submission comments
If enabled by the administrator, there may be a section where students can leave submission comments.
| Student comments |
How do teachers grade assignments?
When students have submitted their assignments, they can be accessed by clicking on the assignment activity. This will bring up the Grading Summary page.
The Grading Summary page displays a summary of the assignment, including; number of participants, number of drafts, number of submitted assignments, due date and time remaining.
Clicking 'Grade' will take you to the first student in the list so you can start grading individually. If you wish to grade several assignments, clicking Save and Show next will take you to the next submission.

Clicking 'View all submissions' will take you to the grading table where you see all students.
The Grading Table contains columns of information about the student, the status of their submission, a link to grade their submission, a link to each submission and feedback comments and files (if enabled).
Filtering submissions
A dropdown menu accessed from the 'Options' section allows you to filter submissions so you can for example quickly see which students have not submitted yet.
You can also filter submissions which have had extensions granted.

Allocating submissions to markers
If you need to divide submissions between more than one person, you can apply groups to the assignment and let markers know which group(s) to mark. Note that because group membership is not itself anonymised, this may make anonymised submissions that bit less anonymous, though as long as the groups aren't very small this should be acceptable.
An alternative is to use marking allocation - this allows anyone with a teacher role to allocate one marker to each submission. This works particularly well if marking is allocated by subject specialism.
If you will be assigning grades to student work, you may want to take note of the submission status before you begin the marking process. If you have required students click the Submit button, you may find that some submissions are still marked as Draft (not submitted), meaning the student has either uploaded a file(s) or entered some text, but has not clicked ‘Submit assignment’.
If it's after the due date and you are about to commencing marking that you use ‘Prevent submission changes’ to stop students from making changes to their assignment. You can do this one by one by using the icon in the Edit column.
Or you can select two or more students by putting a tick in the select column and going to 'Lock submissions’ from the With selected menu under the grading table.
Likewise you can also revert a student's submission to draft if they have uploaded the incorrect file. Instead of selecting ‘Prevent submission changes’ select ‘Revert the submission to draft’, or place ticks against selected students and choose 'Revert the submission to draft status' from the With selected menu under the grading table.
| Submission statuses | Prevent submission changes dropdown | Lock submissions | Revert to draft | Revert to draft status |
If the submission setting 'Attempts reopened' is set to 'Automatically until pass' and a submission is graded below the grade to pass, then then submission is automatically unlocked when the grade is saved. Similarly, if the submission setting 'Attempts reopened' is set to Manually, and a teacher selects 'Allow another attempt, then the submission is automatically unlocked.
Overriding assignment deadlines
A teacher can override a deadline for an individual or group from the Assignment navigation > More link Boost theme or Assignment administration other themes.)
When adding overrides for a group, it is possible to have one group override trump another. This is achieved by moving the override up/down on the group overrides page:

In this situation, a student in both groups (e.g. Frodo Baggins) will have the override from "The Council of Elrond" applied. By pressing the arrow icons on the right, the override for "The Fellowship" can be moved to the top of the list, and will have higher precedence.
Note also that if there exists a user override for a student, it will always take precedence over any group overrides.
Granting extensions
If an assignment has a deadline, a teacher can grant individual or group assignment extensions by selecting the Edit link next to a particular student or group.
- To grant an extension, open the assignment
- Click on "View all submissions"
- Locate the student who is to be allowed to submit after the "Cut-off date"To

- Click on "Save changes".
Quick grading
Quick grading allows you to enter numeric grades directly into the grading table, bypassing the more detailed grading interface. Please note:
- if you want to give feedback, you need to use the more detailed Grade interface.
- Quick grading is incompatible with advanced grading e.g. Rubrics, and is not recommended when there are multiple markers.
- Submission comments are a two-way private conversation between a student and staff and are visible to students immediately i.e. markers use the grading interface to give feedback, not the submission comments.
To access the Quick Grading interface, from the Grading Summary page click 'View all submissions'; the Grading Table displays. Scroll to bottom of the page to configure Options, and check the box for 'Quick grading'. While you're down there, you can also set the number of assignments to display per page, filter the assignments e.g. to see who has not submitted, unmarked assignments, etc.
When you are ready to Quick Grade:
- You can enter grades directly into the grading table.
- Scroll to the bottom of the grading table and click 'Save all quick grading changes'
- A confirmation displays.
Grading individual submissions
If you have enabled File Feedback in the Assignment settings and wish to upload either the marked student assignment, a completed text based feedback document or audio feedback, click on the green tick in the Grade column (or use the icon in the Edit column and select Grade).
This brings you to the Student Grading Page where you can give grades, feedback comments and feedback files (if enabled in the Assignment settings ). You can use drag and drop to upload feedback files.
| Green tick | Grading | Feedback files |
Annotating submissions
If the student has uploaded a PDF, docx or odt file, or if you set 'Comment inline' for an online text submission, then their submission will be displayed on the grading screen, allowing you to annotate it (requires Ghostscript for PDF and unoconv for docx and odt files), using a variety of tools, stamps (if uploaded by the admin) and comments which may be saved to a comments bank. When the annotations are complete, clicking to save the changes will result in it being displayed to the student as part of their feedback.
'Rotate' icons let you change the orientation of an uploaded document if the student submitted it in landscape mode for example.
Comments may be added and then saved in a quick list for future use (1) Click the paper/magnifying glass icon to the right of the page selector to filter comments you have already added to the work (2) :
- In the Search comments pop-up window, enter the term you would like to search for in the Filter comments... box.
- Clicking on the comment will take you to the part of the paper where that comment has been added.
| 1.Saving and re-using comments | 2. Accessing comments |
Note: To ensure that comments display to students as the marker intends, do instruct students to download the annotated PDF rather than just previewing it. Preview sometimes displays comments in a way which obscures the original text.
The review panel and / or the grading panel may be collapsed by clicking the icons at the bottom right of the screen.

Controlling when to notify students of graded work
Notifying as you mark.
If you need to notify individual students, one by one, as you mark, the Notify students checkbox is available when grading individual submissions. Choose Yes to notify the student immediately or No to grade without notifying the student. Assuming you are not hiding grades in the ways outlined below, then Moodle will send a notification.
Note: How students receive Moodle notifications depends on your local default settings, and any changes students have made to those.

Keeping grades hidden until a release date
Assessors often decide to hide grades and feedback until marking is complete and finalised, and then release them all at once. There are two alternatives for this.
- Hide the item in the Grader Report . This is convenient if there are few markers and you have decided a provision date for releasing the marks and feedback.
- Or enable Use marking workflow in the Assignment's settings. This way is best where there are many markers, and/or you don't have a provisional date to release marks and feedback.
Examples of Marking workflow
One marker, Marker, wants to release all grades at the same time
- Marker enables "Use marking workflow"
- Marker marks each submission and transitions the grading to "Marking completed" as each submission is graded.
- Marker then uses the batch operations to transition all grades to "Released" at the same time.
Multiple markers,
Offline marking - downloading and uploading multiple grades and feedback files
If you don't have an internet connection or prefer to grade outside Moodle, you can do so (including with anonymous submissions). These easy stages explained below:
- Download the submissions
- Download the spreadsheet (grading worksheet) to record grades.
- Grade and annotate (if applicable) the submitted work.
- Upload the completed grading worksheet.
- Upload the annotated submissions (if applicable).
Note:You cannot upload marks and feedback to Moodle if you have enabled Rubrics or Marking Guides.
Before you start, enable the multiple file upload settings
Go to the settings of that assignment. For Feedback types, ensure that the Moodle Assignment settings, Feedback comments, Feedback files, and Offline grading worksheet are ticked.
Downloading student submissions
You can download a zip file containing all of the assignment submissions by selecting ‘Download all submissions’ from the 'Grading actions' menu at the top of the grading table, or in the settings menu.
File submissions will be downloaded in the format uploaded by the student. Online text submissions will be downloaded as html files. Each file in the zip will be named with the student first and last name followed by a unique identifier (not the user ID number).
If each submission is more than a single file, then submissions may be downloaded in folders by ticking the option 'Download submissions in folders' (below the grading table). Each submission is put in a separate folder, with the folder structure kept for any subfolders, and files are not renamed. Each folder will be named with the student first and last name followed by a unique identifier (not the user ID number).
You can also download selected assignment submissions (rather than all of them) by selecting the ones you want and then choosing 'With selected....Download selected submissions'.
Download the Grading Worksheet to record grades
- Next, to download the spreadsheet in which you'll enter the grades and brief comments, return to the Moodle Assignment page and from its Grading action drop-down menu choose Download grading worksheet and save that file (keep its csv file format).
Note: Helpfully that downloaded worksheet will contain any existing grades and summary comments which have already been given for that assignment i.e. if marking has already started. However, to see pre-existing comments fully you may need to set your spreadsheet to 'wrap text' within cells.
Grade and annotate (if applicable) the submitted work
After downloading the submissions and the grading worksheet:
- Open a downloaded assignment file to assess it.
- Open the csv file in a spreadsheet editor e.g. Excel.
- For that student's record (if anonymous, a number corresponding to the submission file name will display), enter grades in the Grade column and summary comments in the Feedback comments column for each student.
- Leave the other data untouched unless you know exactly what you're doing.
- Repeat as needed.
- Save the csv file.
Note: Take care to enter data in the correct column of the spreadsheet.
If you are annotating the submissions to return to students as feedback:
- Open a downloaded submission.
- Carry out your annotations.
- Save it in its original place i.e. the folder corresponding to that student.
If you have separate feedback files to upload to students:
- Save these within that student's folder.
- You can give students multiple feedback files in this way e.g. annotations on their work along with a separate pro forma.
Note: Don't change the name or location of the folder - Moodle needs this information to allocate the files correctly.
Compress (zip) all the feedback files:
- Windows: Right click one of the selected files and Send to > Compressed (zipped) folder.
- Mac: Right Click (or Ctrl+click) one of the selected files and click Compress.
- They are now ready for upload (see below).
Upload the completed grading worksheet
When you are ready to upload grades and summary feedback:
- Click on the assignment name on the Moodle course homepage to access the summary page and click View/grade all submissions .
- From the Grading action drop-down menu choose Upload grading worksheet .
- Click Choose a file... and upload the grading worksheet to Moodle, or drag the csv file to the arrow and wait for the file name to appear in the box.
- There is a checkbox to overwrite records that have been modified more recently in Moodle than in the spreadsheet - only check this if you want to spreadsheet to overwrite all Moodle records, including ones made more recently than the spreadsheet.
- Click Upload grading worksheet ; a Confirmation box displays the students grades and feedback that will be imported - check this carefully.
- If you are ready to proceed, click Confirm ; a summary of updates displays.
- Click Continue .
Upload feedback files (if applicable)
- From the Grading action drop-down menu choose Upload multiple feedback files in a zip .
- Click Choose a file... and upload the zipped assignments file to Moodle, or drag the compressed/zipped file to the arrow and wait for the file name to appear in the box.
- Click Import feedback file(s) .
- The Confirmation box will list all the feedback files and student names that will be imported.
- Click Confirm ; the next screen summarises the changes.
- Click Continue .
- From the page containing the Grading Table, you can check your feedback files by enabling Quick grading (see Options at the bottom of that page) and scrolling horizontally, if needed.
For an assignment with no file submissions, see the discussion upload feedback files without student file submissions for details of what to do.
Give the same feedback file to multiple students
If you have high level feedback you want to give to an entire cohort, it is generally a good idea to give this feedback in the context of the assignment, rather than e.g. separately via a Forum. Moodle allows you to select some or all students and attach a single, common feedback file to their assignment feedback. This common feedback will appear to each student along with any other individual feedback files you have prepared for each.
- Prepare the single file of feedback.
- Click on the link to the Assignment; its summary page displays.
- Click View all submissions ; the assignment's Grading Table displays.
- Use the checkboxes to select all or some students to receive the feedback (you may first prefer to configure the Grading Table to show as many students as possible on a single page).
- Underneath the Grading Table click the With selected... menu, choose Send feedback files , then click Go ; a page displays a list of selected students above a file upload area.
- Upload the file of feedback you prepapred, or drag it to the arrow and wait for the file name to appear in the box.
- Click Send feedback files ; the Grading Table displays again.
- Check your file is in place by scrolling horizontally to the Feedback files column.
Keeping records (archiving, exporting, backing up)
When students unenrol from a Moodle area, their records become invisible through the Gradebook interface. In order to have the information to hand, departments or course teaching teams may need systems in place to keep their own records for the data retention period required in their particular context. There are two separate procedures for exporting student submissions and marks.
To export marks (with or without feedback):
- Go to your course administration block and click Grades.
- From the Grader Report Settings block, select Export; a menu displays.
- From the menu, if you need easy viewing and running calculations you probably want to select one of the spreadsheet formats; a page of export settings loads
- Use the Visible Groups pulldown menu to limit the export to specific groups, as required
- In Options, you indicate whether feedback comments are included
- In Grade Items To Be Included lists you can, if required, omit particular Activities from the report
- When you've finished with the settings, click on Submit; a preview of your export displays
- Click on Download to export to the format you chose, and save the file.
To download the original student submissions:
- In your course area, click the link to the Assignment whose submissions you want to download.
- Click on the link to View/Grade all submissions; the Grading Table will load.
- Click the link to 'Download all submissions' and save the file.
Tips and Tricks
- Want to use an Assignment activity again in another Moodle site? Use the backup and restore options.
- Want to use an Assignment activity in another course you teach? Use the Import function in the course administration block.
- Moodle will sometimes appear not to be uploading a resubmitted assignment - you seem to be downloading the original assignment. This is a cache issue, in short, go to "Tools > Clear Recent History" in Firefox or "Tools > Delete Browsing History > Delete Temporary Files" in Windows Explorer. The newer file will then appear.
Examples from School demo site
- Teacher view of a PDF assignment which can be annotated inline. Log in with username 'teacher' and password 'moodle'
- Teacher view of allocated markers and marking workflow status. Log in with username 'teacher' and password 'moodle'
- Student view of an assignment. Log in with username 'student' and password 'moodle'. Scroll down to see the rubric and feedback.
- Student view of a student submission statement Log in with username 'student' and password 'moodle'
- Student view of group assignment grading screen Log in with username 'student' and password 'moodle'
- Teacher view of a group assignment grading screen Log in with username 'teacher' and password 'moodle'.
- Teacher view of Anonymous submissions grading screen Log in with username 'teacher' and password 'moodle'
- One approach to group project grading blog post by Gavin Henrick
- Advantages of using Assignment upload over emailing a document forum discussion
University Library
- University Library Home
- Washington and Lee University Research Guides
Information Literacy Teaching Toolkit
- Research Assignment Design
- Information Literacy Toolkit
- Information Literacy
- Videos & Tutorials

Designing Effective Research Assignments
- Designing a Research Assignment
- Designing an Information Literacy Curriculum
Below are questions to ask yourself when designing an assignment that promotes information literacy and critical thinking skills.
- What will students learn as a result of completing this assignment?
- What are the information literacy student learning outcomes?
- What are the writing or presentation outcomes?
- What are the discipline-specific outcomes?
- Are these goals clear to students?
- Does our library have these resources? Are they freely and easily available elsewhere?
- Is there a link to the library (or other needed resources) in the assignment and/or syllabus?
- Is there a link to any related student services (peer tutoring, technology help desk, etc.) in the assignment and/or syllabus?
- Does this model a process students can repeat in the future? Is that clear to students?
- Is there space for students to reflect on what they are doing, which strategies are working and which aren’t?
- Does this provide enough time for students to be successful?
- Does it provide time for you to give feedback to students, and for students to revise and/or integrate that feedback into their next piece of work?
- Do you have grading criteria or a rubric to help you score student work? Is this available to students?
- Might you ask past students if you can use their work as a sample, or can you create your own?
- How will students access the sample(s)? Hand out in class, provide in Moodle, etc.?
Source: Greenfield Community College Library. “Information Literacy Toolkit for Faculty.” gcc.mass.edu, Greenfield Community College. Accessed 1 Jan. 2021.
Scaffolding and reinforcing information literacy skills and concepts throughout your courses and program, will allow students to develop and master their skill set. Below are a number of questions to think about while creating course and program materials.
- Is it clear to students how these skills connect to continued study and/or real life?
- What do they already know? Can you assume, or do you need to find out?
- Which information literacy skills do you need to teach, in addition to your course content?
- What can a librarian help teach?
- What needs to be done during class time (for face-to-face classes)?
- What can be done outside of class, as homework?
- What supports does the library already have available (i.e. Moodle plug-ins, videos, handouts, etc.)?
- If you want a librarian to teach, where does that fit in the course schedule?
- If not, what needs to change? Course content, the research assignment, or both?
Greenfield Community College Library. “Information Literacy Toolkit for Faculty.” gcc.mass.edu, Greenfield Community College. Accessed 1 Jan. 2021.
Ideas and Examples
- Classic Examples of Research Assignments
- Ideas for Research-related Assignments
Assignments below are linked to documents. Please feel to download and edit for your classroom or context and to remix assignments. A librarian would be happy to tailor a version of an assignment or scaffold research skills into your class.
Example of a short assignment that asks students to think critically about two news sources.
Example of an annotated bibliography assignment that asks students to think critically about their sources.
Example of a research paper abstract assignment that asks students to closely evaluate their topics and sources needed.
Example of an assignment that asks students to brainstorm and evaluate research questions.
Example of an assignment that asks to compare and evaluate various sources.
Example of an assignment that asks students to critically approach source use and paraphrasing.
Example of an assignment that asks students to detail the research process by recording search strategies and resources located.
Example of an assignment that asks students to choose and refine a research topic.
Example of an assignment that asks students to think critically about sources.
Example of an assignment that asks students to crucially evaluate their research topic by evalauting sources.
There are any number of library-related assignments that can be incorporated into a course. Here are a few examples that can be adapted to most subjects (assignments may be repeated across categories).
Critical Evaluations & Comparisons
- Locate a popular magazine article, then find a scholarly article on the same subject. Compare the two articles for content, style, bias, audience, etc.
- Analyze the content, style, and audience of three journals in a given discipline.
- Choose an autobiography of someone related to the course content. Find secondary sources which deal with an idea or event described in the autobiography. Compare and contrast the sources.
- Evaluate a website based on specific criteria.
- Determine the adequacy of a psychological test based on the literature about the test. Then develop a test battery designed for a particular clinical (or other) situation, by using published tests and the literature about them.
- To develop the ability to evaluate sources, students prepare a written criticism of the literature on a particular issue by finding book reviews, by searching citation indexes to see who is quoting the context of the scholarship in a particular field.
- Students use bibliographies, guides to the literature and the Internet to find primary sources on an issue or historical period. They can contrast the treatment in the primary sources with the treatment in secondary sources including their textbook.
- Write a newspaper story describing an event--political, social, cultural, whatever suits the objectives-based on their research. The assignment can be limited to one or two articles, or it can be more extensive. This is a good exercise in critical reading and in summarizing. The assignment gains interest if several people research the same event in different sources and compare the newspaper stories that result.
- Contrast journal articles or editorials from recent publications reflecting conservative and liberal tendencies.
- Write a review of a musical performance. Include reference not only to the performance attended, but to reviews of the composition's premiere, if possible. Place the composition in a historical context using timetables, general histories and memoirs when available, using this information to gain insight into its current presentation.
Fact-Finding Research
- Read an editorial and find facts to support it.
- In biology or health classes, assign each student a 'diagnosis' (can range from jock itch to Parkinson's Disease). Have them act as responsible patients by investigating both the diagnosis and the prescribed treatment. Results presented in a two-page paper should cover: a description of the condition and its symptoms; its etiology; its prognosis; the effectiveness of the prescribed treatment, its side effects and contradictions, along with the evidence; and, finally, a comparison of the relative effectiveness of alternate treatments. This can also be accompanied by oral or visual presentations, slideshow, poster session, etc.
- Students follow a piece of legislation through Congress. This exercise is designed primarily to help them understand the process of government. However it could also be used in something like a 'critical issues' course to follow the politics of a particular issue. (What groups are lobbying for or against a piece of legislation? How does campaign financing affect the final decision? etc.).
- Similar to the above, have students follow a particular foreign policy situation as it develops. Who are the organizations involved? What is the history of the issue? What are the ideological conflicts?
- Nominate someone or a group for the Nobel Peace Prize. Learn about the prize, the jury, etc. Justify the nominations.
- Write an exam on one area; answer some or all of the questions (depending on professor's preference). Turn in an annotated bibliography of source material, and rationale for questions.
Career-Based Research
- Assemble background information on a company or organization in preparation for a hypothetical interview. For those continuing in academia, research prospective colleagues' and professors' backgrounds, publications, current research, etc.
- Ask each student to describe a career they envision themselves in and then research the career choice. What are the leading companies in that area? Why? (If they choose something generic like secretarial or sales, what is the best company in their county of residence to work for? Why?) Choose a company and find out what its employment policies are-flex time, family leave, stock options. If the company is traded publicly, what is its net worth? What is the outlook for this occupation? Expected starting salary? How do the outlook and salaries vary by geography?
Personal Research
- Locate primary sources from the date of your birth. You may use one type type of material only once, i.e., one newspaper headline of a major event, one quotation, one biography, one census figure, one top musical number, one campus event, etc. Use a minimum of six different sources. Write a short annotation of each source and include the complete bibliographic citation.
Historical Research (for any subject)
- Select a scholar/researcher in a field of study and explore that person's career and ideas. Besides locating biographical information, students prepare a bibliography of writings and analyze the reaction of the scholarly community to the researcher's work.
- Pick a topic and research it in literature from the 60s and 70s. Then research the same topic in the literature of the 80s and 90s. Compare and contrast the topic in a bibliographic essay.
- Write a biographical sketch of a famous person. Use biographical dictionaries, popular press and scholarly sources, and books to find information about the person.
- Everyone becomes an historical figure for a day. Students research the person, time-period, culture, etc. They give an oral presentation in class and answer questions.
- Similar to the above, students adopt a persona and write letters or journal entries that person might have written. The level of research required to complete the assignment can range from minimal to a depth appropriate for advanced classes.
- News conferences offer good opportunities to add depth to research and thus might work particularly well with advanced students. A verbatim transcript of an analytical description of a news conference can serve as a format for simulated interviews with well known people of any period. What questions would contemporaries have asked? What questions would we now, with hindsight, want to ask? How would contemporary answers have differed from those that might be given today? Here students have an opportunity to take a rigorous, analytical approach, both in terms of the questions to be asked and the information contained in the answers.
Biographical Research
(annotated) bibliography variations.
- Prepare an annotated bibliography of books, journal articles, and other sources on a topic. Include evaluative annotations.
- Create a Web page on a narrow topic relevant to the course. Include meta sites, e-journals, discussion lists, and organizations.
- Update an existing bibliography or review of the literature.
- Compile an anthology of readings by one person or on one topic. Include an introduction with biographical information about the authors, and the rationale for including the works [justify with reviews or critical materials].
- Choose a topic of interest and search it on the Internet. Cross reference all search engines and find all websites which discuss the topic. Like a research paper, students will have to narrow and broaden accordingly. The student will then produce an annotated bibliography on the topic, based solely on internet references.
- Create an anthology. The model for this format is the annotated book of readings with which most students are familiar. In this case, however, rather than being given the anthology, they are asked to compile it themselves. The assignment can limit the acceptable content to scholarly articles written within the last ten years, or it can be broadened to include chapters or excerpts from monographs and significant older materials. Students should be asked to write an introduction to the anthology that would display an overall understanding of the subject. In addition, each item should be described, and an explanation given as to why it is included. The assignment could also require a bibliography of items considered for inclusion as well as copies of the items selected. In any subject course in which students would benefit from finding and reading a variety of scholarly, such an assignment would guarantee that they use their library skills to locate the articles, their critical reading skills to make the selections, and a variety of writing skills to produce the introduction, the summaries, and the explanations.
Literature Review Variations
- Each student in the class is given responsibility for dealing with a part of the subject of the course. He or she is then asked to 1) find out what the major reference sources on the subject are; 2) find out "who's doing what where" in the field; 3) list three major unresolved questions about the subject; 4) prepare a 15 minute oral presentation to introduce this aspect of the subject to the class.
- Conduct the research for a paper except for writing the final draft. At various times students are required to turn in 1) their choice of topic; 2) an annotated bibliography; 3) an outline; 4) a thesis statement; 5) an introduction and a conclusion.
- Write a grant proposal addressed to a specific funding agency; include supporting literature review, budget, etc. Have class peer groups review. (Best proposal could be submitted for funding of summer research).
Collins Memorial Library. “Ideas for Library-Related Assignments.” Pugetsound.edu, University of Puget Sound. Accessed 1 Jan. 2021.
- << Previous: Teaching Resources
- Next: Videos & Tutorials >>
- Last Updated: Sep 11, 2024 10:20 AM
- URL: https://libguides.wlu.edu/infolit
How to write software documentation ¶
As a software developer or engineer, there is a magical feeling that comes from releasing open-source code. The feeling is a mix of terror and excitement. You’re eager to tell the world about your new project but despair at where to start. Even professional writers know the mixed emotions caused by a blank page.
Good software documentation helps relieve that fear. So, have no fear! Use this guide to document your first open-source project for public release.
Why write software documentation? ¶
Understand your code in 6 months ¶.
Your code from 6 months ago looks like code that someone else wrote. Things that were obvious six months ago are now unclear, and you now empathize with potential users who need good documentation.
Get people to use your code ¶
Just like code comments explain the why and not the how , software documentation states the why behind the code. Good documentation solves a few common reasons people won’t use your code:
- They don’t know why your project exists or how it meets their needs.
- They can’t find how to install your code.
- They can’t see how to use your code.
Therefore, if you love your project, document it so others can use it.
Increase contributions to your code ¶
Potential contributors need help through documentation. Documentation also provides another way for people to contribute and, for people who have never contributed, documentation changes may be easier than code changes. Overall, without documentation, you impede or even lose contributors.
Improve your code ¶
The process of creating documentation requires focused thought that improves code design. Writing out API and design decisions allows you to formally think about them. Documentation also allows people to contribute code that follows your original intentions.
Improve your technical writing ¶
Technical writing is a useful skill for programmers, but it requires different writing skills than most people have naturally. Writing documentation makes you a better technical writer. Technical writing becomes easier over time so maintain your writing skill by documenting your projects.
Start simple to achieve the best results.
What to include in software documentation ¶
Give users the information they need, but not too much.
First, know which of these common audiences you’re writing for:
- Users - want to use your code and don’t care how it works.
- Developers - want to contribute to your code.
Importantly, beware of overusing Frequently Asked Questions (FAQs) as documentation. Although FAQs can be useful starter documentation for new projects until you have time to write better documentation, FAQs quickly outgrow their use due to many drawbacks:
- Become quickly outdated.
- Accumulate disparate content on unrelated topics.
- Become hard to sort and search through as content is added.
- Are rarely an actual list of frequently asked questions from real users.
- Tempt you to add content as a quick fix in lieu of creating actual, thorough documentation.
Show what problem your code solves ¶
People use your docs to learn about your project. Perhaps they will hear about your project from others or will find it from a search engine. Regardless, clearly state what your project does and why.
Fabric does a great job of this.
Provide a small code example ¶
Show a common example use case for your project.
Requests is a great example.
Link to your code and issue tracker ¶
People sometimes browse the code. They might want to file bugs for issues they’ve found, so make your code easy to contribute.
The Python Guide does a good job of this.
Tell people how to get support ¶
Whether from a mailing list or IRC Channel, document how to get help and interact with the community.
Django does a great job at this.
Show how to contribute ¶
People have their own expectations of how to contribute. Document your contribution process so that contributions follow the standards for your project.
Open Comparison does a great job of this.
Provide installation instructions ¶
Once people decide to use your code, they need to install and run it. Keep your install instructions to a couple of lines for the basic case. Link to a page with more information and any caveats.
Read the Docs does a good job with this.
State your project’s license ¶
BSD? MIT? GPL? A project’s license might not matter to you, but the people who want to use your code will care. Think about what you want to accomplish with your license and only pick one standard license.
Next steps for software documentation ¶
After following this guide, we know your code is ready for success! But, if you’d like to learn more, see how to maintain an open source project .
Tools for writing software documentation ¶
Programmers live in a world of plain text. Their documentation tooling and workflows should function similarly while being powerful and easy to use. Writing tools should turn plain text into pretty HTML and track changes to files.
A basic markup example ¶
This will render a nice HTML header and a list with automatically hyperlinked URLs. It’s easy to write and still makes sense as plain text.
Sidebar on markup languages.
The examples in this document are both valid Markdown and reStructuredText . reStructuredText is a bit harder to use, but is more powerful. Check them both out.
README template ¶
Your project’s README is often the first time users interact with your project. Therefore, having a solid README is key. Code hosting services automatically render your README into HTML if you provide the proper extension.
Some people even start a project with a README .
Below is a simple README template to start with. Name the file README.md to use markdown, or README.rst to use reStructuredText.

Write the Docs is a global community of people who care about documentation. We have a Slack community, conferences on 3 continents, and local meetups!
Quick search
Job postings, site content.
- Salary Surveys
- Software documentation guide
- Hiring guide
- Stay Connected
- About Our Organization
- Events and Activities
- Learning Resources
Join our mailing list
- Monthly Community Newsletter
- North American Conference Announcements
- European Conference Announcements
- Australian Conference Announcements
- Atlantic Conference Announcements
Missing something?
You can always contribute to our guide on GitHub .

- Help Center
- Assignments
- Privacy Policy
- Terms of Service
- Submit feedback
How can we help you?
Browse help topics.
This browser is no longer supported.
Upgrade to Microsoft Edge to take advantage of the latest features, security updates, and technical support.
Assignments Admin Documentation
- 5 contributors
Assignments
Assignments stores information that is generated both by teachers and students. All the data is co-shared between teacher and the specific student for which the information is intended in class. There are two stores of this, SharePoint and outside of SharePoint.
To view and manage Assignment settings, go to Education > Assignment settings in the Teams admin center.
The same rules also apply to first-party integrations such as Reading Progress.
Assignments data in SharePoint document libraries
Students' files associated with a Submission for Assignment are stored in a document library (named: Student Work ). Files associated with Assignments that are created by teachers and accessible by Students are stored in another document library (named: Class Files ) in the corresponding Class Team SharePoint site. First-party integrations may also store Assignments data in the same corresponding Class Team SharePoint site (named: Assignments title + time stamp ).
Files associated with the student
IT admins can use the Content Search tool to search for student files ( Student Work , Class Files , or other 1st-party integration files) that are related to assignment submissions and files that are related to assignments. For example, an admin could search all SharePoint sites in the organization and use the student’s name and class or assignment name in the search query to find data relevant to a data subject request (DSR).
Files associated with the teacher
IT admins can use the Content Search tool to search for teacher files ( Student Work , Class Files , or other 1st-party integration files) that are related to assignments as well as files distributed to students by the teachers within a class on assignments. For example, an admin could search all SharePoint sites in the organization and use the teacher's name and class or assignment name in the search query to find data relevant to a DSR.
Assignments data outside of SharePoint document libraries
Some data related to Assignments isn’t stored in the class team SharePoint site, which means it’s not discoverable with Content Search. This includes:
- Student grades and feedback from the teacher
- The list of documents submitted for an assignment by each student
- Assignment details like Due Date, etc.
- First-party integration data like Reading Progress passages or student pronunciation data
For this type of data, an IT admin or data owner, such as a teacher, may have to go into the Assignment in the class team to find data relevant to a DSR. The admin can add themselves as an owner to the class and view all the assignments for that class team.
If a student is no longer part of the class, their data might still be present in the class as no longer enrolled . The student will have to provide the tenant admin the list of such classes that they were ever a part of.
Bulk Export assignment data outside of SharePoint document libraries
Bulk export for a student.
To bulk export a single student's data, before removing the student from the classes they're a part of, run the script and provide the userId . If the student has been removed from the site, either the admin can add the student back to the class before running the script, or the admin can provide the userId and the classId that the student was ever a part of.
The data about the student submissions will be exported.
Bulk export for a teacher
Bulk Export assignment data works the same way for a student, but all submissions that the teacher has access to will be exported.
Bulk Delete assignment data outside of SharePoint document libraries
Bulk delete for a student.
To bulk delete a single student's data, before removing the student from the classes they're part of, run the script and provide the userId . If the student has been removed from the site, either the admin can add the student back to the class before running the script, or the admin can provide the userId and the classId that the student was ever a part of.
Providing a ClassId will allow the admin to only delete information about the student from a specific class.
Bulk delet for a teacher
Since an assignment's data for a teacher is shared across the class, there's no bulk delete option. Instead the admin can add themselves to the class, go to the app, and delete the assignment.
For more information, see Configure assignments for Teams .
Additional resources
- Python »
- 3.12.6 Documentation »
- The Python Language Reference »
- 7. Simple statements
- Theme Auto Light Dark |
7. Simple statements ¶
A simple statement is comprised within a single logical line. Several simple statements may occur on a single line separated by semicolons. The syntax for simple statements is:
7.1. Expression statements ¶
Expression statements are used (mostly interactively) to compute and write a value, or (usually) to call a procedure (a function that returns no meaningful result; in Python, procedures return the value None ). Other uses of expression statements are allowed and occasionally useful. The syntax for an expression statement is:
An expression statement evaluates the expression list (which may be a single expression).
In interactive mode, if the value is not None , it is converted to a string using the built-in repr() function and the resulting string is written to standard output on a line by itself (except if the result is None , so that procedure calls do not cause any output.)
7.2. Assignment statements ¶
Assignment statements are used to (re)bind names to values and to modify attributes or items of mutable objects:
(See section Primaries for the syntax definitions for attributeref , subscription , and slicing .)
An assignment statement evaluates the expression list (remember that this can be a single expression or a comma-separated list, the latter yielding a tuple) and assigns the single resulting object to each of the target lists, from left to right.
Assignment is defined recursively depending on the form of the target (list). When a target is part of a mutable object (an attribute reference, subscription or slicing), the mutable object must ultimately perform the assignment and decide about its validity, and may raise an exception if the assignment is unacceptable. The rules observed by various types and the exceptions raised are given with the definition of the object types (see section The standard type hierarchy ).
Assignment of an object to a target list, optionally enclosed in parentheses or square brackets, is recursively defined as follows.
If the target list is a single target with no trailing comma, optionally in parentheses, the object is assigned to that target.
If the target list contains one target prefixed with an asterisk, called a “starred” target: The object must be an iterable with at least as many items as there are targets in the target list, minus one. The first items of the iterable are assigned, from left to right, to the targets before the starred target. The final items of the iterable are assigned to the targets after the starred target. A list of the remaining items in the iterable is then assigned to the starred target (the list can be empty).
Else: The object must be an iterable with the same number of items as there are targets in the target list, and the items are assigned, from left to right, to the corresponding targets.
Assignment of an object to a single target is recursively defined as follows.
If the target is an identifier (name):
If the name does not occur in a global or nonlocal statement in the current code block: the name is bound to the object in the current local namespace.
Otherwise: the name is bound to the object in the global namespace or the outer namespace determined by nonlocal , respectively.
The name is rebound if it was already bound. This may cause the reference count for the object previously bound to the name to reach zero, causing the object to be deallocated and its destructor (if it has one) to be called.
If the target is an attribute reference: The primary expression in the reference is evaluated. It should yield an object with assignable attributes; if this is not the case, TypeError is raised. That object is then asked to assign the assigned object to the given attribute; if it cannot perform the assignment, it raises an exception (usually but not necessarily AttributeError ).
Note: If the object is a class instance and the attribute reference occurs on both sides of the assignment operator, the right-hand side expression, a.x can access either an instance attribute or (if no instance attribute exists) a class attribute. The left-hand side target a.x is always set as an instance attribute, creating it if necessary. Thus, the two occurrences of a.x do not necessarily refer to the same attribute: if the right-hand side expression refers to a class attribute, the left-hand side creates a new instance attribute as the target of the assignment:
This description does not necessarily apply to descriptor attributes, such as properties created with property() .
If the target is a subscription: The primary expression in the reference is evaluated. It should yield either a mutable sequence object (such as a list) or a mapping object (such as a dictionary). Next, the subscript expression is evaluated.
If the primary is a mutable sequence object (such as a list), the subscript must yield an integer. If it is negative, the sequence’s length is added to it. The resulting value must be a nonnegative integer less than the sequence’s length, and the sequence is asked to assign the assigned object to its item with that index. If the index is out of range, IndexError is raised (assignment to a subscripted sequence cannot add new items to a list).
If the primary is a mapping object (such as a dictionary), the subscript must have a type compatible with the mapping’s key type, and the mapping is then asked to create a key/value pair which maps the subscript to the assigned object. This can either replace an existing key/value pair with the same key value, or insert a new key/value pair (if no key with the same value existed).
For user-defined objects, the __setitem__() method is called with appropriate arguments.
If the target is a slicing: The primary expression in the reference is evaluated. It should yield a mutable sequence object (such as a list). The assigned object should be a sequence object of the same type. Next, the lower and upper bound expressions are evaluated, insofar they are present; defaults are zero and the sequence’s length. The bounds should evaluate to integers. If either bound is negative, the sequence’s length is added to it. The resulting bounds are clipped to lie between zero and the sequence’s length, inclusive. Finally, the sequence object is asked to replace the slice with the items of the assigned sequence. The length of the slice may be different from the length of the assigned sequence, thus changing the length of the target sequence, if the target sequence allows it.
CPython implementation detail: In the current implementation, the syntax for targets is taken to be the same as for expressions, and invalid syntax is rejected during the code generation phase, causing less detailed error messages.
Although the definition of assignment implies that overlaps between the left-hand side and the right-hand side are ‘simultaneous’ (for example a, b = b, a swaps two variables), overlaps within the collection of assigned-to variables occur left-to-right, sometimes resulting in confusion. For instance, the following program prints [0, 2] :
The specification for the *target feature.
7.2.1. Augmented assignment statements ¶
Augmented assignment is the combination, in a single statement, of a binary operation and an assignment statement:
(See section Primaries for the syntax definitions of the last three symbols.)
An augmented assignment evaluates the target (which, unlike normal assignment statements, cannot be an unpacking) and the expression list, performs the binary operation specific to the type of assignment on the two operands, and assigns the result to the original target. The target is only evaluated once.
An augmented assignment statement like x += 1 can be rewritten as x = x + 1 to achieve a similar, but not exactly equal effect. In the augmented version, x is only evaluated once. Also, when possible, the actual operation is performed in-place , meaning that rather than creating a new object and assigning that to the target, the old object is modified instead.
Unlike normal assignments, augmented assignments evaluate the left-hand side before evaluating the right-hand side. For example, a[i] += f(x) first looks-up a[i] , then it evaluates f(x) and performs the addition, and lastly, it writes the result back to a[i] .
With the exception of assigning to tuples and multiple targets in a single statement, the assignment done by augmented assignment statements is handled the same way as normal assignments. Similarly, with the exception of the possible in-place behavior, the binary operation performed by augmented assignment is the same as the normal binary operations.
For targets which are attribute references, the same caveat about class and instance attributes applies as for regular assignments.
7.2.2. Annotated assignment statements ¶
Annotation assignment is the combination, in a single statement, of a variable or attribute annotation and an optional assignment statement:
The difference from normal Assignment statements is that only a single target is allowed.
The assignment target is considered “simple” if it consists of a single name that is not enclosed in parentheses. For simple assignment targets, if in class or module scope, the annotations are evaluated and stored in a special class or module attribute __annotations__ that is a dictionary mapping from variable names (mangled if private) to evaluated annotations. This attribute is writable and is automatically created at the start of class or module body execution, if annotations are found statically.
If the assignment target is not simple (an attribute, subscript node, or parenthesized name), the annotation is evaluated if in class or module scope, but not stored.
If a name is annotated in a function scope, then this name is local for that scope. Annotations are never evaluated and stored in function scopes.
If the right hand side is present, an annotated assignment performs the actual assignment before evaluating annotations (where applicable). If the right hand side is not present for an expression target, then the interpreter evaluates the target except for the last __setitem__() or __setattr__() call.
The proposal that added syntax for annotating the types of variables (including class variables and instance variables), instead of expressing them through comments.
The proposal that added the typing module to provide a standard syntax for type annotations that can be used in static analysis tools and IDEs.
Changed in version 3.8: Now annotated assignments allow the same expressions in the right hand side as regular assignments. Previously, some expressions (like un-parenthesized tuple expressions) caused a syntax error.
7.3. The assert statement ¶
Assert statements are a convenient way to insert debugging assertions into a program:
The simple form, assert expression , is equivalent to
The extended form, assert expression1, expression2 , is equivalent to
These equivalences assume that __debug__ and AssertionError refer to the built-in variables with those names. In the current implementation, the built-in variable __debug__ is True under normal circumstances, False when optimization is requested (command line option -O ). The current code generator emits no code for an assert statement when optimization is requested at compile time. Note that it is unnecessary to include the source code for the expression that failed in the error message; it will be displayed as part of the stack trace.
Assignments to __debug__ are illegal. The value for the built-in variable is determined when the interpreter starts.
7.4. The pass statement ¶
pass is a null operation — when it is executed, nothing happens. It is useful as a placeholder when a statement is required syntactically, but no code needs to be executed, for example:
7.5. The del statement ¶
Deletion is recursively defined very similar to the way assignment is defined. Rather than spelling it out in full details, here are some hints.
Deletion of a target list recursively deletes each target, from left to right.
Deletion of a name removes the binding of that name from the local or global namespace, depending on whether the name occurs in a global statement in the same code block. If the name is unbound, a NameError exception will be raised.
Deletion of attribute references, subscriptions and slicings is passed to the primary object involved; deletion of a slicing is in general equivalent to assignment of an empty slice of the right type (but even this is determined by the sliced object).
Changed in version 3.2: Previously it was illegal to delete a name from the local namespace if it occurs as a free variable in a nested block.
7.6. The return statement ¶
return may only occur syntactically nested in a function definition, not within a nested class definition.
If an expression list is present, it is evaluated, else None is substituted.
return leaves the current function call with the expression list (or None ) as return value.
When return passes control out of a try statement with a finally clause, that finally clause is executed before really leaving the function.
In a generator function, the return statement indicates that the generator is done and will cause StopIteration to be raised. The returned value (if any) is used as an argument to construct StopIteration and becomes the StopIteration.value attribute.
In an asynchronous generator function, an empty return statement indicates that the asynchronous generator is done and will cause StopAsyncIteration to be raised. A non-empty return statement is a syntax error in an asynchronous generator function.
7.7. The yield statement ¶
A yield statement is semantically equivalent to a yield expression . The yield statement can be used to omit the parentheses that would otherwise be required in the equivalent yield expression statement. For example, the yield statements
are equivalent to the yield expression statements
Yield expressions and statements are only used when defining a generator function, and are only used in the body of the generator function. Using yield in a function definition is sufficient to cause that definition to create a generator function instead of a normal function.
For full details of yield semantics, refer to the Yield expressions section.
7.8. The raise statement ¶
If no expressions are present, raise re-raises the exception that is currently being handled, which is also known as the active exception . If there isn’t currently an active exception, a RuntimeError exception is raised indicating that this is an error.
Otherwise, raise evaluates the first expression as the exception object. It must be either a subclass or an instance of BaseException . If it is a class, the exception instance will be obtained when needed by instantiating the class with no arguments.
The type of the exception is the exception instance’s class, the value is the instance itself.
A traceback object is normally created automatically when an exception is raised and attached to it as the __traceback__ attribute. You can create an exception and set your own traceback in one step using the with_traceback() exception method (which returns the same exception instance, with its traceback set to its argument), like so:
The from clause is used for exception chaining: if given, the second expression must be another exception class or instance. If the second expression is an exception instance, it will be attached to the raised exception as the __cause__ attribute (which is writable). If the expression is an exception class, the class will be instantiated and the resulting exception instance will be attached to the raised exception as the __cause__ attribute. If the raised exception is not handled, both exceptions will be printed:
A similar mechanism works implicitly if a new exception is raised when an exception is already being handled. An exception may be handled when an except or finally clause, or a with statement, is used. The previous exception is then attached as the new exception’s __context__ attribute:
Exception chaining can be explicitly suppressed by specifying None in the from clause:
Additional information on exceptions can be found in section Exceptions , and information about handling exceptions is in section The try statement .
Changed in version 3.3: None is now permitted as Y in raise X from Y .
Added the __suppress_context__ attribute to suppress automatic display of the exception context.
Changed in version 3.11: If the traceback of the active exception is modified in an except clause, a subsequent raise statement re-raises the exception with the modified traceback. Previously, the exception was re-raised with the traceback it had when it was caught.
7.9. The break statement ¶
break may only occur syntactically nested in a for or while loop, but not nested in a function or class definition within that loop.
It terminates the nearest enclosing loop, skipping the optional else clause if the loop has one.
If a for loop is terminated by break , the loop control target keeps its current value.
When break passes control out of a try statement with a finally clause, that finally clause is executed before really leaving the loop.
7.10. The continue statement ¶
continue may only occur syntactically nested in a for or while loop, but not nested in a function or class definition within that loop. It continues with the next cycle of the nearest enclosing loop.
When continue passes control out of a try statement with a finally clause, that finally clause is executed before really starting the next loop cycle.
7.11. The import statement ¶
The basic import statement (no from clause) is executed in two steps:
find a module, loading and initializing it if necessary
define a name or names in the local namespace for the scope where the import statement occurs.
When the statement contains multiple clauses (separated by commas) the two steps are carried out separately for each clause, just as though the clauses had been separated out into individual import statements.
The details of the first step, finding and loading modules, are described in greater detail in the section on the import system , which also describes the various types of packages and modules that can be imported, as well as all the hooks that can be used to customize the import system. Note that failures in this step may indicate either that the module could not be located, or that an error occurred while initializing the module, which includes execution of the module’s code.
If the requested module is retrieved successfully, it will be made available in the local namespace in one of three ways:
If the module name is followed by as , then the name following as is bound directly to the imported module.
If no other name is specified, and the module being imported is a top level module, the module’s name is bound in the local namespace as a reference to the imported module
If the module being imported is not a top level module, then the name of the top level package that contains the module is bound in the local namespace as a reference to the top level package. The imported module must be accessed using its full qualified name rather than directly
The from form uses a slightly more complex process:
find the module specified in the from clause, loading and initializing it if necessary;
for each of the identifiers specified in the import clauses:
check if the imported module has an attribute by that name
if not, attempt to import a submodule with that name and then check the imported module again for that attribute
if the attribute is not found, ImportError is raised.
otherwise, a reference to that value is stored in the local namespace, using the name in the as clause if it is present, otherwise using the attribute name
If the list of identifiers is replaced by a star ( '*' ), all public names defined in the module are bound in the local namespace for the scope where the import statement occurs.
The public names defined by a module are determined by checking the module’s namespace for a variable named __all__ ; if defined, it must be a sequence of strings which are names defined or imported by that module. The names given in __all__ are all considered public and are required to exist. If __all__ is not defined, the set of public names includes all names found in the module’s namespace which do not begin with an underscore character ( '_' ). __all__ should contain the entire public API. It is intended to avoid accidentally exporting items that are not part of the API (such as library modules which were imported and used within the module).
The wild card form of import — from module import * — is only allowed at the module level. Attempting to use it in class or function definitions will raise a SyntaxError .
When specifying what module to import you do not have to specify the absolute name of the module. When a module or package is contained within another package it is possible to make a relative import within the same top package without having to mention the package name. By using leading dots in the specified module or package after from you can specify how high to traverse up the current package hierarchy without specifying exact names. One leading dot means the current package where the module making the import exists. Two dots means up one package level. Three dots is up two levels, etc. So if you execute from . import mod from a module in the pkg package then you will end up importing pkg.mod . If you execute from ..subpkg2 import mod from within pkg.subpkg1 you will import pkg.subpkg2.mod . The specification for relative imports is contained in the Package Relative Imports section.
importlib.import_module() is provided to support applications that determine dynamically the modules to be loaded.
Raises an auditing event import with arguments module , filename , sys.path , sys.meta_path , sys.path_hooks .
7.11.1. Future statements ¶
A future statement is a directive to the compiler that a particular module should be compiled using syntax or semantics that will be available in a specified future release of Python where the feature becomes standard.
The future statement is intended to ease migration to future versions of Python that introduce incompatible changes to the language. It allows use of the new features on a per-module basis before the release in which the feature becomes standard.
A future statement must appear near the top of the module. The only lines that can appear before a future statement are:
the module docstring (if any),
blank lines, and
other future statements.
The only feature that requires using the future statement is annotations (see PEP 563 ).
All historical features enabled by the future statement are still recognized by Python 3. The list includes absolute_import , division , generators , generator_stop , unicode_literals , print_function , nested_scopes and with_statement . They are all redundant because they are always enabled, and only kept for backwards compatibility.
A future statement is recognized and treated specially at compile time: Changes to the semantics of core constructs are often implemented by generating different code. It may even be the case that a new feature introduces new incompatible syntax (such as a new reserved word), in which case the compiler may need to parse the module differently. Such decisions cannot be pushed off until runtime.
For any given release, the compiler knows which feature names have been defined, and raises a compile-time error if a future statement contains a feature not known to it.
The direct runtime semantics are the same as for any import statement: there is a standard module __future__ , described later, and it will be imported in the usual way at the time the future statement is executed.
The interesting runtime semantics depend on the specific feature enabled by the future statement.
Note that there is nothing special about the statement:
That is not a future statement; it’s an ordinary import statement with no special semantics or syntax restrictions.
Code compiled by calls to the built-in functions exec() and compile() that occur in a module M containing a future statement will, by default, use the new syntax or semantics associated with the future statement. This can be controlled by optional arguments to compile() — see the documentation of that function for details.
A future statement typed at an interactive interpreter prompt will take effect for the rest of the interpreter session. If an interpreter is started with the -i option, is passed a script name to execute, and the script includes a future statement, it will be in effect in the interactive session started after the script is executed.
The original proposal for the __future__ mechanism.
7.12. The global statement ¶
The global statement is a declaration which holds for the entire current code block. It means that the listed identifiers are to be interpreted as globals. It would be impossible to assign to a global variable without global , although free variables may refer to globals without being declared global.
Names listed in a global statement must not be used in the same code block textually preceding that global statement.
Names listed in a global statement must not be defined as formal parameters, or as targets in with statements or except clauses, or in a for target list, class definition, function definition, import statement, or variable annotation.
CPython implementation detail: The current implementation does not enforce some of these restrictions, but programs should not abuse this freedom, as future implementations may enforce them or silently change the meaning of the program.
Programmer’s note: global is a directive to the parser. It applies only to code parsed at the same time as the global statement. In particular, a global statement contained in a string or code object supplied to the built-in exec() function does not affect the code block containing the function call, and code contained in such a string is unaffected by global statements in the code containing the function call. The same applies to the eval() and compile() functions.
7.13. The nonlocal statement ¶
When the definition of a function or class is nested (enclosed) within the definitions of other functions, its nonlocal scopes are the local scopes of the enclosing functions. The nonlocal statement causes the listed identifiers to refer to names previously bound in nonlocal scopes. It allows encapsulated code to rebind such nonlocal identifiers. If a name is bound in more than one nonlocal scope, the nearest binding is used. If a name is not bound in any nonlocal scope, or if there is no nonlocal scope, a SyntaxError is raised.
The nonlocal statement applies to the entire scope of a function or class body. A SyntaxError is raised if a variable is used or assigned to prior to its nonlocal declaration in the scope.
The specification for the nonlocal statement.
Programmer’s note: nonlocal is a directive to the parser and applies only to code parsed along with it. See the note for the global statement.
7.14. The type statement ¶
The type statement declares a type alias, which is an instance of typing.TypeAliasType .
For example, the following statement creates a type alias:
This code is roughly equivalent to:
annotation-def indicates an annotation scope , which behaves mostly like a function, but with several small differences.
The value of the type alias is evaluated in the annotation scope. It is not evaluated when the type alias is created, but only when the value is accessed through the type alias’s __value__ attribute (see Lazy evaluation ). This allows the type alias to refer to names that are not yet defined.
Type aliases may be made generic by adding a type parameter list after the name. See Generic type aliases for more.
type is a soft keyword .
Added in version 3.12.
Introduced the type statement and syntax for generic classes and functions.
Table of Contents
- 7.1. Expression statements
- 7.2.1. Augmented assignment statements
- 7.2.2. Annotated assignment statements
- 7.3. The assert statement
- 7.4. The pass statement
- 7.5. The del statement
- 7.6. The return statement
- 7.7. The yield statement
- 7.8. The raise statement
- 7.9. The break statement
- 7.10. The continue statement
- 7.11.1. Future statements
- 7.12. The global statement
- 7.13. The nonlocal statement
- 7.14. The type statement
Previous topic
6. Expressions
8. Compound statements
- Report a Bug
- Show Source
Eloquent: Getting Started
Introduction, generating model classes, table names, primary keys, uuid and ulid keys, database connections, default attribute values, configuring eloquent strictness, collections, chunking results.
- Chunk Using Lazy Collections
Advanced Subqueries
Retrieving or creating models, retrieving aggregates, mass assignment, soft deleting, querying soft deleted models, pruning models, replicating models, global scopes, local scopes, comparing models, using closures, muting events.
Laravel includes Eloquent, an object-relational mapper (ORM) that makes it enjoyable to interact with your database. When using Eloquent, each database table has a corresponding "Model" that is used to interact with that table. In addition to retrieving records from the database table, Eloquent models allow you to insert, update, and delete records from the table as well.
Before getting started, be sure to configure a database connection in your application's config/database.php configuration file. For more information on configuring your database, check out the database configuration documentation .
Laravel Bootcamp
If you're new to Laravel, feel free to jump into the Laravel Bootcamp . The Laravel Bootcamp will walk you through building your first Laravel application using Eloquent. It's a great way to get a tour of everything that Laravel and Eloquent have to offer.
To get started, let's create an Eloquent model. Models typically live in the app\Models directory and extend the Illuminate\Database\Eloquent\Model class. You may use the make:model Artisan command to generate a new model:
If you would like to generate a database migration when you generate the model, you may use the --migration or -m option:
You may generate various other types of classes when generating a model, such as factories, seeders, policies, controllers, and form requests. In addition, these options may be combined to create multiple classes at once:
Inspecting Models
Sometimes it can be difficult to determine all of a model's available attributes and relationships just by skimming its code. Instead, try the model:show Artisan command, which provides a convenient overview of all the model's attributes and relations:
Eloquent Model Conventions
Models generated by the make:model command will be placed in the app/Models directory. Let's examine a basic model class and discuss some of Eloquent's key conventions:
After glancing at the example above, you may have noticed that we did not tell Eloquent which database table corresponds to our Flight model. By convention, the "snake case", plural name of the class will be used as the table name unless another name is explicitly specified. So, in this case, Eloquent will assume the Flight model stores records in the flights table, while an AirTrafficController model would store records in an air_traffic_controllers table.
If your model's corresponding database table does not fit this convention, you may manually specify the model's table name by defining a table property on the model:
Eloquent will also assume that each model's corresponding database table has a primary key column named id . If necessary, you may define a protected $primaryKey property on your model to specify a different column that serves as your model's primary key:
In addition, Eloquent assumes that the primary key is an incrementing integer value, which means that Eloquent will automatically cast the primary key to an integer. If you wish to use a non-incrementing or a non-numeric primary key you must define a public $incrementing property on your model that is set to false :
If your model's primary key is not an integer, you should define a protected $keyType property on your model. This property should have a value of string :
"Composite" Primary Keys
Eloquent requires each model to have at least one uniquely identifying "ID" that can serve as its primary key. "Composite" primary keys are not supported by Eloquent models. However, you are free to add additional multi-column, unique indexes to your database tables in addition to the table's uniquely identifying primary key.
Instead of using auto-incrementing integers as your Eloquent model's primary keys, you may choose to use UUIDs instead. UUIDs are universally unique alpha-numeric identifiers that are 36 characters long.
If you would like a model to use a UUID key instead of an auto-incrementing integer key, you may use the Illuminate\Database\Eloquent\Concerns\HasUuids trait on the model. Of course, you should ensure that the model has a UUID equivalent primary key column :
By default, The HasUuids trait will generate "ordered" UUIDs for your models. These UUIDs are more efficient for indexed database storage because they can be sorted lexicographically.
You can override the UUID generation process for a given model by defining a newUniqueId method on the model. In addition, you may specify which columns should receive UUIDs by defining a uniqueIds method on the model:
If you wish, you may choose to utilize "ULIDs" instead of UUIDs. ULIDs are similar to UUIDs; however, they are only 26 characters in length. Like ordered UUIDs, ULIDs are lexicographically sortable for efficient database indexing. To utilize ULIDs, you should use the Illuminate\Database\Eloquent\Concerns\HasUlids trait on your model. You should also ensure that the model has a ULID equivalent primary key column :
By default, Eloquent expects created_at and updated_at columns to exist on your model's corresponding database table. Eloquent will automatically set these column's values when models are created or updated. If you do not want these columns to be automatically managed by Eloquent, you should define a $timestamps property on your model with a value of false :
If you need to customize the format of your model's timestamps, set the $dateFormat property on your model. This property determines how date attributes are stored in the database as well as their format when the model is serialized to an array or JSON:
If you need to customize the names of the columns used to store the timestamps, you may define CREATED_AT and UPDATED_AT constants on your model:
If you would like to perform model operations without the model having its updated_at timestamp modified, you may operate on the model within a closure given to the withoutTimestamps method:
By default, all Eloquent models will use the default database connection that is configured for your application. If you would like to specify a different connection that should be used when interacting with a particular model, you should define a $connection property on the model:
By default, a newly instantiated model instance will not contain any attribute values. If you would like to define the default values for some of your model's attributes, you may define an $attributes property on your model. Attribute values placed in the $attributes array should be in their raw, "storable" format as if they were just read from the database:
Laravel offers several methods that allow you to configure Eloquent's behavior and "strictness" in a variety of situations.
First, the preventLazyLoading method accepts an optional boolean argument that indicates if lazy loading should be prevented. For example, you may wish to only disable lazy loading in non-production environments so that your production environment will continue to function normally even if a lazy loaded relationship is accidentally present in production code. Typically, this method should be invoked in the boot method of your application's AppServiceProvider :
Also, you may instruct Laravel to throw an exception when attempting to fill an unfillable attribute by invoking the preventSilentlyDiscardingAttributes method. This can help prevent unexpected errors during local development when attempting to set an attribute that has not been added to the model's fillable array:
Retrieving Models
Once you have created a model and its associated database table , you are ready to start retrieving data from your database. You can think of each Eloquent model as a powerful query builder allowing you to fluently query the database table associated with the model. The model's all method will retrieve all of the records from the model's associated database table:
Building Queries
The Eloquent all method will return all of the results in the model's table. However, since each Eloquent model serves as a query builder , you may add additional constraints to queries and then invoke the get method to retrieve the results:
Since Eloquent models are query builders, you should review all of the methods provided by Laravel's query builder . You may use any of these methods when writing your Eloquent queries.
Refreshing Models
If you already have an instance of an Eloquent model that was retrieved from the database, you can "refresh" the model using the fresh and refresh methods. The fresh method will re-retrieve the model from the database. The existing model instance will not be affected:
The refresh method will re-hydrate the existing model using fresh data from the database. In addition, all of its loaded relationships will be refreshed as well:
As we have seen, Eloquent methods like all and get retrieve multiple records from the database. However, these methods don't return a plain PHP array. Instead, an instance of Illuminate\Database\Eloquent\Collection is returned.
The Eloquent Collection class extends Laravel's base Illuminate\Support\Collection class, which provides a variety of helpful methods for interacting with data collections. For example, the reject method may be used to remove models from a collection based on the results of an invoked closure:
In addition to the methods provided by Laravel's base collection class, the Eloquent collection class provides a few extra methods that are specifically intended for interacting with collections of Eloquent models.
Since all of Laravel's collections implement PHP's iterable interfaces, you may loop over collections as if they were an array:
Your application may run out of memory if you attempt to load tens of thousands of Eloquent records via the all or get methods. Instead of using these methods, the chunk method may be used to process large numbers of models more efficiently.
The chunk method will retrieve a subset of Eloquent models, passing them to a closure for processing. Since only the current chunk of Eloquent models is retrieved at a time, the chunk method will provide significantly reduced memory usage when working with a large number of models:
The first argument passed to the chunk method is the number of records you wish to receive per "chunk". The closure passed as the second argument will be invoked for each chunk that is retrieved from the database. A database query will be executed to retrieve each chunk of records passed to the closure.
If you are filtering the results of the chunk method based on a column that you will also be updating while iterating over the results, you should use the chunkById method. Using the chunk method in these scenarios could lead to unexpected and inconsistent results. Internally, the chunkById method will always retrieve models with an id column greater than the last model in the previous chunk:
Chunking Using Lazy Collections
The lazy method works similarly to the chunk method in the sense that, behind the scenes, it executes the query in chunks. However, instead of passing each chunk directly into a callback as is, the lazy method returns a flattened LazyCollection of Eloquent models, which lets you interact with the results as a single stream:
If you are filtering the results of the lazy method based on a column that you will also be updating while iterating over the results, you should use the lazyById method. Internally, the lazyById method will always retrieve models with an id column greater than the last model in the previous chunk:
You may filter the results based on the descending order of the id using the lazyByIdDesc method.
Similar to the lazy method, the cursor method may be used to significantly reduce your application's memory consumption when iterating through tens of thousands of Eloquent model records.
The cursor method will only execute a single database query; however, the individual Eloquent models will not be hydrated until they are actually iterated over. Therefore, only one Eloquent model is kept in memory at any given time while iterating over the cursor.
Since the cursor method only ever holds a single Eloquent model in memory at a time, it cannot eager load relationships. If you need to eager load relationships, consider using the lazy method instead.
Internally, the cursor method uses PHP generators to implement this functionality:
The cursor returns an Illuminate\Support\LazyCollection instance. Lazy collections allow you to use many of the collection methods available on typical Laravel collections while only loading a single model into memory at a time:
Although the cursor method uses far less memory than a regular query (by only holding a single Eloquent model in memory at a time), it will still eventually run out of memory. This is due to PHP's PDO driver internally caching all raw query results in its buffer . If you're dealing with a very large number of Eloquent records, consider using the lazy method instead.
Subquery Selects
Eloquent also offers advanced subquery support, which allows you to pull information from related tables in a single query. For example, let's imagine that we have a table of flight destinations and a table of flights to destinations. The flights table contains an arrived_at column which indicates when the flight arrived at the destination.
Using the subquery functionality available to the query builder's select and addSelect methods, we can select all of the destinations and the name of the flight that most recently arrived at that destination using a single query:
Subquery Ordering
In addition, the query builder's orderBy function supports subqueries. Continuing to use our flight example, we may use this functionality to sort all destinations based on when the last flight arrived at that destination. Again, this may be done while executing a single database query:
Retrieving Single Models / Aggregates
In addition to retrieving all of the records matching a given query, you may also retrieve single records using the find , first , or firstWhere methods. Instead of returning a collection of models, these methods return a single model instance:
Sometimes you may wish to perform some other action if no results are found. The findOr and firstOr methods will return a single model instance or, if no results are found, execute the given closure. The value returned by the closure will be considered the result of the method:
Not Found Exceptions
Sometimes you may wish to throw an exception if a model is not found. This is particularly useful in routes or controllers. The findOrFail and firstOrFail methods will retrieve the first result of the query; however, if no result is found, an Illuminate\Database\Eloquent\ModelNotFoundException will be thrown:
If the ModelNotFoundException is not caught, a 404 HTTP response is automatically sent back to the client:
The firstOrCreate method will attempt to locate a database record using the given column / value pairs. If the model can not be found in the database, a record will be inserted with the attributes resulting from merging the first array argument with the optional second array argument:
The firstOrNew method, like firstOrCreate , will attempt to locate a record in the database matching the given attributes. However, if a model is not found, a new model instance will be returned. Note that the model returned by firstOrNew has not yet been persisted to the database. You will need to manually call the save method to persist it:
When interacting with Eloquent models, you may also use the count , sum , max , and other aggregate methods provided by the Laravel query builder . As you might expect, these methods return a scalar value instead of an Eloquent model instance:
Inserting and Updating Models
Of course, when using Eloquent, we don't only need to retrieve models from the database. We also need to insert new records. Thankfully, Eloquent makes it simple. To insert a new record into the database, you should instantiate a new model instance and set attributes on the model. Then, call the save method on the model instance:
In this example, we assign the name field from the incoming HTTP request to the name attribute of the App\Models\Flight model instance. When we call the save method, a record will be inserted into the database. The model's created_at and updated_at timestamps will automatically be set when the save method is called, so there is no need to set them manually.
Alternatively, you may use the create method to "save" a new model using a single PHP statement. The inserted model instance will be returned to you by the create method:
However, before using the create method, you will need to specify either a fillable or guarded property on your model class. These properties are required because all Eloquent models are protected against mass assignment vulnerabilities by default. To learn more about mass assignment, please consult the mass assignment documentation .
The save method may also be used to update models that already exist in the database. To update a model, you should retrieve it and set any attributes you wish to update. Then, you should call the model's save method. Again, the updated_at timestamp will automatically be updated, so there is no need to manually set its value:
Occasionally, you may need to update an existing model or create a new model if no matching model exists. Like the firstOrCreate method, the updateOrCreate method persists the model, so there's no need to manually call the save method.
In the example below, if a flight exists with a departure location of Oakland and a destination location of San Diego , its price and discounted columns will be updated. If no such flight exists, a new flight will be created which has the attributes resulting from merging the first argument array with the second argument array:
Mass Updates
Updates can also be performed against models that match a given query. In this example, all flights that are active and have a destination of San Diego will be marked as delayed:
The update method expects an array of column and value pairs representing the columns that should be updated. The update method returns the number of affected rows.
When issuing a mass update via Eloquent, the saving , saved , updating , and updated model events will not be fired for the updated models. This is because the models are never actually retrieved when issuing a mass update.
Examining Attribute Changes
Eloquent provides the isDirty , isClean , and wasChanged methods to examine the internal state of your model and determine how its attributes have changed from when the model was originally retrieved.
The isDirty method determines if any of the model's attributes have been changed since the model was retrieved. You may pass a specific attribute name or an array of attributes to the isDirty method to determine if any of the attributes are "dirty". The isClean method will determine if an attribute has remained unchanged since the model was retrieved. This method also accepts an optional attribute argument:
The wasChanged method determines if any attributes were changed when the model was last saved within the current request cycle. If needed, you may pass an attribute name to see if a particular attribute was changed:
The getOriginal method returns an array containing the original attributes of the model regardless of any changes to the model since it was retrieved. If needed, you may pass a specific attribute name to get the original value of a particular attribute:
You may use the create method to "save" a new model using a single PHP statement. The inserted model instance will be returned to you by the method:
However, before using the create method, you will need to specify either a fillable or guarded property on your model class. These properties are required because all Eloquent models are protected against mass assignment vulnerabilities by default.
A mass assignment vulnerability occurs when a user passes an unexpected HTTP request field and that field changes a column in your database that you did not expect. For example, a malicious user might send an is_admin parameter through an HTTP request, which is then passed to your model's create method, allowing the user to escalate themselves to an administrator.
So, to get started, you should define which model attributes you want to make mass assignable. You may do this using the $fillable property on the model. For example, let's make the name attribute of our Flight model mass assignable:
Once you have specified which attributes are mass assignable, you may use the create method to insert a new record in the database. The create method returns the newly created model instance:
If you already have a model instance, you may use the fill method to populate it with an array of attributes:
Mass Assignment and JSON Columns
When assigning JSON columns, each column's mass assignable key must be specified in your model's $fillable array. For security, Laravel does not support updating nested JSON attributes when using the guarded property:
Allowing Mass Assignment
If you would like to make all of your attributes mass assignable, you may define your model's $guarded property as an empty array. If you choose to unguard your model, you should take special care to always hand-craft the arrays passed to Eloquent's fill , create , and update methods:
Mass Assignment Exceptions
By default, attributes that are not included in the $fillable array are silently discarded when performing mass-assignment operations. In production, this is expected behavior; however, during local development it can lead to confusion as to why model changes are not taking effect.
If you wish, you may instruct Laravel to throw an exception when attempting to fill an unfillable attribute by invoking the preventSilentlyDiscardingAttributes method. Typically, this method should be invoked in the boot method of your application's AppServiceProvider class:
Eloquent's upsert method may be used to update or create records in a single, atomic operation. The method's first argument consists of the values to insert or update, while the second argument lists the column(s) that uniquely identify records within the associated table. The method's third and final argument is an array of the columns that should be updated if a matching record already exists in the database. The upsert method will automatically set the created_at and updated_at timestamps if timestamps are enabled on the model:
All databases except SQL Server require the columns in the second argument of the upsert method to have a "primary" or "unique" index. In addition, the MariaDB and MySQL database drivers ignore the second argument of the upsert method and always use the "primary" and "unique" indexes of the table to detect existing records.
Deleting Models
To delete a model, you may call the delete method on the model instance:
You may call the truncate method to delete all of the model's associated database records. The truncate operation will also reset any auto-incrementing IDs on the model's associated table:
Deleting an Existing Model by its Primary Key
In the example above, we are retrieving the model from the database before calling the delete method. However, if you know the primary key of the model, you may delete the model without explicitly retrieving it by calling the destroy method. In addition to accepting the single primary key, the destroy method will accept multiple primary keys, an array of primary keys, or a collection of primary keys:
If you are utilizing soft deleting models , you may permanently delete models via the forceDestroy method:
The destroy method loads each model individually and calls the delete method so that the deleting and deleted events are properly dispatched for each model.
Deleting Models Using Queries
Of course, you may build an Eloquent query to delete all models matching your query's criteria. In this example, we will delete all flights that are marked as inactive. Like mass updates, mass deletes will not dispatch model events for the models that are deleted:
When executing a mass delete statement via Eloquent, the deleting and deleted model events will not be dispatched for the deleted models. This is because the models are never actually retrieved when executing the delete statement.
In addition to actually removing records from your database, Eloquent can also "soft delete" models. When models are soft deleted, they are not actually removed from your database. Instead, a deleted_at attribute is set on the model indicating the date and time at which the model was "deleted". To enable soft deletes for a model, add the Illuminate\Database\Eloquent\SoftDeletes trait to the model:
The SoftDeletes trait will automatically cast the deleted_at attribute to a DateTime / Carbon instance for you.
You should also add the deleted_at column to your database table. The Laravel schema builder contains a helper method to create this column:
Now, when you call the delete method on the model, the deleted_at column will be set to the current date and time. However, the model's database record will be left in the table. When querying a model that uses soft deletes, the soft deleted models will automatically be excluded from all query results.
To determine if a given model instance has been soft deleted, you may use the trashed method:
Restoring Soft Deleted Models
Sometimes you may wish to "un-delete" a soft deleted model. To restore a soft deleted model, you may call the restore method on a model instance. The restore method will set the model's deleted_at column to null :
You may also use the restore method in a query to restore multiple models. Again, like other "mass" operations, this will not dispatch any model events for the models that are restored:
The restore method may also be used when building relationship queries:
Permanently Deleting Models
Sometimes you may need to truly remove a model from your database. You may use the forceDelete method to permanently remove a soft deleted model from the database table:
You may also use the forceDelete method when building Eloquent relationship queries:
Including Soft Deleted Models
As noted above, soft deleted models will automatically be excluded from query results. However, you may force soft deleted models to be included in a query's results by calling the withTrashed method on the query:
The withTrashed method may also be called when building a relationship query:
Retrieving Only Soft Deleted Models
The onlyTrashed method will retrieve only soft deleted models:
Sometimes you may want to periodically delete models that are no longer needed. To accomplish this, you may add the Illuminate\Database\Eloquent\Prunable or Illuminate\Database\Eloquent\MassPrunable trait to the models you would like to periodically prune. After adding one of the traits to the model, implement a prunable method which returns an Eloquent query builder that resolves the models that are no longer needed:
When marking models as Prunable , you may also define a pruning method on the model. This method will be called before the model is deleted. This method can be useful for deleting any additional resources associated with the model, such as stored files, before the model is permanently removed from the database:
After configuring your prunable model, you should schedule the model:prune Artisan command in your application's routes/console.php file. You are free to choose the appropriate interval at which this command should be run:
Behind the scenes, the model:prune command will automatically detect "Prunable" models within your application's app/Models directory. If your models are in a different location, you may use the --model option to specify the model class names:
If you wish to exclude certain models from being pruned while pruning all other detected models, you may use the --except option:
You may test your prunable query by executing the model:prune command with the --pretend option. When pretending, the model:prune command will simply report how many records would be pruned if the command were to actually run:
Soft deleting models will be permanently deleted ( forceDelete ) if they match the prunable query.
Mass Pruning
When models are marked with the Illuminate\Database\Eloquent\MassPrunable trait, models are deleted from the database using mass-deletion queries. Therefore, the pruning method will not be invoked, nor will the deleting and deleted model events be dispatched. This is because the models are never actually retrieved before deletion, thus making the pruning process much more efficient:
You may create an unsaved copy of an existing model instance using the replicate method. This method is particularly useful when you have model instances that share many of the same attributes:
To exclude one or more attributes from being replicated to the new model, you may pass an array to the replicate method:
Query Scopes
Global scopes allow you to add constraints to all queries for a given model. Laravel's own soft delete functionality utilizes global scopes to only retrieve "non-deleted" models from the database. Writing your own global scopes can provide a convenient, easy way to make sure every query for a given model receives certain constraints.
Generating Scopes
To generate a new global scope, you may invoke the make:scope Artisan command, which will place the generated scope in your application's app/Models/Scopes directory:
Writing Global Scopes
Writing a global scope is simple. First, use the make:scope command to generate a class that implements the Illuminate\Database\Eloquent\Scope interface. The Scope interface requires you to implement one method: apply . The apply method may add where constraints or other types of clauses to the query as needed:
If your global scope is adding columns to the select clause of the query, you should use the addSelect method instead of select . This will prevent the unintentional replacement of the query's existing select clause.
Applying Global Scopes
To assign a global scope to a model, you may simply place the ScopedBy attribute on the model:
Or, you may manually register the global scope by overriding the model's booted method and invoke the model's addGlobalScope method. The addGlobalScope method accepts an instance of your scope as its only argument:
After adding the scope in the example above to the App\Models\User model, a call to the User::all() method will execute the following SQL query:
Anonymous Global Scopes
Eloquent also allows you to define global scopes using closures, which is particularly useful for simple scopes that do not warrant a separate class of their own. When defining a global scope using a closure, you should provide a scope name of your own choosing as the first argument to the addGlobalScope method:
Removing Global Scopes
If you would like to remove a global scope for a given query, you may use the withoutGlobalScope method. This method accepts the class name of the global scope as its only argument:
Or, if you defined the global scope using a closure, you should pass the string name that you assigned to the global scope:
If you would like to remove several or even all of the query's global scopes, you may use the withoutGlobalScopes method:
Local scopes allow you to define common sets of query constraints that you may easily re-use throughout your application. For example, you may need to frequently retrieve all users that are considered "popular". To define a scope, prefix an Eloquent model method with scope .
Scopes should always return the same query builder instance or void :
Utilizing a Local Scope
Once the scope has been defined, you may call the scope methods when querying the model. However, you should not include the scope prefix when calling the method. You can even chain calls to various scopes:
Combining multiple Eloquent model scopes via an or query operator may require the use of closures to achieve the correct logical grouping :
However, since this can be cumbersome, Laravel provides a "higher order" orWhere method that allows you to fluently chain scopes together without the use of closures:
Dynamic Scopes
Sometimes you may wish to define a scope that accepts parameters. To get started, just add your additional parameters to your scope method's signature. Scope parameters should be defined after the $query parameter:
Once the expected arguments have been added to your scope method's signature, you may pass the arguments when calling the scope:
Sometimes you may need to determine if two models are the "same" or not. The is and isNot methods may be used to quickly verify two models have the same primary key, table, and database connection or not:
The is and isNot methods are also available when using the belongsTo , hasOne , morphTo , and morphOne relationships . This method is particularly helpful when you would like to compare a related model without issuing a query to retrieve that model:
Want to broadcast your Eloquent events directly to your client-side application? Check out Laravel's model event broadcasting .
Eloquent models dispatch several events, allowing you to hook into the following moments in a model's lifecycle: retrieved , creating , created , updating , updated , saving , saved , deleting , deleted , trashed , forceDeleting , forceDeleted , restoring , restored , and replicating .
The retrieved event will dispatch when an existing model is retrieved from the database. When a new model is saved for the first time, the creating and created events will dispatch. The updating / updated events will dispatch when an existing model is modified and the save method is called. The saving / saved events will dispatch when a model is created or updated - even if the model's attributes have not been changed. Event names ending with -ing are dispatched before any changes to the model are persisted, while events ending with -ed are dispatched after the changes to the model are persisted.
To start listening to model events, define a $dispatchesEvents property on your Eloquent model. This property maps various points of the Eloquent model's lifecycle to your own event classes . Each model event class should expect to receive an instance of the affected model via its constructor:
After defining and mapping your Eloquent events, you may use event listeners to handle the events.
When issuing a mass update or delete query via Eloquent, the saved , updated , deleting , and deleted model events will not be dispatched for the affected models. This is because the models are never actually retrieved when performing mass updates or deletes.
Instead of using custom event classes, you may register closures that execute when various model events are dispatched. Typically, you should register these closures in the booted method of your model:
If needed, you may utilize queueable anonymous event listeners when registering model events. This will instruct Laravel to execute the model event listener in the background using your application's queue :
Defining Observers
If you are listening for many events on a given model, you may use observers to group all of your listeners into a single class. Observer classes have method names which reflect the Eloquent events you wish to listen for. Each of these methods receives the affected model as their only argument. The make:observer Artisan command is the easiest way to create a new observer class:
This command will place the new observer in your app/Observers directory. If this directory does not exist, Artisan will create it for you. Your fresh observer will look like the following:
To register an observer, you may place the ObservedBy attribute on the corresponding model:
Or, you may manually register an observer by invoking the observe method on the model you wish to observe. You may register observers in the boot method of your application's AppServiceProvider class:
There are additional events an observer can listen to, such as saving and retrieved . These events are described within the events documentation.
Observers and Database Transactions
When models are being created within a database transaction, you may want to instruct an observer to only execute its event handlers after the database transaction is committed. You may accomplish this by implementing the ShouldHandleEventsAfterCommit interface on your observer. If a database transaction is not in progress, the event handlers will execute immediately:
You may occasionally need to temporarily "mute" all events fired by a model. You may achieve this using the withoutEvents method. The withoutEvents method accepts a closure as its only argument. Any code executed within this closure will not dispatch model events, and any value returned by the closure will be returned by the withoutEvents method:
Saving a Single Model Without Events
Sometimes you may wish to "save" a given model without dispatching any events. You may accomplish this using the saveQuietly method:
You may also "update", "delete", "soft delete", "restore", and "replicate" a given model without dispatching any events:
IMAGES
VIDEO
COMMENTS
What to Include in an Assignment Agreement. Create a thorough assignment agreement by including the following information: Effective Date: The document must indicate when the transfer of rights and obligations occurs. Parties: Include the full name and address of the assignor, assignee, and obligor (if required). Assignment: Provide details that identify the original contract being assigned.
The next assignment might be a progress report (or a series of progress reports), and the final assignment could be the report or document itself. For humanities and social science courses, students might write a proposal requesting approval of a particular topic, then hand in an annotated bibliography, and then a draft, and then the final ...
37 CFR 3.11 Documents which will be recorded. (a) Assignments of applications, patents, and registrations, and other documents relating to interests in patent applications and patents, accompanied by completed cover sheets as specified in § 3.28 and § 3.31, will be recorded in the Office. Other documents, accompanied by completed cover sheets ...
Assignment Center makes it easier to transfer ownership or change the name on your patent or trademark registration. See our how-to guides on using Assignment Center for patents and trademarks. If you have questions, email [email protected] or call customer service at 800-972-6382.
4.8 - 105 votes. Download a basic template (FREE) Create a customized document. This Contract Assignment Agreement document is used to transfer rights and responsibilities under an original contract from one Party, known as the Assignor, to another, known as the Assignee. The Assignor who was a Party to the original contract can use this ...
Assignment Agreement. An assignment agreement is a contract that authorizes a person to transfer their rights, obligations, or interests in a contract or property to another person. It serves as a means for the assignor to delegate duties and advantages to a third party while the assignee assumes those privileges and obligations.
Related to Assignment Documentation. Related Documentation means, with respect to Software, all materials, documentation (including control documentation utilized in connection with an audit), specifications, technical manuals, user manuals, flow diagrams, file descriptions and other written information that describes the function and use of such Software, but excluding source code.
An important tip: Naming files should be descriptive and consistent! Date format (ISO 8601 Standard): YYYYMMDDThhmmss. Make file names sortable and searchable: Project or experiment name. Researcher name/initials. Date or date range of collection version. An example for README file. An example of code documentation.
Lease Assignment Agreement: a document used to transfer a tenant's interest in a property to a new individual who will assume the obligations and rights of the original lease. Termination Agreement: an agreement used to cancel/discontinue an existing contract. Trademark Assignment: a form that transfers ownership of a trademark from the owner ...
Templates for college and university assignments. Include customizable templates in your college toolbox. Stay focused on your studies and leave the assignment structuring to tried and true layout templates for all kinds of papers, reports, and more. Category. Color. Create from scratch. Show all.
We must document the ideas, theories, definitions, data, images, and other information in our writing that originated with others. For example, our work must include documentation when we quote, paraphrase, or summarize another's ideas or when using data from others' research.
☐ - Assignment is Free of Liens, Claims, or Encumbrances. The Assignor is transferring an interest in the Assignment and warranties it to be free of liens, claims, or encumbrances of any kind. ☐ - Assignment is Holds the following Liens, Claims, or Encumbrances: [DESCRIBE] V. 3RD PARTY APPROVAL. For this Agreement to be in effect ...
Easily distribute, analyze, and grade student work with Assignments for your LMS. Assignments is an application for your learning management system (LMS). It helps educators save time grading and guides students to turn in their best work with originality reports — all through the collaborative power of Google Workspace for Education.
Tips For Designing a Digital Assignment. Establish and clarify your teaching and learning goals for the project and use those to formulate a grading rubric. Include objective, gradable moments in the process of planning and producing the project. Even if students are all using the same tools, the finished products may be different enough that ...
Rubric Best Practices, Examples, and Templates. A rubric is a scoring tool that identifies the different criteria relevant to an assignment, assessment, or learning outcome and states the possible levels of achievement in a specific, clear, and objective way. Use rubrics to assess project-based student work including essays, group projects ...
Payment may be made by use of a check, credit card, money order or USPTO deposit account if submitting documents in paper. Trademark assignments submitted electronically may be paid by credit card, USPTO deposit account or electronic fund transfer (EFT). The USPTO accepts VISA, MASTERCARD, AMERICAN EXPRESS and DISCOVER credit cards.
To submit a file submission, students complete the following steps: Click the 'Add submission' button to bring up the file upload page. Upload the relevant file into the submission. They are able to 'drag and drop' the file into the submission box. Click 'Save Changes'.
Example of an assignment that asks to compare and evaluate various sources. Paraphrasing . Example of an assignment that asks students to critically approach source use and paraphrasing. Research Log . Example of an assignment that asks students to detail the research process by recording search strategies and resources located. Topic Proposal
Good documentation solves a few common reasons people won't use your code: They don't know why your project exists or how it meets their needs. They can't find how to install your code. They can't see how to use your code. Therefore, if you love your project, document it so others can use it.
Think about how to break up your product or software into topics and sub-topics. You may also want to consider a documentation platform that supports things like code blocks, API support, and a search function. Most online documentation tools like GitBook off this and more out of the box. 4. Write like you speak.
Official Assignments Help Center where you can find tips and tutorials on using Assignments and other answers to frequently asked questions.
Bulk Export assignment data outside of SharePoint document libraries Bulk export for a student. To bulk export a single student's data, before removing the student from the classes they're a part of, run the script and provide the userId.If the student has been removed from the site, either the admin can add the student back to the class before running the script, or the admin can provide the ...
An assignment statement evaluates the expression list (remember that this can be a single expression or a comma-separated list, the latter yielding a tuple) and assigns the single resulting object to each of the target lists, from left to right. Assignment is defined recursively depending on the form of the target (list).
These properties are required because all Eloquent models are protected against mass assignment vulnerabilities by default. To learn more about mass assignment, please consult the mass assignment documentation. Updates. The save method may also be used to update models that already exist in the database. To update a model, you should retrieve ...