- Skip to primary navigation
- Skip to main content
- Skip to primary sidebar

- FREE Experiments
- Kitchen Science
- Climate Change

Egg Experiments
- Fairy Tale Science
- Edible Science
- Human Health
- Inspirational Women
- Forces and Motion
- Science Fair Projects
- STEM Challenges
- Science Sparks Books
- Contact Science Sparks
Science Resources for Home and School
Get ready to unleash your inner scientist with my HUGE collection of science experiments and investigations for home and school.
Most of the activities use inexpensive materials you probably already have around the house, so grab your lab coat or old t-shirt, collect the supplies, and start experimenting.
All the resources are completely free, hopefully making science easy and accessible to everyone!
These easy science experiments work well in a home or school environment. The instructions are easy to follow, and the science is explained in an easy to understand way.
Easy Science Experiments for Home and School
General fun science activities for kids, life cycle activities, sport science investigations, inspirational female scientist fact files and activities, paper science experiments, book themed science investigations, save the planet educational resources, free science experiments ebooks, space science experiments, valentine science experiments, superhero science experiments, preschool science resources, key stage 1 science resources, candy science experiments, easter science activities, halloween science experiments.

Air Rocket Launcher

Stomp Rocket

Baking Soda Bottle Rocket

Underwater Volcano

Rain Cloud in a Jar

Lift Ice with String

Ice Fishing Experiments

DIY Lava Lamp

Craft Stick Catapult

Does salt water freeze science investigation?

Egg Drop Parachute

Felt tip chromatography investigation

Bubble Blowing Machine
Learn about minibeast life cycles with an edible butterfly life cycle or DIY life cycle spinners.

Butterfly Life Cycle Template
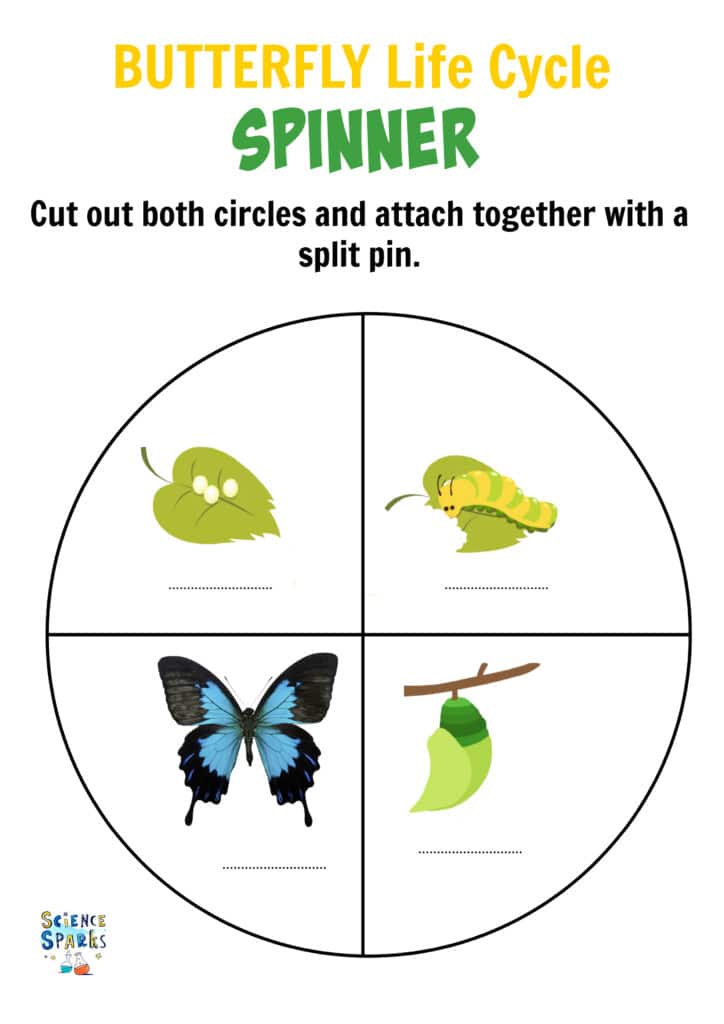
Butterfly Life Cycle Spinner

Frog Life Cycle Spinner

Plant Life Cycle Spinner

Why do balls bounce?

Waterproof a football boot

Design a football boot STEM Challenge

Reaction time investigation
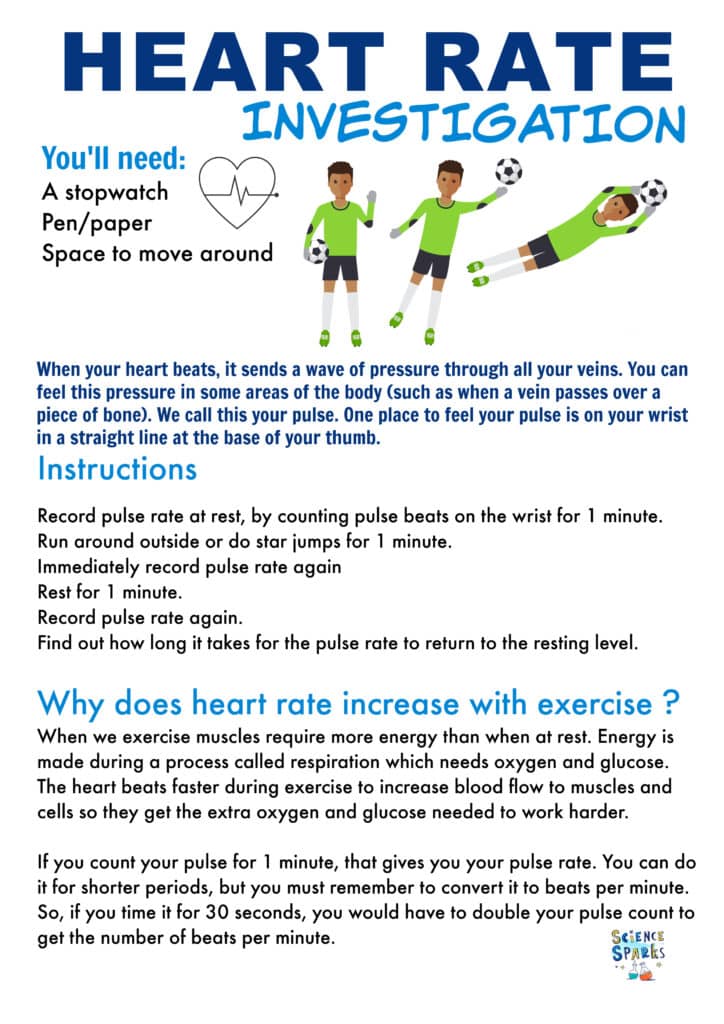
Heart rate investigation

Javelin throw STEM

Reaction time with a ruler investigation

Explore the inspirational world of women in STEM with easy-to-read fact files and activities related to the work of these trailblazing female scientists.

Mary Anning Fact File and Activity

Katherine Johnson Fact File and Activity

Amelia Earhart Fact File and Activity

Ada Lovelace Fact File and Activity

Marie M. Daly Fact File

Rosalind Franklin Fact File and Activity

Marie Curie Fact File and Activity

Florence Nightingale Fact File and Activity

Famous Scientist Bookmark s
Science doesn’t get easier than this! Print the book, grab a paper clip, scissors, tape, and pencils, and you have everything you need for 6 exciting paper-based science experiments.

SIX Paper Science Experiments

Halloween Paper Science Experiments

Christmas Paper Science Experiments
Explore science through stories with these beautifully themed experiments based on books.

Gingerbread Man Science Investigation – Simple Version

Gingerbread Man Science Investigation

Secret Map for Hansel and Gretel

Alice’s Adventures in Wonderland Experiments

5 Jack and the Beanstalk STEM Challenges

Three Little Pigs STEM Challenge

Climate change and the planet’s health are at the forefront of everyone’s mind. Use my planet saving resources to start thinking about how you can help save the world.

Plastic Pledge Worksheet

Save the Bees

Reduce Waste Worksheet

Eco Friendly Packaging Design sheet
If you’re looking for more than one activity, try one of my eBooks.

Early Years eBook – 20 Experiments

5 Easy Egg Experiments

Winter Science Experiments

DIY Space Camp

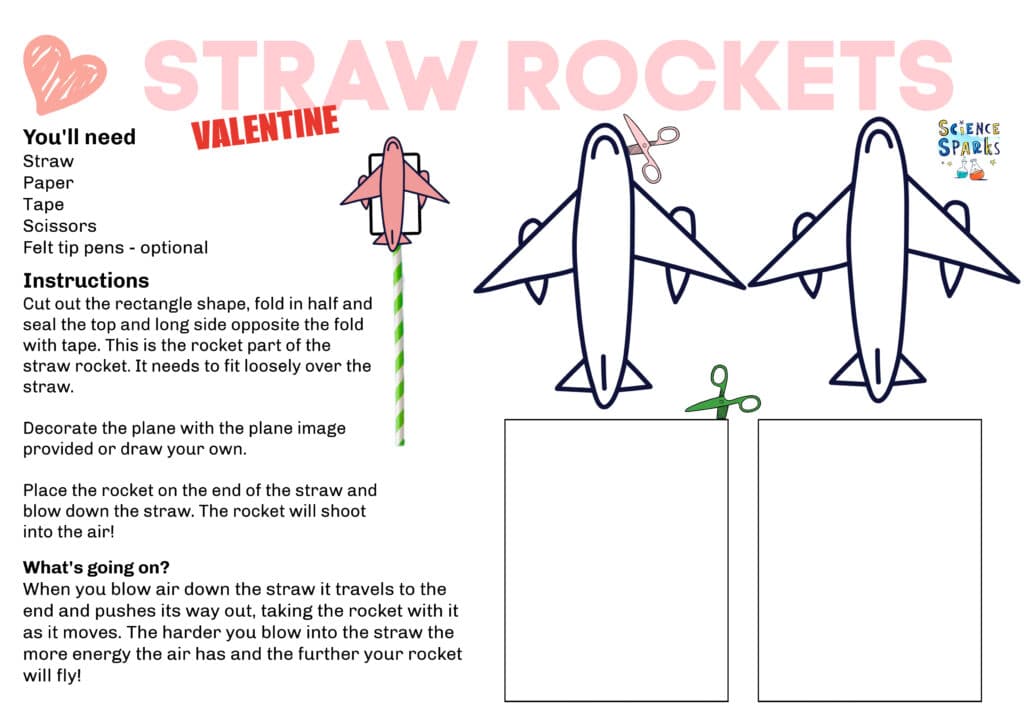
Straw Rockets

Valentine Paper Spinners
Valentine STEM Challenges

B low up a Valentine Balloon

Secret Message with Flowers
Science ideas for even the littlest scientists.

Things I can hear checklist

Painting on Ice

Umbrella for Incy Wincy
These activities are perfect for Key Stage 1 ( ages 5-7 ).

Plant Science for Key Stage 1

Egg Zip Line

Rainbow Skittles

Easter STEM Challenges

Falling chocolate egg challenge
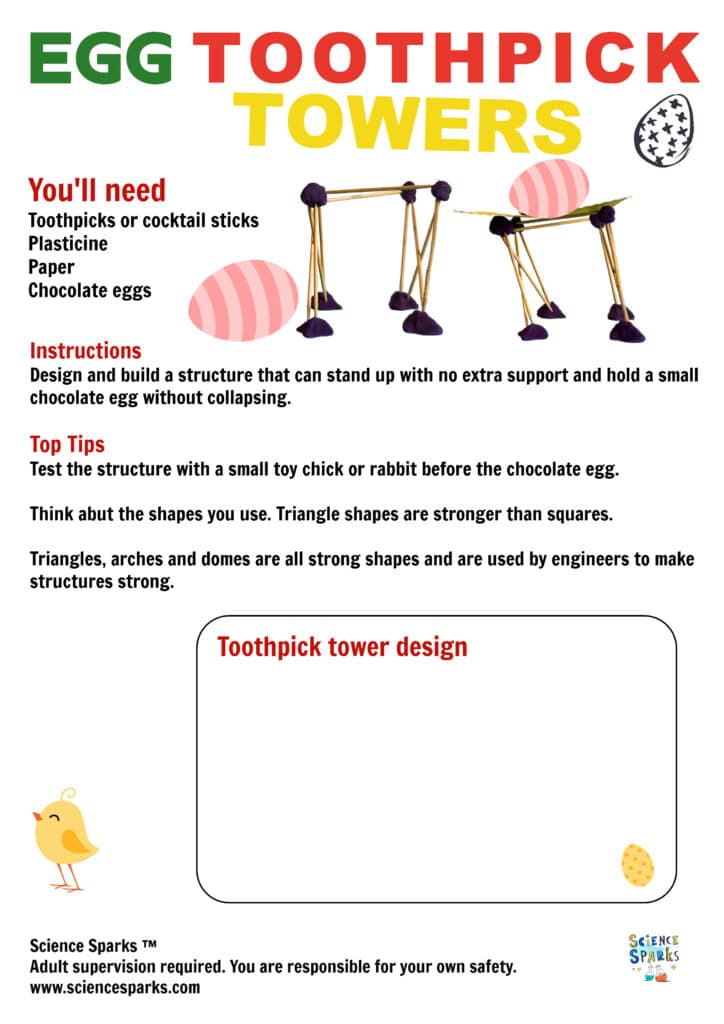
Egg toothpick towers

Create a Code

Toothpick Towers

Easter Egg Hunt

Spider Craft Stick Catapult

Fizzy Pumpkins

Skip to Main Content

HOMESCHOOL SCIENCE HEADQUARTERS SCIENCE HEADQUARTERS
Everything You Need For Science Everything You Need For Science
You're already doing so much. Let's make science lesson prep easy! W e plan the labs, gather the supplies, and provide clear instructions. All you have to do is open the box and let the hands-on learning begin.
Clear, easy-to-follow instructions, high-quality materials, and engaging experiments all in one box.

Give students a solid chemistry foundation with the hands-on experiments in this complete lab kit! This set has 40+ real science tools and chemicals, 27 engaging experiments, a 46-page manual & safety equipment.
View Details:
Out of Stock, Expected to Ship: 09/01/2024
Need It Fast? See Delivery Options In Cart.
Item ships to the United States only.

Learn about Fizz, Foam, and Fire! Perform several chemical reactions to identify evidence for chemical change, use clues to describe reactants and products, and determine whether reactions are endothermic or exothermic.
Accelerate (3rd-7th grade)
In Stock & Ready to Ship

You child will discover and understand the world around them. This year-long curiosity-building bundle of six Science Unlocked kits will introduce your student to biology, chemistry, earth & space, and physics.
Wonder (K-2nd grade)
Out of Stock, Expected to Ship: 09/09/2024
This item only ships Economy or Ground Service to a street address in the 48 contiguous US states.

Find surprising answers to various physics questions with this Complete Introduction to Physics (Grades 6-8)! Why settle for reading about Newton’s laws of motion when you can test them in real life?

Your budding biologist will love learning about arctic penguins and their unique parenting skills. In this penguin theme kit, your student will learn about offspring, how they're cared for, and how they get traits from their parents.

Learn about earth and space this school year as your student studies natural resources, solar energy changes, and more. This bundle includes detailed teacher guides, full-color student workbooks, and experiment supplies.
Launch (8th-12th grade)

Bring the world of biology into focus with our Introduction to Biology kit through a variety of hands-on experiments, over 35 science supplies, and a detailed manual. Study bacterial growth, blood flow, DNA and so much more!

Learn how the heart works as you locate the internal parts of this mammal heart! This kit comes with everything you need, including a preserved mammal heart specimen, a step-by-step dissection guide & essential dissection tools.
This item only ships to a street address in the 50 US states.

Make art using the sun, learn why the sun is important to Earth, find out how to melt chocolate faster and slower, and design a sun blocking device to protect your candy. The Sun Blocker will shed some light on the sun!
Hands-on learning can be the highlight of your homeschool when you have the right science tools. Our mission is to provide homeschool families like yours with the best science equipment, kits & curriculum to bring theory to life. Here are resources to help you teach with confidence!

Free Teaching eBook
Plan & teach science your kids will love, what's inside.
› Tips for Choosing Science Topics to Study › Selecting a Science Curriculum (or winging it!) › Planning Your Year (one week at a time) › Use a Scope & Sequence to build a curriculum plan › Tips for Teaching with a Hands-on Approach

Setting up a Home Science Lab

Tips for Early Elementary Science (Grades K-2)

Tips for Elementary Science (Grades 3-5)

Tips for Middle School Science (Grades 6-8)

Tips for High School Science (Grades 9-12)
We're in it together!
Let us support your homeschooling journey. Give us a call or connect with us using the chatbot in the lower right hand corner.

Science Unlocked

Science Kits for use with Abeka Curriculum

Berean Builders

Christian Light

RS4K: Building Blocks of Science

RS4K: Focus On Science Series

Master Books Chemistry

Navare Science

R.E.A.L. Science Odyssey

Make the Most of Science with these Resources
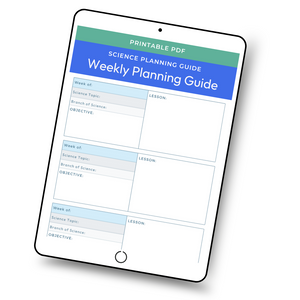
Printable Weekly Science Planner
Tips for Teaching Diverse Learners
Get Started
Teaching a Student with a Short Attention Span
Learning never stops with lessons and experiments that inspire kids to follow their curiosity. We created an entire free resource center to inspire your kids to dive deeper into science discovery.
RENEWABLE ENERGY PROJECT
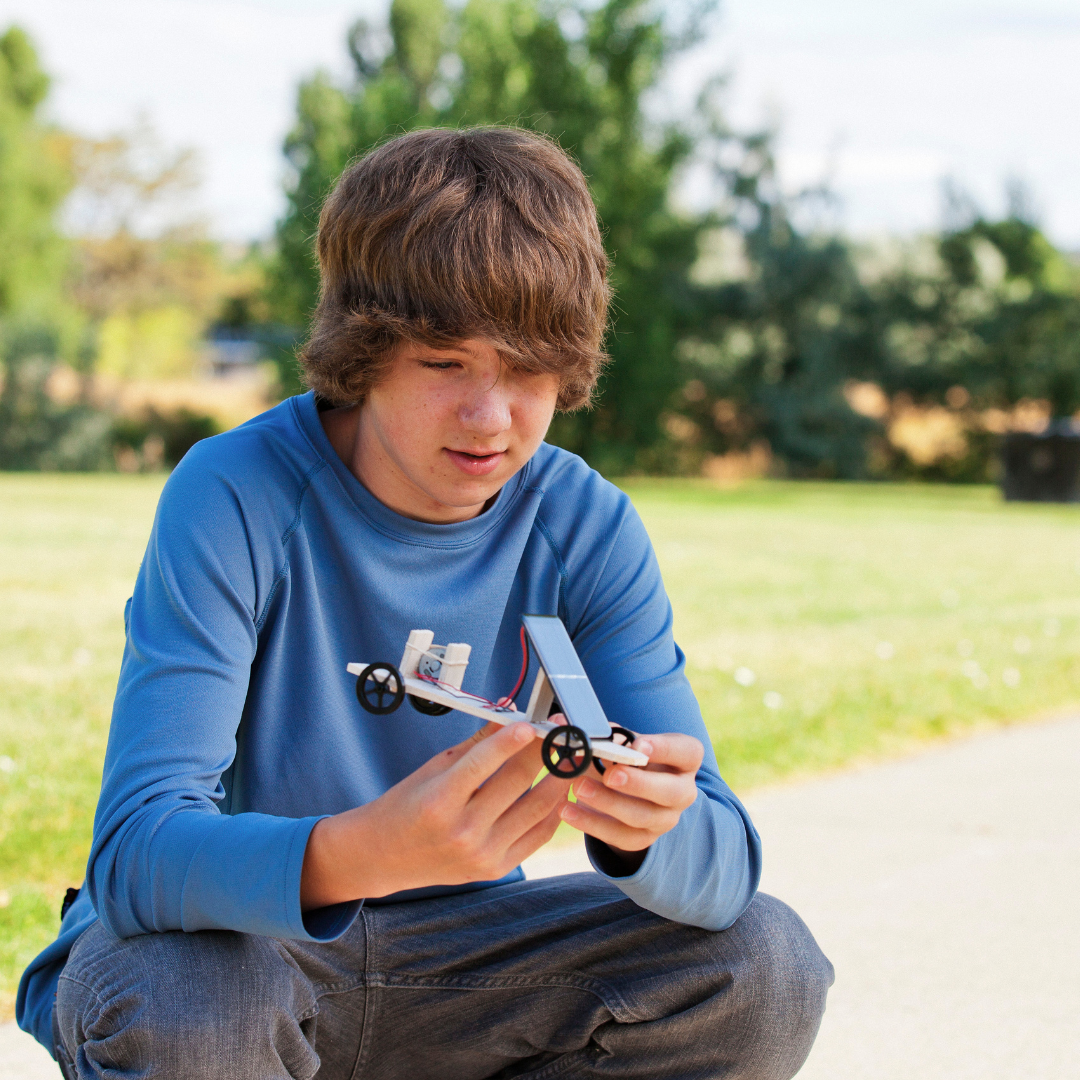
Make a Solar Car
Start Building Get Started
6 POPULAR DIY SLIME RECIPES
How to Make Slime
Learn How Learn How
Download these eBooks filled with fun lessons and hands-on experiments your kids will love!

Explore Our Resource Center
We get it. Science can be messy. But Home Science Tools' products and service can handle it.
Our products are durable, reliable, and affordable to take you from the field to the lab to the kitchen. They won't let you down, no matter what they're up against. Whether it's (over)eager young scientists year after year, or rigorous requirements that come once-in-a lifetime.
And if your science inquiry doesn't go as expected, you can expect our customer service team to help. Count on friendly voices at the other end of the phone and expert advice in your inbox. They're not happy until you are.
Bottom line? We guarantee our products and service won't mess up your science study—no matter how messy it gets.
Questions? Get in touch with our Customer Service team.
Easy Peasy All-in-One Homeschool
A complete, free online christian homeschool curriculum for your family and mine, science — biology.
Levels 1 – 4 (1st through 4th)

Levels 5 – 8 (5th through 8th)

Found a problem? Check here .
Course Description: Students will explore two branches of biology: human anatomy and plant life. Students will learn about the body systems and conduct experiments to further their understanding. A study of plants will include their structure, reproduction, and types. Soil, biomes and underwater plants are some of the special topics covered. Students will use textbooks, videos and online learning materials. Experiments and nature observations will enhance their learning and understanding. Students will have the opportunity to present their experimental findings to an audience.
Reading List : (selections of the following titles)
Levels 1-4 The First Book of Plants , Dickinson; Elementary Life Science , Mr. Q
Levels 5-8 Real Things in Nature , Holden; Life Science for Middle School, Wilkin
- Basic Supplies
- Biology 1-4
- Biology 5-8
Welcome to your first day of school! I wanted to give you one important reminder before you begin. Many of your lessons below have an internet link for you to click on. When you go to the different internet pages for your lessons, please DO NOT click on anything else on that page except what the directions tell you to. DO NOT click on any advertisements or games. DO NOT click on anything that takes you to a different website. Just stay focused on your lesson and then close that window and you should be right back here for the next lesson. Okay?
- If you didn’t get here through My EP Assignments , I suggest you go there and create an account.
- 1 – 4 Print
- 1 – 4 buy
- 5 – 8 print
- 5 – 8 buy
I want to teach you something about science. Science is a collection of observations about the world. When something has been observed enough, it becomes scientific law. That means that scientists say that what they have observed will always be true. It is stated as fact. But even these “laws” have been broken at times when all of a sudden, something different is observed. It was previously believed that the atom was the smallest thing in the universe. It was called fact. Then someone figured out how to split an atom. The point is that science only really tells us what has been observed. It doesn’t prove truth. It just states what is observed and measured in the world around us. Why am I making sure you understand this? Because who was there to observe the creation of the universe? God alone. Science can’t prove anything about the creation of the world because it can make no observations about it. It takes what it observes in the world today and makes hypotheses, guesses, about the creation of the world. Until pretty recently most Western scientists were Christians. Never let anyone make you feel stupid for believing God created the world. Many scientists that you read about in history believed in a Creator, and they were some of the smartest people that have ever lived. The Bible contains all truth. You never have to be afraid to believe the truth in the Bible. There may seem to be things that couldn’t possibly be true. For example, scientists have determined that stars are billions of light years away. That means that in order for us to see a star’s light, that light would have had to be traveling for billions of years to reach us. Well, a Christian mathematician and scientist has shown how it could appear that way and still only be less than ten thousand years away. No one has yet been able to dispute the math he used to show it. Here’s an article about it that your parents might be interested in. One method science uses to try and observe the age of something is carbon dating. There are some who say carbon dating shows that there are bones which are millions of years old. Here are two articles that talk about how carbon dating isn’t accurate. These are articles for adults. You don’t have to read them. The first is much easier to read than the second, but if you or your parents are interested, please go ahead and read them. I just want to show you that there are scientists that believe the earth is young. I personally know a scientist, a physicist with a PhD, who has studied the topic and believes the earth to be less than 10,000 years old. It’s not silly to believe it. It is silly to let someone change your mind with “facts” that aren’t proven true. Remember this: Scientists themselves don’t agree on things! Anytime you hear someone say, “All scientists say that…” you can be sure it isn’t true. It’s propaganda to try and get you to believe something. Don’t be afraid to believe the Bible. It will always prove to be true in the end. God is Truth and cannot lie! You can trust His Word.
- Explain to someone what science is and why it can’t tell us what happened at the beginning of time.
- This is the end of your work for this course for your first day. You are allowed to move at your own pace (this is homeschooling), but it’s intended you complete one lesson a day.
- Read chapter 1 . ( PARENTS : EP uses this resources through out the course. Just read the chapter or the pages that are assigned each time. You do not need to print this. There are 4 pages to read. Do not do the activity pages that you’ll see after the reading.)
- *Print out this page and answer the questions . ( Answers ) ( PARENTS : please check the answers using a separate/different browser from the one your child uses for school.
- Read the activity on page 30 . This is page 36 of the PDF. Make a living and non-living bag and ask others in your family to feel and guess. You tell them whether they are right or not.
- Read the first chapter on Characteristics of Living Organisms . Before you can use this site, you will need to register. Ask a parent to help you create a username and password. This is a site where you can use your “junk” email and password. Make sure you tell the site to remember you.
- Our book does not teach that God created the world in six days. It will speak of millions of years. You aren’t expected to take that as fact. You won’t be learning about this, but it mentions evolution, the hypothesis that all living things came from a single-cell organism that mutated and changed and developed into something else. That’s why people call primates our ancestors. They say they changed little by little until they became human. It takes a lot more faith to believe amazing things like DNA and the human eye were made by accident than to believe our incredible world was designed. I call it a hypothesis because it has never been observed happening and therefore cannot be called scientific theory, let alone fact.
- Watch the video on the introduction to the characteristics of life . You can also watch this cell video . You can jump 40 seconds into it. You don’t need to know all these words, but it’s kind of fascinating watching it all work. It can give you some images in your mind for when you are learning about these things.
- Answer the review questions 1-5. That’s where you stop reading.
- STUDY TIP: Go to the end and read the questions first. That way you can be looking for the answers while you read. It will make it easier for you if you will just take an extra minute to look at the questions before the reading.
- Check your answers when you are done.
- We will learn about cells later, but you should know that cells are your body’s building blocks. Everything in your body is made up of cells.
- Read about skin on pages 3-5 (just the top part until the picture). On the PDF it would be pages 244-246. ( Remember, you are just reading what is assigned here. Don’t print this. Don’t read more than you need to. Don’t do any of the activity pages.)
- Why do you sweat when you are hot?
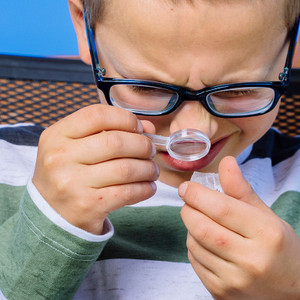
- Look at your skin with a magnifying glass. Make observations. (If you have a microscope, you can rub some skin off of you and look at it with your microscope.) Here’s an image of skin under a microscope .
- We’ll learn about cells later, but you should remember that everything in your body is made up of cells. Each cell is about 70% water, so what atoms do you know are present in your cells? (answer: hydrogen and oxygen –H20 )
- Read about skin . Before you can use this site, you will need to register. Ask a parent to help you create a username and password. This is a site where you can use your “junk” email and password. Make sure you tell the site to remember you.
- Answer review questions 1-7.
- Check your answers .
- Watch this skin lesson .
- What makes skin an organ?
- Look at these images of skin and make observations .
- Get big paper, or tape together white paper. Put all the tape on the back. You need one piece of paper big enough for you to lie down on.
- Have someone trace your body onto the paper.
- This is the beginning of a project you will work on as you learn about the body. Put it somewhere so you can add to it when you are instructed to do so.
- *Print this skin diagram .
- Label the skin. Here’s an image to help. ( Answers ) *PARENTS: please check the answers using a separate/different browser from the one your child uses for school.
- Read page 5-8 . This section is on muscles.
- Start where you left off and read up to the beginning of the bone section.
- Read the section on The Muscular System .
- Answer review questions 1-6.
- Watch this muscle video .
- Add biceps and quadriceps ( close up image ) in your body drawing. Just color them in on one side and label them.
- Now bend and stretch your arms and legs. Do you feel your biceps and quadriceps moving? Picture what they are doing. Describe to someone what they are doing.
- You can work them out with this one small part of this video . It will tell you what muscles you are using! The last one is deltoid. You can stop once you are in the house. 🙂
- Label the muscles . You may not know all the muscles. That’s okay! Learn from it and try it again. See if you can beat your first score.
- Read the section on bones, pages 8-10 . In the document it’s the very end of pages 249 -251.
- Draw the tibia and fibula on your body picture. Use the same side as where you drew the muscles.
- Draw the radius and ulna on your body picture. Use the same side as where you drew the muscles.
- Do you know what your funny bone is? Can you figure out why they call it that? Look at the arm drawing again.
- (You should have registered for a free account with this website when you did your reading in Lesson 2.)
- Answer the review questions.
- Watch this movie about the skeletal system .
- Take the quiz .
- Take a look at this skeleton .
- Put together a skeleton .
- Take the tour of the skeletal system . The list of names is the bones in the highlighted part of the skeleton. Click on other parts of the skeleton to see more bones up close.
- Then you can label the skeleton . It will help you out. Look for the pink dot if you are stuck.
- Read about bone marrow . Tell someone what bone marrow is.
- Watch this video on joints .
- Then take the quiz .
- Do the Hollow Strength activity.
- Look inside a bone (scroll down to the slideshow). Bones, the hard white stuff you see in x-rays, are hollow, but there is stuff inside the hollow part. The inside is soft like a sponge.
- Watch this video on bone structure . Click the box shape in the bottom right corner to make it full screen.
- Look at this skeleton .
- *Print and label this skeleton . ( Answers )
- *Print these pages and complete them. ( Answers )
- These are based on what you’ve been learning . When it mentions the chapter you’ve read, it’s not something you were supposed to read today.
- Let’s see what you remember !
- Today you are going to start reading about your Digestive System .
- Read from the beginning of this chapter through the paragraph after “Why Doesn’t It Do That?” Don’t read yet about the intestines.
- Read some more about it. STOP at “What Does the Small Intestine Do?”
- Add an esophagus and stomach to your wall body. See what they look like and where they go.
- Read the Food and Nutrients chapter.
- Stop at the review questions and answer them.
- Read the rest of the chapter .
- Take a look again inside . Here are the kidneys . Here’s another picture .
- Add intestines and kidneys to your wall body.
- Read the Digestive System chapter. (Just read; don’t worry about the video.)
- Check your answers .
- *Do the matching activity . ( Answers )
- Watch a movie on the digestive system .
- *Label the digestive system . ( Answers )
- Can you fill out the crossword puzzle ?
- Read up until the liver.
- Do the Day Three activity .
- Record the experiment.
- Tell someone what you’ve learned about your digestive system.
- Read the rest of the chapter . Stop at the fill in the blanks page.
- *Print out this page and fill in the blanks of the story. ( Answers )
- Do the Day Two activity. Read the explanation. You are learning about bile chasing down and surrounding fat!
- You can see a video of a very similar experiment here (in case you don’t have food coloring). The only difference is that the paper says to spread out the drops and he puts them close together.
- Complete a crossword puzzle to see what you remember.
- Look at this updated food pyramid that encourages more equal portions of different groups.
- Talk to someone about the food pyramid.
- Add a mouth and tongue to your wall body.
- *Print out and complete this word find . ( Answers )
- Write the story of a doughnut being eaten and digested. You can write it as the doughnut speaking. OR, draw a diagram of its route and add labels telling what happens at each point.
Lesson 17
- Do a chewing experiment. Add water to 2 small cups and vinegar to the other 2 cups. Put a whole candy in one of the water cups and in one of the vinegar cups, and put broken candy pieces in the other water cup and the other vinegar cup. Check back on the candy after a few hours or a day and see how quickly each has dissolved. The smashed candy should dissolve faster (which illustrates the importance of chewing food). Like food particles, broken bits of candies dissolve faster than whole pieces. Vinegar doesn’t dissolve sugar any faster than water does, so you may not see a difference between the two different liquids.
- *Fill in this chewing experiment worksheet.
- Put together the digestive system jigsaw . You can do fewer pieces if you like by changing the 12 to 6 (over on the right).
- Watch the video .
- *Print out this page . Do you know what you are looking at? Color it in and try and make a key for what color is which part.
- You can use this page to check. Note: It calls the large intestines the “colon.”
- See what you remember about the integumentary system.
- *Do the skin word find . ( Answers )
- Write or tell the story of a piece of food. What happens to it? (It first is bitten and chewed and mixed with saliva. Then what happens? Then what?)
- What do you remember ?
- *What do you know? Fill in the muscles . ( Answers )
- Can you do the muscle quiz ?
- Can you do the skeleton quiz ? Do you remember?
- Skeletal System Quiz – Learn as you go!
- Can you put the skeleton together ?
- Read the first three pages about the heart. Stop at the top of the third page where it asks “Why does my heart beat faster…?”
- Draw a heart on your wall body. You can go here in order to see what it looks like and here to see where it is in your body.
- Put your hand on your chest. Can you feel your heart beating? Now jump up and down a lot until you are tired out. Now try and feel your heart beating. Can you?
- Watch this video on circulation .
- Start reading where you stopped yesterday . Read to the end of page 258.
- Add veins and arteries on the wall body from the heart to the empty arm.
- To see veins in the body go here . You will be looking at the circulatory system, or how the blood moves around the body. Notice how the veins get smaller as they move away from the heart. Why? Think about highways and then roads off of highways and then roads off of those roads. Why do they get smaller?
- Watch a movie on circulation.
- Take the quiz .
- Find someone to ask you the questions on page 326 . Go over the definitions on page 325.
- Read this article on the heart .
- Read through all the pages.
- Take your pulse resting and then after running around. Compare the two. Record them.
- Watch a movie about the heart .
- *Complete this worksheet . ( Answers )
- You can see the heart in action (just a drawing). Wait, it will animate and show the path.
- *Print out and label the heart . ( Answers )
- *Complete this worksheet . ( Answers )
- Read the section on Blood .
- Answer the questions at the end of the section.
- *Complete the worksheet .
- Complete the crossword puzzle .
- Read about arteries and veins .
- Read the Overview of the Cardiovascular System .
- Answer the questions.
- *Do the circulatory system word search . ( Answers )
- Memory check !
- Make sure you check your answers and go back and look at what you got wrong and learn the right answer.
- You can try putting a toothpick in a little lump of clay and resting it on your wrist and look for the toothpick to move to count the pulses.
- Reset the timer for 15 seconds . Start counting after you click on “Start.” Stop counting when you hear the beeps. Make sure your sound is turned on.
- Multiply the number you counted by four. That’s your beats per minute.
- Compare the number you got with the average for your age . (Scroll down.)
- Check what you remember !
- Color in the muscles you use when you are stirring a bowl of thick gooey dough.
- Color in the muscles you use when you walk up the stairs.
- Color in the muscles you use when you turn your head side to side.
- Color in the muscles you use when walk. Walk around and think about every muscle you are using. Are you swinging your arms?
- *Print this human body outline . Fill in as much as you can. Draw lines and labels.
- Read 258-260 about lungs .
- Add lungs to your wall body. You can go here to see where the lungs go.
- Read the chapter on the respiratory system . Answer the review questions.
- Read about the word “ inhale .”
- Read about your bronchial tubes .
- Here’s a little video about air pressure and the lungs . When our ribs open up to let in air, air pressure pushes the air into our lungs. When our muscles contract, it puts the pressure on to push the air back out.
- Show your model and explain what the different parts represent.
- Watch this video about our respiratory system .
- Watch this quick video for a little more on inspiration and the motion that allows our breathing to occur.
- Build a model of the lungs. Watch the video . (You can do this together with an L student.)
- Demonstrate your model and explain it.
- Watch a movie about the respiratory system .
- Make sure diaphragm and bronchial tubes are on your wall body.
- Watch the movie about the respiratory system.
- *Label the lungs . ( Answers )
- Read this article on the respiratory system. STOP at “Time for Talk”. ( Alternate link )
- Label the respiratory system .
- See what you remember .
- Learn how vocal sounds are produced. Interested? Click here for more .
- *Do the lungs word search . ( Answers )
- Define the words as you find them. What do they refer to?
- Label the muscles .
- Watch this short movie on the urinary system .
- Read about it.
- Take a quiz on the urinary system . (Answer correction note: The correct answer to question 4 is B. )
- Read the section on the excretory system .
- *Complete the word search . ( Answers )
- Add the bladder to your wall body. You can connect it with a ureter if you like. Label the parts.
- See what you remember !
- Can you complete the crossword puzzle ?
- Read pages 234-236 about the brain.
- Read this definition page .
- Explain to someone what your nervous system controls.
- Read this article .
- Then you can watch this movie .
- Read pages 237-238 .
- *Print out this page and complete it. ( Answers )
- Today read the chapter on the nervous system . (Don’t worry about the video on that page.)
- Check your answers .
- Add your name and date and give your paper to a parent to put in your portfolio.
- Take the tour of the brain . Scroll down through the page (continue past where it asks for your info, ignore that and click X to close anything open when you first come to the page). Where there are boxes of words, click on them to change the picture. Pay attention.
- *Can you fill in the blanks on this nerve picture? ( Answers )
- Read this definition page on the cerebral cortex.
- Read this definition page on the cerebellum .
- *Print out this brain .
- Cut out the parts of the brain and try and put it back together. Let others in your family try.
- Here are some other diagrams.
- *Label the parts of this brain . ( Answers )
- Frontal Lobe – decision making, creativity (art, music), ideas
- Temporal Lobe – smell, hearing, understanding facial expressions, speech including rhythm and intonation
- Occipital Lobe – controls the left eye
- Parietal Lobe – 3D understanding, including body/space awareness
- Sensory Cortex – most of your body on the left side (legs, arms, mouth, etc.)
- Motor Cortex – controls movement on the left side of your body
- Pre-Motor Area – plans your moves
- Occipital Lobe, Parietal Lobe, Sensory Cortex, Pre-Motor Area, Motor Cortex are all the same except for controlling the right side of the body.
- Temporal Lobe – is the same but has an area specifically for understanding sentences.
- Frontal Lobe – Logic side of the brain, forms sentences, names things, tells time, interprets symbols, decides, computes, analyzes, finds patterns, orders

- Study your hat and put it on.
- Have someone quiz you where you do different things, like speech, and you try and point to that part on your “brain.”
- Read “ Why Does My Foot Fall Asleep ?”
- Try this quiz . It’s okay if you don’t know them all. Maybe you’ll learn something new.
- Explain to someone why limbs fall asleep sometimes.
- See what you remember . If you get something wrong, learn from it. You haven’t read the book these questions are from, so it’s okay to get something wrong, but learn from your mistake!
- Add the brain and spinal cord and nerves down the empty leg on your wall body.
- Choose a craft.
- You can use the image in the link above to help you draw it. You don’t have to use colored paper.
- If you really think your child can’t free form it (it doesn’t have to be perfect), they can color and cut and paste using this picture .)
- Spinal cord — Materials : egg carton, thimble, needle and thread, dry wagon wheel pasta (or Honeycomb cereal). Cut out egg carton sections (they probably need help with this). These will be your vertebrae. The wagon wheel pasta is like your spinal column. String them together with a dry wagon wheel pasta in between each “vertebra.” You don’t have to use noodles, but it shows how the spinal cord is connected and can bend in every direction.
- Read about memory . Click to turn the page until the article is finished.
- Try this memory experiment . Read page 8.
- *Print this data chart to use along with the experiment.
- Read this comic book about the brain .
- Take the reaction time test . How quick does your brain respond?
- Here’s a brain game for the whole family. Can you figure any out?
- Brain games…test your brain…what an amazing thing your brain is!
- hit the dot
- short term memory
- face recognition
- Read about vision in the first part of this chapter.
- Add eyes to your body. Label the pupils.
- Explain to someone what the retina does, as well as the eyelids, eyebrows and eyelashes.
- Read about eyes and vision .
- Here’s a video on how the brain works with our eyes to enable us to see.
- Now find those parts on the diagram you first looked at.
- Do the experiment on page 285. (Move your hand out of your line of sight and then place it down.)
- (*) Write up your experiment. You can use an experiment worksheet if you want.
- Learn about eye anatomy . Read about each part and find it on the diagram.
- If you can stomach it, you can watch a cow’s eye dissection .
- It worked. Look straight ahead holding it as described and then swing just a little ways right and left until you can see a whole picture of what’s in front of you.
- You can test your peripheral vision (how far you can see to the side when looking forward) by sticking a push pin or pencil into the middle of a long piece cardboard. Put it all the way on one side of the width near the edge, but in the middle lengthwise. Have someone take a marker and slowly drag it along the edge of the cardboard one direction until you can’t see it any more while looking directly at the push pin. Have them mark the spot. Try it in the other direction as well.
- If you really can’t do the experiment(s), read about this one, upside down .
- Explain to someone how your experiment(s) worked and what the conclusion (result) of the experiment was.
- Finish reading the chapter .
- *Print and complete the two worksheets . ( Answers )
- Scroll down and read “ Other Human Senses ” through to the end and answer the questions.
- Learn about the parts of an ear .
- Do the activity on page 282 and 283.
- Explain how your ear is like the cup.
- Add ears to your wall body.
- Design and carry out an experiment using taste and smell to answer the question, “Can You Identify Food Only with Taste or Only with Smell?”
- *Write up an experiment worksheet .
- Watch “ The Case of the Barking Dogs .” This is an hour. Decide as a family if you are going to watch or not.
- If you don’t watch it, you could try this experiment and try the quiz .
- Learn about how hearing works .
- Explore the ear .
- At the dinner table, tell what you learned on the subject.
- *Print this page and complete it. ( Answers )
- Read the first part of the chapter through “smell.” Stop at “tasting.”
- Add a nose to your wall body.
- Learn more about taste .
- Take a smell quiz .
- Finish reading this chapter .
- Do this taste experiment on page 271.
- Add a tongue to your wall body.
- Take the tongue quiz .
- Take the nose quiz .
- Take the ear quiz .
- Learn from your mistakes.
- Read about internal senses and stop right before “Infrared Vision.”
- Here this video about a kid who uses echolocation. Also, here’s a short article about him if you would like to read it. I was trying to find one I had seen before about a blind boy who could play soccer on a team using this technique.
- Try walking around the house blindfolded. Listen for sound clues to guide you.
- Take the senses quiz . Click on “start.” You don’t know all the answers. Guess when you have to. It will tell you the correct answer, so you can learn from this quiz!
- Here are some quick sense experiments to try.
- Pencil bump
- *Print and complete this worksheet . ( Answers )
- If you want to try some more experiments, try some of these.
- Whether you do the experiments or not, explain to someone about the experiments you did today and yesterday and what they show about our senses.
- Do the writing assignment on the last page of the chapter. Be creative.
- Try one of the experiments on the last two pages of the chapter .
- Make a list. List each of the body systems we’ve learned about and list as many parts as you can in each.
- Afterwards, take a look through this tutorial and see what you forgot.
- Let’s go back for a minute. Reread this chapter and add the liver, pancreas and gallbladder to your wall body. I don’t think we did before!
- Read about the male reproductive system and answer, “What is the main role of the male reproductive system?”
- Check your answer .
- See if you can get all these labels in place. Start with heart, lung, etc. The ones you haven’t heard of, leave for the end. It will only let it be in place if it’s correct.
- Read about the female reproductive system and answer the question, “What is the main function of the female reproductive system?”
- Start reading about cells . Read through page 288. Stop at “Organelles.”
- *There are lots of big words in there! Write what is the same and what is different about the two types of cells. Write what’s the same in the box and what’s different on the two sides of the line. *Print out this sheet to use ( prokaryotic eukaryotic ).
- Watch this video and learn about the development of a baby, of you, from the beginning!
- Here’s more more with an ultrasound pictures (first 4 minutes).
- Here’s another showing what that looks like from the inside .
- Psalm 139:13-14
- Read page 289 .
- *Do this crossword puzzle . (It may be the third page in your workbook labeled Lesson 60.)
- Watch this lesson on the endocrine system .
- Identify the parts of the body . Do the ones you know first! It will only stay in place if it’s in the right spot.
- *Print and complete the multiple choice and fill-in-the-blank .
- Reread the chapter as needed to help you. ( Answers )
- Read the Introduction to Cells and the first half of the chapter on cell structure , up to “Organelles.”
- Watch the video on “The Inner Life of the Cell” .
- Read the chapter on Organelles .
- Have someone ask you the questions on page 331 .
- Read the second half of the chapter on cell structure beginning at organelles and answer the questions.
- Reread the chapter on Organelles .
- Read the section on Transport . Answer the questions.
- *Complete the coloring page . ( Answers )
- Complete this word jumble . They are all bold words found in your current chapter . Use the chapter to help you. You can print this out or click to solve online.
- Read Cellular Respiration . Watch the video (linked at the very end of the lesson just before the Lesson Summary). Answer the review questions.
- Read page 333 .
- *Crack the secret code and follow the directions in the code. ( Answers )
- Read page 335 .
- Act out with people or puppets the roles of DNA, ribosomes and proteins.
- Read Cell Division . The video isn’t working. Here’s a replacement . Answer the questions. Tonight you might want to make tomorrow’s project.
- Read about cells and look at the drawing of a cell.
- Make a model of a cell. Here is some inspiration. one two three four
- You could simply get a plate and put on things like the crayon picture.
- You don’t need the labels. Tell where the membrane, cytoplasm, nucleus, ribosomes, ER and mitochondria are.
- Make “ cells .” Then draw one and label it.
- Read this chapter .
- * Unscramble the words and define them. ( Answers )
- Read about Mendel and the Foundation of Genetics .
- Read pages 385 and 386 and do the experiment.
- *Fill in an experiment worksheet .
- Watch the video on Punnett Squares . (Note: Don’t turn on the CC.)
- Click Start a New Game.
- You will click to Continue.
- When presented with the choice. Click on Genetics Interactive.
- Follow the directions. You’ll drag the letters into the squares.
- Look again at this chapter .
- *Use the information to complete this worksheet . ( Answers )
- *Color in the plant cell using the key at the bottom. ( Answers )
- Read about genetic advances and answer the questions.
- Read this chapter on bacteria cells .
- *Print and complete these pages . ( Answers )
- Read about bacteria and answer the questions.
- *Print this page . Get a large pan or a serving tray. Gather objects to represent each of the cell parts on the list. For example: ER could be a toy car because it transports things. Mitochondria could be candy because it gives energy. Choose an object for each one and put on a show-and-tell for your family. Show them each item and tell them what part of the cell it represents and why.
- Read about Archaea and answer the questions.
Level 1-4 *
- Read the first three pages of this chapter on the immune system , pages 339-341.
- *Print out and complete the word search . ( Answers )
- Read about infectious disease and answer the questions.
- *Complete the matching exercise . ( Answers )
- Read about noninfectious diseases and answer the questions.
- Watch the movie on the immune system. (Note: the video is pro-vaccine.)
- *Complete the compare and contrast worksheet . (If you need a reminder about red blood cells , you can look again at chapter 26, particularly page 258, which is page 5 in the PDF.)( Answers )
- Read about your body’s First Two Lines of Defense and answer the questions.
Lesson 74
(Materials: Q-tips, raw meat, beef bouillon, unflavored gelatin, sealable plastic baggies, antibacterial soaps, lotions, etc., it says 4 foil muffin cups–I don’t know if that’s really necessary — If you can’t get these, there is an alternative activity.)
- *You can use this sheet to record your predictions and results.
- If you don’t have the supplies, do the Day Two activity.
- Read about the immune system ‘s defenses and answer the questions in complete sentences. Give this to your mom to add to your portfolio.
- Watch a model of how a flu cell attacks the body .
- Do you see the red dots? Look at the key. A red dot is a person with the sickness.
- Click on “Step” a few times. What happens? Look at the key.
- Click on “Run.” Does the person get better without infecting anyone else? When the person turns gray, that means he is now immune to that sickness.
- Now play with it. Change the settings. Make the population mix (they can travel and take their diseases to new people for instance). Click on “Run.”
- You can also change the other settings.
- What observations can you make?
- Watch this video on the immune system .
- Do you see the red dots? Look at the key. A red dot is person with the sickness.
- Click on Step a few times. What happens? Look at the key.
- Click on Run. Does the person get better without infecting anyone else? When the person turns gray, that means he is now immune to that sickness.
- Now play with it. Change the settings. Make the population mix (they can travel and take their diseases to new people for instance). Click on Run.
- Read again about these words: Immune System , White Blood Cells , Lymph , Lymph Node
- Write, draw or act out how your immune system defends your body against a virus.
- Read Viral Attack .
- Write the immune system members and their order and function in defense as shown in the comic. You might want to save this for your portfolio.
Review/Genetics (older students)
- Read the review on page 11 .
- Do the writing activity on page 14.
- *Complete these two review pages the best you can and as neatly as you can. ( Answers )
- Give the pages to your mom to add to your portfolio.
- Let’s give this one more try. Read this lesson on Punnett Squares .
- At the bottom of the page, click on “chromosome kindergarten.”
Level 1-4 **
- *Print and cut out these DNA strips . Put all 28 strips into a bag, an envelope, or some other container.
- *Print these dog trait pages.
- Pull one DNA strip randomly from your bag. Look at the top of the first page of dog traits and the “head shape” category. Find the one that matches your DNA strip and circle it.
- Continue through both pages of dog traits, drawing a DNA strip for each trait and circling the corresponding trait in each category. As you determine each trait, tape your DNA strips to each other in the order you pull them out of the bag.
- Use the final page to draw your dog. With permission, display your dog and its DNA somewhere if you’d like!
Level 5-8 *
- *Here’s a genetics activity. Print these pages . Use page 1 for the following steps.
- Cut six squares from colored paper. Do that again with three other colors. You will have 24 squares. If you don’t have color paper, just cut the squares and mark them with different colors. You could use Lego bricks or something instead but make sure they are all the same shape and size.
- Color using only one color in all of the circles in each of the grandparents. For example, one grandparent might have all red circles and another all blue. Each grandparent should be a different color and only one color.
- Put grandmother A and grandfather A’s colors into a bag or something.
- Close your eyes and pick out one. Color using that color in one circle on Father.
- Repeat until all of Father’s circles are colored in.
- Do the same with Mother and the B grandparents’ colors.
- Then put all four colors into the bag according to what colors are colored in on Father and Mother. You should have only 12 squares in the bag. If Father has 2 blue and 4 green, then you should have 2 blue and 4 green squares in the bag.
- Repeat, pulling out one color at a time, and color in Iris’s circles.
- Then do the same with the other children.
- How different are the children? Answer the questions on page 2.
- Now make a similar chart for your family. Talk with your parents and chart the traits that they each have that their parents had, and which of those traits you and your siblings have.
- Human body review .
- Is there anything else you’d like to add to your wall body?
- Make baby things !
- The (R) and (D) in the Body Pattern section tells you if the trait is from a dominant gene or recessive gene.
- If only one parent has that gene and it makes it to the child. That’s the dominant gene. You only need one parent with a dominant gene to have it passed on.
- A recessive gene needs two parents with that gene in order to make it to the child.
- *Play Body Bingo .
- Print out pages 1 and 2 for each player. Page 3 is for the caller. (For harder questions, see 5-8’s page 3.)
- Each player should cut the body parts from page 2 and arrange/glue them onto their board (page 2) randomly. There are more body parts than spots on the board to help with variation.
- The caller should read the statements, and each player should try to figure out the body part being described. The answers are in parentheses if help is needed.
- Using coins, rocks, Legos, scraps of paper, or any other form of marker, have players mark the spaces that have been called. Play any form of Bingo you’d like – 4 in a row, corners, full board, etc.
- Print out pages 1 and 2 for each player. Page 3 is for the caller. (For easier questions, see 1-4’s page 3.)
- Using coins, rocks, Legos, scraps of paper, or any other form of marker, have players mark the spaces that have been called. Play any form of Bingo you’d like – 4 in a row, corners, full board, etc. For extra questions, see 5-8’s page 3.
- Label the body parts .
- Answer the questions .
- Label the body.
- Find the organs in the body.
- Look at the model of the eye . Click on the squares along the bar and then the little dots to read the labels of the parts. What are the white, black, and colored parts of your eye called?
- *Print and complete this page . ( Answers )
- This is our last week working with the human body. What can you remember?
- Label the organs .
- Label the muscles and bones .
- *Print and complete page 1 . ( Answers )
- Look at pictures of bacteria under a microscope .
- What do you think are the most amazing things about the human body?
- Look at these parts of the human body under the microscope .
- Write about what you think are the most amazing things about the human body?
- Play a body systems review game . (Pick from the games listed on that page.)
- *Walk around your house and outside of your home. Make a list of all of the plants you see and a list of what things you see that you think need plants. You can use this sheet ( plants intro ) to record your observations. Hold onto your sheet.
Level 1-4
- Materials: You are going to need soil and seeds at some point. I have always found beans the easiest to grow. Just buy the beans you eat. They work. They are seeds! I also suggest clear plastic cups for your pots. These are best for observation. You might want to go ahead and start a couple growing.
- Read the introduction to the Great Plant Escape . Click “next” and read the Case Brief. Click “next” and click on Plant Structures, the first one. Click on the words that are underlined and read the explanation.
- Go to the dictionary and click on the little speaker next to the big word, herbaceous .
- Take a look at some different types of stems .
- Take your sheet from Lesson 85. Label each plant you listed as H or W (for herbaceous or woody).
- Are there any more plants around you that you recognize now that you can add to your list?
- Explain to someone the difference between the two types of plants.
- Read about Plant Structure . Click on the underlined words. (If you are unsure how to say it, go here and listen to herbaceous .)
- Read pages 235 to 240 of Real Things in Nature .
- Read about plant parts . Click next and next…the last one is fruit. STOP after you read about FRUIT.
- You don’t need to know all of those blue words in there. Just understand the basic parts of a plant. I bet you do. Try the next activity.
- Label the parts of a flower . Choose Easy.
- Read about plant parts .
- Label the parts of a flower . Choose Hard.
- What part of the plant ?
- Read pages 240 to 248 of Real Things in Nature .
- Read about photosynthesis .
- *Complete this worksheet on photosynthesis . ( Answers )
- Learn about photosynthesis .
- Read pages 258 to 259 of Real Things in Nature .
- Draw a diagram demonstrating photosynthesis. Explain it and how plants and people have a symbiotic relationship.
- When you are done, here’s a diagram to compare it to. Are you missing anything on yours?
Lesson 89
(Materials: Broad leaf attached to a plant, tape, black construction paper–seems like you could use other colors)
- Today you are going to start a photosynthesis experiment.
- *Print out an experiment worksheet .
- Fill in the question. What happens if a plant leaf doesn’t get sunlight?
- Fill in your hypothesis, your guess as to what the answer is.
- Read the experiment . If you don’t want to know what happens, don’t scroll all the way down. Just read how to set it up.
- List your materials and procedure.
- Set up the experiment. Save your worksheet to finish next week. (If you can’t do the experiment, you can look at the picture of the result on the page where you read the experiment instructions.)
Level 5-8 **
(Materials: two or three potted plant seedlings OR at least two or three small pots of soil each with the same seed planted–you could put two seeds in each pot to give more of a chance, fan?)
- Read the experiment under Compare Elements of Growth
- I think you could just put one plant in each place, but you can use more if you like. You could use a closet for a dark room. If you are able to, do the fan part of the experiment too.
- *Today print out an experiment worksheet .
- Fill in the question, hypothesis, materials and procedure.
- Set up your experiment.
- *Print out this data sheet ( Compare Elements of Growth ) to record your observations daily. Don’t forget to water every day!
- Learn about the parts of a plant .
- Draw and label a plant.
- What does the process need? (Answers: carbon dioxide, water, and light )
- What does it produce? (Answers: sugar, oxygen )
- Look inside a flower .
- Draw and label a plant as detailed as you can.
- Watch this animation of photosynthesis .
- What can you describe about what’s happening?
- Tell someone what you learned, or ask them the questions and see if they get the answers right.
- Read about the life cycle of the plant . You don’t need to know all of the blue words. Explain the difference between an annual plant and a perennial plant.
- Why do people like to plant perennial plants? (answer: They don’t have to plant them each year. They grow again on their own. )
- Plan a garden. What would you plant? Take a piece of paper. That’s your garden. Write or draw what you would grow.
- Read about the life cycle of the plant . Click on the blue words to learn more about their definitions.
- What does it mean when a plant is dormant? (answer: It is resting. It is not growing. )
- What kind of flower would you choose to plant at your home? Why?
- Take a look at this veggie page . Plan a garden. What would you plant? When would you plant each thing?
- Read the first sections on Growing Plants Indoors . Read “Room to Grow” and “Temperature.”
- Read about plants that live in the hot desert . Click on the arrow to keep turning the pages.
- Explain to someone what types of plants live in hot climates.
- Read the first sections on Growing Plants Indoors . Read “Room to Grow” and “Temperature.”
- How are plants like people? (answer: They like to be at a comfortable temperature, but they each like different temperatures. )
- Read about plants that live in the hot desert . Click on the arrow to keep turning the pages.
- Read about plants in the tundra .
- Explain to someone about the types of plants that live in hot and in cold climates.
Lesson 93
- Read about light and water .
- Grow a plant . What happens when you don’t use enough light or water?
- Explain to someone why a plant needs light and water.
- Take three plants or plant three seeds in three different containers. Put one in the dark (maybe a closet) but water it daily. Put one in the light but never water it. Put one in the light and water it. What happens?
- *Print out this experiment sheet, ( light and water ). Fill in what you think will happen. Save your paper. After a week or so, you can record what happened.
(Materials: shoe box, cup of dirt, bean seed, other pieces of cardboard)
- Read about light and water .
- Start this experiment today. You will observe just how much a plant needs light.
- If you need a picture of how to make it , here’s one. (Below is another set of directions and pictures of how to make it, but the last picture shows the result.)
- Here’s a picture of the result if you can’t do it.
- Read about air , nutrients, and time.
- What is something that can hurt a plant? (answer: smoke )
- Read about the different lengths of time it takes for plants to grow .
- Tell someone three different plants and how long they take to grow.
- Read about air , nutrients, and time.
- It lists three nutrients that plants need. What would give plants those nutrients? Do a little research. Put in the soil of one plant things that would give it those nutrients. Observe its growth next to one without the homemade fertilizer.
- Explain to someone what you did and why and what you think will happen.
- Today do the mystery quizzes . Do them both.
- Make sure to make observations on all the plants you have growing.
- Give someone an update on the plants you have growing.
- If you haven’t yet, take the paper off of your leaf. What has happened?
- Today do the mystery quizzes . Do them both.
- Read this page on the parts of a plant that we eat .
- *Write or draw all the things you can think of that you eat that belong in the different categories . Look around your kitchen or even the grocery store.
- Here are some ideas to check/add to your list when you are done.
- When I lived in Istanbul, Turkey, I shopped for all of my fruits and vegetables at an open air market. One day a week they closed the road and sellers set up tables on the street. One of the sellers sold roots — just the roots. Celery root, beet root…A soup called borscht is made from beet root. Try new parts of plants. Maybe you will be surprised.
- When I lived in Istanbul, Turkey, I shopped for all of my fruits and vegetables at an open air market. One day a week they closed the road and sellers set up tables on the street. One of the sellers sold roots, just the roots. Celery root, beet root…A famous Russian soup called borscht and it is made from beet root. Try new parts of plants. Maybe you will be surprised.
Lesson 97 (Choose an activity — different activities require different things; some require nothing)
- Choose an activity. Grow lettuce Other ideas
- *Try some nature study. Follow the directions on this tree worksheet and fill it out.
- parts of the US
- North America
- Read about trees in Real Things in Nature , pp. 273
- *Like yesterday…follow the directions on this tree worksheet and fill it out.
- Learn about the age of trees . Try counting one of the samples.
- Explain what you learned and the word dendrochronology .
- If you have any experiments still going, make your final observations now.
- *Try and complete a scavenger hunt for the season you are in. Only print the one you need.
- *Try and complete a scavenger hunt for the season you are in. You only need to print one.
- Read the beginning of the case 2 .
- Then read the Case Brief .
- Take a clear plastic cup and fill it with soil (dirt). (It’s okay if you don’t have a clear cup.)
- Make observations. Dig through it. What do you see in there?
- *Fill out this paper with your observations. You will need a ruler. ( soil observations )
- Leave your cup of dirt sitting out in the sun.
- Tell someone what you think you know about soil. What’s it made of? What would you find in it?
- Read the beginning of the case 2 .
- Then read the Case Brief .
- Take a clear plastic cup and fill it with soil (dirt). Try and dig down a bit to get moist soil. (It’s okay if you don’t have a clear cup.)
- Make observations. Dig through it. What do you find? Any surprises?
- Read page 150 Real Things In Nature .
- Is there anything new you learned about soil today?
- Read about the makeup of soil .
- Do you observe all of those things? Were any of them a surprise?
- Measure your soil again. I’m wondering if you can detect the soil being less as the water in it evaporates.
- Your reading says that soil is made up of living and non-living material. What’s another way of saying living and non-living that you learned in the beginning of the year? (answer: biotic and abiotic )
- What’s an example of living material in soil? (answer: leaves )
- What’s an example of non-living material in soil? (answer: rocks )
- Read about the makeup of soil .
- What type of organic matter do you think is found in soil? Make a list.
- Read this list . Did you include all of these?
- Read about what organic matter does for the soil .
- Explain what organic matter is and its purpose in soil.
- Read about the different types of soil .
- Click at the bottom to solve the first mystery.
- Follow the directions. What does your soil smell like? What color is it? Measure it again and see if there is any difference.
- Also, take it apart and sort through it as it describes. You can add any observations to your paper if you like. Or, just tell them to your family.
(Materials: jar, dirt)
- Learn about soil .
- Learn about the types of soils .
- What type of soil do you think you have? Go get some and compare to the lists.
- While you’re out gathering dirt, get some from a few different locations into a jar. Add water. Shake. Let it sit. You can check on this tomorrow. It’s the first activity on this page.
- Read this next page on the nutrients (that’s like the vitamins in the food you eat) in soil.
- Learn how organic matter helps the soil.
- Tell someone about two of them.
- Read all about soil . Keep clicking on “next.”
- How does weather affect soil? (answer: Weather helps make soil by causing rocks to crack and break up. )
- How does soil help plants? (answer: It gives them nutrients to make them healthy. )
- Read about how different factors affect soil.
- Write a paragraph about soil: its makeup, purpose and what affects it.
- Learn about the best soil for growing plants in containers .
- Turn the page and read about composting.
- Make a compost pile of any size.
- Learn about the best soil for growing plants in containers .
- Turn the page and read about composting. Make sure you click on all of the underlined words. If you have studied year 4, acidic and basic should be familiar.
- Teach someone about your compost. What is in it and why?
- Read more about soil and composting . Stop after you’ve read the worm page.
- Go back to the soil observation page and find some soil to observe. Use sticks or popsicle sticks to mark off your area.
- *Here’s a page to record your observations ( Soil Squares Observations ). Follow the directions on the web page and don’t forget to check back on other days.
- You can make a worm bin if you like 🙂
- Add worms to your compost if you can.
- Read about soil substitutes .
- Do the experiment with as many different things that you can. Remember that you can mix them together too.
- *Here is a sheet to record your observations ( Soil Substitutes Observations ). You can make another page for more space and you can add lines at the bottom to write more. The lines at the bottom are for writing what’s in each cup. Label your cups! The boxes are for your observations.
- You’ll have to observe over the next week or so.
- Do the experiment with as many different things as you can.
- *Here is a sheet to record your observations ( Soil Substitutes Observations ). You’ll have to observe over the next week or so.
- Play the senses game .
- Test out all five senses. Observe yourself using each one.
- Do a super easy senses activity . Keep going to the end.
- Can you see these 3D optical illusions ? Click on an image and then relax your eyes and try to see the 3D image “jumping out” of the center of each one.
- Color blindness . (It will ask for your email address at the end to send your results. It’s not necessary. You’ll know if you could read the numbers or not.)
- Optical illusions (Click on the first square at the top of the boxes on the right for the full tour. Do as many as you like.)
- Check on your soil squares and cups.
- reaction time
- spot the real smile (answers: I think the REAL smiles are on the R-L-R-R. )
- Read about your next case .
- Read the case brief.
- Tell someone everything you think you know about seeds.
- Do you have any seeds in your house?
- Read about your next case .
- Go through each of the ideas and write down what you think you know about that topic. Give some space between topics so you can add what you learn.
- Read “ All About Seeds .”
- How do you think each of those seeds (pictured at the bottom of the page) travel?
- Here’s a lesson on seeds traveling .
- Watch this lesson on seeds and how they grow.
- What seeds are in your kitchen? If you have a yard, what seeds are in your yard?
- Read about seed dispersal .
- Read “ How Seeds Are Scattered .”
- Did you have all of these ways written down on Lesson 111? Add to your list from Lesson 111 the new things you learned about seed dispersal.
Lesson 113
- Read about seed structure .
- Turn the page and read about germination.
- You don’t need to know all of the blue words.
- *Place a bean (or a few beans) in a ziplock bag (or some tight clear container, even a glass with plastic wrap covering it with a rubber band to hold it on) on top of a soaking wet paper towel (or substitute). Place it in the sun. Every day draw a picture of what it looks like. Label each picture with the day #. Here’s a paper to use if you like. Print as many as you need. ( Germination Observations )
- Watch this video of green bean germination . Does it have one or two leaves as it sprouts?
- Read about seed structure .
- Read this seed overview . Complete steps 1 and 2 of the experiment at the bottom. (Scroll down past the picture.)
- You can give this page to a parent to add to your portfolio.
L evel 1-4 *
- *Draw the steps of germination . You can just use this as a guide to draw it yourself. You can trace the parts onto your germination “canvas.” You could cut out the parts and glue them on. You could ask a parent to make a stencil.
- Make sure to check on your bean and record your observations.
- Read about germination .
- You can read about and watch germination here.
- Go back to your experiment and complete steps 3 and 4. Name the parts of the seed.
- Photosynthesis review. Watch the video and then click on part 2 .
- Do this photosynthesis lesson/quiz. Click on “Next Activity” when you are done each part.
- Take a look at this photo of the power of life . The seeds want to live. Have you ever seen a plant breaking through a sidewalk, a wall, or a rock?
Lesson 116
- Do all plants have seeds to make more plants? What do you think? Make a guess then read this page .
- Now turn the page . Can you figure out which seeds grow into which plants?
- *Make a mini-book about four different seeds and what they turn into. Here is a lift-the-flap template book. The seed pictures would go on the flap. Write or draw what it turns into on the inside when you lift the flap.
- Put your mini book or your soil substitute observations in your portfolio.
(Materials: clear plastic cup, paper towels, seeds, black construction paper)
- Can you say which way a seed becomes a plant ?
- Read this page and follow the directions on the next page to make a Seed Viewer.
- *Print and fill out an experiment worksheet . Add this worksheet to your portfolio.
Lesson 117
- *Do you remember woody and herbaceous plants ? Label the parts of the tree (the woody plant) and the flowers (the herbaceous plant). ( Answers )
- What parts do both types of plants have?
- Read pages 18-21 of The First Book of Plants . These pages are about two things that woody and herbaceous plants have in common.
- Are you remembering to record your daily observations of germination?
- See what goes into identifying a plant . See if you can get through one plant. You’ll click on the picture and then click your choice from the boxes that show below the picture of the plant. Over on the right you’ll find the information you need to choose.
- Start a seed collection. Glue seeds down to a stiff paper or cardboard. Decorate it if you want to make it nice. Label each seed. Can you place them into any categories, edible/inedible for instance?
- *Does it come from a plant ? Fill out the worksheet.
- When you are done read this (highlight to read): Plants may be used for decoration, erosion prevention, and climate control (wind and sun breaks), as well as foods, beverages, flavorings, medicines, fabrics, rope and other fibers, wood, rubber, dyes, paper, and many other products. The original form of aspirin came from willow bark. American Indians would make a tea from the bark for fevers and pain. Even marijuana was originally introduced into this country as a source of hemp for making ropes, cloth and sail. (ends here)
- Read this page about plant classification .
- *On this worksheet write one specific type of plant in each category. You can use the internet to help you.
Lesson 119
(Materials: two leaves, not dried out–they can’t be crumbly)
- Get two leaves. Place one under a piece of thin white paper. Rub with a pencil or crayon over the part of the paper covering the leaf. Do the same with the other leaf.
- *Print out these pages for your leaf rubbings and fill out the other information as well ( Leaf Rubbings ). If your leaf is huge, you can rub the back of the paper.
- Let’s review again. Make a comic strip that teaches the process of photosynthesis . Here’s a reminder .
- Go to number 1 under “ Procedure .” Read the story and identify the tools as directed. Do you have tools at your house to care for plants? What kinds?
- Have you met your goals ? Tell someone about each thing on the list. Can you do it?
- Review: Write or tell about each thing in the goals lists.
- Goals for case 1
- Goals for case 2
- Goals for case 3
- Read your new mission .
- *Print out this KWL chart . Read the Case Brief with the list of goals. Use the goals to fill in the “What I Know” and “What I Want to Know” parts of the chart. Leave the “What I Learned” part empty, for now.
- Read your new mission .
- *Print out this KWL chart . Read the Case Brief with the list of goals. Use the goals to fill in the “What I Know” and “What I Want to Know” parts of the chart. What you want to learn is whichever of the goals you don’t already know the answer to. Leave the “What I Learned” part empty, for now.
- Read Real Things in Nature pages 261-268. Fill in the “What I Learned” box.
- Read about the parts of a flower . Just read this one page.
- Read The First Book of Plants pages 23 and 24.
- Draw a picture of a flower and label it.
- Draw a picture of flower and label it with what you remember from yesterday.
- Then go back to Real Things in Nature and see if you got it correct. Fill in what you missed. Try and put on all of the italicized words.
- Read The First Book of Plants pages 25 to 29.
- Act out with people or props the process of how you get from pollen to fruit. OR
- *Print out this page ( reproduction cartoon ) and draw the process from pollen to fruit.
- Write labels/descriptions for each of your pictures. You can draw lines in the middle of the empty boxes to add more boxes if you want them.
- Read The First Book of Plants pages 30-33.
- Take the quiz and see what you remember. It’s okay to make mistakes if you learn from them! Skip the page with the blank boxes. Click next to move on.
- Read this page about nonflowering plants and take notes. Write each of the blue words down and what you learned about each word. It doesn’t have to be in complete sentences. When you take notes, you write briefly, but enough so that you remember all of the facts. Read your notes back to someone when you are done.
- Fill in the “What You Learned” section of the worksheet from Lesson 121.
- Did you find the answers to everything you wanted to learn?
- Learn about the life cycle of a fern . Watch carefully and read the words.
- Explain it to someone. Use some of those words!
- Take the little quiz . Skip the page with the blank boxes and click “next” to move on. The last page is identifying fruit.
Lesson 126 (Materials: flower, if possible)
- Find a flower. Draw a picture of it. Write its name on the page if you know it. If you don’t, use the internet to try and find out.
- On the page, write “Number of petals,” “Color of petals,” “Shape of petals,” “Scent” and anything else. What else can you observe, count, record? Do you see any pollen? Make a thorough recording of it. When explorers went to new areas, they drew careful pictures and wrote careful observations to tell people about their new discoveries.
- Can your flower be used for anything? Use the internet. Is it poisonous ? Edible ?
- Find a flower. Draw a picture of your flower or take a picture of it and put it in a document. Include all of this information on your page. What other observations can you make? Do you see any pollen?
- Try growing something from a cutting. You can use this page and the next for ideas.
- Pollination review You can sing the pollination song 🙂
- Try growing something from a cutting. You can use this page and the next for ideas.
- Pollination review
- Time to start a new mission . Read this page the case brief.
- *What do you think you know? Fill out the chart. KWL chart
- Take a look at pages 44 and 45 of The First Book of Plants .
- Time to start a new mission . Read this page the case brief.
- Read pages 269 to 271 of Real Things in Nature.
- Read about bulbs . You don’t have to learn the blue words, but click on the word “bulb” and then draw and label a picture like the one shown. Don’t click on the box at the bottom of the page.
- Tell someone about bulbs.
- Read about bulbs . Draw and label a picture of a bulb and write all of the blue words and their definitions.
- Don’t click on the box at the bottom of the page.
- Read “ What is a bulb ?” and follow the directions. Add to your list.
- See if you can see the parts of a bulb in an onion or garlic clove.
- Finish reading the rest of the case. Keep clicking next.
- Read “ What is a bulb ?” and follow the directions.
- Cut open an onion or garlic clove. These are bulbs. Plants can be grown from these. Do you ever see green leaves coming out of your onions or garlic? What parts of a bulb can you see inside? Show someone.
Lesson 131 (Materials: potato)
- Fill out the rest of your KWL chart.
- Plant potato parts as described. Watch their growth.
- If you have access to a sweet potato, you can grow a sweet potato vine.
- Here’s the last case . It’s not really a case. On the last page you can print out the certificate if you like.
- Read the first part of the chapter about vascular plants. Stop at flowering and non-flowering plants.
- Take a piece of paper and divide it in half. On one side write” vascular” and on the other side write “nonvascular.”
- Draw a picture of a kind of vascular plant on the one side and a nonvascular plant on the other.
- Show your picture to someone and explain the difference.
- Learn about how living things are classified , or organized.
- Complete the activity .
- Learn about the protist kingdom .
- Tell someone what classifies something as protist and some examples of what is in this kingdom.
Lesson 133
- *Finish reading the chapter and do the word search . ( Answers )
(Materials: ziplock bag or clear glass jar)
- Read about fungus and mold .
- Here are before and after pictures to help you decide what foods you might want to try. You can just do one, or you can do several.
- *Print out this sheet, Mold Observations , and draw pictures of what you think your food will look like on the given days. Use color. Keep the sheet and on the days draw what it actually looks like. If you are against drawing, you can write a description.
- *Do the matching worksheet . ( Answers )
- Write a water drop story as described on page 138.
- Read or listen to the story of aspirin .
- Read the history of plants as medicine . (Now I’m combining science and history!)
Lesson 135
(Materials: white carnation or other white flower, if possible)
- Look at pages 186 to the end .
- *Print out the petal sheet .
- Do the two experiments.
- If you don’t have a flower, you can watch the video of the experiment . Even if you have a flower, you might want to watch it. 🙂
- Make a mini book. Use this list and choose twenty plants. Write their names, their uses and include a picture. Make sure you give your book a title.
- From this list you are going to choose one to write a report on. Decide today. It should be one that you can find information on about its use today and historically.
- Read the beginning of the chapter until it says Kingdom Protista.
- What is a kingdom? Watch the movie .
- Choose one plant that has been used as medicine. Learn about the plant, how it’s currently used, and how it’s been used historically and in other cultures.
- Take good notes. Write down where you got each bit of information. Write down the websites. Get as much information as possible. You should use lots of sources.
- How do fungi eat? (answer: Fungi are decomposers. They spread a sticky goo into the area surrounding their body that contains enzymes. These chemicals break down biotic material into smaller, softer parts. The fungi can then absorb this substance. (from the textbook) )
- Take a piece of paper and fold it in half. Open it up.
- On one half, write fungi, and on the other half, write protist.
- Draw a picture on each side of an example.
- Write a paragraph (in proper form) about the benefits and drawback of the plant as medicine and any conflicting information about how it should or shouldn’t be used.
- *Print and complete the worksheet . ( Answers )
- Answer the question on the last page . You don’t have to write your answer. You can tell your answer.
- Write a paragraph about the plant as a drug and on plants as drugs in general. Would you recommend the plant you researched? Would you recommend over-the-counter plant-based medicines? Why or why not?
- How about some review by movie . See if you remember any of these big words about cells. When you are done, tell someone some big words and what they mean. See if you can name two.
- Make sure you are watching your growing things and making observations. What do you observe today?
- Make your report. Give it a title. Put your data in it. Change the end of your introductory paragraph to be a thesis statement introducing what you are going to talk about.
- Edit it. You could work on the transition between each paragraph.
- Create a final page that lists the resources you used. Give that page a title, “Resources.”
- Save! Print. Share.
- Watch the video to review photosynthesis .
- Take the quiz (scroll up when you click the link) and see how you do.
- How about some review by movie . See if you remember any of these big words about cells. When you are done, tell someone a couple of big words from each video.
- Watch a video on seed plants .
- Watch the video on photosynthesis .
Underwater Plants
- What types of plants did you see?
- Read about aquatic plants .
- Read about the different types of aquatic plants .
- If you haven’t learned what an outline looks like yet, here is an example .
- Use what you know so far to fill in the outline.
- Read the “ Brief intro on Sea Plants on Site .” It’s just the first part.
- Look at marine (sea) plants .
- The introduction mentioned food chains . Read about what a food chain is.
- Play the food chain game . Click on the animal picture and then click on Check. Scroll down to see the info and to click on Next.
- You will learn more about food chains in Zoology (year 2).
- Read about algae . Read the intro on the page and then click on the algae link and click on the specific types. List five types and information you learned on your outline.
- Read survival, flowering, and phytoplankton . Scroll down. This is pages 2 and 3.
- What is phytoplankton? (answer: type of algae )
- Where do the plants that live in the dark get their nutrients, since they can’t produce their own food using the sun (photosynthesis)? (answer: from dead fish )
- Read about floating plants . Read the intro on the page, and then click on the floating plants link and click on the specific types. List five types and information you learned on your outline.
- Read pages 4 and 5 about seaweed .
- Take a look at brown seaweed and green seaweed .
- Is there kelp in your cupboard ?
- Read about submerged plants . Read the intro on the page and then click on the submerged plants link and click on the specific types. List five types and information you learned on your outline.
- Read page 6 the “ End of Sea Plants .”
- What is happening to destroy sea plant life?
- What do you think people should do to stop it?
- What can you do?
- Read about emergent plants . Read the intro on the page and then click on the emergent plants link and click on the specific types. List five types and information you learned on your outline.
Plant Biomes
- You are going to make a Biome Book. A biome is a big description for a type of environment. Each lesson you will read about one type of biome and about the plants that live there. Each lesson you will take one piece of paper. On the top write the name of the biome. Draw a scene of what that biome looks like and what plants live there. (If you are really against drawing, you can write a description of the biome and list what plants live there.)
- Today do oceans. Read, “ What is an ocean? ” and about plants in the ocean.
- Make the ocean page of your book.
- *Complete this biome lapbook . Print the lapbook pieces and this map . You need to finish on Lesson 150. You need to read the basic information about each biome and then about plants in that biome . Write about each biome and give an example of what type of plants live there. Be prepared to share why those plants live where they do. What is special about them, that they can survive and thrive in that environment?
- There is one piece for each biome. They will go along the outer edges of the lapbook. The big middle section of the lapbook will be the map.
- Come up with a map key that includes a color for each biome, and write each biome name in its color in a blank space on the map. Then color the map accordingly to show where each biome is found in the world.
- Today do the Arctic. Read about the Arctic and about plan ts in the Arctic .
- Make the Arctic page of your book.
- Work on the lapbook.
- Today do deserts. Read about the desert and desert plants .
- Make the desert page of your book.
- Desert looks a lot like dessert. How can you remember which is which? Dessert has more Ss because you always want more dessert!
- Today do forests. Read about forests and plants in the forest .
- Make the forest page of your book.
- Today do tropical biomes. Read about the rainforest in the tropics .
- Make the tropical page of your book.
- Present your book. Show it to an audience and explain about the different biomes and plants that live there.
- Finish the lapbook.
- Present it. Read your lapbook to your audience and tell them why those plants live where they do. How does the environment fit them?
- The scientific method is how scientists approach a problem. They have a problem they want to solve. They learn all they can about it. Then they guess at a solution. That’s called the hypothesis. They test their solution to see if it works. That’s their experiment. They look at the results of their experiment to see if their hypothesis (guess) was right. If it was, they come up with their conclusion, what they think is true.
- Watch this video on the scientific method .
- *Print out this page on the scientific method . Complete the piece on, “What is the Scientific Method?” Save the rest of the page.
- Watch this video on the scientific method . When you get to the military example, if you want, skip ahead to the 20-minute mark.
- Explain what the scientific method is and what science is.
- Complete the “Steps of the Scientific Method” and “What is a hypothesis?” pieces from the page you printed on Lesson 151.
- You start with a question you want answered.
- Use what you know, learn more and make observations.
- Then you form a hypothesis, which is your best guess at the answer to your question.
- Then you experiment.
- When you are done, you look at your data, all of the observations and information you gathered during the experiment.
- You use that information to make your conclusion, your final statement on whether or not you think your hypothesis was right.
- Read about the scientific method and then take the quiz .
- Control variables are the things that you are not going to change. They are going to always stay the same with each version of the experiment.
- The independent variable you change hoping for different results.
- Dependent variables are the things are impacted as a result of the change made to the independent variable.
- *Complete the variable piece .
- Read until you get to “ answer questions ” for the first time. Can you answer the questions?
- Make sure you click on the sore feet research investigation. To use it click on “sore feet” repeatedly to collect data and then view the results.
- Read the ten slides in this presentation on the scientific method . If you are on a mobile device, swipe left through each of the slides. Do not click Download. Do not click any other links on this page.
- Listen to the scientific method song . You can read the lyrics while it plays.
- Finish the page .
- Make sure you do the required research activities. Stop at “required reading.” You don’t need to do that.
- *Practice. Print out this Scientific Method Worksheet . Order the steps of the scientific method. (Use the song or presentation from Lesson 154 if you need help.) Then describe what you would do for each step. Your problem is that you can’t blow a big bubble. You want to know if there is gum out there that makes it easier to blow a bigger bubble. ( Answers )
- Watch the presentation on the scientific method .
- *Print out this scientific method worksheet .
- Complete the second page; fill in the blanks.
- Today you are going to start thinking about what experiment you would like to do about plants. Try and come up with a question you would like answered.
- *Fill out the question worksheet .
- If you are stuck, here are some questions to get you thinking. Here are some more experiment questions . Here’s another idea .
- Today you are going to decide on a question you would like answered about plants.
- If you are stuck, here are some questions to get you thinking. Here are some more experiment questions .
- *Today you will do the observations and research part of the scientific method. You are looking for information that will help you form your hypothesis. Record your resources and notes on these pages .
- *If you are ready, write down your hypothesis, what you think you will find to be true after your experiment. Fill in your hypothesis on this worksheet .
- Decide on how you will do an experiment to check if your hypothesis is right or not.
- What will your variables be? What will you change? What will stay the same? What will you be looking for? Fill in the variable section of your worksheet. The definitions of the different kinds of variables are on the page.
- *List your materials and procedures .
- Make sure you have the materials.
- If you are ready, start your experiment. Because plant experiments often need several weeks to observe, I wanted you to get started on it right away.
- Decide how you are going to record your observations. How often are you going to make observations? Make sure you have a method for carefully recording when you made observations and what you saw.
Level 1-4 (*) Note that an asterisk in parenthesis (*) indicates an optional page to print.
- Now we are going to start all over!
- You can print a second copy of the worksheets or you can record all of the information yourself on paper or on the computer.
- You are going to be doing a human body experiment as well.
- Don’t forget about making observations on your plant experiment.
Level 5-8 (*) Note that an asterisk in parenthesis (*) indicates an optional page to print.
Level 1-4 (*)
- (*)Today you will do the observations and research part of the scientific method. You are looking for information that will help you form your hypothesis. Record your resources and notes .
Level 5-8 (*)
- (*)If you are ready, write down your hypothesis, what you think you will find to be true after your experiment. Write down your hypothesis .
- (*)List your materials and procedures .
- Don’t forget about your plant experiment and observations.
- If you are ready, start your experiment.
- You have twelve days to collect your data starting today.
- Collect your data.
- Start work on a landscaping project.
- Plan what trees, bushes, flowers, etc. you will plant in your yard or in your neighborhood.
- Research what grows in your biome.
- Make decisions based on your area and what would be easiest and best for your neighborhood.
- Don’t just pick anything. Choose plants for a reason. You’ll explain your reasons when you present your landscaping project.
- This is due on Lesson 170. You’ll need a picture, a diagram of your landscaping plan.
Lesson 167
- Work on your landscaping project.
Lesson 168
Lesson 169
- Draw a picture of your neighborhood and show where you would plant the things you decided on.
- Present your project. Why did you choose the plants you did?
- Why did you put them where you did?
Lesson 171*
- *Go back to your same tree and observe it now.
- Don’t forget to make observations.
- Take the human body quiz .
- Make observations. Collect data.
- Review the respiratory system .
- Review the digestion system .
- Review the skeletal system .
- Take a human body quiz .
- Take a human body quiz .
- Write up your data in a chart or graph. Make it look great.
- Make sure it is labeled clearly so that someone can understand it without you explaining it to them.
- Write your conclusion.
- Older students should write a paragraph.
- Make sure everything is neat and orderly. Practice presenting your experiments in front of an audience.
- Present your experiments. Tell your audience about each experiment. Tell them your hypothesis, your procedure, what your data showed and what your conclusion is.
Congratulations ! You are finished! Way to go!
70 Best High School Science Fair Projects in Every Subject
Fire up the Bunsen burners!

The cool thing about high school science fair projects is that kids are old enough to tackle some pretty amazing concepts. Some science experiments for high school are just advanced versions of simpler projects they did when they were younger, with detailed calculations or fewer instructions. Other projects involve fire, chemicals, or other materials they couldn’t use before.
Note: Some of these projects were written as classroom labs but can be adapted to become science fair projects too. Just consider variables that you can change up, like materials or other parameters. That changes a classroom activity into a true scientific method experiment!
To make it easier to find the right high school science fair project idea for you, we’ve rated all the projects by difficulty and the materials needed:
Difficulty:
- Easy: Low or no-prep experiments you can do pretty much anytime
- Medium: These take a little more setup or a longer time to complete
- Advanced: Experiments like these take a fairly big commitment of time or effort
- Basic: Simple items you probably already have around the house
- Medium: Items that you might not already have but are easy to get your hands on
- Advanced: These require specialized or more expensive supplies to complete
- Biology and Life Sciences High School Science Fair Projects
Chemistry High School Science Fair Projects
Physics high school science fair projects, engineering high school stem fair projects, biology and life science high school science fair projects.
Explore the living world with these biology science project ideas, learning more about plants, animals, the environment, and much more.
Extract DNA from an onion
Difficulty: Medium / Materials: Medium
You don’t need a lot of supplies to perform this experiment, but it’s impressive nonetheless. Turn this into a science fair project by trying it with other fruits and vegetables too.
Re-create Mendel’s pea plant experiment
Difficulty: Medium / Materials: Medium ADVERTISEMENT
Gregor Mendel’s pea plant experiments were some of the first to explore inherited traits and genetics. Try your own cross-pollination experiments with fast-growing plants like peas or beans.
Make plants move with light
By this age, kids know that many plants move toward sunlight, a process known as phototropism. So high school science fair projects on this topic need to introduce variables into the process, like covering seedling parts with different materials to see the effects.
Test the 5-second rule
We’d all like to know the answer to this one: Is it really safe to eat food you’ve dropped on the floor? Design and conduct an experiment to find out (although we think we might already know the answer).
Find out if color affects taste
Just how interlinked are all our senses? Does the sight of food affect how it tastes? Find out with a fun food science fair project like this one!
See the effects of antibiotics on bacteria

Difficulty: Medium / Materials: Advanced
Bacteria can be divided into two groups: gram-positive and gram-negative. In this experiment, students first determine the two groups, then try the effects of various antibiotics on them. You can get a gram stain kit , bacillus cereus and rhodospirillum rubrum cultures, and antibiotic discs from Home Science Tools.
Learn more: Antibiotics Project at Home Science Tools
Witness the carbon cycle in action

Experiment with the effects of light on the carbon cycle. Make this science fair project even more interesting by adding some small aquatic animals like snails or fish into the mix.
Learn more: Carbon Cycle at Science Lessons That Rock
Look for cell mitosis in an onion
Cell mitosis (division) is actually easy to see in action when you look at onion root tips under a microscope. Students will be amazed to see science theory become science reality right before their eyes. Adapt this lab into a high school science fair project by applying the process to other organisms too.
Test the effects of disinfectants

Grow bacteria in a petri dish along with paper disks soaked in various antiseptics and disinfectants. You’ll be able to see which ones effectively inhibit bacteria growth.
Learn more: Effectiveness of Antiseptics and Disinfectants at Amy Brown Science
Pit hydroponics against soil
Growing vegetables without soil (hydroponics) is a popular trend, allowing people to garden just about anywhere.
More Life Sciences and Biology Science Fair Projects for High School
Use these questions and ideas to design your own experiment:
- Explore ways to prevent soil erosion.
- What are the most accurate methods of predicting various weather patterns?
- Try out various fertilization methods to find the best and safest way to increase crop yield.
- What’s the best way to prevent mold growth on food for long-term storage?
- Does exposure to smoke or other air pollutants affect plant growth?
- Compare the chemical and/or bacterial content of various water sources (bottled, tap, spring, well water, etc.).
- Explore ways to clean up after an oil spill on land or water.
- Conduct a wildlife field survey in a given area and compare it to results from previous surveys.
- Find a new use for plastic bottles or bags to keep them out of landfills.
- Devise a way to desalinate seawater and make it safe to drink.
Bunsen burners, beakers and test tubes, and the possibility of (controlled) explosions? No wonder chemistry is such a popular topic for high school science fair projects!
Break apart covalent bonds

Break the covalent bond of H 2 O into H and O with this simple experiment. You only need simple supplies for this one. Turn it into a science fair project by changing up the variables—does the temperature of the water matter? What happens if you try this with other liquids?
Learn more: Covalent Bonds at Teaching Without Chairs
Measure the calories in various foods
Are the calorie counts on your favorite snacks accurate? Build your own calorimeter and find out! This kit from Home Science Tools has all the supplies you’ll need.
Detect latent fingerprints

Forensic science is engrossing and can lead to important career opportunities too. Explore the chemistry needed to detect latent (invisible) fingerprints, just like they do for crime scenes!
Learn more: Fingerprints Project at Hub Pages
Use Alka-Seltzer to explore reaction rate
Difficulty: Easy / Materials: Easy
Tweak this basic concept to create a variety of high school chemistry science fair projects. Change the temperature, surface area, pressure, and more to see how reaction rates change.
Determine whether sports drinks provide more electrolytes than OJ
Are those pricey sports drinks really worth it? Try this experiment to find out. You’ll need some special equipment for this one; buy a complete kit at Home Science Tools .
Turn flames into a rainbow
You’ll need to get your hands on a few different chemicals for this experiment, but the wow factor will make it worth the effort! Make it a science project by seeing if different materials, air temperature, or other factors change the results.
Discover the size of a mole

The mole is a key concept in chemistry, so it’s important to ensure students really understand it. This experiment uses simple materials like salt and chalk to make an abstract concept more concrete. Make it a project by applying the same procedure to a variety of substances, or determining whether outside variables have an effect on the results.
Learn more: How Big Is a Mole? at Amy Brown Science
Cook up candy to learn mole and molecule calculations

This edible experiment lets students make their own peppermint hard candy while they calculate mass, moles, molecules, and formula weights. Tweak the formulas to create different types of candy and make this into a sweet science fair project!
Learn more: Candy Chemistry at Dunigan Science on TpT
Make soap to understand saponification

Take a closer look at an everyday item: soap! Use oils and other ingredients to make your own soap, learning about esters and saponification. Tinker with the formula to find one that fits a particular set of parameters.
Learn more: Saponification at Chemistry Solutions on TpT
Uncover the secrets of evaporation
Explore the factors that affect evaporation, then come up with ways to slow them down or speed them up for a simple science fair project.
Learn more: Evaporation at Science Projects
More Chemistry Science Fair Projects for High School
These questions and ideas can spark ideas for a unique experiment:
- Compare the properties of sugar and artificial sweeteners.
- Explore the impact of temperature, concentration, and seeding on crystal growth.
- Test various antacids on the market to find the most effective product.
- What is the optimum temperature for yeast production when baking bread from scratch?
- Compare the vitamin C content of various fruits and vegetables.
- How does temperature affect enzyme-catalyzed reactions?
- Investigate the effects of pH on an acid-base chemical reaction.
- Devise a new natural way to test pH levels (such as cabbage leaves).
- What’s the best way to slow down metal oxidation (the form of rust)?
- How do changes in ingredients and method affect the results of a baking recipe?
When you think of physics science projects for high school, the first thing that comes to mind is probably the classic build-a-bridge. But there are plenty of other ways for teens to get hands-on with physics concepts. Here are some to try.
Remove the air in a DIY vacuum chamber

You can use a vacuum chamber to do lots of cool high school science fair projects, but a ready-made one can be expensive. Try this project to make your own with basic supplies.
Learn more: Vacuum Chamber at Instructables
Put together a mini Tesla coil
Looking for a simple but showy high school science fair project? Build your own mini Tesla coil and wow the crowd!
Boil water in a paper cup
Logic tells us we shouldn’t set a paper cup over a heat source, right? Yet it’s actually possible to boil water in a paper cup without burning the cup up! Learn about heat transfer and thermal conductivity with this experiment. Go deeper by trying other liquids like honey to see what happens.
Build a better light bulb
Emulate Edison and build your own simple light bulb. You can turn this into a science fair project by experimenting with different types of materials for filaments.
Measure the speed of light—with your microwave
Grab an egg and head to your microwave for this surprisingly simple experiment. By measuring the distance between cooked portions of egg whites, you’ll be able to calculate the wavelength of the microwaves in your oven and, in turn, the speed of light.
Generate a Lichtenberg figure

See electricity in action when you generate and capture a Lichtenberg figure with polyethylene sheets, wood, or even acrylic and toner. Change the electrical intensity and materials to see what types of patterns you can create.
Learn more: Lichtenberg Figure at Science Notes
Explore the power of friction with sticky note pads
Difficulty: Medium / Materials: Basic
Ever try to pull a piece of paper out of the middle of a big stack? It’s harder than you think it would be! That’s due to the power of friction. In this experiment, students interleave the sheets of two sticky note pads, then measure how much weight it takes to pull them apart. The results are astonishing!
Build a cloud chamber to prove background radiation
Ready to dip your toe into particle physics? Learn about background radiation and build a cloud chamber to prove the existence of muons.
Measure the effect of temperature on resistance

This is a popular and classic science fair experiment in physics. You’ll need a few specialized supplies, but they’re pretty easy to find.
Learn more: Temperature and Resistance at Science Project
Launch the best bottle rocket
A basic bottle rocket is pretty easy to build, but it opens the door to lots of different science fair projects. Design a powerful launcher, alter the rocket so it flies higher or farther, or use only recycled materials for your flyer.
More Physics Science Fair Projects for High School
Design your own experiment in response to these questions and prompts.
- Determine the most efficient solar panel design and placement.
- What’s the best way to eliminate friction between two objects?
- Explore the best methods of insulating an object against heat loss.
- What effect does temperature have on batteries when stored for long periods of time?
- Test the effects of magnets or electromagnetic fields on plants or other living organisms.
- Determine the best angle and speed of a bat swing in baseball.
- What’s the best way to soundproof an area or reduce noise produced by an item?
- Explore methods for reducing air resistance in automotive design.
- Use the concepts of torque and rotation to perfect a golf swing.
- Compare the strength and durability of various building materials.
Many schools are changing up their science fairs to STEM fairs, to encourage students with an interest in engineering to participate. Many great engineering science fair projects start with a STEM challenge, like those shown here. Use these ideas to spark a full-blown project to build something new and amazing!
Construct a model maglev train

Maglev trains may just be the future of mass transportation. Build a model at home, and explore ways to implement the technology on a wider basis.
Learn more: Maglev Model Train at Supermagnete
Design a more efficient wind turbine
Wind energy is renewable, making it a good solution for the fossil fuel problem. For a smart science fair project, experiment to find the most efficient wind turbine design for a given situation.
Re-create Da Vinci’s flying machine

Da Vinci sketched several models of “flying machines” and hoped to soar through the sky. Do some research into his models and try to reconstruct one of your own.
Learn more: Da Vinci Flying Machine at Student Savvy
Design a heart-rate monitor
Smartwatches are ubiquitous these days, so pretty much anyone can wear a heart-rate monitor on their wrist. But do they work any better than one you can build yourself? Get the specialized items you need like the Arduino LilyPad Board on Amazon.
Race 3D printed cars

3D printers are a marvel of the modern era, and budding engineers should definitely learn to use them. Use Tinkercad or a similar program to design and print race cars that can support a defined weight, then see which can roll the fastest! (No 3D printer in your STEM lab? Check the local library. Many of them have 3D printers available for patrons to use.)
Learn more: 3D Printed Cars at Instructables
Grow veggies in a hydroponic garden

Hydroponics is the gardening wave of the future, making it easy to grow plants anywhere with minimal soil required. For a science fair STEM engineering challenge, design and construct your own hydroponic garden capable of growing vegetables to feed a family. This model is just one possible option.
Learn more: Hydroponics at Instructables
Grab items with a mechanical claw

Delve into robotics with this engineering project. This kit includes all the materials you need, with complete video instructions. Once you’ve built the basic structure, tinker around with the design to improve its strength, accuracy, or other traits.
Learn more: Hydraulic Claw at KiwiCo
Construct a crystal radio

Return to the good old days and build a radio from scratch. This makes a cool science fair project if you experiment with different types of materials for the antenna. It takes some specialized equipment, but fortunately, Home Science Tools has an all-in-one kit for this project.
Learn more: Crystal Radio at Scitoys.com
Build a burglar alarm

The challenge? Set up a system to alert you when someone has broken into your house or classroom. This can take any form students can dream up, and you can customize this STEM high school science experiment for multiple skill levels. Keep it simple with an alarm that makes a sound that can be heard from a specified distance. Or kick it up a notch and require the alarm system to send a notification to a cell phone, like the project at the link.
Learn more: Intruder Alarm at Instructables
Walk across a plastic bottle bridge

Balsa wood bridges are OK, but this plastic bottle bridge is really impressive! In fact, students can build all sorts of structures using the concept detailed at the link. It’s the ultimate upcycled STEM challenge!
Learn more: TrussFab Structures at Instructables
Looking for more science content? Check out the Best Science Websites for Middle and High School .
Plus, get all the latest teaching tips and tricks when you sign up for our newsletters .

You Might Also Like

The Big List of Science Fair Project Ideas, Resources, and More
Options for every age, interest, and skill level! Continue Reading
Copyright © 2024. All rights reserved. 5335 Gate Parkway, Jacksonville, FL 32256
- Teachers' Resources
HOME SCIENCE SCHEMES OF WORK FORM 1-4 (EDITABLE)
|
| |||||||
|
| |||||||
| 5 | 1-2 | Introduction to Home science | By the end of the lesson, the learner should be able to | KLB F1 page 1 | |||
| 3-4 | Personal hygiene | By the end of the lesson, the learner should be able to | KLB F1 pg 6 | ||||
| 6 | 1-2 | Care of different parts of the body | By the end of the lesson, the learner should be able to | KLB F1 pg 10 | |||
| 3-4 | Care of the teeth | By the end of the lesson the learner should be able to | Chart on structure | KLB F1 pg 13 | |||
| 7 | 1-2 | Enhancing personal appearance | State ways of enhancing personal appearance | Assorted items | KLB F1 pg 16 | ||
| 3-4 | Figure types | Explain the care of clothes and shoes | KLB BK 1 pg 20 | ||||
| 8 | 1-2 | Choice and use of clothes and accessories | By the end of the lesson learners should be able to | H/science F1 KLB pg19 | |||
| 3-4 | Cosmetics | By the end of the lesson, the learner should be able to | H/science F1 by KLB pg 23 | ||||
| 9 | 1-2 | Adolescence o physical changes in boys and girls | By the end of the lesson, the learner should be able to o State changes that occur to boys and girls during adolescence | H/science F1 pg 24 | |||
| 3-4 | Emotional changes | By the end of the lesson, the learner should be able to | H/science by EAEP pg 26 | ||||
| 10 | 1-2 | First aid | By the end of the lesson, the learner should be able to | H/science by EAEP pg 26 | |||
| 3-4 | Common accidents, their first aid prevention. | Explain the cause, prevention and first aid for: | · Demonstrations · Group practical | · First aid kit | H/science KLB PG 28 | ||
| 11 | 1-2
3-4 | By the end of the lesson, the learner should be able to | · Demonstration · practice in groups · -discussions | · First aid box · books | H/science pg 30 | ||
| 12 | 1-2 | Foreign bodies in the eyes, ears and nose | By the end of the lesson, the learner should be able to |
| · First aid box | Focus on H/science pg 35 | |
| 3-4 | · Nose bleeding | By the end of the lesson, the learner should be able to | · First aid box | Focus F2 pg 37 | |||
| 13 | 1-2 | Medicine
| By the end off the lesson, the learner should be able to | · Teacher-pupil discussion | · Assorted medicine and drugs · -text books | KLB pg 50-51 | |
| 3-4 | By the end of the lesson, the learner should be able to | Focus H/science pg 59 | |||||
| 14 | 1-2
3-4 | By the end of the lesson, the learner should be able to |
| Focus on H/science pg 55 | |||
|
| |||||||
|
| ||||||||
| 1 | 1-4 | Reporting and revision of holiday assignment | ||||||
| 2 | 1-2 | By the end of the lesson the learner should be able to: | KLB Form 1 pg 52-59 | |||||
| 3&4 | By the end of the lesson, the learner should be able to | KLB Form 1 pg 59-64 | ||||||
| 3 | 1
2&3 | KLB Form 1 Pg 65-67 | ||||||
| 4 | By the end of the lesson, the learner should be able to: | Focus on H/Science Form 1 KLB Form 1 Pg 67-69 | ||||||
| 4 | 1-4 | By the end of the lesson, the learner should be able to
| KLB Form 1 H/Science Pg 80-82
| |||||
| 5 | 1 | By the end of the lesson, the learner should be able to | KLB Form 1 H/Science Pg 80-82 | |||||
| 2&3
4 | Reasons for cleaning a house
Methods of removing dirt surfaces | By the end of the lesson, the learner should be able to | KLB Form 1 Pg 83-85 | |||||
| 6 | 1-4 | By the end of the lesson the learner should be able to |
| KLB Form 1 Pg 85-105 | ||||
| 7 | 1-4 | Practical cleaning of various rooms Daily and weekly cleaning using the various rooms in the school compound
| ||||||
| 8 | 1
2&3 |
| · Classify kitchen equipment · State general points to consider in choice of equipment · Explain the care and use of large equipment | · Teacher – pupil discussions · -Identification | H/Science KLB form I pg 106-112 | |||
| 4 | H/Science KLB form I pg 113 | |||||||
| 9 | 1-2 |
| By the end of the lesson the learner should be able to | KLB form I pg 125-127
| ||||
| 3&4 | Kitchen equipment made from
| KLB form I pg 127-128 | ||||||
| 10 | 1
2&3 | Common metals used to make kitchen equipment | KLB form I pg 129-131 | |||||
| 4 | · Identify equipment made from enamel and wood · Mention various ways of finishing wooden equipment · Care for wooden equipment
| · Identifications · Teacher – pupil discussions | KLB form I pg 131-136 | |||||
| 11 | 1
2&3
4 | · Glass · Earthenware / ceramics · Calabashes / gourds | By the end of the lesson the learner should be able to;
|
| Assorted equipment Books
Assorted cleaning equipment | |||
| 12
13 | 1-4
1-4 | By the end of the lesson, the learner should be able to · State rules and precautions to observe when handling kitchen equipment · Improvise kitchen equipment and tools | · Teacher-pupil discussions · Demonstrations and practice · Identification of available improvised equipment · practical improvisation of equipment( making) | · Assorted kitchen equipment ant tools · Books · Assorted equipment and materials | KLB form I pg 140 -142
| |||
| 14 | 1-3 |
| ||||||
|
| |||||||
| 1 | 1-4 | REPORTNG and revision of the holiday assignment
| |||||
| 2 | 1 |
| By the end of the lesson the learner should be able to; | H/scie fm I by EAEP pg 113 | |||
| 2-3 |
| KLB fm 1 pg 183 | |||||
| 4 | Large sewing equipment
| By the end of the lesson the learner should be able to
| H/sc by EAEP pg 118 KLB fm 1 H/scie | ||||
| 3 | 1 | Use of a sewing machine |
| KLB fm 1 pg 193-195 | |||
| 2-3 | By the end of the lesson the learner should be able to;
|
| KLB fm 1 H/scie pg 192 | ||||
| 4 | Faults in use of a sewing machine | By the end of the lesson the learner should be able to;
| H/scie KLB fm1 pg 196 | ||||
| 4 | 1-2 | Stitches -Classification | By the end of the lesson the learner should be able to; | H/scie by EAEP pg 124 | |||
| 3-4 | Stitches | By the end of the lesson the learner should be able to; | H/scie by EAEP pg 124 | ||||
| 5 | 1 | Working of temporary stitches | By the end of the lesson the learner should be able to;
| H/scie KLB pg 200 | |||
| 2-4 | Stitches
| By the end of the lesson the learner should be able to;
| H/scie by EAEP pg 126 | ||||
| 6 | 1-3 | Stitches -Working of different stitches -Embroidery stitches
| By the end of the lesson the learner should be able to;
| H/scie by EAEP pg 127 | |||
| 4 | Mid term break
| ||||||
| 7 | 1 | Mid term break
| |||||
| 2-3 | Environmental hygiene
| By the end of the lesson the learner should be able to; | KLB fm 2 pg 1-4 | ||||
| 4 | Drainage | KLB fm 2 pg 4-9 | |||||
| 8 | 1 | Sanitation | By the end of the lesson the learner should be able to; | KLB fm 2 pg 9-11 | |||
| 2-3 | Common communicable diseases and typhoid, malaria, cholera, dysentery | By the end of the lesson the learner should be able to; | KLB H/scie pg 11-15 | ||||
| 9 | 1 | By the end of the lesson the learner should be able to;
| KLB H/scie pg 11-15 | ||||
| 2-3 | Worm infestation | By the end of the lesson the learner should be able to; | KLB fm 1 pg 17 | ||||
| 4 | Food nutrients | By the end of the lesson the learner should be able to;
| Focus on H/scie pg 65 | ||||
| 10 | 1 | By the end of the lesson the learner should be able to; | -Note taking |
| KLB fm 2 pg 112 | ||
| 2-3 | By the end of the lesson the learner should be able to; |
| Focus on H/scie fm 2 pg 67 | ||||
| 4 | Micro-nutrients Vitamins – B complex
| ||||||
| 11 | 1-2 | Micro-nutrients
| By the end of the lesson the learner should be able to; | Focus on H/scie pg 71 | |||
| 3-4 | By the end of the lesson the learner should be able to; | Focus on H/scie pg 74 | |||||
| 12 | 1-4 | Minerals
| By the end of the lesson the learner should be able to; |
| Focus on H/scie fm 2 pg 75 | ||
| 13 | 1-4 |
| |||||
|
| |||||||
|
| |||||||
| 1 | REPORTING & ISSUING OF TEXTBOOKS | ||||||
| 2 | 1-2 | Use of a sewing machine | By the end of the lesson the learner should be able to wind a bobbin and thread the machine. | Focus H/science F1 | |||
| 3-4 | Environmental Hygiene | By the end of the lesson the learner should be able to | Focus H/science f 2 pg 1-5 | ||||
| 3 | 1-2 | Sanitation | By the end of the lesson the learner should be able to | Focus H/science F2 pg 5-7 | |||
| 3-4 | Common communicable diseases | By the end of the lesson, the leaner should be able to state signs and symptoms of dysentery, malaria, bilharzias and scabies | Focus F2 pg 8-10 | ||||
| 4 | 1-2 |
| By the end of the lesson the learner should be able to |
| Focus F2 pg 10 H/science by EAEP F2 | ||
| 3-4 | Laundry equipment | By the end of the lesson the learner should be able to | Focus H/science | ||||
| 5 | 1-2 | Choice, use and care of different laundry equipment | By the end of the lesson, the learner should be able to · Choose, use and care for washing equipment. | Focus F2 H/science pg 14 | |||
| 3-4 | Choice and care of drying equipment | By the end of the lesson, the learner should be able to |
| Focus form 2 Pg 16-17 | |||
| 6 | 1-2 | Choice, use and care of finishing equipment | By the end of the lesson, the learner should be able to | Focus form 2 H/SCIENCE pg 17-22 | |||
| 3-4 | Detergents and laundry agents | By the end of the lesson, the learner should be able to |
| Focus form 2 pg 23-24 | |||
| 7 | 1-2 | Soap less detergents-synthetic detergents
| By the end of the lesson the learner should be able to | Focus form 2 pg 24-26 | |||
| 3-4 | Other laundry agents | By the end of the lesson, the learner should be able to | Focus form 2 pg 26-27 | ||||
| 8 | 1-2
3-4 | Laundry processes | By the end of the lesson, the learner should be able to | Focus form 2 pg 33-40 | |||
| 9 | 1-2 | Laundering different fabrics | By the end of the lesson, the learner should be able to | Focus F2 Pg 42-46 | |||
| 3-4 | General rules for ironing | State rules for ironing and pressing | Focus F2 pg 46-50 | ||||
| 10 | 1-2 | Special treatment in laundry work | State factors to consider while removing stains
| Focus form 2 pg 51-53 | |||
| 3-4 | Fixing co lour | By the end of the lesson, the learner should be able to prepare starch, identify types of starch, | FOCUS FORM 2 pg 53-55 | ||||
| 11 & 12 | 1-4 | Practical | By the end of the lesson, the learner should be able to | ||||
| 13 | 1-4 | Storage of clothes and house hold articles | By the end of the lesson, the learner should be able to | KLB F2 pg 103 | |||
|
| |||||||
|
| |||||||
|
| |||||||
| 1 | 3&4 | Laundry process. Repair of clothes & house hold articles. | By the end of the lesson the leaner should be able to | KLB fm 2 H/science. Pg 52-55 | |||
| 2 | 1 | Darning. · Rules · Darning different | By the end of the lesson the learner should be able to · Darn · A straight cut · A three cornered cut. | · Discussion |
| KLB Fm 2 H/science. Pg 57-62 | |
| 2&3 | Types of tears cuts | By the end of the lesson the learner should be able to | |||||
| 4 | Patenting | By the end of the lesson the learner should be able to
| KLB Fm 2 H/science Pg 62-66 | ||||
| 3 | 1 | Working | Work patches | ||||
| 2&3 | Repairing · Hanging hems · Gasping seams · Replacing buttons. · Belt loops. · Button holes. · Working of samples | By the end of the lesson the learner should be able to.
| · Discussion · Working of sample. | · Garments requiring repair. · Books · Chalk · Board. | |||
| 4 | 4 | Laundering different fabrics. | By the end of the lesson the learner should be able to · Write the methods that are used for laundering different fabrics.
| · Discussion & note taking | · Groups · Note books | KLB fm 2 pg 71-77. | |
| 5 | 1 | Care labels. | By the end of the lesson the learner should be able to · State the importance of care labels. · Identify symbols used on care labels & interpret them | · Drawing · Discussion | · Charts. · Books · Chalk | KLB fm 2 H/science Pg 77-82. | |
| 2-4 | Sundering different fabrics. · Cotton. · Woolen
| By the end of the lesson the learner should be able to | · Laundry equip & materials. · Garments | KLB fm 2 pg 71-77 | |||
| 2&3 | Repairing · Hanging hems · Gasping seams · Replacing buttons. · Belt loops. · Button holes. · Working of samples | By the end of the lesson the learner should be able to. · Explain the repair of hanging hems gasping seams, belt loops, and button holes & replacing buttons.
| · Discussion · Working of sample. | · Garments requiring repair. · Books · Chalk · Board. | |||
| 4 | 4 | Laundering different fabrics. | By the end of the lesson the learner should be able to · Write the methods that are used for laundering different fabrics.
| · Discussion & note taking | · Groups · Note books | KLB fm 2 pg 71-77. | |
| 5 | 1 | Care labels. · Importance · symbols & · Interpretation. | By the end of the lesson the learner should be able to · State the importance of care labels. · Identify symbols used on care labels & interpret them | · Drawing · Discussion | · Charts. · Books · Chalk | KLB fm 2 H/science Pg 77-82. | |
| 2-4 | Sundering different fabrics. · Cotton. · Woolen
| -By the end of the lesson the learner should be able to | · Laundry equip & materials. · Graments | KLB fm 2 pg 71-77 | 2-4 | ||
| 6 | 1&2 | Laundering Different fabrics · Loosed coloured. · Woolens · Silks · Nylons · Acylics · Polyster | By the end of the lesson the learner should be able to | · Teacher – pupil discussions. · Note taking.
| · Text books · Note books | Focus fm 2 Pg 42-46 | |
| 3&4 | · General rules for ironing. · General rules for pressing. · Care labels. | By the end of the lesson the learner should be able to · State rules for ironing and pressing. · Explain care labels. | · Teacher pupil · Discussions | · Pictures. · Books | Focus fm 2 pg 46-50. | ||
| 7 | 1&2 | Special treatment in laundry work. · Defination. · Stain removal. · Disnifection | By the end of the lesson the learner should be able to · State factors to consider while removing stains. · Define stain removal & disinfection. · State methods of disinfection. | · Teacher – pupil · Discussions | Text books · B.B. · Chalk | Focus fm 2 pg 51-53 | |
| 3&4 | Fixing colour starching. · Blueing · Valeting · Dry cleaning · Sponging · Fabric. Conditioning. | By the end of the lesson the learner should be able to prepare starch. · Identify types of starch. · Explain valeting dry cleaning, sponging and fixing of colour. | · Teacher – pupil · Discussion | · Books · Chalk · B.B | Focus fm 2 pg 53-55 | ||
| 8 | 1-4 | Practical · Cottons · Woolens · Nylons · Tcylres | By the end of the lesson the learner should be able to prepare starch | ||||
| 9 | 1-4 | Storage of clothes & household articles. | By the end of the lesson the learner should be able to prepare starch · Identify storage facilities. · Explain methods of storing clothes. | · Practical hanging /folding. · Teacher learner discussions. | · Clothes. · Hangers. · Assorted facilities. | KLB fm 2 Pg 103 |
| 10 | 1&2 | · Seams · Types. · Choice of seams · Qualities of well made seams. · Points to note when making seams, plain seam. | By the end of the lesson the learner should be able to · State the qualities of well made seams. · Explain factors in choice of seams. · Identify various types of plain seams.
| · Teacher – pupil · Discussions | · Samples · Boards · Chalk · Board | Fm 2 KLB pg 141. | |
| 3&4 | Working of pain seams · Open · Not open. · Neatening of edges. | By the end of the lesson the learner should be able to · Work an open and plain seam that is nor open. · Neaten edges of a plain seam. | Practical working of seams and neatening. | · Fabrics · Needles. · Threads. · Books. | Form 2 KLB pg 142-146 | ||
| 11 | 1 | French seam. · Uses. · Working | By the end of the lesson the learner should be able to · Explain the uses of a French seam. · Work a French seam.
| · Working of samples. · Discussions. | · Fabrics. · Needles. · Threads. · Books samples. | Fm 2 KLB pg 147-148 | |
| 2&3 | Double stitched seam. · Machine fell. · Run & fell. | By the end of the lesson the learner should be able to:- · Identify types of double stitched seam. · Work double –stitched seam. | · Discussions. · Working samples | · Fabrics. · Needles. · Threads · Samples | KLB fm2 pg 149 | ||
| 4 | Overlaid seam | By the end of the lesson the learner should be able to · State uses of an overlaid seam. · State advantages. · Work samples. | · Working of samples | · Fabrics. · Needles · Threads. · Samples. | KLB fm 2 pg 148 | ||
| 12 | 1&2 | Consumer buying. · Principles of wise buying. · Factors influencing consumer buying.
| By the end of the lesson the learner should be able to:- · Define buying. · Explain the principles of wise buying. · State factors that influence consumer buying. | · Books · Chalk · Board. | KLB fm 3 pg 166. | Teacher pupil Discussion. | |
| 3&4 | Common methods of buying. | By the end of the lesson the learner should be able to:- | · Books. · Chalk
| KLB fm 3 pg 168 | Teacher –pupil discussion. | ||
| 1&2 | Making a budget. · Definition. · Importance. · Steps | By the end of the lesson the learner should be able to | · Sample budgets · Books. | KLB 3 PG 172 | Teacher – pupil discussions. | ||
| 3&4 | Factors that may affect – Sample budget. | By the end of the lesson the learner should be able to
| · Books. · Writing materials | KLB fm 3 pg 173 | Each learner prepares a sample budget. | ||
| 13 | |||||||
| 14 | 1-4 | ||||||
|
| |||||||||
|
|
|
|
|
|
|
|
| ||
| 1 | 1-4 |
| |||||||
| 2 | 1 | Maternal child health care | By the end of the lesson the learner should be able to;
| KLB fm 3 pg 41-43
| |||||
| 2 | Maternal child health care
| By the end of the lesson the learner should be able to; | H/sc by EAEP pg 57 | ||||||
| 3-4 | Maternal child health care – preparing for delivery | By the end of the lesson the learner should be able to;
|
|
| H/sc by EAEP pg 64 KLB fm 3 pg 43 Focus fm 3 pg 53
| ||||
| 3 | 1 | Immunization | By the end of the lesson the learner should be able to; | H/sc KLB pg 50 | |||||
| 2 | Childhood diseases and ailments
| By the end of the lesson the learner should be able to; | H/sc EAEP pg 78 | ||||||
| 3-4 | Childhood diseases and ailments – influenza(B)
| By the end of the lesson the learner should be able to; | H/sc by EAEP pg 80 | ||||||
| 4 | 1 | Childhood diseases and ailments
| By the end of the lesson the learner should be able to; | H/sc EAEP pg 83 | |||||
| 2 | Breastfeeding | By the end of the lesson the learner should be able to; | Teacher-learner discussions
| H/sc KLB pg 55 | |||||
| 3-4 | Problems related to breastfeeding | By the end of the lesson the learner should be able to; |
| H/sc KLB pg 56 | |||||
| 1 | Weaning
| By the end of the lesson the learner should be able to; | H/sc fm 3 pg 63 | ||||||
| 2 |
| By the end of the lesson the learner should be able to; | KLB fm 3 pg 68 | ||||||
| 3-4 | Practical on weaning dishes
| ||||||||
| 6 | 1-2 | Habit training
| By the end of the lesson the learner should be able to; | KL fm 3 pg 71 | |||||
| 3-4 | Construction of apron | By the end of the lesson the learner should be able to; | Fm 2 KLB pupils book pg 152-154 KLB teachers guide
| ||||||
| Drafting pattern for apron | By the end of the lesson the learner should be able to draft a pattern for apron | Fm 2 KLB pg 159-165 fm 2 teachers guide
| |||||||
| 7 | 1 | Revision of the series 3 exam 3
| |||||||
| 2 | Preparation of fabric | By the end of the lesson the learner should be able to grain fabric for apron
|
| Fm 2 KLB pupils book pg 165 | |||||
| 3-4 | Preparation of fabric | By the end of the lesson the learner should be able to press his fabric
| Fm 2 KLB pupils book pg 165 | ||||||
| 8 | 1-2 | By the end of the lesson the learner should be able to; | Fm 2 KLB pupils book pg 165-166
| ||||||
| 3-4 | Transfer of pattern markings | By the end of the lesson the learner should be able to;
| KLB fm pg 202-203 | ||||||
| 9 | 1 | Stitching up of apron
| By the end of the lesson the learner should be able to stitch up neck and waist bands | KLB fm 2 pupils book pg 167 | |||||
| 2 | Stitching up of apron
| By the end of the lesson the learner should be able to stitch up the sides of his apron | KLB fm 2 pg 167 | ||||||
| 3-4 | Stitching up of apron | By the end of the lesson the learner should be able to stitch up
| KLB fm 2 pg 167 | ||||||
| 10 | 1-4 | Stitching up of apron
| By the end of the lesson the learner should be able to | KLB fm 2 pg 167
| |||||
| 11 | 1 | Meal planning and management
| By the end of the lesson the learner should be able to
| Focus H/sc fm 3 pg 1 | |||||
| 2-3 |
| By the end of the lesson the learner should be able to
|
| H/sc fm 3 by EAEP pg 3 | |||||
| 4 | Food presentation | Focus H/sc fm 3 pg 17-20 | |||||||
| 12 | 1-3 | Table setting
| By the end of the lesson the learner should be able to
| Focus fm 3 pg 20 | |||||
| 4 |
| By the end of the lesson the learner should be able to
|
| Focus fm 3 pg 24-25 | |||||
| 13 | 1-4 | ||||||||
|
| |||||||||
|
| |||||||
| 1 | 1-2 | Reporting/ Holiday assignment | |||||
| 3-4 | Flour mixtures and raising agents | By the end of the lesson the learner should be able to | Focus form 3 pg 87-89 | ||||
| 2 | 1 | Raising agents | By the end of the lesson the learner should be able to | Form 3 KLB pg 77-78 | 2 | ||
| 2 | By the end of the lesson the learner should be able to |
| KLB form 3 pg 79-80 | ||||
| 3-4 | Batters | By the end of the lesson the learner should be able to | Form 3 H/science by EAEP pg | ||||
| 3 | 1-2 | Pastry making | By the end of the lesson the learner should be able to | H/science EAEP pg 84-87 | 3 | ||
| 3-4 | Cake making | By the end of the lesson the learner should be able to | H/science by EAEP form3 pg 117-119 | ||||
| 4 | 1 | By the end of the lesson the learner should be able to | H/science by EAEP pg 120-127 | 4 | |||
| 2 | Bread and doughnut | By the end of the lesson the learner should be able to
| H/science by EAEP pg 128-132 | ||||
| 5 | 1 | Practical on Creamed cake
| By the end of the lesson the learner should be able to
|
|
| Recipes
Books | 5 |
| 2 | By the end of the lesson the learner should be able to |
| KLB form 3 pg 105 | ||||
| 3-4 | Practical on | Recipe
Books | |||||
| 6 | 1 | By the end of the lesson the learner should be able to | H/science KLB pg 112 | 6 | |||
| 2 | Management of fullness | By the end of the lesson the learner should be able to; | H/science KLB pg 109 | ||||
| 3-4 | Disposal of fullness | By the end of the lesson the learner should be able to
| H/science KLB form 3 pg 115 | ||||
| 7 | 1-2 | By the end of the lesson the learner should be able to | H/science KLB form 3 pg | ||||
| 3-4 |
| ||||||
| 8 | 1-2 | Disposal of fullness | By the end of the lesson the learner should be able to; |
| 8 | ||
|
| 3-4 | construction of apron | By the end of the lesson, the Learner should be able to take measurements for apron | Form 2 KLB pupils BK pg152-154 -KLB Teachers guide | |||
| 9 | 1-4 | Drafting pattern for apron | By the end of the lesson, the learner should be able to draft a pattern for apron | Form 2 KLB PG 159-165 -form 2 teachers guide. | |||
| 10 | 1 |
| |||||
| 2-3 | Preparation fabric | By the end of the lesson, the learner should be able to grain fabric for apron | Form 2 KLB pupils BK pg 165 | ||||
|
11 | 4
1 | Preparation of fabric pressing | By the end of the lesson, the learner should be able to press his fabric | Form 2 KLB pupils BK pg 165 | |||
| 2-4 | Laying out of pattern pieces before cutting | By the end of the lesson, the learner should be able to lay out pattern pieces | KLB F2 pupils BK pg 165-166 |
| |||
| 12 | 1-2 | Transfer of pattern markings | The learner should be able to identify methods of transferring pattern markings | KLB F 1 pg 202-203 | |||
| 3-4 | Stitching up apron | By the end of the lesson, the learner should be able to stitch up neck and waist bands | KLB F 2 pg 167 | ||||
| 13 | 1-2 | Stitching up of apron | By the end of the lesson, the learner should be able to stitch up the sides of his apron | KLB F 2 pg 167 | |||
| 3-4 |
| ||||||
|
| |||||||
| 1 | 4 | HOLIDAY ASSIGNMENT | By the end of the lesson the learner should be able to: | questions | |||
| 2 | 1&2 | Series 2 exam 1 | By the end of the lesson the learner should be able to | Past papers | |||
| 3-4 | construction of apron | By the end of the lesson, the Learner should be able to take measurements for apron | Form 2 KLB pupils BK pg152-154 -KLB Teachers guide | ||||
| 3 | 1-4 | Drafting pattern for apron | By the end of the lesson, the learner should be able to draft a pattern for apron | Form 2 KLB PG 159-165 -form 2 teachers guide. | |||
| 4 | 1&2 | Preparation fabric -graining | By the end of the lesson, the learner should be able to grain fabric for apron | Form 2 KLB pupils BK pg 165 | |||
| 3&4
| Preparation of fabric pressing | By the end of the lesson, the learner should be able to press his fabric | Form 2 KLB pupils BK pg 165 | ||||
| 5 | 1-4 | Laying out of pattern pieces before cutting | By the end of the lesson, the learner should be able to lay out pattern pieces | KLB F2 pupils BK pg 165-166 |
| ||
| 6 | 1-2 | Transfer of pattern markings | The learner should be able to identify methods of transferring pattern markings | Fabrics[cut] | KLB F 1 pg 202-203 | ||
| 3-4 | Stitching up apron -neck and waist bands | By the end of the lesson, the learner should be able to stitch up neck and waist bands | Neck bands | KLB F 2 pg 167 | |||
| 7 | 1-2 | Stitching up of apron | By the end of the lesson, the learner should be able to stitch up the sides of his apron | Each learner works on own apron | Apron pieces | KLB F 2 pg 167 | |
| 3&4 | Management of fullness | By the end of the lesson the learner should be able to; | H/science KLB pg 109 |
| ||||
| 8 | 1&2 | Disposal of fullness | By the end of the lesson the learner should be able to;
| H/science KLB form 3 pg 115 | ||||
| 3 | By the end of the lesson the learner should be able to; | H/science KLB form 3 pg | ||||||
| 4 | MIDTERM BREAK | |||||||
| 9 | 1&2 | By the end of the lesson the learner should be able to; | -Sewing equipment machine | H Science KLB pg 112
| ||||
| 3&4 | Management of fullness · -pleats | · -work different types of pleats | · Working of samples | KLB fm 3 pg 112-116 | |||
| 10 | 1&2 | Needlework processes | By the end of the lesson the learner should be able to; | KlB FM 3 PG 124 | |||
| 3&4 | By the end of the lesson the learner should be able to; | KLB fm 3 pg 125 | |||||
| 11 | 1&2 | By the end of the lesson the learner should be able to; | KLB fm 3 pg 124 Focus Hsc fm 3 | ||||
| 3&4 | By the end of the lesson the learner should be able to | KLBfm 3 pg 128 | |||||
| 12 | 1&2 | By the end of the lesson the learner should be able to · Define opening and fastening · Identify different openings | KLB fm 3 pg 130 | ||||
| 3&4 | By the end of the lesson the learner should be able to · Work the opening correctly | KLB fm3 pg 131 | |||||
| 13 | 1&2 | By the end of the lesson the learner should be able to | KLB fm 3 pg 134 | ||||
| 3&4 | By the end of the lesson the learner should be able to | KLB fm 3 pg 137 | |||||
| 14 | 1-4 | ||||||
|
| |||||||
|
| |||||||
| 1 | 1- 4 | REPORTNG | |||||
| 2 | 1-4 | Fabric construction processes
| By the end of the lesson the learner should be able to work samples on openings |
| KLB fm 3 pg 130-144 | ||
| 3 | 1-4 | Fabric construction processes | By the end of the lesson the learner should be able to;
|
| KLB fm 3 pg 14 | ||
| 4 | 1-4 | Fabric construction processes
| By the end of the lesson the learner should be able to manage hems
|
| KLB fm 3 pg 157-160 | ||
| 5 | 1 | Caring for the sick at home -Reasons for caring the sick at home
| By the end of the lesson the learner should be able to; | KLB fm 4 pg 1-2 focus fm 4 pg 1-4 | |||
| 2-3 | Needs of patient | By the end of the lesson the learner should be able to; |
| focus fm 4 pg 4-6 | |||
| 4 | Needs of a patient | By the end of the lesson the learner should be able to; | KLB fm 4 pg 3 | ||||
| 6 | 1 | Preventive measures in the spread of infection | By the end of the lesson the learner should be able to;
|
| KLB pg 6-7 | ||
| 2-3 | Ventilation | By the end of the lesson the learner should be able to; |
| KLB H/scie fm 4 pg 9-10 | |||
| 4 | Ways of ventilating a room | By the end of the lesson the learner should be able to; | KLB H/scie fm 4 pg 10-14 | ||||
| 7 | |||||||
| 2-4 | Fuels in the home Common types | By the end of the lesson the learner should be able to; | KLB fm 4 pg 17-27 | ||||
| 8 | 1 | Conservation of energy
| By the end of the lesson the learner should be able to;
|
| KLB fm 4 pg 28 | ||
| 2-3 | Lighting in the home
| By the end of the lesson the learner should be able to; | KLB fm 4 pg 29-31 | ||||
| 4 | Artificial lighting
| By the end of the lesson the learner should be able to; | KLB fm 4 pg 32 | ||||
| 9 | 1-3 | By the end of the lesson the learner should be able to; |
| KLB fm 4 pg 35 | |||
| 4 | Cleaning of oil lamps | By the end of the lesson the learner should be able to clean lamps correctly
| H/scie by EAEP pg 46 | ||||
| 10 | 1 | Furnishing the home
| By the end of the lesson the learner should be able to; |
| H/scie by EAEP pg 56 | ||
| 2-3 | By the end of the lesson the learner should be able to; |
| H/scie by EAEP pg 57,59 | ||||
| 11 | 1 | Hard furnishings | By the end of the lesson the learner should be able to; |
| H/scie by EAEP pg 60-63 | ||
| 2-3 | Furniture requirement for different rooms | By the end of the lesson the learner should be able to;
| KLB fm 4 H/scie pg 56-60 | ||||
| 4 | Soft furnishings | By the end of the lesson the learner should be able to; |
|
| H/scie by EAEP pg 63-66 | ||
| 12 | 1 | Flower arrangements | By the end of the lesson the learner should be able to; |
| KLB fm 4 H/scie pg 62 | ||
| 2-3 | By the end of the lesson the learner should be able to; |
| KLB fm 4 H/scie pg 64-66 | ||||
| 4 | Consumer protection | By the end of the lesson the learner should be able to;
|
| KLB fm 4 H/scie pg 130-134 | |||
| 13 | 1-3 | Agencies dealing with consumer protection | By the end of the lesson the learner should be able to; | KLB fm 4 pg 134-139 | |||
| 4 | By the end of the lesson the learner should be able to;
|
| KLB fm 4 pg 140-142 | ||||
|
| |||||||
|
| |||||||
| 3-4 | Flower arrangement | By the end of the lesson, the learner should be able to state points to consider when arranging flowers, identify equipment for arrangement, identify and choose flowers. | KLB BK 4 pg 62 | ||||
| 2 | 1-2 | Methods of arranging flowers | By the end of the lesson, the learner should be able to | KLB F4 pg 64 | |||
| 3-4 | Food preservation | By the end of the lesson, the learner should be able to | KLB F 4 pg 68 | ||||
| 3 | 1-2
| Modern methods of preserving food | By the end of the lesson, the learner should be able to explain modern methods of preserving food. | KLB F4 pg 79 |
| ||
| 3-4 | Convenience Foods
| By the end of the lesson, the learner should be able to | KLB F4 pg 83 | ||||
| 4 | 1-2 | Rechauffe cookery | By the end of the lesson, the learner should be able to | KLB F 4 pg 86 | |||
| 3-4 | Rechauffe cookery | By the end of the lesson, the learner should be able to write recipes on requested dishes. | KLB F4 pg 89 | ||||
| 5 | 1-2 | Practical on | Reheated dishes | ||||
| 3-4 | Clothing construction processes
| By the end of the lesson, the learner should be able to | KLB F4 pg 100 | ||||
| 6 | 1-2 | Qualities of a good collar
| By the end of the lesson, the learner should be able to | KLB F 4 pg 106 | |||
|
7 | 3-4
1-2 | Sleeves | By the end of the lesson, the learner should be able to : | KLB F4 pg 111 | |||
|
| 3-4 | Facings and interfacings | By the end of the lesson, the learner should be able to | KLB F4 pg 116 | |||
|
| |||||||
|
| |||||||
| 10 | 1-4 | Preparation for paper 1 exams | By the end of the lesson, the learner should be able to identify common Mistakes in exams |
|
| ||
| 11 & 12 | 1-4 | Paper 3 | |||||
| 14 | 1-4 | Paper 3 | |||||
|
| |||||||
|
| |||||||
| 1 | 2-4 | REVISION AND HOLIDAY ASSIGNMENT | |||||
| 2 | 1 | PRE MOCK 1 EXAM REVISION | By the end of the lesson the learner should be able to: | Past papers | |||
| 2&3 | PRE MOCK 1 EXAM REVISION | By the end of the lesson the learner should be able to: | Past papers | ||||
| 3 | 4 1 | PRE MOCK 1 EXAM REVISION | By the end of the lesson the learner should be able to: | Past papers | |||
| 2&3 | PRE MOCK 2 EXAM planning | By the end of the lesson the learner should be able to: | Exam papers | ||||
| 4 | 4 1 – 4
|
| |||||
| 5 | 1 | PRE MOCK 2 EXAM REVISION
| By the end of the lesson the learner should be able to: | Past papers | |||
|
6 | 2&3
4
1 | PRE MOCK 2 EXAM REVISION PRE MOCK 2 EXAM REVISION | By the end of the lesson the learner should be able to: | Past papers
Past papers | |||
| 2-4 |
| ||||||
| 7 | 1-4 |
| |||||
| 8 | 1 | ||||||
| 2-4 |
| ||||||
| 9 | 1-4 | REVISION AND PREPARATION FOR MOCKS PAPER 1 | By the end of the lesson the learner should be able to: | Form 1-4 syllabus | |||
| 10 | 1-4 | REVISION AND PREPARATION FOR MOCKS PAPER 2 | By the end of the lesson the learner should be able to: | Form 1-4 syllabus | |||
| 11 | 1-4 | REVISION AND PREPARATION FOR MOCKS PAPER 3 | By the end of the lesson the learner should be able to:
| Form 1-4 syllabus KNEC guidelines | |||
| 12-14 | 1-4 | ||||||
|
| |||||||
| 1 | 1 |
| |||||
| 2-3 | Revision of holiday assignment (paper 2) | By the end of the lesson the learner should be able to;
| Pre mock 2 paper 2 exam | ||||
| 2 | 4 1-4 | Post mock exams | |||||
| 3 | 1-4 | Preparation for paper 2 exam | By the end of the lesson the learner should be able to correct areas in which he has difficulties in clothing construction processes
| ||||
| 4 | 1-4 | Preparation for K.C.S.E paper 3 exams | By the end of the lesson the learner should be able to;
| ||||
| 5 | 1-4 | Preparation for planning exam
K.C.S.E HOMESCIENCE PAPER 3 PLANNING EXAM
| |||||
| 6 | 1-4 | Preparation for K.C.S.E. PAPER 3 PRACTICALS
Revision for paper I
| |||||
| 7 | 1-4 | K.C.S.E PAPER 3 PRACTICALS
Revision for paper I
| |||||
| 8-13 |
| ||||||
Madira Girls High School’s KCSE Results, KNEC Code, Admissions, Location, Contacts, Fees, Students’ Uniform, History, Directions and KCSE Overall School Grade Count Summary
Santa maria girls secondary school’s kcse results, knec code, admissions, location, contacts, fees, students’ uniform, history, directions and kcse overall school grade count summary, related posts, free cbc exams downloads, microsoft office word free computer studies notes, grade 1 lesson plans free.

zoritoler imol May 13, 2024 7:39 am
Great web site. Lots of useful info here. I’m sending it to some friends ans also sharing in delicious. And naturally, thanks for your sweat!
Post Comment Cancel reply
Save my name, email, and website in this browser for the next time I comment.
You May Have Missed

TSC 𝐭𝐞𝐚𝐜𝐡𝐞𝐫 𝐰𝐢𝐧𝐬 𝟏𝟎,𝟎𝟎𝟎,𝟎𝟎𝟎 𝐬𝐩𝐨𝐫𝐭𝐩𝐞𝐬𝐚

Pay us Security allowances- Teachers demand

𝐂𝐒 𝐌𝐢𝐠𝐨𝐬i 𝐰𝐚𝐧𝐭𝐬 𝐦𝐚𝐫𝐢𝐭𝐢𝐦𝐞 𝐭𝐫𝐚𝐢𝐧𝐢𝐧𝐠 𝐢𝐧𝐜𝐨𝐫𝐩𝐨𝐫𝐚𝐭𝐞𝐝 𝐢𝐧 𝐂𝐁𝐂
Tsc teachers & civil servants’ salaries- src proposes new structure for cba negotiations.

Explainer: What You Need to Understand When Applying For TSC Transfer

Salary boom for teachers as TSC implements CBA phase 2
Tsc to ‘punish’ striking teachers, 𝐌𝐢𝐧𝐢𝐬𝐭𝐫𝐲 𝐨𝐟 𝐄𝐝𝐮𝐜𝐚𝐭𝐢𝐨𝐧 𝐝𝐞𝐩𝐥𝐨𝐲𝐬 𝟐,𝟎𝟎𝟎 𝐭𝐫𝐚𝐢𝐧𝐞𝐫𝐬 𝐭𝐨 𝐓𝐕𝐄𝐓𝐒 𝐢𝐧𝐬𝐭𝐢𝐭𝐮𝐭𝐢𝐨𝐧𝐬.

Follow Us On:

Toll Free: 1800-180-9393

- Chairperson's Message
- Objectives & Functions
- Vission & Mission
- Publication
- At a Glance
- International Activities
- Research & Development Cell
- Regional Center Website
- Citizens' Charter
- RTI Disclosure
- Vocational Education
- Student Support Services
- Administration
- Computer Unit
- Capacity Building Cell (CBC)
- Media Unit/Telecast
- Minority Cell
- Material Production Dispatch & Distribution
- Sr. Secondary
- Open Basic Education(OBE)
- D.El.Ed (Dip. in Elementary Education)
- Life Enrichment
- Life Skills Programme
- Admission procedure & Videos
- Study Material
- Tutor Mark Assignment
- Secondary & Senior Secondary
- D.El.Ed. (Oct-Nov 2018 offline)
- Vocational Exam.
- On-Demand Examination
- Notification,Orders & Office Orders
- Transfer Order
- Important Notice about Fake website
- Admissions & TMA
- Examination & Result
- Medical Facilities
- Study Centres & Accreditation
- MOE External Website that opens in a new window
- SWAYAM External Website that opens in a new window
- IGNOU External Website that opens in a new window
- CBSE External Website that opens in a new window
- KVS External Website that opens in a new window
- NVS External Website that opens in a new window
- COL External Website that opens in a new window
- UNESCO External Website that opens in anew window
- DU External Website that opens in a new window
- JNU External Website that opens in a new window
- YCMOU External Website that opens in a new window
- Headquarter
- Regional Offices
- List of NIOS Official Portals
- Study Centres
- Learner Support Centre
- Regional Centre Website
- Ask Your Teacher
- Chairman Message
- Public Examination(Sec., Sr.Sec., Voc.,D.El.Ed.)
- Hunar Examination
- MHRD External Website that opens in a new window
- Online Course Material
- Sr. Secondary Courses
Home Science (321)
Please, follow the links below for details:
- English Medium
- Hindi Medium
Syllabus Bifurcation of Home Science (321)
| - | - | - | - | - | - | - | |||
| - | - | - | - | - | - | ||||
| - | 1. 2. | 1. (part1) | - | - | |||||
| - | - | - | |||||||
| - | - | - | - | ||||||
| - | - | - | - | - | - | - | - | ||
| | - | - | - | ||||||
|
| 1. 2. 3. | - | - | ||||||
|
|
| - | - | ||||||
| - | - | - | |||||||
| 1. 2. 3. | - | - | - | ||||||
| 1. 2. | - | - | - | ||||||
| - | - | - | - | - | - | - | - | ||
| 1. 2. 3. | - | - | - | ||||||
| 1. 2. 3. | 1. | - | - | ||||||
| 1. 2. 3. | - | - | |||||||
| - | (part1)
| - | - | ||||||
|
| - | - | - | - | |||||
| - | - | - | - | ||||||
| - | - | - | - | ||||||
|
| - | - | - | - | |||||
| - | - | - | - | - | - | - | - | ||
|
|
| - | - | - | |||||
|
| - | - | - | - | |||||
| - | - | - | - | ||||||
| - | - | - | - | ||||||
| - | - | - | - | - | - | - | - | ||
| - | - | - | |||||||
| - | - | - | |||||||
| - | - | - | - | ||||||
| - | - | - | |||||||
| - | - | - | |||||||
| - | - | - | - | ||||||
| - | - | - | - | - | - | - | - | ||
|
|
|
| - | 1. 2. | - | - | |||
|
| - | - | - | ||||||
|
| - | 1. 2. | - | - | |||||
| - | - | - | - | ||||||
| - | - | - | - | - | - | - | - | ||
|
| - | - | - | - | |||||
| - | - | - | - | - | |||||
| - | - | - | - | ||||||
| - | 1. (part1) 2. | - | - | ||||||
| - | - | - | - | - | - | - | - | - | |
| Question paper Design (32 KB) | - | - | - | - | - | - | - | - | |
| - | - | - | - | - | - | - | - | - | |
Information About
- On Demand Examination
- Accreditation/E-Accreditation
- Felicitations/Awards
- Notice Board / Office Order
- Tender Notice
- Success Stories
Additional Links
- Meeting and Events
- Proud Learners of NIOS
- News Bulletin
More on What's New

Important Links
- NIOS Alumni
- Download Section
- Court Decisions
- Academic Facilitator
- Conferences & Workshop
- Statistical Report
- Submit Query
- Cancellation & Refund policy
- Hunar Programme
- Photo Gallery
- Terms & Conditions
- Privacy Policy
- Accessibility Statement
© 2012 The National Institute of Open Schooling. All Rights Reserved.

NIOS Class 10th Home Science (216) English Medium Solved Assignment PDF (TMA) 2023-24 | Nios Home Science TMA 2023-24
Home science (216), tutor marked assignment, 20% marks of theory.

PDF is Paid
Note:- if you want solved assignment pdf and handwritten scanned assignment click on whatsapp button, 1. answer any one of the following questions in about 40-60 words., (a) identify any two natural fibers from your surroundings. why is it advisable to use garments made from natural fibers, (b) mention any two differences between plain weave and twill weave in a tabular form., answer: for pdf click on whatsapp button (pdf is paid), 2. answer any one of the following questions in about 40-60 words., (a) sheena’s foot accidently touched a naked wire from the socket and she got an electric shock. state any two appropriate ways for the safe use of electricity at home., (b) critically examine your surroundings and identify any four reasons for suffocation and amongst children and adults., 3. answer any one of the following questions in about 40-60 words., (a) baby mridula is 8 months old. mention any two characteristic features each of growth and development of children of her age., (b) “development is correlated”. justify the statement by giving any two suitable examples., 4. answer any one of the following questions in about 100-150 words., (a) health is the proper functioning of both body and mind. define “health” according to world health organisation (who). enlist two characteristic features each of good physical health, good mental health and good social health., (b) define immunity. how is natural immunity different from acquired immunity mention two ways by which we can acquire immunity., 5. answer any one of the following questions in about 100-150 words., (a) tarun is a student of class 12th. he wants to pursue his career as a engineer. help him to identify the four steps of management to use his resources effectively to achieve his goal., (b) (i) resources are limited. what four guidelines will you suggest to your community to use resources efficiently (ii) discuss the misuse of any two resources in your own community and suggest ways to prevent it., 6. answer any one of the following questions in detail., (a) (i) karuna and taruna are identical twins. karuna is brought up in a village by her mother and taruna is brought up in a urban setting by her father. analyse any three important aspects of development of both siblings in a tabular form. (ii) in your opinion what is more important to determine the children’s personality and individual differences and why, (b) each nutrient has a specific role in keeping us healthy. if we start eating the food with missing nutrients, symptoms of the disease will start appearing. (i) write any two functions of the following nutrients that are important to sustain life. dietary fiber, water, vitamin a (ii) make a diet plan for yourself in terms of inclusion of food groups and balanced diet in a tabular form., leave a reply cancel reply.
Your email address will not be published. Required fields are marked *
Save my name, email, and website in this browser for the next time I comment.
WhatsApp Us
Notes World
Hollywood movies, nios home science (321) solved assignments [tma] 2023-24.

NIOS Home Science (321) Solved Assignment 2023-24 , FREE Home Science (321) Solved Assignment 2024 , FREE Home Science (321) Assignment PDF , How to get Home Science (321) Solved Assignment for Free, We are providing NIOS English Home Science (321) Solved Assignment all over India.
In this website students will get the all solutions related with their NIOS Assignments, NIOS Study Material , NIOS Previous Years Papers and NIOS Study Notes , Home Science (321) Solved Assignment 2023-24 is for those candidate who want to submit their assignments on time.
FREE NIOS Home Science (321) Solved Assignment 2023-24 , students can directly done their assignment by simply take reference through our free Notes World ( notesworld.in ) . Home Science (321) Free solved assignment available here. NIOS Senior Secondary Solved TMA 2023-24 for class 12.
NIOS SOLVED ASSIGNMENTS [TMA] 2023-24
Senior secondary solved [tma] 2023-24.

Home Science (321)
Tutor Marked Assignment
Click to buy NIOS Home Science (321) Solved TMA (2023-24) PDF
Max. Marks: 20
(i) All questions are compulsory. The marks allotted for each question are given at same place.
(ii) Write your name, enrollment number, Al name and subject on the top of the first page of the answer sheet.
1. Answer any one of the following questions in about 40-60 words.
a) After studying Home Science at Senior Secondary Level, one is equipped with many skills. Mention two opportunities using these skills for wage employment or self employment. (See Lesson 1)
Ans - After studying Home Science at the Senior Secondary Level, individuals can pursue opportunities such as becoming a nutrition consultant, offering personalized diet plans and healthy cooking classes for wage employment. They can also start a catering business, providing homemade meals for events and gatherings, for self-employment.
b) Because of urbanization, joint family seems to be completely vanish from our society. Do you think that joint family has advantages over nuclear family? Give reasons to support your answer. (See Lesson 3)
Ans - Answer Anyone
2. Answer any one of the following questions in about 40-60 words
a) List any four major characteristics of cognitive development in middle childhood. (See Lesson 18)
Ans - Four major characteristics of cognitive development in middle childhood are:
- Improved Memory: Children in this stage have better memory retention and recall abilities, which aid in learning and problem-solving.
- Concrete Operational Thinking: They can think logically and understand concepts like conservation, classification, and seriation.
- Increased Attention Span: Middle childhood sees an extended ability to focus and sustain attention on tasks and activities.
- Development of Mental Operations: Children can perform mental operations, such as reversibility and transitivity, allowing for more complex problem-solving.
b) Write two differences between fine muscular coordination and gross muscular coordination and support your answer with appropriate examples. (See Lesson 18)
3. Answer any one of the following questions in about 40-60 words.
a) Mention the names of any four personnel involved in housekeeping in a hotel or corporate office. (See Lesson 29 A)
b) Design is a plan or a drawing produced to show the appearance of something before it is made. State any four factors you must consider while selecting a design for embroidery on a cushion cover/pillow cover. (See Lesson 28 B)
4. Answer any one of the following questions in about 100-150 words.
a) A decision is selection of a course of action from alternative choices. Justify the Statement with the help of an example by applying the four steps of decision making. (See Lesson 10)
b)To achieve our goals with limited resources, we have to follow a systematic method. Briefly describe the four steps of management process with the help of an appropriate example. (See Lesson 10)
5. Answer any one of the following questions in about 100-150 words.
a) On the basis of structure, yarns are classified into three types. Write difference between yarn and thread. Also describe the characteristics of all the three types of yarn with suitable diagrams. (See Lesson 23)
b) In order to get a design on the fabric, dyes can be applied at different stages of fabric production. Briefly describe the stages of dye-application with suitable diagrams. (See Lesson 25)
6. Prepare any one project out of the given below –
a) Based on the interrelationship of food, Nutrition and Health
(i) Plan two messages for Nutrition and Health using poster and slogan as modes of communication for school going children on junk food.
(ii) Solar cooking has come up as an alternative fuel source for cooking Highlight on the pros and cons of solar cooking. (See Lesson 4, 7 and 8)
b) Sixteen year old Nisha is often feeling tired and weak and has pale and yellowish skin. Mention four rich sources of the nutrient to overcome the symptoms. Also plan a recipe of a evening snack for her using the rich sources of the nutrient along with the method of cooking used. How your chosen method of cooking will help in the conservation of nutrients. (See Lesson 4, 7 and 8)
***********************
Subcribe on Youtube - NotesWorld
For PDF copy of Solved Assignment
Any University Assignment Solution
WhatsApp - 9113311883 (Paid)
Post a Comment
Top post ad, below post ad, recents in beach, social plugin, universities/board.
- Andhra University 35
- Dibrugarh University 5
- Sikkim Manipal University (SMU) 1
- University of Jammu 12
.webp "assignment on home science")
- Privacy Policy
- Terms & Conditions
- Copyright and DMCA Notice
Footer Copyright
Contact form.
Choose Your Test
- Search Blogs By Category
- College Admissions
- AP and IB Exams
- GPA and Coursework
The 5 Best Homework Help Apps You Can Use
General Education

We know that homework can be a real drag. It’s time-consuming, and can be difficult to complete all on your own. So, what can you do if you’re struggling?
You might try looking online or in the app store! If you’ve already looked around you probably know that there are tons of homework sites for students and homework apps out there that all say they can help you improve your grades and pass your classes. But, can you trust them? And what are the best apps for homework help?
Below, we answer these questions and more about homework help apps–free and paid . We’ll go over:
- The basics of homework help apps
- The cost of homework help apps
- The five best apps for homework help
- The pros and cons of using apps that help you with homework
- The line between “learning” and “cheating” when using apps that help you with homework
- Tips for getting the most out of homework sites for students
So let’s jump in!

The Basics About Apps that Help You With Homework–Free and Paid
The bottom line is, homework sites and homework apps are intended to help you complete your take-home assignments successfully. They provide assistance that ranges from answering questions you submit through a portal all the way to one-on-one tutoring, depending on the help you need!
The big plus for both homework help apps and websites is that they usually offer help on-demand. So if you can’t make it to after school tutoring, or if you're studying late into the night (it happens!), you can still access the help you need!
If you’re specifically looking for an answer to the question: “what is the best homework help website ?,” you can check out our article on those here! [LINK COMING SOON]
What’s the Difference Between a Homework Help Website and an App?
So if they’re both designed to give you a little boost with your take-home assignments, what makes homework apps and websites different from one another? First off, homework help websites are optimized to be used on a desktop, while apps are designed to be run natively on mobile devices. So depending on which devices you have access to, you may decide to use a website instead of an app…or vice versa!
The other big difference between homework help apps and websites is that they sometimes offer different features. For instance, with the Photomath app, you’ll be able to submit photos of math problems instead of having to type everything out, which is easier to do by using an app on your phone.
If you’re trying to decide whether to go with a website or app, the good news is that you may not have to. Some homework help websites also have companion apps, so you can have the best of both worlds!
What Makes a Homework Help App Worth Using
Apps that help you with homework should ideally help you actually learn the material you’re struggling with, and/or help you turn in your work on time. Most of the best apps for homework help allow you to ask questions and provide answers and explanations almost immediately. And like we mentioned earlier, many of these apps let you send a picture of a question or problem instead of writing it all out.
But homework help apps offer more than just quick answers and explanations for your assignment questions. They also offer things like educational videos, lectures, tutorials, practice tests and quizzes, math solving tools, proofreading services, and even Q&A with experts.
And the best part is, most offer these services 24/7!
What You Should Look Out For
When it comes to homework help, there are lots–and we mean lots –of apps willing to prey on desperate students. Before you download any apps (and especially before you pay to sign up for any services), read reviews of the app to ensure you’re working with a legitimate company.
Keep in mind: the more a company advertises help that seems like cheating, the more likely it is to be a scam. Actual subject matter experts aren’t likely to work with those companies. Remember, the best apps for homework help are going to help you learn the concepts needed to successfully complete your homework on your own.
If you’re not sure if an app is legitimate, you can also check to see if the app has an honor code about using their services ethically , like this one from Brainly. (We’ll go over the difference between “homework help” and “cheating” in more detail a little later!)
How Expensive Are Apps That Help You With Homework?
A word to the wise: just because a homework help app costs money doesn’t mean it’s a good service. And, just because a homework help app is free doesn’t mean the help isn’t high quality. To find the best apps, you have to take a close look at the quality and types of information they provide!
Most of the apps out there allow you to download them for free, and provide at least some free services–such as a couple of free questions and answers. Additional services or subscriptions are then charged as in-app purchases. When it comes to in-app purchases and subscriptions for homework help, the prices vary depending on the amount of services you want to subscribe to. Subscriptions can cost anywhere from $2 to around $60 dollars per month, with the most expensive app subscriptions including some tutoring (which is usually only available through homework help websites.)

The 5 Best Apps for Homework Help
Okay, now that you’re up to speed on what these apps are and how they can help you, we’ll run you through the best five apps you can use.
Keep in mind that even though we recommend all of these apps, they tend to excel at different things. We’ve broken these apps into categories so that you can pick the best one for your needs!
Best Free Homework Help App: Khan Academy
- Price: Free!
- Best for: Practicing tough material
While there are lots of free homework help apps out there, this is our favorite because it actually supports learning, rather than just providing answers. The Khan Academy app works like the website, and offers the same services. It’s full of information and can be personalized to suit your educational needs.
After you download the app, you choose which courses you need to study, and Khan Academy sets up a personal dashboard of instructional videos, practice exercises, and quizzes –with both correct and incorrect answer explanations–so you can learn at your own pace.
As an added bonus, it covers more course topics than many other homework help apps, including several AP classes.
Best Paid Homework Help App: Brainly
- Price: $18 for a 6 month subscription, $24 for a year
- Best for: 24/7 homework assistance
Brainly is free to download and allows you to type in questions (or snap a pic) and get answers and explanations from both fellow students and teachers. Plus, subject matter experts and moderators verify answers daily, so you know you’re getting quality solutions! The downside is that you’re limited to two free answers per question and have to watch ads for more if you don’t pay for a subscription.
That said, their subscription fees average around only $2 per month, making this a particularly affordable option if you’re looking for homework help on a budget. Brainly subscriptions not only cover unlimited answers and explanations on a wide variety of school subjects (including Art and World Languages which aren’t always included in other apps), they also provide tutoring in Math and Physics!
Best App for Math Homework Help: Photomath
- Price: Free (or up to $59.99 per year for premium services)
- Best for: Explaining solutions to math problems
This app allows you to take a picture of a math problem, and instantly pulls up a step-by-step solution, as well as a detailed explanation of the concept. Photomath subscription services also include animated videos that break down mathematical concepts–all the way up to advanced Calculus!--to help you better understand and remember them.
The basic textbook solution service is free, but for an additional fee you can get extra study tools, access to one-on-one tutoring, and additional strategies for solving common math problems.
Best App for STEM and English Homework Help: Studypool
- Price: Varies; you’ll pay for each question you submit
- Best for: Science and English homework help in one app
When it comes to apps for science and English homework help, there aren’t lots of great resources out there, much less out there all in one place. While Grammarly is a good service for proofreading, SparkNotes has some decent summaries, and Khan Academy covers science, the best of the bunch if you need help with both subjects Studypool. Instead of using lots of different apps for STEM and English help, they’re combined together here! But while Studypool has great reviews, there are some downsides as well.
The Studypool Q&A model is a little different than other homework help apps. After you create a free account, you ask questions, and tutors submit bids to answer them. You’ll be able to select the tutor–and price point–that works for you, then you’ll pay to have your homework question answered. You can also pay a small fee to access thousands of notes, lectures, and other documents that top tutors have uploaded.
The downside to Studypool is that the pricing is not transparent . There’s no way to plan for how much your homework help will cost, especially if you have lots of questions! It’s also not clear how they choose their tutors, so you’ll need to be careful when you decide who you’d like to answer your homework questions. That said, if you only need a few questions answered per month, this could be cheaper than other monthly subscription services.
Best Homework Scheduling App: MyStudyLife
- Best for: Keeping track of your schedule and deadlines
If the reason you’re looking for homework help is less about finding answers to questions and more about needing assistance with organization and time-management , MyStudyLife is a great option. This is a cross-platform planner that allows you to store your class schedule, upcoming tests, and homework assignments in the cloud so you can access it all wherever you are, and on any device.
One of the unique things about it is that it easily works for daily or weekly rotating class schedules that can get confusing, helping you keep track of when you need to finish your homework based on your changing schedule. You can get reminders for upcoming classes and assignments as well as past-due homework and any revisions you may need to do. It can even let you know when you need to start studying for a big test!
Best of all, you can actually schedule assignments and study sessions for multiple nights, and specify how much of the task you got done each night. That way you’ll know how much additional time you’ll need to spend!

While homework apps might seem like magic, it's important to weigh the pros and cons before you commit to one.
What Are the Pros and Cons of Using Homework Help Apps?
Homework help apps can be useful tools if you’re struggling in any of your classes. But there are a few problems you might run into if you don’t use them ethically and responsibly.
Below we’ll cover some of the good and the not-so-good parts of using homework help apps to complete your take-home assignments.
3 Pros of Using Homework Help Apps
Let’s start with the pros of using apps for homework help.
Pro 1: All-Around Better Grades
This is undeniably the main pro and the reason apps that help you with homework are so popular with students. Not only can you potentially get better grades on individual assignments, because they help you learn tricky concepts, you can also earn better grades overall .
Just keep in mind that if you want better grades you have to actually learn the material you’re studying, not just find easy answers. So be sure to use apps that provide good explanations . That way you’ll have the mental tools you need to succeed on your class exams and on standardized tests for college.
Pro 2: Flexibility
It’s hard to beat homework help that you can access anywhere you are from your mobile device. You can also get assistance whenever you need it since the best apps offer their services 24/7. This is especially useful for students who need to study during hours when their free school resources aren’t available because of extracurriculars, jobs, or family obligations.
If you need convenient and flexible homework help or tutoring services to fit your schedule, apps can be your go-to resource.
Pro 3: Individualized Learning
Sometimes the kind of learner you are doesn’t match your teacher’s style of teaching. Or maybe the pace of a class is a little too fast or too slow for your tastes. Homework apps can help by allowing you to learn at your own speed and in ways that support your own learning style.
You can use their features, such as educational videos, 24/7 conversations with experts and peers, and tutorials to review concepts you may have forgotten. These apps can also let you dive deeper into topics or subjects you enjoy! With homework help apps, you get to choose what you need to learn and how you learn it.

3 Cons of Using Homework Help Apps
Next, let’s look at the cons of homework help apps.
Con 1: Questionable Info
Unfortunately there are lots of less-than-reliable homework help apps out there. They might not hire actual experts in their fields to provide answers and create study tools, or they rely on user-submitted answers that they don’t verify. In those cases, you might not be getting the accurate, thorough, and up-to-date answers you need to really learn.
In addition to the possibility of running into plain-old wrong answers, even the best apps sometimes just won’t have a specific answer you need. This could be because you’re enrolled in an advanced class the app doesn’t really cover or because of the algorithm or chatbot a particular app uses.
If that’s the case , your best bet will likely be to talk to your teacher or a free tutor (if your school provides them) to get help answering your question.
Con 2: Information Overload
While having tons of information at your fingertips can be helpful, the sheer amount and variety of videos, tutorials, expert answers, and resources a homework app provides can be overwhelming . It’s also easy to get sucked into a research rabbit-hole where you learn new things but don’t actually get your work done. This is especially true for students who tend to be easily distracted.
Additionally, you may be learning to do things differently than you’ve learned them in class , which could cause problems. For example, if your math teacher asks you to solve a problem one way, but you learned to do it differently through an app, you could get confused come test time!
Con 3: Cutting Corners
There are a lot of apps out there that bill themselves as “the best app for cheating.” They allow users to type in a question or take a picture, then instantly provide an answer without any explanation of the material. Many of these are scams or provide unreliable answers, but not all. Some apps are legitimate and provide quick and easy answers that could allow you to do your whole homework assignment in minutes.
The problem is that even though taking shortcuts on homework to save time is tempting, it can keep you from really learning. The point of practicing concepts and skills is so you develop them and can access them whenever you need to. This is especially true if skills build on one another, like in a math or English class.
Sometimes s truggling with an assignment or question, trying, failing, then trying again until you succeed can help you learn difficult material. If you don’t let yourself really try, and instead take too many shortcuts, you may end up behind.

When Does “Help” Become “Cheating”?
When it comes to using homework help apps, sometimes the difference between “help” and “cheating” is really clear. For example, if you’re using an app to get answers while you’re taking a test, that’s definitely cheating . But what if you’re struggling with a math problem and need to know the correct answer so you can work backwards to learn the process? Is that “cheating” or is it “help?”
The truth is, not everyone agrees on when “help” crosses the line into “cheating .” If you’re not sure, you can always check with your teacher to see what they think about a particular type of help you want to get. That said, a general rule of thumb to keep in mind is to make sure that the assignment you turn in for credit is authentically yours . It needs to demonstrate your own thoughts and your own current abilities. Remember: the point of every homework assignment is to 1) help you learn something, and 2) show what you’ve learned.
So if you’re relying on an app to do all of the work for you, there’s a good chance using it might constitute cheating.
Think of it this way: say you’re studying for an upcoming math test, and are stumped by a few of the questions on the study guide. Even though you’ve tried and tried, you can’t seem to get the right answer because you can’t remember the steps to take. Using an app to explain the steps as you’re studying is “help.” Using the app to get answers so you can make a good homework grade is “cheating.”
The same is true for other subjects: brainstorming essay ideas with others or looking online for inspiration is “help” as long as you write the essay yourself. Having someone read it and give you feedback about what you need to change is also “help,” provided you’re the one that makes the changes later.
But copying all or part of an essay you find online or having someone write (or rewrite) the whole thing for you would be “cheating.” Ultimately, if you’re not generating your own work or learning to produce your own answers, it’s probably cheating.

5 Tips for Finding the Best Homework Help App for You
If you’re serious about using a homework help app, our expert tips can help you pick one that’s right for you and your budget!
#1: Decide What Tools You Need to Succeed
While most apps offer Q&A services, the best apps provide study tools to help you learn the material you need to learn .
For instance, if you’re a visual learner, you might need an app that provides lots of videos. If you learn best by reading, an app that provides lots of in-depth written resources might be better for you. Or, if you learn best by actually doing things, look for an app that provides practice tests and quizzes, along with explanations for correct and incorrect answers.
Before committing to an app, take a quick survey of the tools they offer users to make sure they meet your unique learning needs.
#2: Decide Which Subjects You Need to Study
Not all homework apps are created equal. One might provide tutoring in math and science, but no proofreading services to help you with writing. Another might be perfect for American History, but what you really need help with is your Spanish class. So, before you can decide which app is best for you, make sure to create a list of the subjects you need the most help in.
#3: Do Your Research
As we’ve said before, there are tons of homework apps in the app store to choose from, and the most important thing you can do is research what they offer students. Services, prices for those services, and subjects that the apps cover all vary, so it’s important that you look into your options. We’ve compiled our all-around favorite (and reliable) apps here, but it’s still a good idea to do your own research to find out what might meet your individual needs best.

#4: Learn Why People Like and Dislike the App
Maybe you’ve heard the phrase “buyer beware?” It means that the person buying something should check for quality before actually handing over their money. This applies to both free and paid homework apps, but especially those that actually cost money.
Before you download anything, be sure to read the user reviews . While all apps will have both positive and negative reviews, you want to look for one that has more positive than negative. And if you’re considering paying for a service, be sure that users think it’s worth the price overall!
#5: Budget Yourself
If you find a paid app that provides the learning tools you need, covers the subjects you need to study, and that has good reviews overall, set a budget to pay for it before you hit that “install” button. The costs for paid homework apps vary, and especially if you’re using one that requires you to pay for individual questions or services, the prices can add up quickly. So make sure there’s money for it in your budget before you commit!

What’s Next?
If you’re not quite sure why you’re struggling with homework, or want to know how you can do your homework as quickly as possible , check out this list of 15 expert homework tips and tricks to make your life a little bit easier!
Effective studying requires the right balance of concentration, understanding, retention and rest. So if you need help striking that balance, read these 16 tips for better study habits in both the short and long-term.
Getting good grades is about more than just answering questions correctly on your assignments. It also requires planning ahead and participation. In this article we cover the academic survival strategies that can help you throughout high school .
Trending Now
How to Get Into Harvard and the Ivy League
How to Get a Perfect 4.0 GPA
How to Write an Amazing College Essay
What Exactly Are Colleges Looking For?
ACT vs. SAT: Which Test Should You Take?
When should you take the SAT or ACT?
Get Your Free
Find Your Target SAT Score
Free Complete Official SAT Practice Tests
How to Get a Perfect SAT Score, by an Expert Full Scorer
Score 800 on SAT Math
Score 800 on SAT Reading and Writing
How to Improve Your Low SAT Score
Score 600 on SAT Math
Score 600 on SAT Reading and Writing
Find Your Target ACT Score
Complete Official Free ACT Practice Tests
How to Get a Perfect ACT Score, by a 36 Full Scorer
Get a 36 on ACT English
Get a 36 on ACT Math
Get a 36 on ACT Reading
Get a 36 on ACT Science
How to Improve Your Low ACT Score
Get a 24 on ACT English
Get a 24 on ACT Math
Get a 24 on ACT Reading
Get a 24 on ACT Science
Stay Informed
Get the latest articles and test prep tips!
Ashley Sufflé Robinson has a Ph.D. in 19th Century English Literature. As a content writer for PrepScholar, Ashley is passionate about giving college-bound students the in-depth information they need to get into the school of their dreams.
Ask a Question Below
Have any questions about this article or other topics? Ask below and we'll reply!

Home Science 216 Solved Assignment 2021 - 22 | NIOS Secondary Solved Assignment (2021 - 22)
nios solved assignments ( 2021-22) home science 216 solved assignment 2021 - 22 tutor marked assignment max marks: 20.
Note: (i) All questions are compulsory. The Marks allotted for each question are given beside the questions.
(ii) Write your name, enrollment numbers, AI name and subject on the first page of the answer sheet.

1. Answer any one of the following questions in about 40-60 words. 2
(a) ‘Home Science’ is both art and science, justify and tell two career opportunities after studying home science. (See Lesson 1, 12)
Ans: Home Science is a field of study which combines both art and science. There are many career opportunities for the students of Home Science. The first career opportunity is in the field of healthcare, where one might work as a nurse or as a doctor’s assistant. The second career opportunity is in the field of sociology and psychology where one might work as a researcher or counselor.
(b) How can we use the knowledge of home science in home decoration to make a small house look spacious give four examples to explain. (See Lesson 1, 12)
Ans: The knowledge in home science has always been useful for the people in their daily life even in decorating small houses. By using the knowledge of home science, we can make a small house look large and spacious Here are four examples of it:
1) Paint the walls light colours for example pink.
1) Use natural light instead of table lamp.
4) Use mirrors to create the illusion of space;
4) Hang paintings and artwork on the walls not of table and furniture;
गृह विज्ञान (216)| Home Science 216 NIOS Free Solved Assignment 2021 – 22 (Hindi Medium)
2. Answer any one of the following questions in about 40-60 words. 2
(a) Give the importance of balanced diet. (See Lesson 3, 5)
Ans: A balanced diet is very important because it helps in maintaining good health and avoiding diseases. It provides our body all important nutrients which help us to grow, develop and stay healthy. Balanced diets are key for good health. It also helps in lowering pressure and blood sugar level.
(b) Give four ways to maintain food hygiene. (See Lesson 3, 5)
Ans: Four ways to maintain food hygiene:
1. Clean your hands thoroughly with soap and water before and after preparing food.
2. Always wash fresh fruit and vegetables before cooking and eating.
3. Store vegetables and fruits in fridge
4. Always cook vegetables and meat thoroughly before eating.
3. Answer any one of the following questions in about 40-60 words. 2
(a) Discuss two products each made from natural and man – made fibres and give two reasons why sorting should be done before washing clothes. (See Lesson 9, 10)
Ans: Natural fibres are made from plants, animals or minerals.
For example:
1. Silk is made from silk a cocoon which is one of the most popular natural fibres for making clothes because of its smooth feel and high value.
2. Wool made from the sheep’s hair which is used mostly in winter season.
Man-made fibres are created from synthetics or processes such as spinning, weaving or knitting.
1. Synthetic Fibers: synthetic fabrics that have been manufactured from raw materials by chemical processes or extrusion, for example polyester and nylon.
2. Manufactured Fibers: A man-made fiber that has been spun, woven, knitted into a textile fabric, for example rayon and acetate.
There are two main reasons why laundry should be sorted before washing:
1. Firstly, natural fabrics need less detergent than man-made fabrics, and
2. Secondly, different types of clothes require different conditions. Natural fabrics should be washed at 30C with softener and man-made fabrics should be washed at 40C with no softener.
(b) Give two differences between gray fabric and finished fabric and Explain the method of marbeling and knotting to make colourful duppattas by tie and dye method. (See Lesson 9, 10, 11)
Ans: Difference between gray fabric and finished fabric:
1. Gray fabric does not have any color added to it. Finished fabric has some color added to it – usually white.
2. Gray fabric does not have any finishing, such as sheen and texture. Finished fabric have finishing.
Tie and dye is an ancient art of Indian textiles. It is quite popular in India, Pakistan, Bangladesh and other countries. Marbling refers to the act of creating patterns by spreading colours on a surface with paints or inks while they are still wet. Knotting means fixing the folds while dyeing the yarns while packing them closely together to form a tight knot. The tie-dye technique is used to create colourful fabrics which are popular worldwide because of their eye catching nature. They are made by tying knots on yarns before dyeing them with different colours one by one.
4. Answer any one of the following questions in about 100 to 150 words. 4
(a) Your family of six member comprising of grandparents, parents and two children have planned to go on a trip to Goa for two weeks. Help them two make their trip successful by : (See Lesson 14, 15)
(i) Show the steps of management process.
(ii) Make a time plan for a day that you would follow during the trip.
Ans: Our family planned for a day trip to Goa. In our family there are 6 members comprising of grandparents, parents and two children. The grandparents are not very active, so it is necessary that they are taken care of when the parents have work commitments.
It is necessary that everyone is aware of what each person needs in order to have a smooth day. It is important for the parents to know how many hours they can manage with their children before they get tired and how much time the grandparents require before they need some rest.
The most essential part of this process is communication between all members in order to plan out an itinerary with things that fit everyone’s abilities and skill sets so that there are no clashes or conflicts.
(i) Steps of management process of trip:
a) Do plan for your travel in advance
b) Do consult with your parents to get their consent before booking the tickets
c) Don't book a hotel without consulting with your parents
d) Don't take too much luggage for a day trip to Goa
e) Do carry only essentials that you need to stay comfortable during the day
(ii) Time plan for a day trip to goa:
Planning a day trip to Goa seems like an easy task. However, when you are not familiar with the city or are there for the first time, it can be quite difficult to manage the time in a way that you see all the major tourist attractions. Due to this we have taken the help of guide who plan our trip as follows:
a) The itinerary starts with an early morning breakfast at 8 AM and ends at 10 PM when you can enjoy some delicious seafood dinner.
b) There are many beaches in Goa, but one of the most famous ones is Palolem Beach. We plan to visit this beach by 10 AM. This beach is one of the best places to visit in Goa when you have limited time.
c) Palolem Beach also has some shops where we plan a shopping around 12 noon.
d) We will took lunch at The Fisherman's Cove around 2 pm.
e) We will visit Anjuna Beach after lunch. Anjuna Beach is an amazing place to hangout with your friends and enjoy the music from the bar.
f) We will visit Arambol Beach around 5 pm. Arambol Beach is one of the most popular beaches in Goa that has been ranked as one of nicest beaches in Asia. It is famous for its fishing spots, country markets, and small villages.
g) Finally we will take our especially some fresh seafood at The Fisherman's Cove.
(b) You have come to the city for higher studies and live alone in a rented accommodation. Share the following with your friend: (See Lesson 3, 19)
(i) Explain the advantages of living in a joint family to your friend.
(ii) Plan a weekly menu for yourself which you will give to your food vendor.
Ans: Only one question is necessary
5. Answer any one of the following questions in about 100 to 150 words. 4
(a) Your mother bought a washing machine from a reputed company during ‘sale period’ which developed a defect after a week. (See Lesson 22)
(i) Tell your mother what are her rights as a consumer (any two)
(ii) What can be a possible disadvantage of buying a product during ‘sale period’?
Ans: (i) Tell your mother what are her rights as a consumer (any two)
Many consumers buy a product during a sale period and later realise that the item they bought is faulty. When this happens they have legal protections as a consumer. I tell my grandmother about her right against any loss from washing machine she bought under sale period:
a) If you have bought a washing machine under the sale period, the company only has to replace it with a new one.
b) If you have bought a washing machine during or after the sale period, then the company will compensate you with cash if any loss caused.
(ii) Disadvantages of buying a product during sale period:
Many consumers buy a product during a sale period and later realise that the item they bought is faulty. When this happens they have legal protections as a consumer.
Some people buy products during sale period for the wrong reasons. They tend to buy items without considering all the factors. Buying a product at a discount does not mean that it is worth buying.
Weighing utility and quality, many customers pay more than the actual price of the product to get something of higher quality. There is no point in buying an expensive washing machine because it is on sale if you are looking for long-term value or are not sure about how often you will use it.
(b) You have been asked by the Gram-Panchyat to talk about health give your talk on the following points. (See Lesson 7, 8)
(i) Define health and give two characteristics each of good physical and mental health.
(ii) What four measures can you take at home to avoid communicable diseases?
6. Prepare any one project out of the given below: 6
(a) Visit your neighbourhood and find out the following details: (See Lesson 8)
(i) How many of the 60 yr old and above have taken the vaccine for Covid – 19? Why is vaccine important for infectious diseases?
(ii) What safety measures did your family adopt to protect themselves from getting infected with Covid – 19?
(iii) Write a poem / song to apprise about the safety measures to be taken to prevent communicable diseases.
(b) Talk to your grandparents or elderly people in your neighbourhood and gather the following information. (See Lesson 5, 6, 20)
(i) How did they preserve seasonal food items without refrigeration?
(ii) Why was there less noise pollution in their time? Can those practices be used now?
(iii) What challenges did adolescent girls face in their time?
Ans: (i) After a long discussion from my grandparents and other elderly people in my neighbourhood, I sort out some effecting method of preserving seasonal foods which are listed below:
a) One method is to freeze the item in a sealed container or bag. This is an effective way that has been used for a long time. However, with the development of new technologies, freezing food items can have some negative effects on its quality and taste. For this reason, it is not the most recommended preservation method by experts in the field.
b) The other method is to dry the item using a dehydrator or oven with low heat settings. Dehydration can be done in two ways: air-drying and sun-drying. The former involves drying out the food with circulating air while sun-drying needs sunlight exposure to make it happen. It usually takes more time than air drying but can be done almost anywhere and is a favorite for those that enjoy a hands-on approach.
c) One tasty way to preserve your food is by putting it into a pot of cold water. This technique has been used for centuries. Another technique is heating the food items with the heat of the sun.
d) Smoking is the oldest method of preserving seasonal food. Smoking can be done at home using a smoker or by using an outdoor grill for cold smoking.
(ii) In the past, there was less noise pollution because of a few factors.
a) For one, there were fewer cars on the road.
b) In addition, people in that time would usually walk or take public transport to get around so they were not constantly surrounded by noise.
c) Finally, this time period was before the days of TVs and radios so there was a lot less sound coming from home appliances.
We can't really use these practices in our current society because we have a lot more vehicles on the roads and most people have their own cars now which is making it hard to avoid traffic noise. In addition, most people don't walk around anymore and instead they either drive or take public transit which means that they are surrounded by noise constantly. The noise pollution in their time was less because the population was smaller and the environment was cleaner. That doesn't mean that they can use those practices now. They need to apply more strict standards to reduce the amount of noise pollution in our environment.
(iii) The girls of the past had to deal with different challenges than what we face today. Most of these challenges were caused because the world was so much quieter in their time.
They had to be submissive, obedient and subservient to their parents.
They were not allowed to go out of home without their parents’ permission. They were not allowed to play with boys or talk with unknown people.
They were required to do household chores like cooking, washing clothes, cleaning house and taking care of babies.
But, the challenge that the adolescent girls face today are much different than what they faced in their grandparents’ time. Today, girls face struggles such as social media pressures, body image issues and sexual harassment.
Posted by Kumar Nirmal Prasad
You might like, 0/post a comment/comments.
Kindly give your valuable feedback to improve this website.
Post a Comment
Subscribe us, social widget, contact form.
- Publications
- Conferences & Events
- Professional Learning
- Science Standards
- Awards & Competitions
- Instructional Materials
- Free Resources
- For Preservice Teachers
- NCCSTS Case Collection
- Science and STEM Education Jobs
- Interactive eBooks+
- Digital Catalog
- Regional Product Representatives
- e-Newsletters
- Browse All Titles
- Bestselling Books
- Latest Books
- Popular Book Series
- Submit Book Proposal
- Web Seminars
- National Conference • New Orleans 24
- Leaders Institute • New Orleans 24
- National Conference • Philadelphia 25
- Exhibits & Sponsorship
- Submit a Proposal
- Conference Reviewers
- Past Conferences
- Latest Resources
- Professional Learning Units & Courses
- For Districts
- Online Course Providers
- Schools & Districts
- College Professors & Students
- The Standards
- Teachers and Admin
- eCYBERMISSION
- Toshiba/NSTA ExploraVision
- Junior Science & Humanities Symposium
- Teaching Awards
- Climate Change
- Earth & Space Science
- New Science Teachers
- Early Childhood
- Middle School
- High School
- Postsecondary
- Informal Education
- Journal Articles
- Lesson Plans
- e-newsletters
- Science & Children
- Science Scope
- The Science Teacher
- Journal of College Sci. Teaching
- Connected Science Learning
- NSTA Reports
- Next-Gen Navigator
- Science Update
- Teacher Tip Tuesday
- Trans. Sci. Learning
MyNSTA Community
- My Collections
Safety Blog
Safety for Hands-On Science Home Instruction
By Kenneth Roy
Posted on 2020-07-28
Share Start a Discussion
With the advance of the COVID-19 pandemic during the latter part of the 2019-2020 academic year, virtual learning became the viable alternative in many school districts nationwide. In this venue, some science/STEM teachers considered and adopted hands-on activities to be completed remotely at home by students. This coming fall, for the 2020-2021 school year, there probably will be a continued need for such home-based, hands-on activities. This actually is not new. Teachers have assigned home activities for years, such as science fair projects, extra-credit work, general classroom homework assignments, and more. The bottom line is this: Whether hands-on activities are done in a formal academic school laboratory or out in the field or at home, all modes are a springboard for developing scientific concepts and methodology.
This is, however, a double-edged sword. Whether in the formal academic school laboratory or off-site, these activities promote science education. However, they also introduce legal issues under “duty or standard of care.” Basically “duty or standard of care” is defined as an obligation, recognized by law, requiring conformance to a certain standard of conduct to protect others against unreasonable risk. Check out the NSTA’s Legal Implications of Duty of Care for Science Instruction for additional information and guidance on this topic. Be aware that school staff and school district leaders have a duty of care in this situation that extends outside the classroom or laboratory to family members who supervise the students during these assignments at home or in the field.
Activities assigned must not only be aligned with the curriculum, but also support legal safety standards and better professional safety practices. Whether the teacher is on-site or not, any hands-on activity assigned introduces teacher liability, should someone get injured. Teachers have the professional responsibility to provide safety protocols and training as part of the assignment, and they need to be properly documented in the teacher’s lesson plans. A safety quiz should also be given and passed before the student is allowed to conduct the experiment. Students and parents also need to review and sign a safety acknowledgement form before any activities are done in or outside of the science/STEM laboratory. Examples of such documents can be found on the NSTA Safety Portal site as follows:
Elementary Safety Acknowledgement Form
Middle School Safety Acknowledgement Form
High School Safety Acknowledgement Form
Teachers can use these as models and fine-tune them as appropriate, depending on hazards, risks, and needs safety actions for hands-on activities. Please note that these documents must be approved by your administration, and in some cases, the Board of Education, on an annual basis. If modifications are made, they must also be approved by the administration and possibly the Board of Education. Safety acknowledgement forms that are used without appropriate approval can potentially also lead to teacher liability.
At-Home Safety Protocols
The following are examples of safety pre-planning suggestions and recommended safety protocol that students and parents need to be aware of and should follow for safer hands-on activities in the home:
A. Preplanning by Teachers/Supervisors
1. Before beginning any hands-on work, an “AAA” activity for safety needs to be effected. This includes doing a hazard analysis, a risk assessment, and safety actions to be taken based on legal safety standards and better professional safety practices. Note there are three types of hazards to be considered: biological (bacteria, virus, etc.), chemicals (toxins, flammables, corrosives, etc.) and physical (sharps, impalement, spring/coils, etc.). Safety Data Sheets (SDSs) can be a helpful resource for determining many of the hazards associated with chemicals.
2. Chemicals required outside the formal lab should only involve common, but safer household products. These should have a relatively low safety classification on the Safety Data Sheet (SDS). For example, vinegar commonly used on salads has a safety label of 2. If used, appropriate personal protective equipment (PPE) such as indirectly vented chemical splash goggles must be used. Under duty of care, teachers need to provide SDSs as part of the assignment.
Keep in mind that not all households will have the needed common household goods to conduct a lab. What may be common to the instructor may not be common to the students and their families. Families may not have access to the stores where they can purchase the materials. Some families may not be able to afford buying materials to use in the laboratory.
Safety Data Sheets should be reviewed before indicating the use of any household substances in an activity. Safety hazard information can be found here . Additional information on acceptable chemical use can be found on Rehab-the-Lab chemical list .
Do not allow students or their families to use substitute materials, especially chemicals, without the teacher’s approval. Substituting materials can lead to dangerous situations. This can also occur if the student switches brands, as different brands have different ingredients. If the student cannot get the materials that are required to conduct the experiment, provide an alternative learning assignment.
Correct cleanup and disposal procedures should be enforced to maintain the safety of the areas being used in the laboratory activity. These procedures should be documented as part of the learning activity.
3. Safety Data Sheets are required to be provided to the purchaser at the school district. They are often provided online by commercial companies where the chemicals are purchased. If unavailable, try searching the internet for “SDS <chemical name>." Flinn Scientific is also a good reference for SDS.
4. Sanitized personal protective equipment (PPE) is to be provided by the schools or parent prior to the beginning of any lab assignment with safety considerations. This of course includes hands-on activities outside of the formal science/STEM lab. Eye protection, such as indirectly vented chemical splash goggles (meeting the ANSI/ISEA Z87.1 D3 standard) are to be used when working with liquid hazards (chemicals or biologicals), or protective safety glasses with side shields when using solid physical hazards (springs, sharp objects, projectiles, etc.) Vinyl or nitrile gloves and non-latex aprons should be used when dealing with biological or chemical hazards. If proper PPE is not available, the laboratory exercise or activity must not be conducted.
All students and parents involved in the laboratory activity should be properly trained on how to use, wear, and dispose of PPE. The teacher is responsible for making sure that everyone involved in the laboratory experiment is properly trained.
5. For hands-on science/STEM activities involving students in grades K-5 or elementary level, duty of care must be provided directly by a responsible adult.
6. In the case of middle and high school lab activities, teachers should consider using simulations when school-based laboratory investigations are not an option.
7. In some instances, a hybrid model of instruction or blend of both traditional classroom instruction and online learning activities can be used. Actual hands-on laboratory experiments and collaborative activities should involve focus of face-to-face instruction. This is particularly important when these laboratory exercises and activities require the use of personal protective equipment. Online portions of instruction should then focus on laboratory experiences and independent in-class activities.
8. In other instances, it may be safer to use teacher demonstrations, either in a face-to-face session or through a virtual platform. It is critical to communicate that these demonstrations should not be conducted outside of a formal laboratory setting following specific safety protocols like use of appropriate personal protective equipment
9. Although by following safety protocols, an activity can be made safer, it possibly may not be totally safe. Accidents can still happen. This is especially true when teaching remotely. In this case, as in all others, absolute caution must be exercised by a reasonable and responsible adult who is supervising such activities outside of school. In school, this is directly the teacher’s responsibility. Remember, the teacher’s responsibility for safety still applies when students conduct hands-on activities at home or out in the field.
B. Home Lab Safety Guidelines for Students/Parents
In addition to the safety protocols provided in the NSTA Safety Acknowledgement forms, there are a number of additional resources on the internet noting basic safety guidelines for home lab safety. A prime example are the guidelines for home lab safety developed by The Centre for Science at Athabasca University, Athabasca, AB T9S 3A3 Canada, found here . These are applicable and a great resource for students and home supervisors to follow for a safer home science activity experience.
The site first states the importance of thoroughly reading the lab activity instructions before beginning the lab. This is for not only better understanding the purpose of the activity, but also to be aware of the potential safety hazards.
Below are some specific examples of home lab safety guidelines that can be found on their website relative to Personal Safety and Equipment.
Personal Safety and Equipment • Keep the Home Lab Kit and the supplementary materials safely away from children. • Wear approved eye protection at all times when doing your lab activities. • Confine long hair when doing your lab activities. • Perform no unauthorized experiments. • Select a safe site for lab activities in your home that is well ventilated and protected from spills, children, and pets. Use a work area, such as your kitchen, where there is a flat and stable working surface, and access to water and various supplies. • Have no food or drink in the lab area. • Never place any instrument or materials in your mouth. • Wash your hands before taking a break for a snack or meal. • Wear appropriate foot coverings in case of spills; i.e., no open-toed sandals, no bare feet, etc.
Chemicals • Keep all chemicals and equipment out of the reach of children and pets. • If possible, keep all unauthorized people out of your selected site when chemicals are in use in order to avoid any unforeseen accidents. If anyone is allowed to observe you or participate in experiments, follow all of the proper safety rules. • Never wear contact lenses when working with chemicals. • Work with the (small) quantities indicated. Follow the instructions to prevent fires, burns, and cuts. • Do not smoke or eat when you are using flammable or poisonous materials. • Label all materials clearly, and make accurate observations and measurements so that you do not make mistakes or need to repeat experiments. • Ensure that the area you are working in is well-ventilated.
Spills and Cleanup • In case of a chemical spill, clean up thoroughly with paper towels and dispose of chemicals out of the reach of children and pets. • If chemical spills occur on people or clothing, rinse thoroughly with lots of running water, and seek medical attention if necessary. • Be sure to thoroughly clean up the lab site and all utensils used after working on labs.
Emergencies • Have the following emergency equipment handy in your working area: a fire extinguisher, water, a first aid kit, and a telephone.
Again, remember that safety guidelines needed depend on the types of hazards and resulting risks associated with the activity. Although the samples provided at The Centre for Science at Athabasca University, Athabasca, are very good, they may not be complete for all types of at-home activities.
In the End!
This information should be helpful for teachers, students, and parents/guardians in planning for safer home science/STEM activity assignments. Please note the content of this commentary is based on prudent professional safety practices (e.g., NSTA, ACS, etc.) and on OSHA, NFPA, and other legal safety regulations, but do not purport to specify all legal standards. They are intended to provide basic guidelines in the areas of employee and student health and safety. Therefore, it cannot be assumed that all necessary warning and precautionary measures are contained in this information. Users of this information should also consult pertinent school board safety policy; local, state, and federal laws; and legal counsel for additional safety prevention program components during these challenging times of the COVID-19 pandemic.
Additional Resources
National Science Teaching Association. 2020. Legal Implications of Duty of Care for Science Instruction .
Recommendations for the “At Home Safety Protocols” section have been adapted from resources provided by Dr. Anne Peterson, Science Coordinator, Virginia Department of Education.
Guidance for Reopening: Next Generation Science Standards and Science Instruction at Grades K-12 Delaware’s Science Standards
Submit questions regarding safety to Ken Roy at [email protected] or leave him a comment below. Follow Ken Roy on Twitter: @drroysafersci.
Safety Blog Acknowledgement. NSTA Chief Safety Blogger Dr. Ken Roy wishes to sincerely thank nationally recognized District Supervisor of Science Kevin S. Doyle, Ed. D., Morris Hills Regional High School District, Rockaway, New Jersey ( [email protected] ) for his professional review of this commentary.
General Science Safety Middle School Early Childhood Elementary High School Postsecondary Preschool
You may also like
NSTA Press Book
COMING SOON! AVAILABLE FOR PREORDER. Here’s a fresh way to help your students learn life science by determining how you can help them learn best...
Web Seminar
Join us on Thursday, January 30, 2025, from 7:00 PM to 8:00 PM ET, to learn about the search for planets located outside our Solar System....
Join us on Thursday, November 14, 2024, from 7:00 PM to 8:00 PM ET, to learn about the role that rocks and minerals play regarding climate change....
Reports Article
IMAGES
VIDEO
COMMENTS
Go Science Kids. 43. "Flip" a drawing with water. Light refraction causes some really cool effects, and there are multiple easy science experiments you can do with it. This one uses refraction to "flip" a drawing; you can also try the famous "disappearing penny" trick.
Get ready to unleash your inner scientist with my HUGE collection of science experiments and investigations for home and school. Most of the activities use inexpensive materials you probably already have around the house, so grab your lab coat or old t-shirt, collect the supplies, and start experimenting. All the resources are completely free ...
Complete Introduction to Chemistry (Grades 6-8) 4.6. (122) $129.95. Add to Cart Quick View. Give students a solid chemistry foundation with the hands-on experiments in this complete lab kit! This set has 40+ real science tools and chemicals, 27 engaging experiments, a 46-page manual & safety equipment.
Free homeschool science printables for all ages. Topics include the rock cycle, butterflies and pollination, Newton's 3 Laws of Motion, bats, elephants, birds, botany, chemistry, and much more. Add these free printables to your homeschool science curriculum or use as standalone science activities for elementary, middle school, and high school.
Over 1,200 free science projects for K-12. Browse by subject, grade level, or try our Topic Selection Wizard to find your winning science project. With science projects in 32 different areas of science from astronomy to zoology, we've got something for everyone! Let us help you find a science project that fits your interests, with our Topic ...
Now's the time to decide if you want to print out the worksheets for this course or buy them as a workbook. This is just for this science course. 1 - 4 Print; 1 - 4 buy; 5 - 8 print; 5 - 8 buy; I want to teach you something about science. Science is a collection of observations about the world.
Lesson Plans. (248 results) Free science lesson plans designed to engage students through hands-on experiments and activities. Chemistry, life sciences, physics, engineering and more, for elementary, middle and high school teachers.
216 - Home Science NATIONAL INSTITUTE OF OPEN SCHOOLING (An autonomous organisation under MHRD, Govt. of India) A-24-25, Institutional Area, Sector -62, NOIDA-201309 (U.P .) Website: www .nios.ac.in, Toll Free No. 1800 180 9393 Course Coordinator Ms. Neha Sharma Project Coordinator Ms. Asheema Singh
Remove the air in a DIY vacuum chamber. Instructables. Difficulty: Medium / Materials: Medium. You can use a vacuum chamber to do lots of cool high school science fair projects, but a ready-made one can be expensive. Try this project to make your own with basic supplies. Learn more: Vacuum Chamber at Instructables.
If you're seeing this message, it means we're having trouble loading external resources on our website. If you're behind a web filter, please make sure that the domains *.kastatic.org and *.kasandbox.org are unblocked.
3. Answer any one of the following questions in about 40-60 words. (a) List four good housekeeping practices that you expect from the staff in a hotel for a. comfortable stay. (b) "Embroidery is a painting with needle and thread". Elaborate & explain. 4. Answer any one of the following questions in about 100-150 words.
1-4. Safety precautions and rules when handling kitchen equipment. -Improvising kitchen equipment. By the end of the lesson, the learner should be able to. · State rules and precautions to observe when handling kitchen equipment. · Improvise kitchen equipment and tools. · Teacher-pupil discussions.
The National Institute of Open Schooling (NIOS) formerly known as National Open School (NOS) was established in November 1989 as an autonomous organization in pursuance of National Policy on Education 1986 by the Ministry of Human Resource Development (MHRD), Government of India. NIOS is providing a number of Vocational, Life Enrichment and community oriented courses besides General and ...
Max: Marks 20. 1. Answer any one of the following question in about 40-60 words. (a) The study of Home Science is an Art and Science. Explain both implications with two examples each. Ans- Home Science deals with the scientific methods of handling the home management and it is related to the other branches of science as well.
We will provide NIOS Class 10th Home Science (216) English Medium Solved Assignment PDF (TMA) 2023-24, NIOS Class 10th Home Science TMA Answer 2023-24, NIOS Home Science Solve TMA For Class 10th. google.com, pub-1384127205564088, DIRECT, f08c47fec0942fa0. Skip to content. Menu.
Chegg is one of the leading providers of science help for college and high school students. Get help and expert answers to your toughest science questions. Master your science assignments with our step-by-step science textbook solutions. Ask any science question and get an answer from our experts in as little as two hours.
Tutor Marked Assignment. Click to buy NIOS Home Science (321) Solved TMA (2023-24) PDF. Max. Marks: 20. Note: Also read : NIOS Senior Secondary Solved Assignment 2023-24. (i) All questions are compulsory. The marks allotted for each question are given at same place. (ii) Write your name, enrollment number, Al name and subject on the top of the ...
The bottom line is, homework sites and homework apps are intended to help you complete your take-home assignments successfully. ... When it comes to apps for science and English homework help, there aren't lots of great resources out there, much less out there all in one place. While Grammarly is a good service for proofreading, SparkNotes ...
NIOS Solved Assignments (2021-22) Home Science 216 Solved Assignment 2021 - 22. Tutor Marked Assignment. Max Marks: 20. Note: (i) All questions are compulsory. The Marks allotted for each question are given beside the questions. (ii) Write your name, enrollment numbers, AI name and subject on the first page of the answer sheet. 1. Answer any ...
5. For hands-on science/STEM activities involving students in grades K-5 or elementary level, duty of care must be provided directly by a responsible adult. 6. In the case of middle and high school lab activities, teachers should consider using simulations when school-based laboratory investigations are not an option. 7.
CE (Code No. 064) (CLASS - XI AND XII) (2023-2024) PrefaceThe course in Home Science encompasses five areas namely, Foods and Nutrition, Human Development and Family Studies, Fabric. and Apparel, Resource Management and Communication and Extension. All these domains have their specific content in focus that contributes to the study o.
Subject: Home Science. CODE: S08. IENCE AND FOOD SERVICE MANA. Food science and nutrition. physical and chemical propertiesQuality evaluation of. oods- objectives and subjective.Effects of cooking and processing techniques on nutritional components and other physical parameters, od preservation and applicat.
After 12 weeks in space, Boeing's Starliner spacecraft is finally set to return home from the International Space Station on September 6 — albeit without its two-person crew.
NEW YORK (AP) — The St. Louis Cardinals designated Tommy Pham for assignment on Friday, ending the outfielder's second stint with the team after one month, and recalled outfielder Jordan ...