This post may contain affiliate links. See our affiliate disclosure for more.


How to Present a Logo to Clients in 6 Steps (Tips from Experts)
Preston Lee
Preston Lee is the founder of Millo where he and his team have been helping freelancers thrive for over a decade. His advice has been featured by Entrepreneur, Inc, Forbes, Adobe, and many more. Learn more »
Adam Wright
Adam Wright is the Content Manager at Millo, in addition to running his own graphic and web design business, Adam Wright Design. When he's not working on his business, you can find him watching hockey or just about any type of racing. Learn more »
1. Start with the logo design brief
2. make the logo presentation in-person or via video, 3. tell a compelling story about the logo, 4. include mockups & provide context, 5. show off the logo’s versatility, 6. focus on the audience, 3 logo presentation templates for inspiration, mastering how to present a logo.
BIG NEWS! We just released The Freelance Files , a collection of professional done-for-you email scripts, contracts, invoices, and more for smarter freelancing. The first 50 customers, save 50% with this link .
Mastering how to present a logo to clients can take years of practice and experience.
Plus, there’s the pressure of getting a client logo presentation right the first time in order to avoid starting over or frustrating your client.
While a logo technically should stand on its own, my friend and logo expert Ian Paget perhaps put it best:
“I’ve learned through experience that how you present your design work is as important, if not more, than the physical design phase.”
With that in mind, I reached out to Ian, who runs a wonderfully successful logo design company in the UK and asked for a favor.
Could he connect me with dozens of talented logo designers to answer the question of how to present a logo to a client successfully?
What I got back was a collection of incredible advice from experienced logo designers who have been designing logos and presenting them to clients for years.
That means, instead of slogging through learning how to present a logo from scratch, you can learn from some talented and experienced logo designers exactly how to present a logo for the highest chances of client satisfaction.
- When presenting a logo, keep it simple. Present only your best design option(s).
- Explain how your design choices align with the client’s brand and goals.
- Consider using mockups to show how the logo would look in real-life scenarios.
Below are some of the most helpful responses I received. I hope they’ll prove useful as you perfect how to present a logo to your own clients.
The success of your logo presentation to a client starts long before you sit down to present your logo.
The real secret of how to present a logo begins in your initial meetings with clients when you send a proposal and agree on a creative brief.

Then, presenting a logo to a client becomes a matter of showing them how your design fulfills the requirements you both agreed on earlier in the process.
Here’s what a few expert logo designers had to say about how to present a logo according to the design brief:
Always start with a detailed design brief. If the client doesn’t provide you with one, create your own by asking the right questions. Once you have created a brief, get the client to approve this before starting anything. As part of my logo design process I create a tick-list of objectives by asking questions. I then ask the client to check and approve this list. This approach ensures that we’re both on the same page from the outset, and that I have goals to refer back to when presenting my work. — Ian Paget, LogoGeek Before presenting I start with a conversation. I tell them what they are going to see, and how I will explain the reasons behind the work. I talk about research and reiterate what the creative brief outlines. —Susan Feinberg, Fireside Take them through the logo design process and show them how your concept meets their criteria. —Col Gray, PixelsInk Refer back to the brief to show your understanding of their brand and requirements. — James Mortimer Sponsored Become a sponsor Start with the end in mind – the goal – then repeat the brief, linking to aspirations they have for their company/brand. Then take them through what you will be presenting and your thought process for each. — Danny Matthews, Danny & Co. The most important thing is that the client can see how the solution delivers the strategy. — Iain Hamilton
Another suggestion on how to present a logo that came up over and over again in our group of experts was to make your logo presentations to clients in-person (or online), not via email.
Part of mastering how to present a logo is being able to gauge client reactions on the fly and adapt to a wide variety of responses. This proves near impossible when you simply present a logo via email.
Taking time to prepare a logo presentation that you make “in person” also shows you care about how you present the logo and that you believe in your final logo design.
Here’s what a few of our expert logo designers had to say about how to present a logo in-person (or via video):
My best advice is to always present [the logo] face to face. Never just send a file… It’s a simple one but also one of the most important things, in my opinion.
— Mads Haakansson, N’fellows Have structure to the presentation and always do it in person/live, instead of email. — Danny Matthews If you’re presenting the logos over skype or Zoom, do not send the presentation document to the client ahead of the call, instead present the logos document to them page by page and talk them through what they are seeing. — Ben Stanbury – Prosper Sponsored Become a sponsor
Learning how to present a logo to a client is as much about storytelling as it is about professional presenting skills.
In fact, a story will often get you much further with a client than a stiff, executive-style presentation ever will.
Your story should present the problem the company or its customers have faced and how the new logo solves many previous issues.
Here’s what some of our experts had to say when it comes to using storytelling when presenting a logo:
Tell the story behind the logo and it’s meaning. Touch on how it meets their criteria and how you see it resonating with the target market. Make sure to summarize that story as a simple blurb in the presentation, so the client can reference it as they deliberate.
— Rachel Stoneking, Stoneking Design Take them on a journey. Tell a meaningful story both visually and in writing. — Craig Burton Make a little animation or GIF to explain the story of the logo. This makes your client’s life easier as they explain further to all other stakeholders. — Mohak Ahuja Tell their story. Show how you’ve listened and interpreted their core. Show them that you understand and share their vision and goals. The craft and implementation can come later in the presentation but they need to believe you’ve ‘got it’. — Jonathan Harris, Harrisment
In addition to telling a story and showing how your logo solves the client’s problem-at-hand, you’ll also want to learn how to present a logo in context by providing real-life scenarios and mock-ups.
By presenting a client’s logo in real-world settings (like on their products, on business stationary, or in advertisements), your client will be more likely to envision the strength of the new logo you’re presenting.
Here’s what logo presentation pros told me about harnessing the power of logo mockups:
Include mockups to show the logo in use in real world situations and not just on an empty white page. Many people need help with visualising their logo in use and it really helps to sell the design. — Col Gray Give the logos some context. Whether that’s on the back of a business card, or the side of a building. It will help them understand how their new brand is going to work in the real world. — Simon Potter, Pixels & Paper Show them how the logo will be used in real life and suggest an application they may not have thought of relating to their aspirations. So if they would love to bring out a new product in future – show how that would look in real life to give longevity to the designs. —Danny Matthews Showcase the logos on mockups! Be sure to use the typical business stationery mockups, but also include a few that are relevant to the clients and their industry. Mockups are a great way to show clients how their new logo will work in the real world. —Rachel Stoneking Choose some selected key visuals/mockups of their identity in action. Get them to buy into themselves and their audience using and experiencing the new scheme. —Jonathan Harris You have to present [the logo] in context, and build on a story that the client will embrace. All of this stems from understanding the business, the culture, and the brand to help establish the right design for the right narrative. — Tony Lopez
In addition to presenting mockups of the logo’s potential usage, it will be helpful to show how versatile your logo can be.
Learning how to present a logo in a wide variety of ways will help your client see how flexible and timeless your new design is. It will help them see exactly why you charge good money for logo design .
Here’s what some of our logo design pros said about versatility:
Present it in as many ways as you can. Show it big, small, white only, black only. Show it embroidered, screen printed, embossed, glossy, matte. Show it on a mug, a hat, a t-shirt, on paper, on a car, on a billboard, in a newspaper… you get the idea. The point is to show them the versatility of the logo. Show that you’ve put in enough thought on the design that no matter the situation your design is going to work for them and not be something they need to “find a solution for” down the road. — Mike Pickett Don’t just show it large, show it tiny too. Large is impactful, but small shows it has range. There’s no point progressing a design that doesn’t work at 100px wide. —Mark Bowley, Bowley Design
Throughout your entire logo design presentation, you want to focus on the logo’s audience.
The audience is often not the client you’re presenting the logo to, but their customers or clients. So while it may be tempting to talk about how much your client should like your new logo designs, learning how to present a logo with the right audience in mind is critical to your success.
Perhaps one of the most critical pieces of advice was given by logo designer Ben Mottershead from Ben Designs: “Always show the logo as it would be seen by an audience.”
That means as you’re presenting mockups or highlighting the versatility of your new logo design, make sure you highlight the new logo from the perspective of the most important audience: your client’s customer.
You may find you need to remind your client to judge the new concept based on the audience, as I was reminded by designer Darius Enache: “Tell them on what criteria they should judge the logo (functionality, not personal preference).”
Show customers using products with the new logo. Show team vans parked on streets with the new logo plastered on the side. Mock-up a banner to see what the logo might look like at a major convention.
Putting the audience first through the entire process will be critical as you learn how to present a logo successfully.
To help your logo presentations and spark some ideas, here’s 5 designs done from experts showing you how it’s done.
Grid logo presentation by Gennady Savinov

In this logo presentation, designer Gennady Savinov created a simple, yet effective grid layout to show both color variations. Additionally, he included the logo spacing spec for added visuals. This layout quickly and easily shows the client your design concept.
Single logo presentation by Angie Mathot

Detailed logo presentation by Jeroen van Eerden

In this logo presentation design, designer Jeroen van Eerden created a one-pager full of info. This gives a breakdown of who the company is, what they’re about, the logo design variations, and the typography to be used. Although it’s a little busy, this style can be super informational and useful for relaying brand guidelines.
The truth is, you won’t be perfect at presenting logos to clients overnight. And that’s ok.
But with time, and using the advice of the expert logo designers above on how to present a logo, you’re way ahead of the competition.
In addition to the advice shared above, Steve Evans from Sed+Co urges, “Make sure you … tell them to sleep on the concepts. Far too often clients are too quick to pick an option. Once they’ve gained some distance from the initial excitement, they’re mind is clearer to make an informed ‘business minded’ decision.”
And, of course, perhaps the most important advice for anyone wanting to learn how to present a logo comes from designer Liam Jackson:
“Only present designs you’re happy with. (We all know why 😅 ).”
For anyone who doesn’t know (yet), there’s an unwritten law in logo design that the client will always, ALWAYS pick the design you like the least.
So when presenting logos to clients, never show them something you’re not happy with yourself.
With that, you’re ready to go. All of us wish you the best of luck on your next logo design presentation!
Keep the conversation going...
Over 10,000 of us are having daily conversations over in our free Facebook group and we'd love to see you there. Join us!
Clients Creativity

Written by Preston Lee
Editor at millo.co.
Preston Lee is the founder of Millo where he and his team have been helping freelancers thrive for over a decade. His advice has been featured by Entrepreneur, Inc, Forbes, Adobe, and many more.
Preston's Articles
Reviewed & edited by Adam Wright , Editor at Millo.
At Millo, we strive to publish only the best, most trustworthy and reliable content for freelancers. You can learn more by reviewing our editorial policy .
Comments from the community
All of these are highly appreciated and remarkable client dealing strategies. But I have a query, what if you get some really annoying client who is not willing to show any interest in that design you made with full dedication and hard work. I was in a trouble last month when this type of situation happened to me and after all the efforts, I was no excuse for my services I provided him. However, nice post and I’ve learnt a lot from this.
Thank you for this great article. It is very important to provide clients with more than one logo concept for them to be satisfied with the service you have offered. This gives them a chance to choose from different styles and options.
Offering clients free revisions will also win clients over.
I just want to know how designers deliver the logos to the client? By email? By jump drive?
i see that a lot of logo designers who post their work online present their work on business cards or a large wooden panel. Especially for compete branding packages. How do they do this?
Focus should be on the logo and not presenting it on different material or backgrounds. That stuff comes later. The logo should be on a white background and free of clutter and other distractions. what your talking about is a brand identity which comes with big budget clients and possibly after they select one of the designs.
I’m not in agreement with this. A logo is never seen in isolation, so why present in this way? I think a logo needs to be tested in application by the designer, and also presented in this way too. I personally present the logo on its own as you mentioned, together with a few slides showing it in use as it helps to sell the design. There’s lots of really cool tools out there to make this a quick/easy process.
Awesome article. I love being able to explain “why” I create a logo the way I do and the elements I choose to include. It does double duty as showing the client that I was listening to their wants and it serves as a barrier to keep me from including irrelevant information or elements. Again, awesome post!
Your article covers almost all points.But I want to know to make a attractive background and portfolio that can help me getting more clients.I make good logos but problem comes while showing them .please help
Great article, nice tips! The first impression is so important, that there’s no room for bad logos. Unfortunatelly it is sometimes hard to convince clients of the solution that would be the best for them.
Nice article. Anyone that is presenting full web designs should remember to create a “mockup” of their work that your client can view in a browser with a background.
Very good post, awesome read, thanks
To echo Shea’s comment, Murphy’s law applies here. If you include a logo you are not 100% pleased with, the client will pick that one. Also, if you are working with an AE on the project, be sure to sit down beforehand and explain your reasoning so they can appropriately champion your work to the client. If you don’t work together as a team, it will make everyone look bad, not just the design. Great article Preston!
– “Present practical application”
Very often their first reaction is not so good when you showed them JUST logo. Then you put in on the business card, stationery, t-shirt, whatever – and they love it.
Most people perceive things depending on their surroundings :).
@Michal Kozak, That is a very good point! It seems that the client is always more impressed when you go the extra mile to help them understand application of the logo. Thanks for adding.
Sure do all that work but make sure your getting paid for all that additional work. That stuff comes after they decide on one of the concepts. Also the proper way is to have them pic a logo and if there are additional revisions, then you move to all that jazz with business cards etc.. You only do that if they pay for it, not to win them over. Your logo should do that by itself.
Nice Article. The first impression counts!
The “why” factor is always acting as the main principle in my presentation. From my experience: the more time you spend and efforts give to writing presentation the more positive client’s reaction is. So obviously sometimes it’s just not enough for a result and then it comes to how good you can be at explanations of your decisions.
And never present something that you don’t love. If it’s just okay… It it’s your least favorite… If it’s one one that you did just to illustrate how much better of an idea the others are, It is guaranteed that the client will pick that one.
YES! THIS CANNOT BE OVERSTATED! It has proven true SO many times.
It must be your best pick. Nice one Shea.
Nice tips! The way we present the logos might be 50% of success. We can drive the client’s mind to what we want 🙂
wicked article. You defiantly hit the nail on the head with a lot of those points. A lot of what I have read says that how you present your concept is just as important as what you present to a client.
- Color Palettes
- Baseball Team Colors
- NHL Team Colors
- Superhero Fonts
- Gaming Fonts
- Brand Fonts
- Fonts from Movies
- Similar Fonts
- What’s That Font
- Photoshop Resources
- Slide Templates
- Fast Food Logos
- Superhero logos
- Tech company logos
- Shoe Brand Logos
- Motorcycle Logos
- Grocery Store Logos
- Pharmaceutical Logos
- Graphic Design Basics
- Beer Brand Ads
- Car Brand Ads
- Fashion Brand Ads
- Fast Food Brand Ads
- Shoe Brand Ads
- Tech Company Ads
- Motion graphics
- Infographics
- Design Roles
- Tools and apps
- CSS & HTML
- Program interfaces
- Drawing tutorials

The Granada Logo History, Colors, Font,

What Font Do Doctors Use? Medical
The Real Betis Logo History, Colors,

What Font Is Used on Diplomas?
Design Your Way is a brand owned by SBC Design Net SRL Str. Caminului 30, Bl D3, Sc A Bucharest, Romania Registration number RO32743054 But you’ll also find us on Blvd. Ion Mihalache 15-17 at Mindspace Victoriei
- Graphic Design
How to do a great logo presentation for your clients
- BY Bogdan Sandu
- 12 April 2023
Logo presentation is a critical step in branding. It’s not merely about showcasing a design; it’s about telling a story, revealing the soul of a brand through visual elements.
Effective logo presentation involves more than just the final design; it incorporates the brand guidelines , visual identity , and design principles that bring consistency and recognition.
Why does this matter? Because a well-crafted logo presentation can make or break the perception of your brand’s identity .
By the end of this article, you’ll understand how to create a compelling logo presentation that highlights logo variations , leverages typography , and integrates visual consistency .
Dive in as we explore the nuances of presenting your logo with impact, covering everything from design brief to brand assets . This guide will equip you with the tools to elevate your logo presentation, ensuring your brand resonates and stands out.
How to present a logo
The Nike logo (symbol) and the history behind its simple design
Get the hulk font or similar options for your designs.

You may also like
Layout Design for A Magazine Page and Printing Tips
- Bogdan Sandu
- 19 March 2018
The best graphic design quotes to inspire you while working
- 26 October 2018
- Brand Strategy
- Brand Identity
- Website Design Process
- Monthly Maintenance
- Digital Marketing
- Commercial Photography
- Videography
- Case Studies
- Butler Studios
- Start a Project
- How To Present Logo Concepts

Why present, instead of email?
I never email logo concepts to clients without first presenting the concepts. Live presentations (whether in person or via ZOOM) are critical for several reasons:
- It gives you the chance to explain the logic and insights that drove your creative decisions
- It allows you to educate the client while presenting (most clients need guidance on what makes for a good, and consequently a bad logo)
- It helps build rapport with the client and stakeholders
- It reassures the client that the design concepts are not random expressions of your subjective preference
- It allows you to show the concepts in the order and manner you choose
- It enables you to gauge the temperature of the room and gain feedback in real time
- It gives you the chance to defend your design decisions when met with pushback, if needed
Build your design vocabulary
A huge part of the presentation is the designer’s ability to articulate the design direction, the decisions made, the style of design, and the usage for the logo. Reading books, forums, reviews, and blogs about design will help build our design literacy.

The Presentation Flow
Every time I present logo concepts to clients, I follow the same general flow of presentation.
Step 1) Pre-Framing
Pre-framing is a tactic of preparing your clients frame of mind before you show them your logo concepts. Before revealing the logo concepts, I like to remind the client of two things:
1. What a logo is. A logo is not communication, it is identification. It shouldn’t try to say a whole lot. It is best to think of a logo as an empty vessel that meaning can be breathed into over time, with consistency of use and follow through on the brand’s promise. When you try to communicate too much with a logo, it becomes too busy and distracting. Helping clients understand this will answer the notorious question/objection before it comes – “I don’t get it? What does it mean?”.
2. How we define good (and bad) design. Logo design has a bit of subjectivity to it. Who is the standard for what good and bad design is? When we see a good logo it’s difficult to explain why it’s good. We just kind of know it when we see it. Same goes for bad design. However, it’s not as arbitrary as you might think. There are some basic rules for what constitutes a good and bad logo. During Discovery I like to share a short video from the Futur featuring Sagi Haviv regarding the 3 rules to a good logo (I add a fourth rule). At the beginning of the logo reveal presentation, I remind them of the rules which, for us, act as the filter through which we determine what designs would work for their project.
Pre-framing takes only about 1-2 minutes, and I show them these two slides…
Step 2) Objectives and Strategy
Now that the ground is laid and the client is aware of what to expect for the logo presentation, I remind them of our objectives for designing the logo, and the strategy we took to accomplish their objectives.
Objectives need to come from the client – not the designer . It’s important for the designer to understand the client’s need for a logo design or logo redesign, and the need must be deeper than aesthetic preference. Objectives are uncovered during Discovery. Maybe they are trying to tap into a new market. Maybe their logo isn’t able to move with them into the future. Maybe there have been organizational changes and they want to communicate change through a fresh identity. Reviewing objectives not only reassures the client that you understood the problem to solve, it also removes their design preference from the equation. Most clients are willing to settle on a logo they don’t personally like, so long as the designer can clearly articulate why the logo meets their business objectives.
Strategy needs to come from the designer – not the client. Once I restate the client’s objectives for the logo design, I inform them of the strategy we took to accomplish their objectives. I inform them with words, first – then showing them how those words are expressed through the concepts we created. It’s critical to build the case for your strategy before you show the execution.
(Example from an actual presentation)
Step 3) Review Insights from Discovery
The logo concepts we come up with are a byproduct of the strategy we develop. The strategy we develop is the byproduct of the Discovery session. Discovery is a facilitated meeting lead by the designer for the purpose of uncovering insights that will inform the creative team on what and how to design.
The last step before revealing the logo concepts is to remind the client of the insights they gave you during Discovery. This reaffirms the fact that the logo concepts are just as much from them as they are from you. It gives the client a sense of ownership of the concepts since their insights are what drove your decisions.
Step 4) Reveal the Logos
Show only three logos. Even though during the creative process we may sketch or work on dozens of logo concepts, we typically only reveal up to three and no more. Showing too many concepts can be overwhelming and cause paralysis, making it more difficult for the client to choose. It also cheapens the design for each concept you show. When you narrow down your concepts to three, it reinforces the idea that these are the top three strongest choices.
Show one logo at a time. Instead of showing all the concepts together on one image, I focus on building a single case for each concept. Showing one logo at a time helps the client focus on the logic and the story, rather than their personal preference. If you start by showing them multiple concepts at once, their eye might naturally be drawn to the one of their personal preference – hindering them from hearing the case and logic for each logo.
Show the logo in context. In everyday life, you never see a logo by itself on a clean white background with no other distractions or surrounding elements. You always see a logo in context of something it’s placed on. During Discovery its important to identify what context the logo will be used in, then show the logo concept in those contexts. It changes a design when you see it on an application rather than on a simple white background. Remove as much guesswork as you can, filling in the mental gaps your client will have when they see your concepts.
(From the ZND Residential Example)
(Other Samples)
Step 5) Gain Feedback
After you reveal your concepts, building a case for each logo, ask your client to share their initial thoughts. “What are you thinking? How are you feeling? Which one feels right, based on the objectives and strategy?”
Don’t put pressure on the client to make a final decision on the spot. Reassure them that they will have time to make their determination (how long depends on how you structure your timeline). However, gaining their initial feedback during the time of the presentation is important. Document what they say by writing notes on each concept they comment on.
In my opinion, the more people in the room during the presentation the better. With more people it is easier to gauge consensus as people start to speak up. They will collectively start building a case for the popular choice, and landing on a decision will be quick. When there are only one or two other people in the room, there tends to be a bit more hesitation because they do not want to make a wrong decision. People thrive off confirmation, which is why you’ll hear “I love the concepts. Send me the samples and let me think about it over the weekend” (AKA – let me show a bunch of people and get a vote). Larger companies know better than to get cheap opinions from non-professionals – especially those who weren’t present for the Discovery session and have no insights into the strategy. However, even if this does happen, so long as you have done a good job articulating your case for each logo and demonstrating how the concepts are a direct result of their objectives, a few outside opinions won’t hurt. It is extremely rare when a client is unhappy with any of the concepts and asks for another one when you present well.
- Never email logo concepts, always do live presentations.
- Develop your design vocabulary so you can effectively articulate your concepts.
- Follow a structured flow for your presentation
- Pre-frame your client’s mindset before the reveal
- Remind them of the objectives and inform them of your strategy
- Review the insights from Discovery that informed your design decisions
- Reveal the logo concepts. No more than three, one at a time, and in context.
- Gain feedback

Heavily Influenced By These Resources

Related Posts

Home Blog Design How to Create and Deliver a Logo Presentation
How to Create and Deliver a Logo Presentation
What do Amazon, Walmart, Apple, and GE have in common? A logo identity with a powerful story behind its creation. Working with a well-crafted logo is the first step in a company’s visual branding, as it encapsulates its values, ethos, and vision in a single, memorable emblem. However, it’s important to understand that this logo becomes the cornerstone of a more extensive corporate identity presentation, which encompasses every visual aspect of a company’s brand. That being said, part of the process of creating a logo is submitting it for its approval at board meetings and mass public, and here’s where our expertise will guide you.
This article delves into the significance of creating and presenting a logo that resonates with both the market and the ethos of the business. We will discuss the rules behind creating a logo presentation, tips for introducing the new brand identity, and how to construct a story that refers to each stage of logo creation. Let’s get started.
Table of Contents
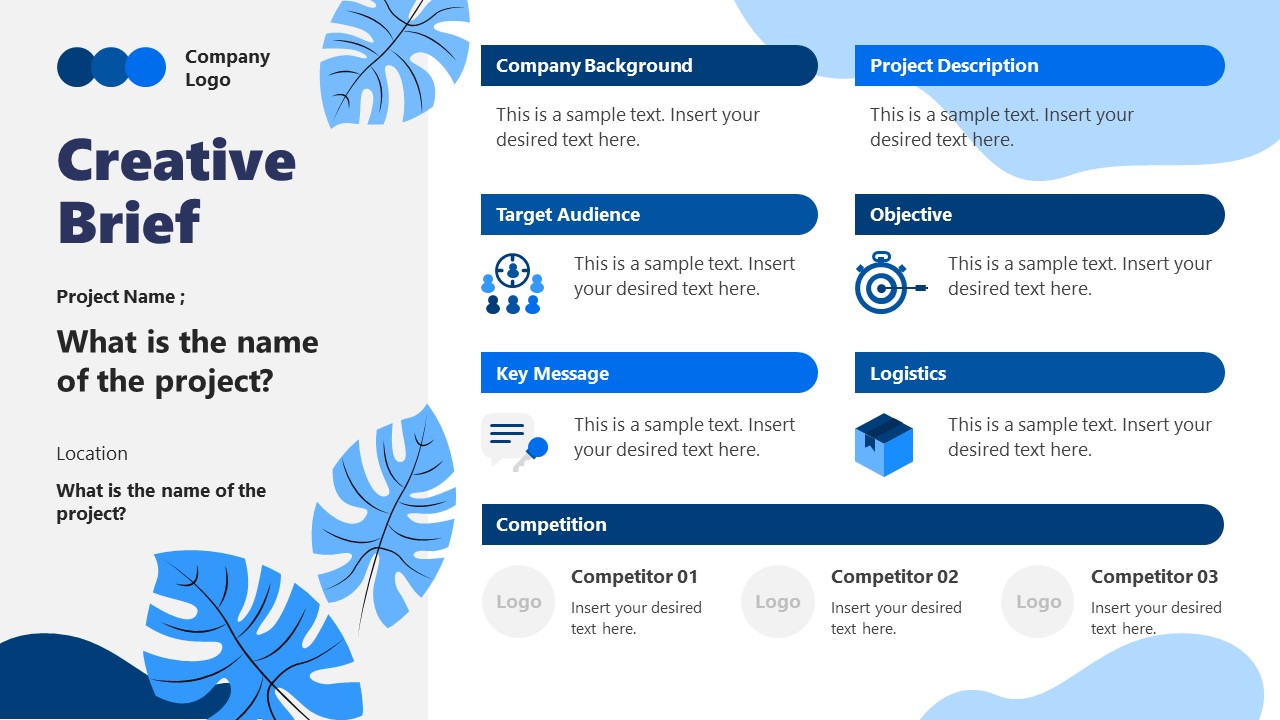
What is a Logo Presentation?
What should be included in a logo presentation, how to explain the logo creation process, common mistakes in logo presentations, recommended logo presentation decks, final words.
A logo presentation is one of the core elements of a brand identity presentation , and it helps designers or marketing teams introduce the new logo identity in board meetings or deliver company-wide presentations about new branding strategies.
This type of presentation reveals the design and articulates its rationale, demonstrating how it aligns with the company’s branding and business goals. A well-crafted logo presentation can significantly influence the client’s decision-making process and perception of the company’s value.
Key Elements of a Logo Presentation
In order to structure a logo presentation, designers must be aware of the following elements.
- Understanding Client Needs: Before the presentation, the designer must have a thorough understanding of the company’s business, target audience, and brand values. This understanding guides the design process and forms the foundation of the presentation.
- Conceptualization and Design: The core of the presentation is the logo itself. Designers typically present several concepts, showing variations in color, typography, and style. Each design is not just a visual but a strategic solution to the client’s branding needs.
- Rationale and Storytelling: A crucial part of the presentation involves explaining the reasoning behind each design. This includes the symbolism of shapes and colors used, the choice of typography, and how the design communicates the brand’s message. Effective storytelling can connect the logo to the client’s brand story, making it more meaningful and impactful.
- Application and Versatility: Demonstrating how the logo will look in various applications (like business cards, websites, or billboards) helps clients visualize the logo in real-world scenarios. This also shows the logo’s versatility and scalability.
- Feedback and Revision Process: A logo presentation is often an interactive session where clients provide feedback. This stage is required for refining the design and ensuring it aligns with the client’s expectations and needs.
- Technical Details: The presentation may also cover technical aspects like file formats, color codes, and usage guidelines, ensuring the client knows how to use the logo correctly across different mediums.
We can summarize a logo presentation deck as a set of 5-7 slides. We will introduce some examples for each section.
Title Slide
As with any other topic, knowing how to start a presentation in style is a plus. Therefore, we highly recommend using a title slide that doesn’t instantly disclose what the logo is about but gives general guidelines for your ideas.
For example, you can use a title slide that contains photos of your sketches laid out on a table to give hints about the creative process that brought the logo to life.
Background Info
The information that drove the company to the research and the information gathered by the designer to back up its creation has to be presented next. Using proper visual communication techniques, we can condense that information into a series of graphics or placeholder text areas that pinpoint the core reasons that support a branding change.
Presenters can use up to two slides to summarize this point, and customer testimonials can also help gain insights into market trends for a particular design.
Logo Presentation
This is what everyone wants to see: the new logo. Presenters can use up to two slides to introduce the process that drove them to create the logo, then the logo itself. A well-crafted story has to link the points between the different stages to create the logo to the end piece and its potential real-life application.
The new logo should be highlighted in an individual slide with its associated values.
Presenters must also demonstrate the logo in action, which can be done in the next slide or by using a video presentation that features the logo in target consumer products (in this case, mockups of bottles, t-shirts, etc.).
As the background research is already covered in the slides, a good question arises: how do we explain the logo concept presentation? Designers can initially speak about which ideas the initial meeting with the customer evoked. Those are the driving forces behind logo creation.
One approach is to show competitors’ logos and briefly analyze why they successfully convince the target audience that their product is good. For starters, using a logo maker can help generate initial concepts to discuss in relation to these competitors’ designs before customizing further to align with the client’s core values and vision when introducing the first drafts of the new logo.
Speak of the objectives your logo has to answer for, then honestly say why some ideas were accepted or discarded. Present hand-drawn mock-ups about how the logo ideas fit the target products. Then, move on to your pre-selection of 2-4 potential logos, their high-quality format, and the reasons why you consider these logos may be apt for the customer.
Out of the pre-selection of logos, choose the definite logo for the project and introduce it by telling a story about a potential customer looking for a product, how no other option in the market seemed to answer their search intent, and how seeing the logo was the answer. Put yourself in the shoes of the ideal customer persona of that brand and present facts that drove that customer’s interest. Using storytelling techniques can help build a convincing story from a consumer’s perspective, and the outcome format should contain either a physical product as a logo presentation example or a video telling that same consumer story.
Mistake #1 – Not Using Mockups
Your client may not understand the full impact of the logo until a physical application of the logo is seen. Although you must present the logo in full format, you must also introduce realistic mockups, videos, and physical products showing the new identity and submit them to the customer’s approval.
Tiny details like the chosen typeface not being clear enough can only be appreciated on the final product, not with an upscaled image that shows no imperfection.
Mistake #2 – Considering the Logo as a Solo Piece
Your logo ppt presentation is part of a new brand identity concept. Therefore, designers should align their efforts to disclose which fonts should be used alongside this new logo, which colors best suit any media advertisement using the logo, etc. This mistake is commonly triggered when multiple teams work on the brand identity or if that process is made in different stages.
Mistake #3 – Revealing the Logo in the Title Slide
Ignoring the surprise factor is one certain way to tank your presentation in seconds. You need to build excitement, present your ideas aligned to the course of your talk rather than showing the end product on the first slide, and have no extra surprise factor to gather the interest of your audience.
If you fall prey to presenting the logo in the title slide, the rest of the conversation will steer towards why they like certain aspects of the logo or not and why it should be accepted or discarded, rather than a reasonable story explaining each of your design decisions.
Mistake #4 – Ignoring the Feedback
Delivering a logo design presentation doesn’t automatically imply the customer accepts the logo. A back-and-forth process of changes may be triggered instantly, where the designer must clearly state the agreed revisions per contract on that logo. Then, a new meeting should be scheduled where the designer will answer the customer’s requirements.
Safely keep copies of your previous presentations to protect yourself against misunderstandings. These logo presentation templates save you time and document your decisions and what you present to your customer on one specific date. If one revision requires going back to a previous version of the design, bring that particular presentation file to the front and explain why it was initially rejected and the changes the customer requested.
Take a look at this selection of PowerPoint templates and Google Slides themes that can fit your logo presentation needs. You can also find comprehensive corporate identity presentation templates that follow the brand identity and brand guidelines, ensuring a cohesive presentation of your company’s visual brand to stakeholders.
1. Logo Presentation PowerPoint Template
An all-in-one solution that lists the tools required to create a captivating logo presentation. In a clear timeline format, this logo presentation deck can help us structure the story that backs up the logo creation process – ideal for those who prefer to omit hand-drawn illustrations and stick to the final digital files. We can also find a slide that gives guidelines on the typography to pair your logo, preferred color palette and ideal use size of the logo.
Use This Template
2. Branding Process Logo Presentation Slide Deck for PowerPoint and Google Slides
For larger projects that require full guidance on every aspect of the brand identity, this slide deck contains tools such as surveys, roadmaps, brand logo options, and more. Presenters can use this PPT slide deck to attend the initial meetings for findings about which direction should the logo creation process take.
3. One-pager Logo Creative Brief PowerPoint Template
After your initial meetings with the customer conclude, it is time to put your hands into logo creation, but how do you express the ideas gathered with pen and paper to your team in a clear, easy-to-understand format?
Meet this one-pager creative brief, ideal for reference, and check all the aspects your logo creation process should cover. This document can be shown in your logo presentation as part of the background research done, as it contains a summary of the ideas agreed with the customer.
A logo presentation may divert from the usual format of presentations as it combines aspects like factual data with design decisions and the reasoning behind them. Presenters should approach this type of presentation as not a final product but a series of iterations that will result in an end product. The logo presentation then becomes a collaborative project between the designer and the customer, where the designer needs to keep an open mind to allocate new ideas or present a past concept from a different perspective.
Like this article? Please share
Logos, Presentation Approaches Filed under Design
Related Articles

Filed under Design • August 14th, 2024
Creating Custom Themes for PowerPoint and Google Slides
Do you want your slides to go beyond the average result from a template? If so, learn how to create custom themes for presentations with this guide.

Filed under Business • July 24th, 2024
How to Create a Demo Presentation
Discover the secrets behind successful demo presentations and what they should contain with this article. Recommended PPT templates included.

Filed under Presentation Ideas • July 17th, 2024
How to Convert a Text Document into a Presentation with AI
One of the biggest challenges for presenters is to summarize content from lengthy reports, academic papers, or any other kind of written media in an informative and concise way. Rather than losing countless hours going over and over the same text, we can speed up the process thanks to the virtues of artificial intelligence. In […]
Leave a Reply
- See All Buying Guides »
- Best Art Supplies
- Best Computers
- Best Courses
- Best Headphones
- Best iPhones
- Best Keyboards
- Best Laptops
- Best Monitors
- Best Office Hardware
- Best Photography Gear
- Best Printers
- Best Scanners
- Best Smartphones
- Best Smartwatches
- Best Software
- Best Speakers
- Best Tablets
- Best Video Gear
- Work From Home Tools
- Top Gear for Designers
- Buying Guides
- Illustrator
- Logo Design
- Popular Articles
- Top Tools & Resources
- What is branding?
- How much for a logo?
- Free Branding Briefcase
- Our Services
- Brand Strategy
- Cricut & Craft
- Deals & Freebies
- Digital Art
- Guest Articles
- Graphic Design
- NFTs & Web3
- Photography
- Tools & Gear
- Videography
- Web Design & UX
- After Effects
- Premiere Pro
- All Adobe »
- Adobe Discounts
- Google’s Apps
- State of Brand Report
- Envato Elements: Unlimited Stock Offer
- JUST Sans Font
- Logo Package Express
How To Present Logo Design Projects to Clients (Pro Tips)
- Adobe Deals
- Brand Builders Summit ’24

We independently research, test, review, and recommend the best products—learn more about our process . If you buy something through our links, we may earn a commission.
What makes the difference between a premium designer and a beginner?
At first glance, the logos of a professional design studio don’t seem that much different from a freelancer’s work. That’s just the first glance, though.
sponsored message

The truth is, there’s a whole other layer of design process that beginners ignore.
It’s presenting your work to clients.
Premium designers understood that a logo is only as valuable as the story and strategy behind it. So, they convey their reasoning and vision to clients – while beginners simply send an image.
Below you will discover how to present logo design projects including identity design projects.
How To Present Logo Design Projects to Clients

In this post, I’d like to share a logo presentation strategy honed by many years and trial-and-error attempts. Over years of work, it became clear that presenting logos is a science, not an art. Just like in science, there are methodologies and conventions to follow.
A good presentation allows you to:
- Sell your logo designs to prospective clients
- Present your portfolio in a fresh, detailed brand book
- Display your creative vision and create the appealing end result
A logo is the product of your work, but its presentation is the packaging. Who if not designers should pay attention to packaging and presentation? After all, it’s why people hire us.
Presentations make the first impression
The client hasn’t seen any of your logos yet. It’s time to introduce them to your creative vision. Keep in mind that clients have huge expectations getting into this.
When I work with beginner designers, they choose a simple strategy. They attach jpg files with different logo versions to an email. Usually, the files are accompanied only by a short explanation. Clients get a pack of visual information with no context and explanation.
The traditional approach is deeply flawed
When you send your logos via email, you treat your client as a team member, and not as the end audience. It’s almost as if you expect the client to choose among 5-10 variations and give you some artistic direction.
You should be responsible for the creative vision – and don’t expect the client to outline the direction.
Clients are not designers
Sending an email with 10 attachments might be okay if you are working with fellow designers or art-directors. Clients, on the other hand, might not have the skills that are needed for choosing among logo variations.
Explain your concept and vision and don’t expect clients to identify a creative direction for you.
Don’t treat your work like a draft
When you send your logos via email, clients can’t approach it as a final version. You give them a reason to believe that it’s a rough draft. Don’t be surprised to get 10-15 revisions – after all, you were the one to lead clients to believe your work wasn’t complete.
If you were to pack it in a fancy presentation with engaging headlines and wholesome design, the results will definitely be different. Presentation reduces the number of revisions to 2-3 sessions.
Act like a senior
If you want to increase your rates, it’s important to take a look at your practices and abandon junior habits. If you want to get premium rates, you need to constantly prove that you are not a junior anymore.
So, go the extra mile and pay attention to details that beginners ignore. This is what sets you apart from the rest of the market. This is how you can get the biggest slice of the pie and finally transition to the premium segment.
How To Present Logo Design Projects
Designers want to charge a lot for the logo but don’t spend enough time learning to justify the price tag. If you want to charge more for your current work, it’s time to go the extra mile besides designing.
So, we already established that sending logos in the email is NOT a logo presentation. Now, let’s throw in the criteria for actual professional design presentation.
You know your logo presentation is awesome when it:
- Presents multiple design choices to your clients without confusing them;
- Answers all questions about design and concepts in your presentation before a client even thinks of asking them;
- Describes the mission, vision, and values behind the logo;
- Makes file navigation comfortable both for you and your client.
Let’s take a look at the visuals and tools that you’d need to accomplish this goal. You’ll be surprised, but you might not need much additional information. As long as you apply available resources in a smart way, you’ll be able to impress clients.
Rule #1 – Let the client know the process
For non-designers, the logo design process might seem straightforward. Your clients could think that it’s something that can be done in an hour. They aren’t to be blamed – you should be the one to introduce them to the intricacies of creative work.
Creating a logo takes a lot of research, experiments, and creative thought. If you demonstrate the step-by-step process to your clients and prove that every stage of the process was valuable, they will be ready to pay more.
How to present the process to the client?
- Show logo variations and explain why you chose your favorite option: show a client your experiments and explain the process behind your brainstorming and creative search
- Display applications of a logo : seeing a logo on different backgrounds, colors, mediums helps the client to understand how universal your chosen concept is
- Introduce your clients to the scientific side of the process : walk them through the dimensions and proportions of your logos, explain why you chose a particular composition standard, and show examples.
Letting clients get a peek of your creative thoughts increases the transparency of the cooperation. Most importantly, this is how you demonstrate your hard work and argument the price.
Rule #2 – Build a visual identity, not a logo
When you say “a logo”, a client imagines a small icon that can be generated by any automated creator. Even if they acknowledge the value of custom work, it’s still just one picture. Naturally, there’s a limit to how much you can charge.
However, if you conduct proper research and present them with a full concept, you aren’t working on a logo anymore. You are creating a visual identity for a brand – and that entails a lot more than just a logo.
Turning logos into visual identity isn’t difficult.
Here’s what you need to do:
- Describe the values and inspiration that you considered before building a logo. Present your thoughts in a structured, researched manner.
- Offer multiple options for different applications . It’s not difficult – because you likely already have these variations. Now, instead of hiding them, demonstrate them to clients, as variations of an identity. Show mockups that demonstrate how the logo fits into multiple mediums and backgrounds – websites, paper, outdoor advertising, merchandise, etc.
- Create fonts and color palettes that complement the logo . You don’t need to do it manually – there are tools that can do it for you (but we’ll get to that later).
A tip: there are tools that walk designers through the process of creating logo presentations and brand books. The editor will suggest what to upload and how to group it. You don’t need branding experience.
Rule #3 – Tell a story
Several years ago, the New York Times did research where journalists set out to understand how much the story behind the product impacted its final cost.
The journalist who was working on the experiment collected items with an average price of $1.25. These were very typical items – a plastic bottle cap, a room key, a cup. Nothing special.
The next step was to contact professional writers who wrote a story about each object. They wrote engaging stories about each object. Then, he updated the description of objects and waited to see for how much they’d sell.
In the end, the plastic cup worth 0,99 was sold for 62 dollars. He spent 197 dollars to buy all his items – and made in total more than 8000 dollars. The intrinsic value of products didn’t change – but their presentation did.
You can and should apply the same strategy to your creative work.
How to tell a story about a logo?
- Describe values, mission, and vision . Use bold, creative images to create the vibe about your work. Remember, designers get paid for out-of-the-box concepts – not only for the final combination of lines and figures.
- Let the presentation show your work in the best light . Prepare your presentation in brand colors. Create a stylish layout that would drive attention to logos.
- Make it relevant . Underline the fact that all the context is based on the careful research of the company. Analyze current logos and positioning before offering your own vision. You need to show respect to current style of the company before offering a new vision.
Most importantly keep your story engaging. If it’s a story, it should be fun to read – and look at.
Rule #4 – Show respect for your own work
If you are a designer, you are also an artist. Artists are very picky about how they demonstrate and interpret their work. You should have the same mentality towards your logos, too.
Letting clients use your logos however they please is not what an artist would do.
Reglament use cases for your logos
No matter how great a logo is, it won’t look good if someone were to stretch it disproportionately or put it on the unfitting background. As an artist, you have a right to come up with constraints for your logo usage. It will help clients achieve better results and show them how seriously you treat your work.
- Define use and misuse cases for your logos . Let clients know if the image can’t be stretched, rotated, or placed on a certain background.
- Show allowed alternatives . Demonstrate the best-looking modifications of your logos, the ones that express your vision, and don’t violate the composition rules.
Present your work as if it’s art. It will make the client respect your expertise and creativity a lot more.
Rule #5 – Use the right tools
Even if designers are ambitious about logo presentation, they make it manually in Illustrator or Photoshop, spending hours.
At first, you need to modify each logo alternative manually. Then, you have to put all these modifications together on a single page. Formatting, converting, and organizing takes a lot of time – almost as much as the design itself.
When you see how much time manual strategies take, it’s no wonder that many designers get discouraged.
Isn’t there a smarter, more awesome way to present your epic logos to clients?
Well, yeah.
Try Present Your Logos in Brand Books
Gingersauce is an automated brand book builder that lets designers build a professional brand book around their logos.
The platform creates a PDF presentation of your logos that explains a designer’s vision and generates multiple logo variations a client can review and approve of.
You can do in minutes what others are accomplishing in hours:
- Generate a PDF presentation with logo variations, use cases, automatically generated palettes, and fonts;
- Tell the story behind your logo concept and design process
- Earn 2-3 times more just by changing the presentation of your logos
- Generate a full visual identity automatically just from a logo – Gingersauce generates palettes, use cases, fonts;
- Forget about sending multiple attachments via email – instead, give your work a premium look and feel.
After packing logos in a brand book, you’ll be getting fewer questions and edits. The brand book will sell your concept. Clients will get a professional result, which will likely be far beyond their expectations.
Frequently Asked Questions
How are you supposed to present your logo.
When presenting your logo, keep in mind brand visuals. In order to do this, the designer must create a brand color palette, logo alternatives, sizing, and compile all these together in a brand book. When presenting to the client, it’s important that you build a brand story behind your design that is cohesive to the brand image.
What are the best tools for logo presentation?
When it comes to designing logos, color palettes, a questionnaire / brief about the direction the brand is moving towards along with a software like photoshop or illustrator are your first tools to create a logo from scratch.
What is the best software for creating a logo from scratch?
When it comes to creating a logo from scratch the best vector graphic software would be Adobe Illustrator, that said the best raster graphic software for working with designs would be Adobe Photoshop. Both options entirely depend on what it is you’re going for.
How do you tell a compelling story around your logo for a client presentation?
When presenting to the client it’s important that you go with a cohesive brand image, values and mission and build your whole presentation around this. Consider your brand colors, brand goals and relevant themes and images to set the feel for your design.
How much should your logo cost?
Pricing your logo depends entirely on your experience level and portfolio. Newbie designers usually charge anywhere from $0 to $500. But more experienced designers usually charge around $500 to $5000, while professional firms charge $5000 and upwards depending on size and portfolio. That said, you should check out our logo pricing article for more details on this.
What should be there in your brand book?
In your brand book you include the positioning of your logo, the brand colors, various logo coloring alternatives and their treatment on different backgrounds. Other than this, using the logo design on different creative mock-ups like billboards, banners, and merchandise can really help sell your design.
More Logo Resources
- Best Logo Design Courses
- Best Free Logo Makers
- The Logo Design Process of Top Designers [Infographic]
- Color Psychology in Logo Design
- Best Logos of Popular Brands
- Best Logo Design Software
Do you have any other logo design presentation tips ?

About Jacob Cass
Jacob Cass is a brand designer & strategist, educator , podcaster , business coach and the founder of JUST Creative, an award-winning branding & design consultancy that doubles as an industry-leading blog. Get in touch .
Meet our expert writers and contributors

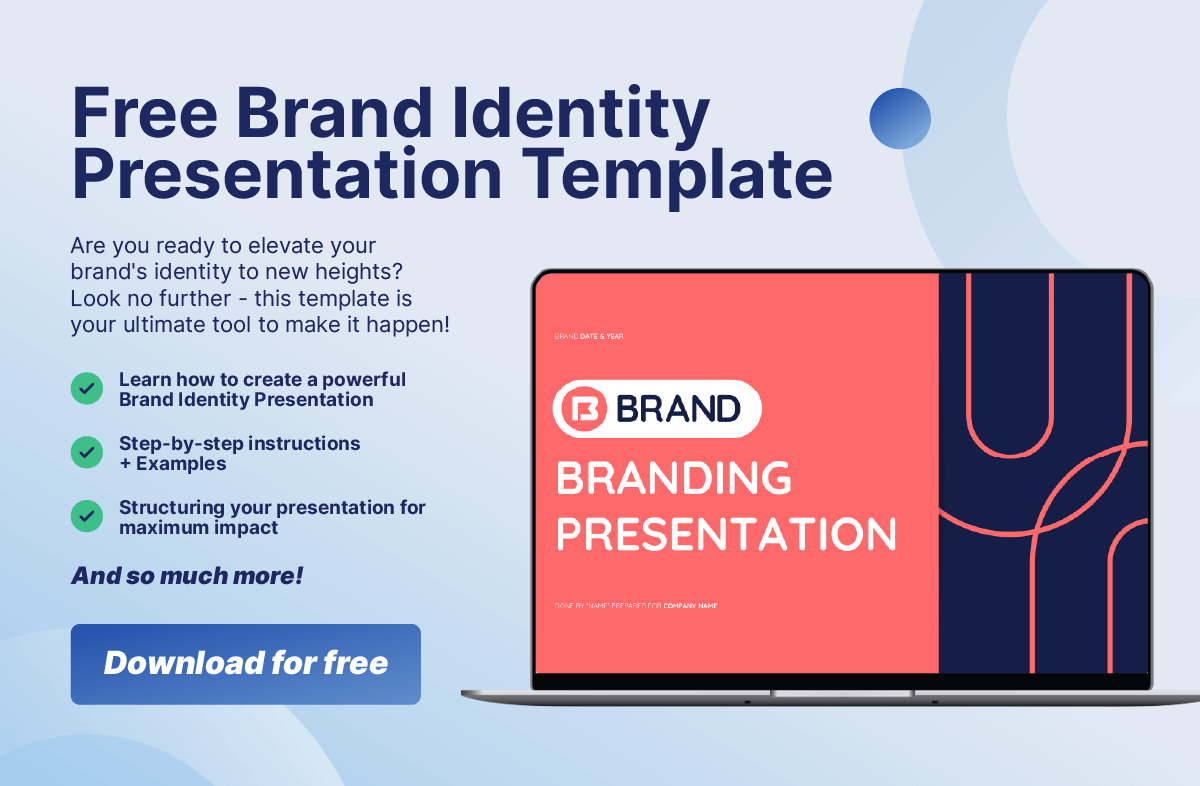
The Ultimate Brand Identity Presentation Guide [FREE PPT Template]

If you’re in the process of building the right image for your company, it’s essential that you and your team manage clear guidelines on how to present your brand to the world .
These guidelines will help you maintain consistency (a KEY aspect of branding), and that’s why today, I’ll show you how to create a brand identity presentation that helps you inject your corporate identity into every single material.

We’ll go over the following topics:
- Starting with the basics: What is a brand identity presentation?
How to present a brand identity?
What to include in a brand identity presentation.
- Your Brand Identity
- Your Brand Visual Elements (+ Expert Tips!)
- What to expect? Brand identity presentation examples
- Check out our FREE Brand identity presentation template!
- Final Step: Brand Your Guidelines! Check out how we can help you out
Download your brand identity presentation PDF
What is a brand identity presentation.
A brand identity presentation is a practical and efficient way to present your brand’s guidelines. What are brand guidelines? They are a set of rules on how your brand should be used across any type of media.
These guidelines include all of your brand’s elements, such as your typography, color palette, tone of voice, etc . They provide all the instructions you need to maintain consistency every time you create new marketing materials, from brochures to flyers, packaging, and even your branded presentations .
The best way to present your brand identity is through a PowerPoint presentation. Why? For several reasons:
- Adaptability: Having all your brand's elements in a PowerPoint presentation not only provides the convenience of having everything accessible but also offers the flexibility to adapt it to various formats, such as social media and websites.
- Familiarity: PowerPoint is already a tool you likely use regularly. This familiarity makes using it for brand identity design presentation the easiest choice.
- Rich content: PowerPoint presentations have ample space for including visual examples, videos, and essential links. They encompass a wide array of content types, including text, charts, infographics, and videos.
Let's take a look at all the elements you should include in your brand identity presentation:
Your brand identity
1. Mission and Vision
Including your mission and vision in your brand identity design presentation is vital because it defines your brand’s purpose and long-term goals . You should structure these slides with a brief introduction followed by concise mission and vision statements:

2. Brand Purpose
Your brand’s purpose allows your audience to emotionally connect with your content, so it is crucial to include it to ensure everyone in the company creates content aligned with it. Present a brief statement with any explanation you’d like to have:
Including your brand’s values in your presentation is crucial as it helps match your team's actions and decisions with the core principles your brand stands for . You can present them simply or provide explanations for each one:
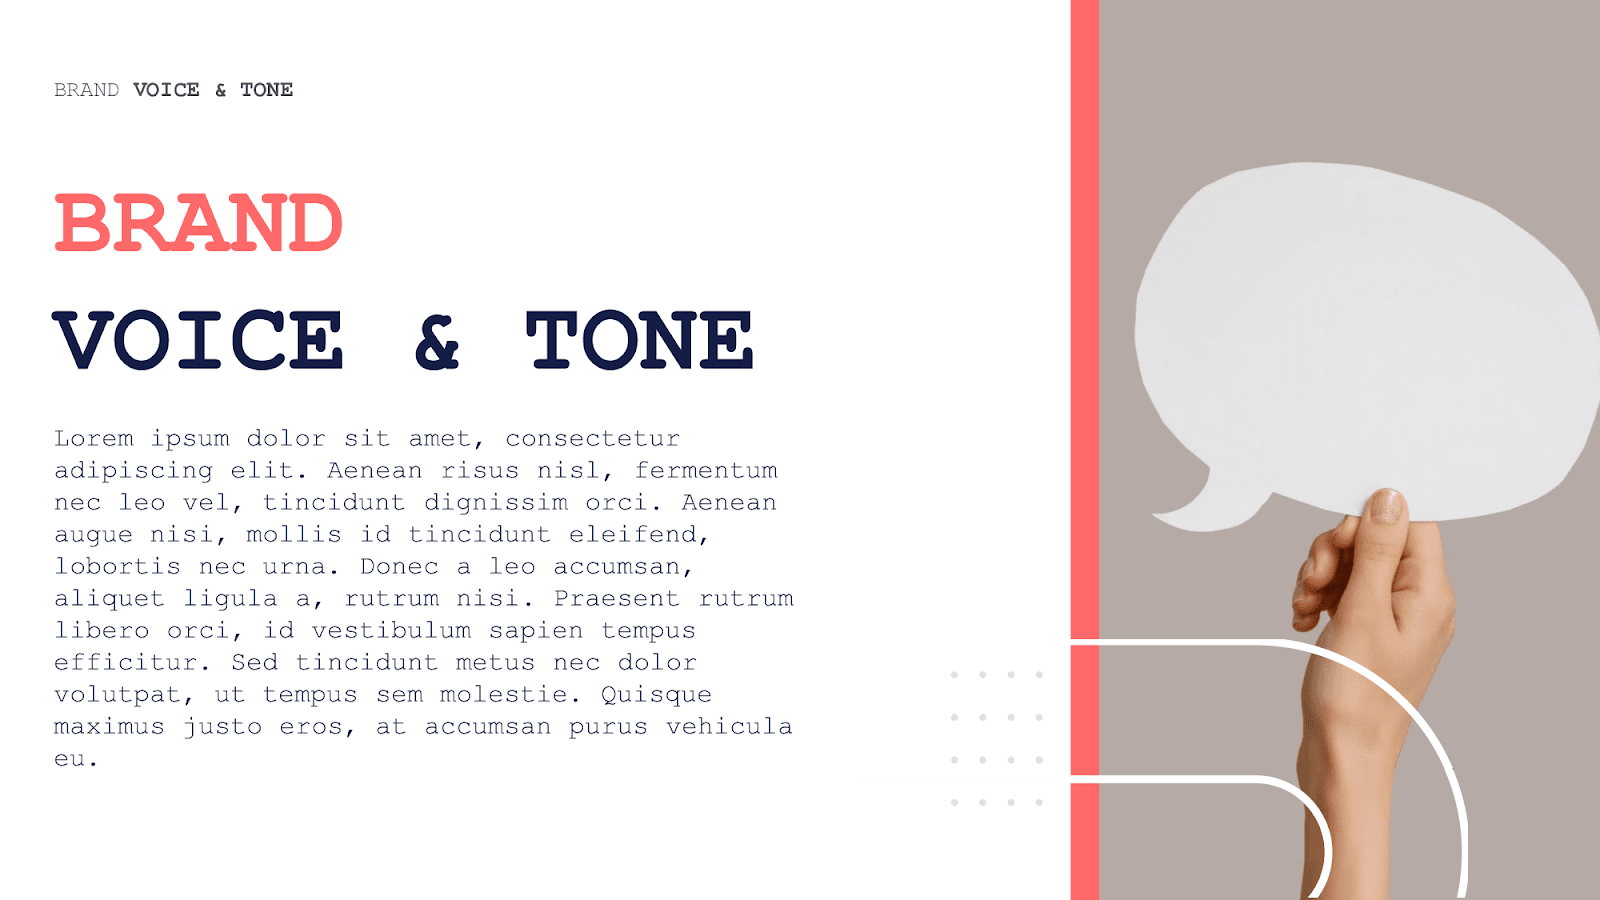
4. Tone of voice
Explaining your brand's preferred tone of voice is essential because it sets the style for all your content. Be sure to provide a description of how your brand should communicate and share examples about what to do and what not to do in order to clarify expectations:
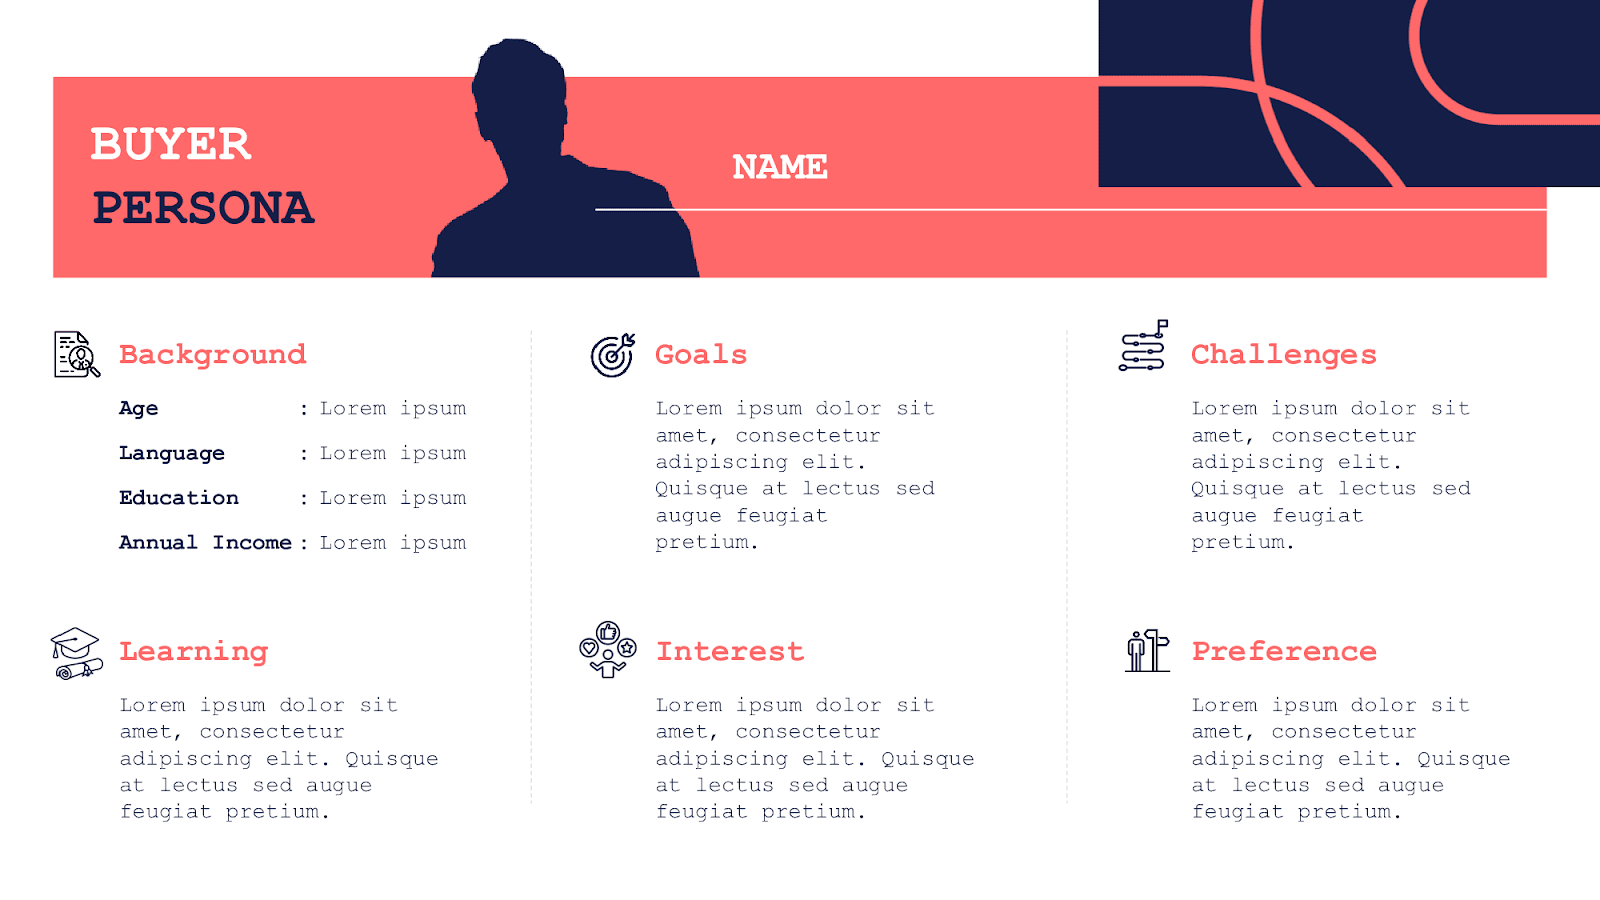
5. Intended audience
By presenting your buyer persona, you ensure that everyone involved understands who the brand is speaking to . This way, you help them create content that resonates with the target audience:
Your Brand Visual Elements
Now, let’s check out the visual elements you should definitely include :
6. Logo design
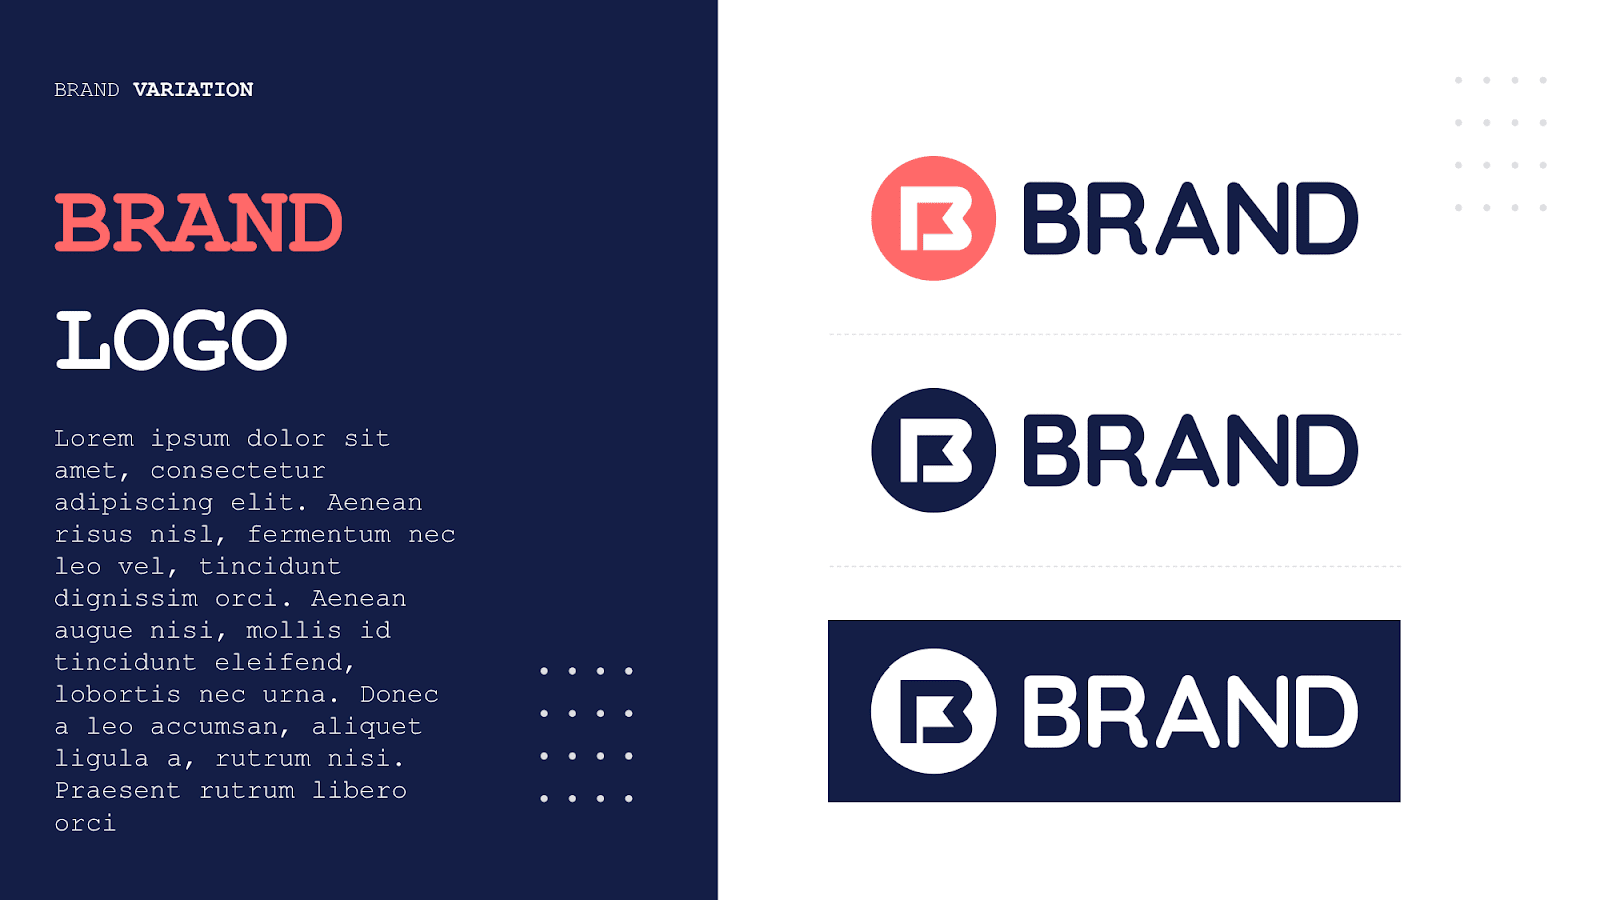
Your logo is a cornerstone of your brand identity. Including it, along with variations and do’s and don'ts , ensures that everyone has access to and uses it correctly, which helps maintain a professional and consistent brand image:
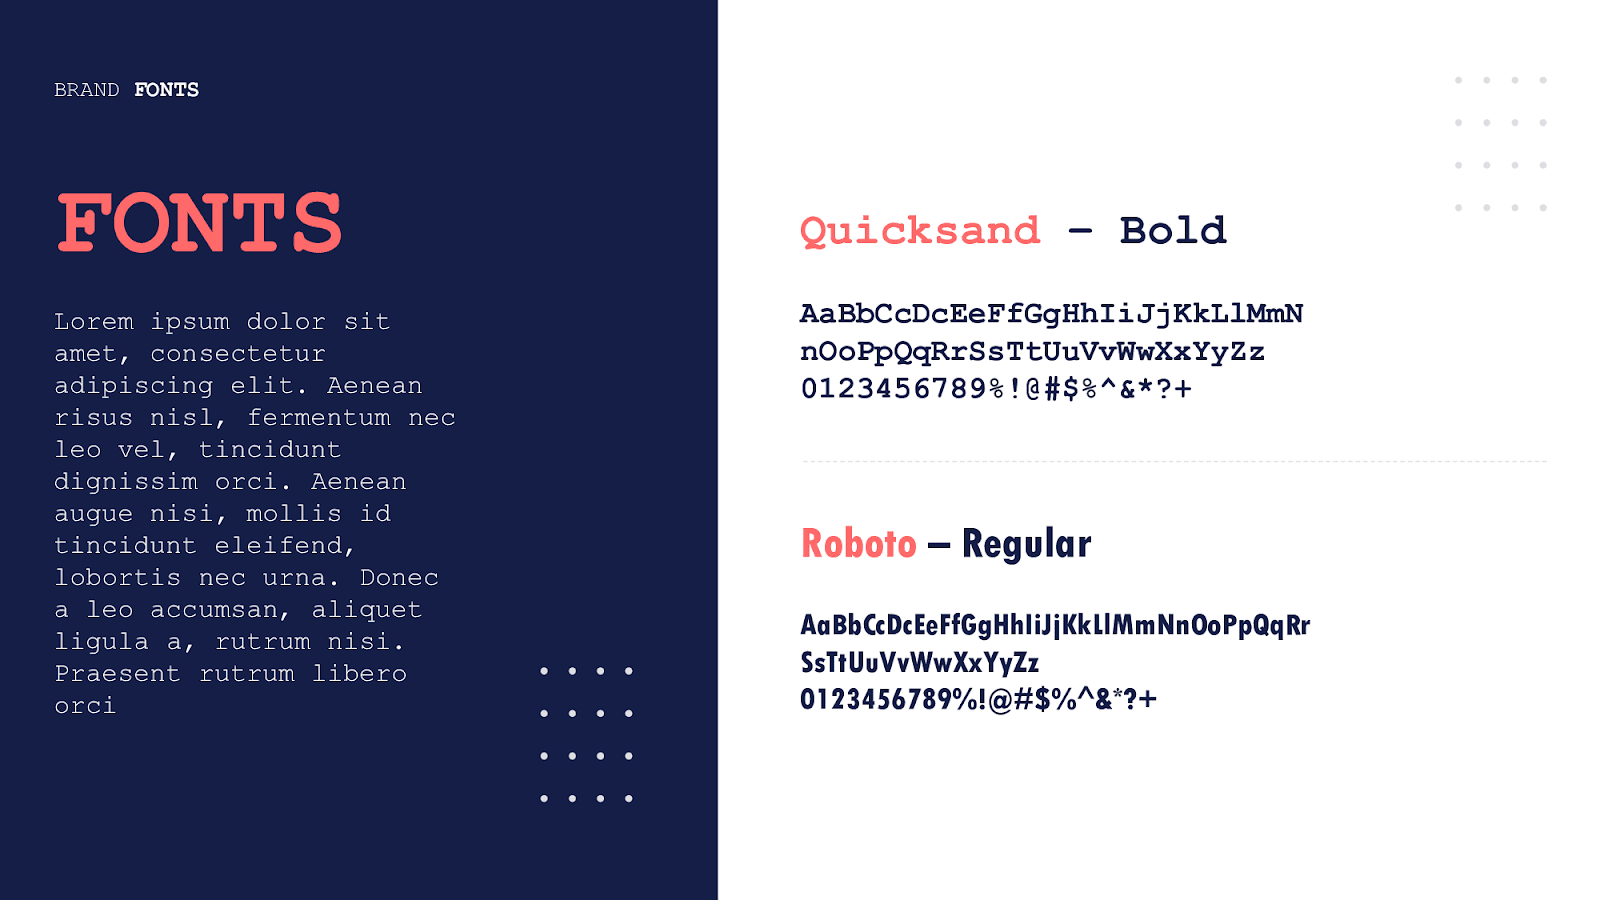
7. Typography
Presenting your chosen typography is essential for maintaining a uniform visual identity in your text-based content. Include font styles for different types of text and usage guidelines to ensure that all written materials adhere to your brand’s style:
8. Brand Colors
Displaying your primary brand colors and their codes is essential for consistent visual branding. By providing the color palette and codes , you ensure that all design elements align with your brand's color scheme:

9. Photography
Explaining the style and types of photography that align with your brand is crucial. Make sure to include examples of preferred photography styles that help your team understand the visual aesthetic your brand aims to achieve :

10. Illustrations
If illustrations are part of your brand, presenting their style and usage guidelines is vital . You should include examples that illustrate the desired style and do’s and don’ts, making it easier for designers and content creators to maintain consistency in visuals:
Additionally, make sure you include these supplementary recommendations to elevate the quality even further, as suggested by our design managers Ramaditya Ananda and Indah Yuniarti .
As Ramaditya says:
“Make sure to include a link to access existing assets so it’s easier and faster for designers to use them.”
Including links to ALL the assets is a great way to facilitate the process for everyone designing or creating content. Attach these links for your logos, illustrations, shapes, etc.
Additionally, remember that you should include as many examples as possibl e. Try to be as specific as you can to ensure that all your content is illustrated exactly as you have in mind. As Indah adds:
"Be specific about how you would like to visualize your brand. Provide context regarding how the elements should be used and include the DO's and DON'Ts. Offer examples of both correct and incorrect applications of brand guidelines to help minimize errors in their implementation."
Check out the final product: Brand identity presentation examples
Ready to see the final product? Check out some amazing brand identity presentation examples.
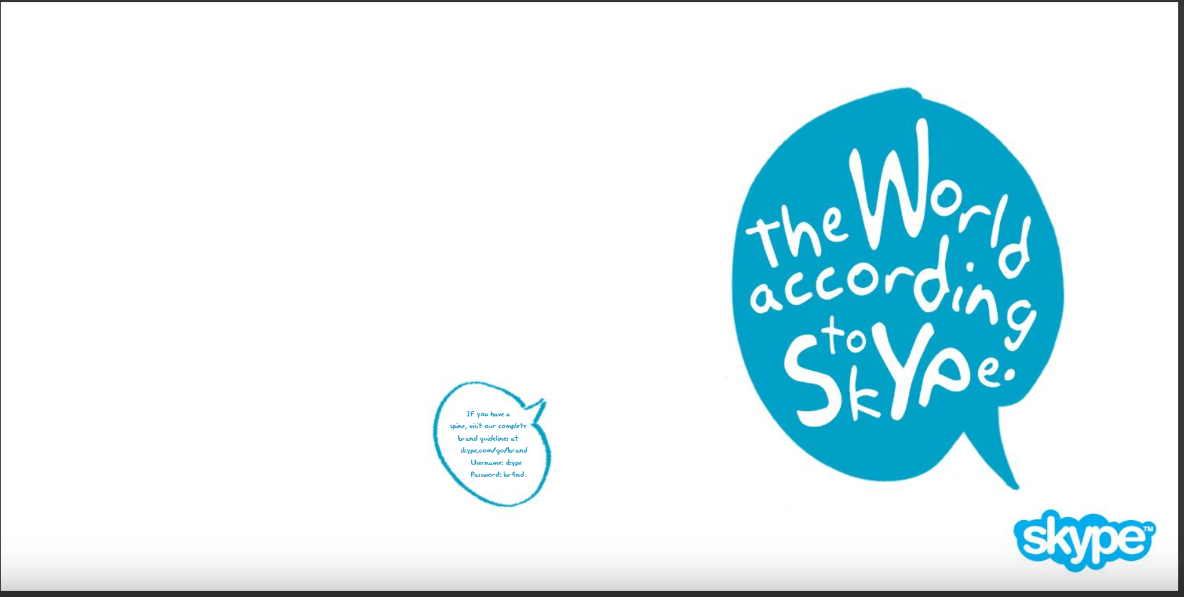
Skype provides a great example of everything you must include in your presentation, especially how to present it. Skype’s guide offers a visually appealing yet playful presentation that cleverly introduces all of the brand’s elements in carefully crafted storytelling.
See the full brand guide here .
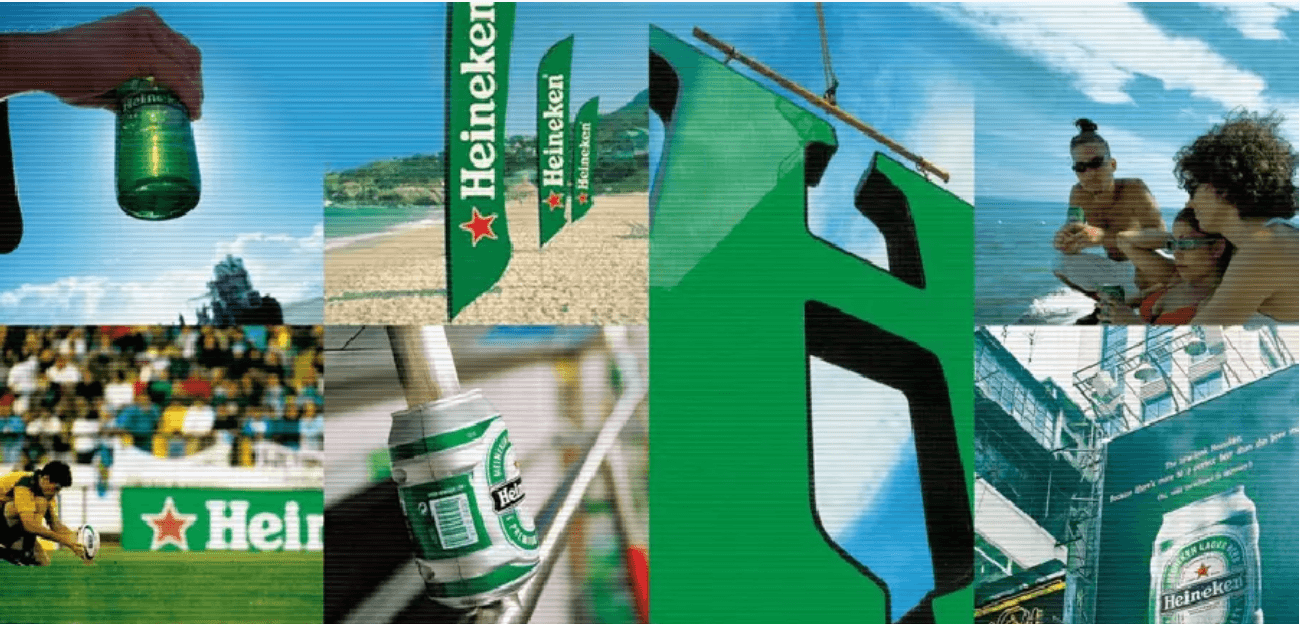
Heineken’s brand identity presentation provides every detail you should be including in your own presentation. They consider every single element, from all the logo variations, to all the visual elements the content creators or designers could need.
Check out the full brand guide here .
FREE Brand identity presentation template!
Now you’re ready to create your own brand style guide!
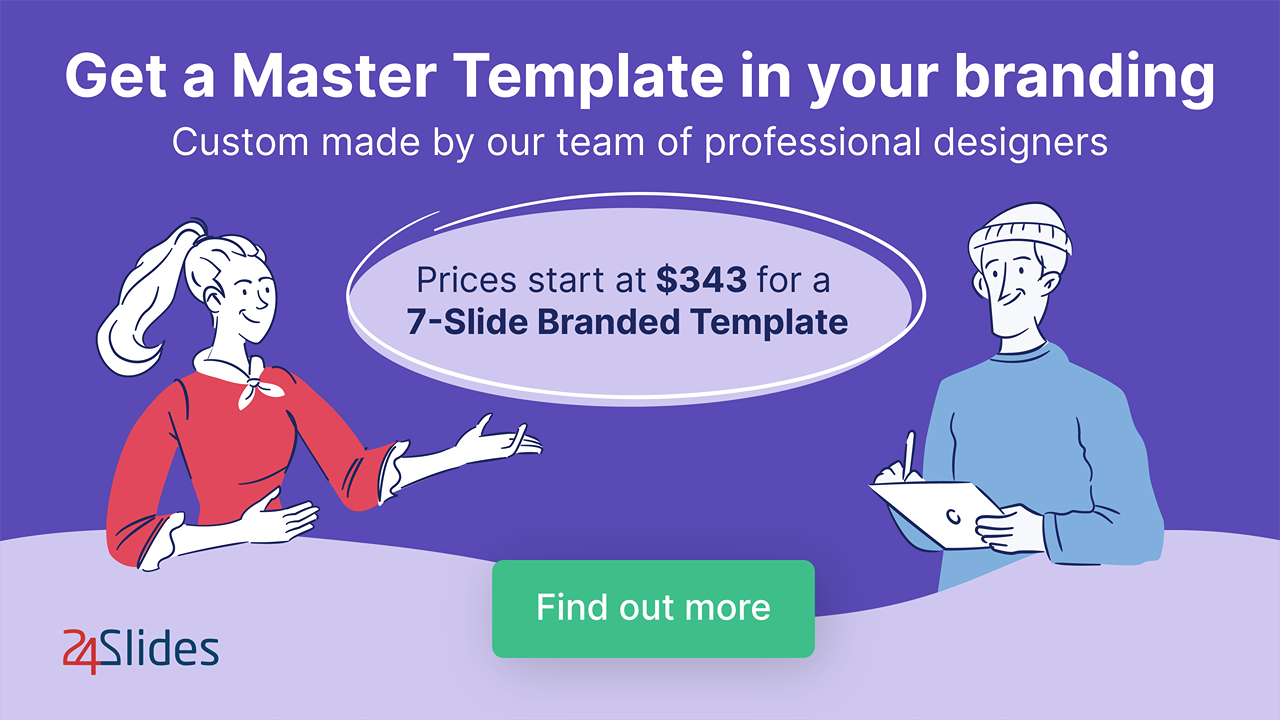
And to help you in the process, the 24Slides designers created a PowerPoint template that follows the structure we’ve seen above. Take this as your starting point in the making of your company’s brand identity presentation .

This hands-on brand identity presentation template comes with 20 slides for you to insert each one of your brand elements. If you feel ready to start, click on the image. You’ll be sent to our Templates Hub where you can download these slides for free.
However, as you might already notice, this is a generic template . It helps tremendously to get everything structured and in place as your first draft, but it’s not quite the finished document you want to present.
There’s one last step you shouldn’t skip if you really want to create a brand style guide that you and your team feel proud of.
Final Step: Brand Your Guidelines!
How are you going to encourage people to use your brand properly if you don’t do it yourself? Branding your guidelines, or any of your presentations , is key!
Your brand style guide or brand identity presentation is an excellent opportunity to practice what you preach and show how a document can breathe and live your brand to the fullest.
Ideally, your brand manual will be a consultation document for internal and external teams (graphic designers, copywriters, web developers, marketers, consultants, etc.), so it makes sense to have it aligned with your brand as well.
If you envision your brand style guide with a professional aspect but don’t know exactly how to get it there, you might be interested in outsourcing your presentation design .
At 24Slides , our PowerPoint designers are experts at making presentations that truly reflect your brand and values. Just check some of our before-and-after examples :
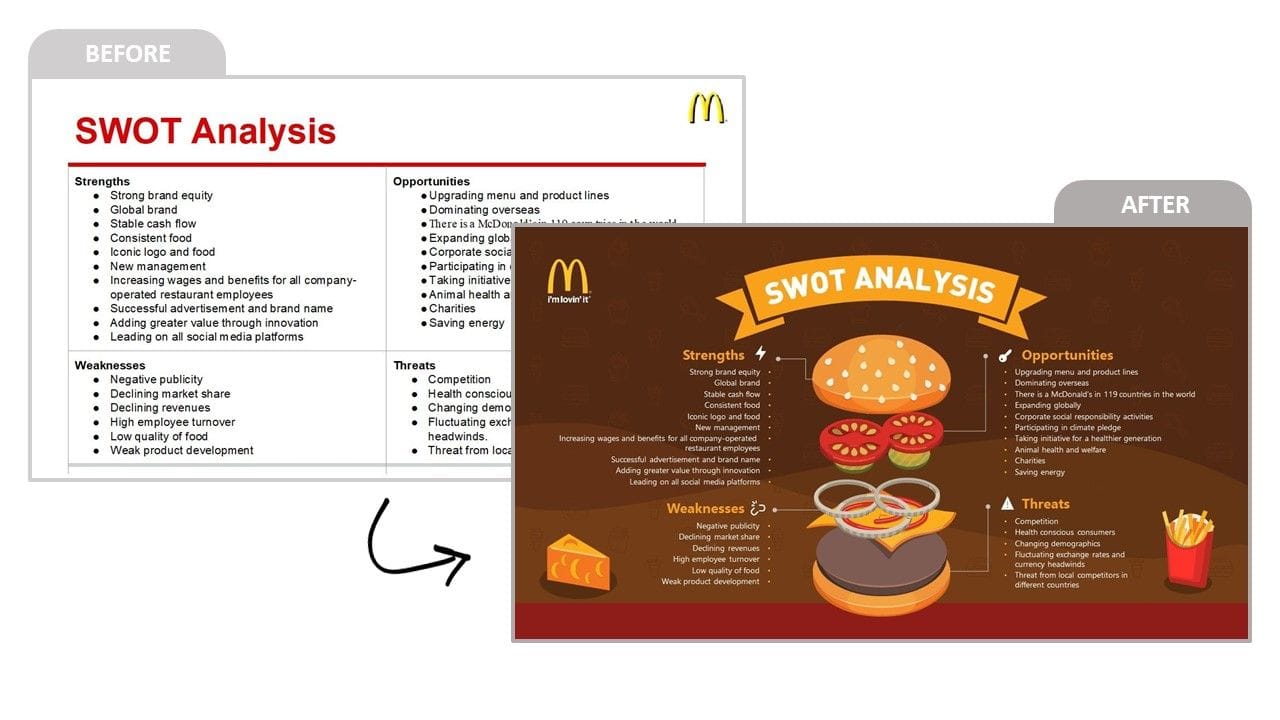
If you’ve already got all your elements and text in your brand identity PowerPoint template, all you need to do is send it our way ! Our designers have provided top-notch presentations to thousands of professionals and companies around the world, so rest assured your slides are in good hands.
But if you’d like to test the service first, that’s totally okay! We’re all about transparency and 100% customer satisfaction, so here’s a try-out offer for you : Send us one slide (maybe the cover of your brand style guide!), and we’ll redesign it for just one dollar. This is a cool way to experience what our presentation design service can do for you and your team.
As I mentioned before, no two brand style guides are the same. These 10 points we’ve covered are the essential parts any brand style guide should have, but you can add others according to what your brand needs.
Just remember to keep your brand style guide short, easy to read for everyone, and shareable!
Ready to create your own brand identity presentation? Look no further - this template is your ultimate tool to make it happen! Download it for free:

Want to learn more?
- Get superb on-brand presentations with 24Slides!
- Corporate Identity: Why is Branding Important in a Presentation?
- How to Write a Design Brief for Your Next Project?
- Rebranding Checklist: 5 Aspects You Should Consider
Create professional presentations online
Other people also read

How To Write Effective Emails That Will Improve Your Communi...
How to Make a Marketing Plan Presentation in PowerPoint

Alternative presentation styles: Takahashi

Logo Design Presentation Template
Organize and share your logo design concepts
How you present your design work is just as important as the actual artwork itself. It's here that you get to tell the story and strategy behind your work, not just share the final artwork.
Whether you're presenting in person or remotely, it's important to display your concepts in a way that's easy for others to compare and discuss, and most importantly shows your work in the best light.
In this guide, you'll learn the modern approach to presenting logo concepts and gathering feedback from your team and client using Milanote. This template is part of our guide on How to plan a logo design project .
- Explore ideas
- Organize visually
- Share with your team & clients
- Gather feedback
- Export to PDF
How to use this template
Whether you’re a designer or creative director, follow this step-by-step guide to learn the modern process of sharing logo concepts with your team or client in Milanote, a free tool used by top creatives.
1. Start with an empty template
The Logo Design Presentation template contains beautifully composed placeholders for images, video, notes and more. Just drag and drop your content onto the board to create a presentation in minutes.
Create a new board for your concepts.
Create a new board
Drag a board out from the toolbar. Give it a name, then double click to open it.
Choose the Logo Design Presentation template.
Choose a template
Each new board gives you the option to start with a beautiful template.
2. Arrange your concepts
Start by uploading the concepts you've designed so you can share them with your team or client. Provide a few example of the logo in different environments. E.g. If it's a logo for a clothing brand, show how the logo will looks on its own, on store signage and on packaging or wrapping paper.
It's best to provide at least 2-3 different concepts so your team and client can start to debate which one best suits the business.
Drag files from your computer.
Upload a file or document
Click the "Upload" button or just drag a file onto your board. You can add images, logos, documents, videos, audio and much more.
3. Explain your thinking
Next, include some written notes about each concept. This will help explain your ideas and keep everything in context. Refer to the client's goals you set earlier in the Logo Brief and the visual direction from the Moodboard to communicate the path to this point.
Try to provide reasons why these concepts will provide the perfect visual brand for the client's company. Explain how they embody the brand personality and why they'll appeal to the target audience.
Add a note to describe each option.
Drag a note card onto your board
Start typing then use the formatting tools in the left hand toolbar.
4. Share with your team or client
With any creative technique or project, it’s important to be open to constructive criticism. Now that you've prepared the initial concepts, it's time to ask for specific feedback. Share the board with your team or client and get together to choose a final direction.
Share the concepts with your team.
Share a read-only link with others.
Click Share in the top right of your board. You can add a Welcome message for viewers, allow comments, set a password or embed the board in another app or website.
5. Agree on a concept
Ensure that everyone involved agrees on the concept direction before you start finalizing the logo artwork. Try to keep the conversation focused on the strategy behind the logo rather than discussing just the visual aspects. Consider how the logo addresses the goals, audience and requirements. Lastly, make sure you stay open to suggestions and improvements and try not to take criticism personally.
Start a conversation about the options.
Start a comment thread
Drag out a comment from the toolbar on the left and place it on your board. Other editors can reply to your comment.
Mention others to get their attention.
Mention teammates to get their attention
Type '@' in any text field to mention someone who has access to your board. They'll receive a notification and be able to respond to your comment.
Start your Logo Design Presentation
Organize and share logo design concepts
Sign up for free with no time limit
Milanote is where creative professionals organize their most important work.
Free with no time limit
Create your account
How to present your logos to the client?
When you present your logo work to clients, your goal is convincing them in your creative vision and stylistic choices. There’s a problem, though – clients aren’t designers. Things that you take for granted might not be that obvious to a client. Creative decisions that would be immediately appreciated by fellow-designers or art-directors often don’t stand out to business owners.

Clients might not understand the difference between fonts and gradients. But we all understand and love a good story. The inspiration behind the concept, the workflow, mission, and vision that lie at the core of the work – all these things should be spelled out in your presentation.
What’s the gain? Professional design presentation makes a difference in the way clients perceive you. If you don’t limit yourself to just a brand logo but prepare a full brand identity instead, you will be able to charge more. You will be able to enter the pro league.
What is the logo presentation?
It’s a document that features your logos, alternatives, variations, mission, vision. You can include additional branding elements like color palettes, fonts, and icons.
A good logo presentation is the one that
- Shows the full concept behind the logo rather than just slapping images in the client’s face;
- Describes the inspiration behind the design, letting the client in the creative process
- Collects all the alternatives and variations and presents them to clients;
- Provides answers to practical questions like “How will the logo look on the dark background? or “Does it fit for printed ads?”
- Makes file navigation comfortable both for you and your client.
Many designers don’t invest that much time in presenting their logos. They prefer traditional methods like sending files over emails. Generally, it’s not a good idea – and here’s why.
- Designers are expected to put in efforts in visuals and presentation . We are getting paid to make things look good, and it’s natural that clients come with certain expectations. We have to provide each step of the way that we are careful with artistic details and concepts.
- Files in email attachment give off the draft vibe . Clients think that you are sending logos not for approval but for discussion. You are laying the ground for multiple edits and feedback loops.
- When you will be building your portfolio , you’ll have to invest more time in presenting logos anyway. Why not save yourself some time and present your work properly right away? You’ll save a lot of time in the long run.
- You can charge a lot more for brand identity compared to ordinary logo prices . When you present logos with variations, use cases, palettes, you are increasing the price tag on your design.
- Designers who send files in attachments will struggle to present themselves as pros . To distinguish yourself from beginners, you have to use practices that beginners either don’t know about or ignore. Set the bar higher than the rest of the market – that’s how you will move to the premium category.
So, by presenting your logos in the detailed presentation, you avoid unnecessary questions and edits. You can charge 2-3 times more and provide the full brand identity, based on the logo work.

At this point, you might have a question. Sure, the gain is obvious, but how much more effort will it require to prepare an impressive presentation?
If you were to do it manually in the Illustrator, it could take up to several days. But you don’t have to take this road. With Gingersauce, you can create a full brand book for your logos in just 5 minutes.
How to present your logos with Gingersauce?
Gingersauce is an online platform that allows designers to build a branding identity from just a logo. It’s a professional tool built for designers who want to present their work in the full presentation.
We took all the best manual practices that are used by professional graphic and branding designers and automated them in the smart editor. After reading this guide, you’ll know how to create a presentation with logo variation, fonts, palettes, mission, vision. The fun part is, the style of the brand book itself is automatically designed to suit your logo’s style and colors, yet everything is still customizable for your creativity to shine.
Here’s what we are talking about. This is an example of Skype’s brand book that we built with Gingersauce.

See the neat little detail? The word “logo” is underlined by a blue line, exactly in Skype’s logo color. There are dozens of such small details dispersed throughout the brand book. These small accents give your brand book the custom look and feel – even if in reality, it was built in less than 5 minutes!
Getting started
Start by entering your brand name and slogan. Upload a logo. Select the type of brand book that you’d like to build. Are you branding a product or a company? Is it a new brand or rebranding? The editor selects templates depending on your purpose.
Step 1 – Upload the main logo
Select an SVG logo to get started with building a brand book. Gingersauce editor will use this vector image as the main reference for creating a palette, fonts, use cases, proportions, etc.
Gingersauce uses SVG files because they can be easily modified by the editor. This format is not damaged during edits, providing professional logo variations and use cases. After testing multiple formats and getting feedback from users, we understood that SVG logos fit the needs of logo presentation the most.
What to do if I don’t have an SVG logo?
Just open your file in Adobe Illustrator and resave it as SVG. It takes less than a minute. If you don’t have Illustrator or experience some difficulties with the process, don’t worry. You can write in our messenger Chat (in the lower right corner of the page), and we’ll convert it for you right away.

Add alternative logos
A good logo presentation should feature more than one logo, but it’s not a mandatory requirement. To get a perfect presentation, we encourage you to add a secondary logo.
Gingersauce allows you to add 2 more logo images to represent your brand in its full colors and complete style.
The editor will edit both your primary and secondary logos, prepare variations, calculate proportions, and prepare custom palettes.
Approve a palette
When you create a color palette for the logo, you are going beyond simply creating logos. You start talking about brand identity – and that’s exactly what most clients are really looking for. Also, using a color palette in the presentation gives the client a better view of your creative process.
Gingersauce pulls up the color palette used in your primary and secondary logos. You can edit each color manually – the editor has a smart design for selecting a precise color shade.
- Each color is described by its code: you can easily use these specific colors in all promotional materials, design projects, product design, etc.
- You can manually choose the preferred shade and the editor will find a matching 6-character code.

Approve logo variations
We are nearing the most important part of the brand presentation. Seeing one variation of the logo allows clients to understand a basic concept. To understand how the logo can be used practically, designers have to apply it to different backgrounds and styles.

The old-fashioned strategy is to create all these variations manually, spending 5-10 minutes on each icon. If you have many logos and icons, you’ll need days to wrap things up.
However, our smart automation offers you a much smarter alternative. Gingersauce will offer you 3-6 alternatives for your logo use. These options include black and white positive, negative, primary color positive and negative, and others. The exact types and number of variations depending on the logo itself. You can also upload all the logo variations that you have created manually. Automation is a feature, but it’s only optional.
Add a brand icon to your logo presentation
Logos often tend to be pretty big. You need to fit in the name of the brand or incorporate several visual elements. Obviously, a large-format logo doesn’t fit to all advertising formats, websites favicons, and other mediums. This is why you absolutely need to include an icon into your logo presentation.
With Gingersauce, you can upload the favicon for your brand in the vector file. Remember though that you should create the icon beforehand – so far, Gingersauce doesn’t have features that would let you create an icon right on spot.
However, if you already have an image, Gingersauce will help you do the rest of the magic for you. The editor will offer its variation, use and misuse cases, and insert it between the pages. This step adds a touch of personality to the brand book.
Approve a brand icon variation
Just like a primary logo, a brand icon is set to undergo variations, which are executed after the user’s approval. Consider multiple design options, black and white negative and positive, primary color variations, etc.
At this point, your logo presentation already has multiple layers and variety. What before would’ve been a simple email is now forming into a full-fledged brand book. And we aren’t even done yet.
Describe logo proportions
A logo will be used to represent the brand everywhere. This is why your clients will appreciate having precise information on the logo’s characteristics and use cases. Most people you’ll work with might not even ask for these details – but since you are an expert, it’s up to you to know better. That’s what pushing the bar is all about.
Why do you need to describe proportions scientifically?
Industry standards are pretty specific when it comes to defining proportions, shapes, and dimensions. There are geometric rules and laws that most designers are taught to follow. Many of the images that you interact with are governed by precise geometrical laws and composition rules.
Professional designers are those who know how to combine creativity and science. Gingersauce makes it a lot easier – just choose a law and proportion, and the editor will automatically adjust the image.

Now you’ll be able to casually mention to clients that you used the Fibonacci compositional scheme and adhered to Pythagoras space laws.
- Choose logo proportions among common compositional schemes like Leonardo, Michaelangelo, Fibonacci, Vitruvius, etc.
- Determining a clear space: choose physical laws for the space around the logo among Newton, Hawkings, Einstein, Pythagoras, and other mathematical and physical principles.
- Determine dimensions for minimal size calculation: you can choose the minimum allowed size of the logo that will still preserve the general look and readability. Gingersauce Editor offers four options, from the smallest to the largest: quarks, neutrons, atoms, molecules.
Once again, you don’t have to know in-depth details about these proportions. Gingersauce will provide you explanation and information, and most importantly, you’ll see the effects of each of these laws in action, on your logo. After some trial and error, you’ll quickly figure out what options work best for this particular project.
Approve logo misuses
Every professional logo presentation sets clear restrictions on how a logo shouldn’t be used. This way, designers help teams to figure out the best ways of applying logos to materials. The presentation should be a guideline to logo use – this is how you can help your client to avoid mistakes later on.
What’s in it for you? Including logo misuses into your presentation shows that you care about your logo’s destiny once it’s out there. This speaks volumes about your professional quality – thinking long-term and seeing the bigger picture are qualities of thorough, experienced, and enthusiastic designers.
Gingersauce Editor automatically processes the main logo and determines laws that shouldn’t be violated in the process of logo modification. The examples of logo misuse options in Gingersauce are:
- Do not distort or alter the proportions of the logo.
- Do not add contours to the logo.
- Do not add a drop shadow to the logo.
- Do not change any elements respectively to each other.
- Do not rotate the logo to any angle.

You don’t have to agree with every logo misuse law, proposed by Gingersauce. It’s possible to reject some of the offered options.
Select primary and secondary fonts
If you want to dive even deeper into offering full-fledged brand identity, consider adding fonts to your presentation. It won’t take long – Gingersauce allows you to upload custom fonts as well as choosing among existing ones.
In the editor, you can define the main font and pick additional variations. Make sure that these fonts are unified by a single concept and fit cohesively with the style of the logo.

Adding a font to your logo presentation takes a couple of minutes, possibly seconds. The impact, however, is much bigger. Your client will see that you are willing to go overboard and include additional elements into the project. Once again, you will be taking your logo work to the next level – without making any changes to the logo itself
Another fun part: add mission, vision, values
At this point, the visual preparation of your presentation is almost done. All that’s left is describing your inspiration and the concept behind the visual.
Gingersauce presentations feature pages, dedicated to the brand’s mission, vision, values. Such structure of a brand book gives designers a chance to elaborate on their creative thought. You can describe the bigger picture behind your logo.
Professional designers who prepare logos and brand identity for large brands excel in this. They research key values and elaborate on them in the final work. Even if your logo is a simple black square, you might have a shot of selling it – if there’s a compelling story behind.
Examples of brand missions that you can use to describe your concept
- Slack : the speech bubble evokes communication and connectivity, and will form the basis of a system of customized icons, illustrations, and motifs with rounded corners that echo the shapes of the logo.
- Starbucks : the logo is derived from a twin-tailed siren in an old sixteenth-century Norse woodcut.
- Skype : the brand name is inserted in the Cloud that represents the communication bubble, an integral element of Skype’s interface. The blue color in the Skype logo expresses main brand values – communication, prosperity, and the emotion of hope; White color represents harmony and peace.
As you can see, professional designers and big brands care a lot about the story behind their logos. Your clients do, too. In fact, the story might be just as important as the visual itself.
In Gingersauce, you can simply type or paste your mission in the editor – the tool will add it to the presentation and present it in the style of the brand.
It’s time to present your logos
For years, designers had to create logo presentations manually, which took loads of time. With such an inefficient method, it’s no wonder so many choose to simply send logos via attachments.
Hopefully, our work here at Gingersauce will make it easier for you to present your logos. You don’t need to install any software or edit every variation manually. All the process is online and takes less than 5 minutes. The result, however, is highly professional and custom. Try it out yourself – and offer a lot more value to your clients.

Josh is a multidisciplinary designer with over 20 years of experience in industrial design, exhibitions, branding, 2d and 3d animation, graphics for print and digital, illustration, and UX/UI for mobile and desktop apps.
Related Content

Passive Income Ideas For Designers + Ways to Earn More
Sometimes designers have a hard time finding a way to earn a little bit more money – especially freelance designers. But, while looking for another

Don’t Send Your Logo to the Client Yet: Logo Creation Checklist
Do you double-check your logo designs? No? Well, it’s high time you do it! After spending many hours working on the same design, even the
In our newsletters, we send out project updates, branding news and tips, and more (also discounts 🤫)!
All you need to automatically create a professional brand book is a logo. Leave the rest to our wizard!
Are you sure your logo is all ready to be sent to a client?
Beautiful design is only half the deal — does it really suit the brand, though? We’ve created a short checklist for you to see if your logo is truly ready to be presented. Leave your email, and you’ll receive it right away.
- Graphic design trends
- Design inspiration
- Design history & movements
- Famous design & designers
- Creative thinking
- Top 9 at 99
- Design basics
- Design tutorials
- Design resources
- Logo & branding
- Web & digital design
- Video & animation
- Packaging & label
- Marketing & advertising
- Book design
- Art & illustration
- Clothing & merchandise
- Other design
- Entrepreneurship
- Freelancing
- Crowdsourcing
- Business resources
- Case studies
- Our community
- Our designers
- Our customers
- Engineering
- Get inspired
- Learn design
- Build a business
- Grow an agency
- Look inside 99d
The logo design process: a guide to professional logo development

- 14 min read
- Logo & branding
The logo design process can be hard to define outright: every graphic designer has their own approach to logo development. For some, it’s methodical and disciplined—60 minutes of concept development followed by 90 minutes of execution, all while listening to their favorite album to boost creativity. For others, it’s watching reruns of Will & Grace until they find inspiration from the commercial breaks.
We’re not here to judge—if it’s stupid but it works, then it’s not stupid. But we are here to outline a general logo design process that you can use as a starting point. We’ll show you how to combine research and analysis with creative ingenuity to create an outstanding logo design. Below are the 7 basic steps to logo development, complete with examples that show the process in action.
What are the 7 steps to design a logo? —
- Step 1: Evaluate the brand
- Step 2: Research the industry
- Step 3. Make a list of where the logo will be used
- Step 4. Sketch a variety of logo concepts
- Step 5. Create digital drafts in vector software
- Step 6. Refine your logo design with feedback
- Step 7. Prepare and deliver the final logo files
Step 1. Evaluate the brand —
Your first step in the logo design process is to understand what the brand embodies and what the business’s goals are. This is known as the Client Discovery phase. There’s no one-size-fits-all for logo design—a logo is only as good as its representation of a business, so it won’t be effective unless you first know what kind of impression the brand is aiming for.

A lot of the information you’ll need should be in the design brief . But there are always clients who can’t articulate what they want or don’t know themselves, and it is up to the designer to draw this information out. And even in the case of the most detailed, well-composed briefs, designers should probe deeper—explore how the client really feels about their business and the awesome work that they do in words that go beyond the official corporate statement. Every bit of insight you can get into the company and the people that comprise it will contribute to the success of your design in the long run.
Here are just a few general questions you can start with to kick off your client research:
- Why are you getting a logo design? What problem are you trying to solve?
- If your brand were a person, what adjectives would you use to describe it? (clever, prudent, etc.)
- What is your brand voice? (eloquent & formal, jokey with slang, etc.)
- Which beliefs and values are important to your brand?
- What is your unique value proposition? What does your company offer that your competitors don’t?
- How do you want your customers to describe your brand to their friends?

Of course, these aren’t exactly design questions—this belongs more to the field of branding . But considering that logos are one of your strongest vehicles for branding, asking these questions is a necessary first step.
Evaluating a brand is one of the first steps in the 99designs logo design process . We ask clients to define their attributes in some core areas so that designers have a good idea of the brand identity before they even start. Even taking just 5 minutes to consider where a brand falls on these metrics can help you formulate more complex brand inquiries later on.
At the end of this step, you should have your own well-informed take on the brand (supported by plenty of notes). From here, you can start brainstorming to distill this information into key words and phrases. One popular brainstorming technique is mind mapping , in which designers take their overall brand impressions and expand them into related ideas. Save your favorites—these will support your logo concepts later. But your research isn’t done yet!
Step 2. Research the industry —
No brand exists in a vacuum. Every company has to contend with the standards of their industry, even if they are doing everything to stand out.
By completing this form, you agree to our Terms of Service and Privacy Policy . This site is protected by reCAPTCHA and the Google Privacy Policy and Google Terms of Service apply.
So the next step in the logo design process is to research what kind of logos competitors and industry leaders have. This is referred to as the Industry Discovery phase, and it can mean the difference between a logo that is generic and one that is too far out of left field.
From other logos in your industry you can glean:
- what logo techniques work for your industry, i.e., brand colors or particular shapes
- what logo techniques are overused, to the extent that they lose personality
- what logo techniques are ignored, which might inspire ways to stand out
- what kind of customers dominate your industry (or which customers your rivals prefer to target)

For example, most logos in the tech industry use the color blue . With this information, you can either (1.) also use blue because the data suggests it works best, or (2.) use another color in order to stand out from the sea of blue logos. There’s no right or wrong answer, it depends on how much of a priority standing out is to your branding strategy. But either way, you won’t even know there’s a choice to make unless you research other logos in your industry first.
Step 3. Make a list of where the logo will be used —
Just like the brand strategy, the physical or digital space the logo will occupy should also inform your design choices. Research where the logo will be used—this is known as the Application Discovery phase. Although you may not yet have a complete list, the earlier you can predict how your logo will be used, the better for logo development. Where you need your logo might determine the color model, the shape or even design software used.
For example, if you want your logo on large billboards, you can design more detailed, larger-scale logos. If it’s going to be situated in the corner of a mobile app, you should opt for simplicity and smaller scales. If social media will play a heavy role, the logo should sit comfortably in both circular and square avatars and be adaptable to larger cover images. If you want to stand out in video or digital platforms, you can even have an eye-catching animated logo . More often than not, a designer will want to plan for all of these scenarios.

These are some common use cases for logo design:
- Website icons
- Signs and banners
- Product packaging
- Advertisements
- Social media profiles and banners
- Business cards
- Company letterheads (invoices, internal documents)
- Email marketing campaigns
- Marketing swag (pens, shirts, mugs, etc.)
You also have to consider the logo’s shape and how it fits its surroundings. Some spots require a wide, rectangular logo, like letterheads; others require something small and discreet, like a watermark on shareable content. Luckily, you can have several different versions in your stable.
Considering the popularity of responsive logos , you don’t have to limit yourself to one standard design. Plus, you always have the best logo for any situation. The trick is to make sure that these different versions of your logo all feel like the same logo. It helps to plan ahead and design these variations all at the same time, rather than designing the main logo and adapting it to different situations as they come up. If an adaptable logo appeals to you, aim for four variations at first, escalating the logo in both size and complexity.
Step 4. Sketch a variety of logo concepts —
If you already have some logo ideas, you might be tempted to jump ahead into logo design software . But before you start zeroing in on your final design, take some time to sketch plenty of ideas. Sketching is cheap, easy and fast, but most importantly, it’s an effective brainstorming tool.

Sketch out a bunch of different logo ideas to see how they look outside your head. For one thing, the act of sketching alone can get the creative juices flowing. But more to the point, sketching a wide variety of concepts lets you see what works and what doesn’t. You’ll start to notice certain threads or themes you like, and you can mix and match different elements until you settle on the perfect one.
Even if you’re almost certain you have an idea you like, sketch other ideas. You might surprise yourself with something you like better, and if nothing else, this will give you some backups in case the client ends up not liking the direction of your initial concept.
Once you’ve settled on your preferred concept, try sketching some variations on it, adding or removing elements, changing minor details, and beginning typography explorations.
Step 5. Create digital drafts in vector software —
By now, you should have a messy smorgasbord of logo sketches as well as a better sense of what you want the final logo to look like. Of those sketches, take around 3 of your best ones and recreate them in your design software. This is where your final logo really starts taking shape.
For a comprehensive step-by-step guide, take a look at this article on making a logo in Illustrator .

Now you can make all those crucial design decisions you couldn’t in the sketch phase. In your digital draft, you can experiment with logo colors as well as typography .
In case you’re a business owner trying to make your own logo, this step of the logo design process does require technical knowledge of design software. But you can always use a user-friendly DIY editor. Although these don’t have the features or complexity to create a substantial logo, they do have the bare minimum of what you need.
You can also hire a freelancer or commission a design contest if you prefer to outsource this to step to someone with more expertise. Working with a professional will pretty much guarantee a great result. If you want to learn more about the pros and cons, check out this comparison of the best ways to get a logo .
Once you have a solid draft, go the extra mile to create a presentation to showcase your logo . This involves presenting the flat logo along with any variations, an overlay with brand imagery, and mockups of the logo out in the real world. The goal is to communicate your vision of the brand with a persuasive, knockout logo presentation.
Step 6. Refine your logo design with feedback —
Here’s something you don’t need to be a designer to appreciate: everyone’s a critic! No matter how perfect you think your logo design is, chances are someone, somewhere, is going to request changes.
That’s not always a bad thing. When you work on the same image for hours or days (or weeks, or months), you tend to mistake the forest for the trees. A fresh set of eyes on the final product can reveal some room for improvement you hadn’t noticed before.

You want to encourage criticism on your logo design and show it to a variety of people. Show your clients or co-workers first and foremost, but don’t stop there! Show your significant other, your friends, your neighbors, your Uber driver. New, fresh ideas come from the unlikeliest of sources, and at the very least you can gauge people’s reactions to the logo to make sure it’s having its desired effect.
Getting feedback on your design is the easy part. The real challenge lies in interpreting and acting on client feedback . Ask follow-up questions and use your best judgment to decide what feedback is most valuable. Your logo’s job is to represent a brand, and the question you should ask yourself is whether the feedback is helping the logo do that better. If not, you may need to politely articulate the reasoning behind your design choices. At the same time, you don’t want to be so stubborn or precious over your logo that you are unwilling to see potential flaws.
Step 7. Prepare and deliver the final logo files —
With your logo finalized, it’s time to deliver your final files! You should determine what design files your client needs at the start of the process (in case they have any special requirements). But in general, it is best to include:
- Layered source vector files, such as AI
- Layered EPS/PDF files (for clients using different vector programs)
- High resolution raster files for web, including PNGs with transparent backgrounds

Be sure to include basic variations of the logo, such as full color, black, white and monochrome.
If you are using a standard font (as opposed to custom lettering), you should also outline the text. Otherwise, the font will change on computers that do not have it installed.
You should also inform the client of any fonts used in the logo in case they will need them for future branding projects (be advised that most font licenses require the client to purchase it themselves).
This is all information that is great to include in a brand style guide. Not only does this ensure that your logo will be used correctly long after you are gone, it makes a great parting gift for the client and increases their confidence in the brand vision you’ve crafted for them.
Smart logo development brings brands to life —
You could say that great design takes talent, but you can never know for sure what that means or whether you have it. What you can say for sure is that great logos do not happen by accident. They are the result of critical thinking, interrogating, collaborating, exploring, failing and starting again.
Each detail of your logo—colors, fonts, sizes, shapes and more—can affect the kind of impression it makes on customers. Although at the end of the day your logo may not resonate with every single viewer, a robust logo design process is your best opportunity to bring your brand vision to life.
Want to learn more about logo design? Check out our article on how to design a logo .
Want a great logo to represent your brand?
Our designers can make it happen.
This article was originally written by Peter Vukovic and published in 2012. The current version has been updated with new information and examples.

Current design contests
Designers, check out these contests so you can start building your career.
- Logo design
- Web page design
- Brand guide
- T-shirt design
- Illustration or graphics
- Browse categories
- How it works
- Find a designer
- Inspiration
- 99designs Pro
- Design contests
- 1-to-1 Projects
- Discover inspiration
- 99designs Studio
- Business card
- Browse all categories
- 1 800 513 1678
- Help Center
- Become a designer

10 Examples of a Professional Logo Presentation
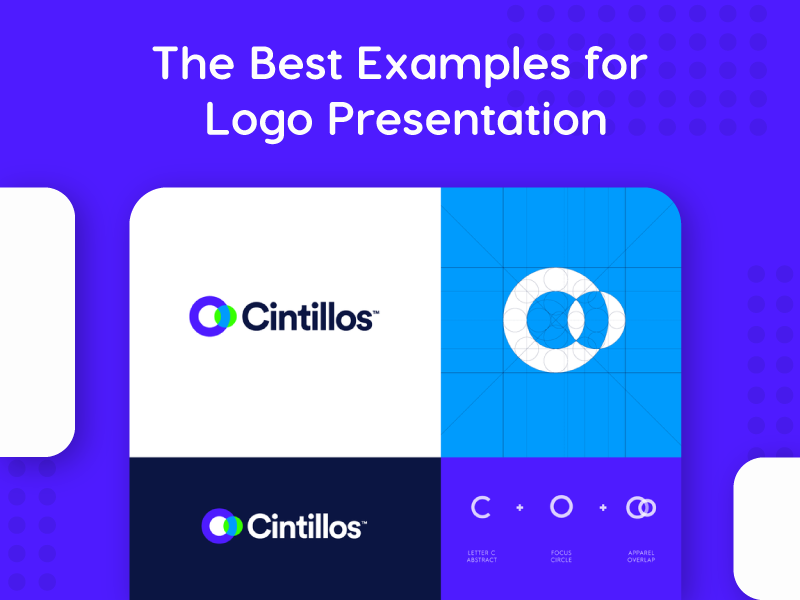
Logo presentation, and leaving a great first impression is one of the crucial moments in every successful project. Your design may be solid, and you have researched it thoroughly. Still, if your presentation isn’t professional, you can have overly negative feedback. Every designer needs to have multiple logo presentation templates for every occasion and type of project. Here are some of the best examples that can make an impact on your workflow.
1. Blurred Background Image Logo Presentation
Here is one of the most straightforward ways to present your logo. Find an image that is related to your logo in some way. It could be a similar design idea, complementing shapes, or colors. Additionally, a great photo or an image will help you set the right mood. You can find thousands of royalty-free stock photos on websites like unsplash.com . All you have to do then is to apply your logo. Consider adding a blur effect on the background image to concentrate attention on the logo itself.
2. Visual Explanation of The Logo
‘How did you come up with that?’ is a question many designers don’t like to hear. It isn’t very enjoyable to explain the whole process or a moment of inspiration when it comes to creative work. By presenting your work this way, you will be able to avoid that situation. Here we have an example of precisely that. The designer presented a primary logo, an inverted color logo, an outline grid, and a simple visual explanation with essential elements.

3. Inverted Color Options Presentation
Here is an option you can use that works excellent for mascots. Also, you can use it for logos meant to be used on various color backgrounds. This particular designer added just a bit of a drop shadow effect to make a mascot ‘pop’. On the right side of the screen is a mascot on a darker background, and of course, a color palette.

4. Multiple Logo Variations
Can’t decide which version of the logo looks better? Simply lay them all out on the artboard and let the client decide. This style of logo presentation works well if you already have to design multiple variations or styles (vertical, horizontal, inverted color, badge, etc.)

5. Background Logo with reduced opacity
Similar to adding a background image, adding the actual logo to the background will look even better. Scale the design, reduce opacity, and send it to the back.
6. Colored Bottom Line with Color Palette
This is one of the most straightforward ways to get away from the blank artboard. Present a nice and clean logo design is adding a colored bottom line. Not only that, but it can provide contrast and serve as a creative way to present the color palette used.
7. Logo Wireframe Presentation
Geometry is an essential factor when it comes to designing a logo. Then why shouldn’t you show how carefully planned out are your designs? It will help you show your work in a much more professional way. Feel free to make a beautiful logo presentation, with a finished product and initial wireframe right next to each other.
8. Sticker Bomb
Knowing where and how your design is going to be used is a big part of the process anyway. In this case, it is in the form of a sticker. Take that opportunity to present it as a sticker bomb. It will look more natural, and your client will love it!

9. Logo Sketch
With a sketch of the logo with gridlines, 3D looking mockup, and simple white on black background, this logo presentation has it all. Keep in mind that sometimes less is more, and to use this way of presenting sparingly.
10. Hand Drawn Logo Sketch Presentation
Designers sometimes argue if sketching out your logo by hand first is necessary. Even more, if your client should ever see your sketches and initial ideas. However, this is the way to go if you are on an extremely tight schedule, or have to work with superficial information. It will help you get started and test out which direction to take before you fully commit and deliver a final presentation.
Top 5 Hosting Websites for WordPress in 2021

What Is Graphic Design? 2021 Update
Leave a comment cancel reply.
Save my name, email, and website in this browser for the next time I comment.
- Join for Free
Introduction to Logo Design: From Brief to Final Presentation
A course by guilherme vissotto , graphic designer.

Express the identity of a brand by learning to create personalized logos from start to finish
- Information

Conveying the identity of a brand using logos full of personality is one of graphic designer Guilherme Vissotto's fortes. In this online course, he walks you through all the steps so that you can create a striking and powerful logo of your own for a brand or company.
Throughout the course, learn to strategically develop your design starting from the client brief and analysis, moving on to some conceptualization tools and your first sketches, and finishing up with your final piece ready to present to the client.
What will you learn in this online course?
13 lessons & 21 downloads

- 97% positive reviews ( 475 )
- 10,426 students
- 13 lessons (56m)
- 21 additional resources (11 files)
- Online and at your own pace
- Available on the app
- Audio: Portuguese
- Portuguese , Spanish , English , German , French , Italian , Polish , Dutch
- Level: Beginner
- Unlimited access forever
Recommended software for this course
What is this course's project?
Create a logo for a company or your own brand using all the skills learned in the course.
Projects by course students

By joaoluzdesign
By fabricio.job7

Who is this online course for?
Any designers, whether just starting out or well-established, who want to hone their logo-designing skills.
Requirements and materials
You need a basic working knowledge of both Adobe Photoshop and Illustrator to take this course.
In terms of materials, all you need is paper, a pencil, an eraser, and a computer installed with both software.

curso completo e muito bem explicado
View translation
Hide translation
li.designstudio
good course
Ótimo Curso! Muito bom.
O Guilherme é a minha principal inspiração no mundo do design, com ele eu me encontrei nesse mundo de vetores, grids, branding, etc, e ainda com essa didática incrível estou amando o curso!
Guilherme sempre inspirador. Eu amei o curso e super recomendo ;)
- More reviews

Guilherme Vissotto A course by Guilherme Vissotto
Guilherme Vissotto is a graphic designer with more than seven years' experience in the sector. He worked for big advertising and graphics agencies before becoming a freelance professional specialized in visual identities.
His work has been seen in over 14 countries through a diverse range of companies, from cafés and clothing brands to investment banks and even pet shops.
Introduction
Principles and fundamentals.
- Function and aesthetics
- Elements and typographies
- Use of color
Strategic workflow
- Mood board and surveys
- Setup and construction
- Colors and fonts
Grand finale
- Introducing your logo
Final project
What to expect from a domestika course, learn at your own pace.
Enjoy learning from home without a set schedule and with an easy-to-follow method. You set your own pace.
Learn from the best professionals
Learn valuable methods and techniques explained by top experts in the creative sector.
Meet expert teachers
Each expert teaches what they do best, with clear guidelines, true passion, and professional insight in every lesson.
Certificates Plus
If you're a Plus member, get a custom certificate signed by your teacher for every course. Share it on your portfolio, social media, or wherever you like.
Get front-row seats
Videos of the highest quality, so you don't miss a single detail. With unlimited access, you can watch them as many times as you need to perfect your technique.
Share knowledge and ideas
Ask questions, request feedback, or offer solutions. Share your learning experience with other students in the community who are as passionate about creativity as you are.
Connect with a global creative community
The community is home to millions of people from around the world who are curious and passionate about exploring and expressing their creativity.
Watch professionally produced courses
Domestika curates its teacher roster and produces every course in-house to ensure a high-quality online learning experience.
Domestika's courses are online classes that provide you with the tools and skills you need to complete a specific project. Every step of the project combines video lessons with complementary instructional material, so you can learn by doing. Domestika's courses also allow you to share your own projects with the teacher and with other students, creating a dynamic course community.
All courses are 100% online, so once they're published, courses start and finish whenever you want. You set the pace of the class. You can go back to review what interests you most and skip what you already know, ask questions, answer questions, share your projects, and more.
The courses are divided into different units. Each one includes lessons, informational text, tasks, and practice exercises to help you carry out your project step by step, with additional complementary resources and downloads. You'll also have access to an exclusive forum where you can interact with the teacher and with other students, as well as share your work and your course project, creating a community around the course.
You can redeem the course you received by accessing the redeeming page and entering your gift code.
- Branding & Identity
- Digital Design
- Logo Design
- Stationery Design
Courses you might be interested in
How to Design a Logo [Step-by-Step Guide]
Published: March 06, 2024
A great logo is instantly recognizable, memorable, and closely connected to your brand’s core values and ideas. Just sit back and think about it, what logos are simply unforgettable? The first that comes to mind for me are iconic logos like Apple, Coca-Cola, and Nike. Logos like these are simple and elegant yet bold enough to leave a lasting impression.
When designing your logo, you can make a powerful impact on how your brand is perceived. Designing a timeless logo is challenging, I'm here to help. To get your logo right, you’ll need to have a firm grasp of your market, buyer personas, and your company’s ethos.
![Download Now: 150+ Content Creation Templates [Free Kit]](https://no-cache.hubspot.com/cta/default/53/5478fa12-4cc3-4140-ba96-bc103eeb873e.png "logo presentation methods")
Ready to dive in?
Read on for logo design best practices, helpful tools, and a step-by-step guide to creating the perfect logo.
Table of Contents
What is a logo?
How to design a logo, types of logos, logo design best practices, logo design tools.

150+ Free Content Creation Templates
Access ebook, blog post, CTA, case study, and more content templates.
- Ebook Templates
- CTA Templates
- Blog Post Templates
Download Free
All fields are required.
You're all set!
Click this link to access this resource at any time.
A logo is a visual symbol or mark that represents a company or organization, often used to identify and distinguish a brand from competitors. It typically consists of unique colors, shapes, and typography that convey the company's identity and values.
Designing a logo that embodies your brand can help you grow better, but doing it right is just as important. Here’s how to design the perfect logo, step-by-step.
- Understand your brand.
- Brainstorm words that describe your brand.
- Sketch ideas based on these words.
- Test your top sketches with your buyer persona.
- Refine your chosen sketch.
- Develop your logo's layout on a free design platform.
- Pick versatile color options.
- Choose a font.
- Ensure scalability.

HubSpot's Free Website Builder
Create and customize your own business website with an easy drag-and-drop website builder.
- Build a website without any coding skills.
- Pre-built themes and templates.
- Built-in marketing tools and features.
9. Get feedback.
“There are three responses to a piece of design — yes, no, and WOW! Wow is the one to aim for.” – Milton Glaser
Once you feel your logo design is ready, consider sharing it with others and seeking constructive feedback.
Of course, you can seek input at any point in the process, but it is precious to get people’s reactions to your realized vision and reiterate from there.
Whew — still with us? We know this might seem a little overwhelming, but take it slow and don’t rush yourself.
It’s better to follow the process through to completion and end with a remarkable logo than to start over a few months later due to a design error or change of heart.
Once you’ve completed your logo, how can you tell if you scored a winner? Easy: Use our Logo Grader to assess the sustainability and effectiveness of your new logo.
Pictorial Marks (or Logo Symbols)
Wordmarks (or logotypes), monogram logos (or lettermarks).
- Abstract Logo Marks
Mascot Logos
Combination marks.
With millions of logos worldwide, you may be surprised that they all fit into one of seven main categories.
Each logo type has its characteristics, strengths, and weaknesses, so choose the variety that best aligns with your brand values and goals when designing your logo.

An emblem is a logo incorporating text within a symbol for a cohesive image, often conveying formality and tradition. It is strong and impactful, yet challenging to separate for integration and may not reproduce well in small sizes.
Pictorial marks, also known as logo symbols, are logo types that rely on a single image to represent a brand. These logos can be iconic and memorable and are effective at conveying a brand without text, yet may pose challenges in establishing brand recognition and connecting to the brand's purpose without words.
Wordmarks are text-based logos that use typography to turn the brand name into a logo, ideal for companies with unique names. They offer simplicity and integration ease, but may struggle to stand out or suit longer, less distinctive names.
Monogram logos, also called lettermarks, use initials to create a concise logo suitable for companies with longer names. They are easy to remember and scale, but may require displaying the full brand name initially for recognition and could be confused with other brands if the initials are similar.
Abstract Logomarks
Abstract logos, such as the Pepsi logo, are unique representations of brands using geometric forms and colors instead of real-life images. They are inherently unique and capable of communicating complex ideas through simple shapes and colors but may be open to misinterpretation due to their abstract nature and unclear meaning for unestablished brands.
Mascot logos feature illustrated characters to personify a brand with a fun and friendly image, ideal for brands seeking a light-hearted and family-friendly appeal. They offer an inviting and controllable brand storytelling approach but may not suit serious or corporate brands, and their complex design can pose challenges for reproduction at smaller sizes.
A combination mark integrates text with an icon, offering versatility by combining a brand name with a memorable symbol. This type of logo provides clarity in brand messaging but may become overly busy if not carefully designed and could face challenges in scaling down for smaller applications.
1. Keep it simple.
Simplicity is key in logo design. Aim for a clean, uncluttered design that communicates your brand identity as straightforwardly as possible. The goal is for viewers to recognize and understand your logo instantly.

Get started with HubSpot's Logo Maker
Our logo maker can assist you in designing and customizing the ideal logo for your brand, offering a wide range of professionally designed templates that eliminate the need to start from scratch. By simply providing your industry, company name, and slogan, the tool will offer personalized recommendations tailored to your needs.

Don't forget to share this post!
Free templates for blog posts, images, ebooks, CTAs, and more.
Marketing software that helps you drive revenue, save time and resources, and measure and optimize your investments — all on one easy-to-use platform
5 Logo Design Presentation Methods to Impress your Clients
Presentation takes a big part in getting approval from your client. If your client has already liked your design, a little extra effort in presenting the design will help the client make his/her decision. The key here is to help the client to see your design applied on the chosen medias, as if they were already printed out. For an example, a picture of a business card held by our hand looks more appealing than a picture of the flat business card by itself. In this tutorial, we’ll show you how to present your logo design in 5 different ways.
Here’s the example logo was used for this tutorial:

1.Holding Business Card

2.Contrast Background

Make a new layer on top of the logo layer. With the elliptical tool, make an ellipse on the logo, where you want the shadow to be. Use the gradient of 50% black from top.

Last Step is to make shadow under the logo by right-clicking the logo, choose Blending Options on the menu, Drop Shadow, adjust the distance of the shadow to 2 or 3 px, depends on your size of the file and your preference.
3.Wood Texture Background
Choose a wood texture background you like, smooth texture works better for logo bevel and emboss.

Copy the logo to another layer and fill it with brown color picked from the background.

Multiply the logo layer on top of the wood texture layer. The color will look darker like below. Right-click on the logo layer and choose Blending Options, Inner Shadow. You might wonder why I don’t use Bevel and Emboss option there, you can always try it and compare the results. Personally I prefer a manual Bevel and Embossing because the light and shadow would look more real.

Duplicate the logo layer into two different layers. Black on top of white logo layer, move the black logo slightly right and down.

4.On the Office Building (Sign)
Get a picture of the company building which logo you’re designing. Open it in photoshop, copy the logo into a new layer.

5.Product Background

Presenting your logo designs to clients on signage, a business card or even a piece of wood will: 1) show how well it works in ‘the real world’ and 2) make the logo more appealing to your client. Remember, presentation is critical when pitching on freelance logo jobs and logo design contests – it will help you win more work!

About the author: Elisha Leo is a freelance graphic, web and logo designer from Canada.
29 comments
Excellent work .. thanks
Very presentable … simply awesome! thanks for this tutorial ..
Good tips for identity projects!
Great tips, thanks for sharing!
Excellent article and great work
Great presentation to make someone impressed..
Great design. I like the different visual implementations of the logo. Great post.
Great ideas. I never thought of presenting logos in this manner.
lol nice – I like the office building trick 😉
Really great. Thanks a lot for sharing..
What a great Idea, I will definitely try that one out next time, some times clients don’t appreciate the logo until they can see it practically applied. Awesome idea Elisha Leo. What tips would you give someone wanting to improve their logo design skills?
Superb. Thank you for sharing this.
Wow! Good post. Business card presentation I use everytime. It’s work!
nice tips. tnx for sharing.. 😀
Awesome stuff, thanks.
Great tips! Would definitely try these out.
The extra effort probably can go a long way
Good idea on helping clients to visualize how the logo looks in the real world. Will definately try that out next time. Thanks for sharing.
Wooow, that’s alot of info right there… Thanks alot…
wonderful and informative article and useful examples
This was totally not what I was expecting when I followed a tweet here. I was expecting to read about the pitch and a process to presenting concepts (verbally, not visually)
While this may get a client buy-in, in my opinion, it puts focus on the wrong things..Maybe I’m way off base.
My main goal is to get the client to look at the concepts as a solution to their needs and not with emotion. For my first review I present concepts ONLY in high contrast BW and I show them in 2 sizes — one that’s large on the page/screen and one that is minuscule. BW because people most always have some type of emotional response to color. The variation is size because logos get reproduced in so many formats and almost any size.
very impresssive…….. thanx “)
What a great presentation tips ! wow ! thanks Elisha Leo !
Very nice and helpful – thanks putting this out there.
Great ideas, however I would keep the background distraction to a minimum since it is the logo that you want to focus on.
this will be a really good idea to show logo to my client.. thanks for nice tips…
Good post, useful, relevant and fresh. Subscribed.
very informative !
great tips 🙂
Comments are closed.

An Ostentatious Collection of Awesome Munny Designs for Inspiration

30 Free To Download Seashell Texture for your Designs

22 Stunning Shells Brush Sets For Photoshop

Creative Photo Delights With The Use Of Multiple Exposure Photography

Create a Creepy Face Photo Manipulation in Photoshop

32 Awesome Cyclops of X-Men Illustrations
© Naldz Graphics 2019. All rights Reserved.
Logo Design Process From Start To Finish
Top 3 picks:.
Our Top Products:

The Brand Master Bundle

The Creative Suite Bundle

The Brand Strategy Guide

The Brand Story Guide

The Rich Designer Book

The Brand Guidelines Kit

The Brand Archetypes Course

The One-Page Style Guide
Deals for creatives:.
.webp "logo presentation methods")
I'm a branding expert and graphic designer based in Brooklyn, New York. Need help with branding?—Just Get in touch

Need help with branding?
Every logo designer has a different approach, but most of them would agree that there are certain steps in logo design process all professionals share..
In this article, I will show you my step-by-step logo design process.
The 7 steps that I go through when designing a new logo.
And I will do so on a real case study—A logo and identity i designed for one of my recent clients.
BTW—If you're looking to hire for logo design, check out my services page .
Starting with discovery , then conducting research , running a brainstorm , then sketching logos, designing those logo concepts, presenting them to the client and preparing final deliverables which I give to the client.
I’m sharing with you my process, so that hopefully you can improve your way of designing logos —if you’re a designer.
Or you can just get an overview of how professionals do it , if you’re a business owner looking for a custom logo.
7-Step Logo Design Process
- Discover —Get to know the client’s business.
- Research —Learn about the industry & competitors.
- Brainstorm —Develop ideas & decide on art direction.
- Sketch —Create logo concepts based on strategy.
- Design —Select best logos & execute them digitally.
- Present —Show logos concepts & get client's approval.
- Deliver —Export logo files & create a style guide.
You can also watch this tutorial on my YouTube channel.
BTW. For an in-depth look at my comprehensive approach, check out my article on my branding process , where I detail each step from initial consultation to final handover."
Introduction
In this article, I will walk you through my proven 7-step logo design process and do so on a real-case scenario.
So that you can see my going through these steps and get inspired to make your work more efficient and more effective as well.
“Logo design process demands a combination of investigation, strategic thinking and design excellence.“ — Alina Wheeler, Designing Brand Identity
So whether you’re a designer, or you’re looking to hire one, this article will give you a valuable insight into the logo making process.
Now, my client approached me with a rebranding project and I know you want to see the logo before and after so here you go:
Now, before we talk about each and every step that led my to that final design, it’s important to briefly remind ourselves what makes a great logo in the first place.
What makes a good logo
Every designer will give you a slightly different definition of what makes a great logo, but basically you can boil it down to the three fundamental logo design principles .
And as the famous logo designer, Sagi Haviv said:
We judge each of our early design concepts by the following criteria: Is it appropriate ? Is it simple ? Is it memorable ?—Sagi Haviv, Identify
These three criteria come in the form of questions that we can ask ourselves when developing logo designs.
Now, let’s explain each of those principles shortly to understand what they really mean.
Is it appropriate?
Appropriate means that the logo is relevant in form and concept to the client and its industry.
For example: If you’re designing for a fashion brand, then the logo needs to be elegant, but if you’re designing for a sports brand, then the logo probably needs to be bold and dynamic.
Is it simple?
Simple means that a logo has to be focused on a single story and in most cases it must be uncomplicated in form .
A logo must be simple so it can work effectively and flexibly in a wide range of sizes and media e.g. in small size on a business card, and in big size such as a signage.
Is it memorable?
Memorable means that while the form must be simple, it must also be distinctive enough to be easily remembered .
Of course the simpler the form is, the less special it tends to become, so the challenge is to keep it simple while making it distinctive enough so it can be remembered.
Ok, so without further ado, let’s jump right into the first step of my logo design process which is the discovery phase.
1. Discover—Get to know the client’s business.
Now, every designer will have a slightly different approach, but most would certainly agree that running a discovery phase and developing some sort of a brand strategy is an absolute must .
Discovery is about getting to know the client’s business, it’s history, industry, competitors and audience.
And this is because logo design is not art, so we shouldn’t just start coming up with logo ideas out of thin air relying purely on our sense of aesthetics.

You see, a logo should serve a specific business objective, so therefore you need to stay objective in the process in order to design something that is appropriate.
A logo is the centerpiece of all brand communication—it’s literally everywhere—so it should stand the test of time.
We naturally don’t want to redesign that logo in the foreseeable future, so we want to give ourselves the best possible chance at designing a logo that will endure.
Before you actually open up the Illustrator and start playing with type, color and shape—you must first brief the client and create a foundation for your creative exploration .
Now, different designers will go to different extent with the discovery phase.
Some designers will just send a branding questionnaire or have a more informal discovery phone call.
However, I use my proprietary brand strategy framework that I run with my clients prior to embarking on any design work.
So I run the strategy workshop with my client, and during that session we go through a series of branding exercises that help me extract all the necessary information about the project.
2. Research—Learn about the industry & competitors.
Now, in the second step, I take all the information form the discovery phase and conduct further research to draw insights that will serve me later on in the ideation phase.
Research is all about analyzing the industry in more detail, conducting visual research and drawing conclusions.
Researching the industry helps you as a designer get a sense of the environment the logo’s going to live in.

The goal of this phase is to better understand the client’s field in order to ensure that the solutions that you will later come up with can work for them effectively.
Now, you need to know what can work and what’s appropriate and most importantly how to differentiate the company from its competitors .
And this understanding may be achieved by experiencing the organization from a customer’s perspective.
So stepping in the customers shoes and further analyzing the industry and competitors is a crucial step in logo design process.

It will help you steer your creativity later on and you will avoid making a mistake of designing something that is too similar to their competitors.
During the strategy session ( 5th exercise ), we start doing some competitive analysis with my client and now I take it further and conduct additional research.
I gain insights from navigating competitors’ websites and evaluating their brand identities .
Then I take notes on what are their strong and weak points, so that it can serve me in the next step—the brainstorming step.
3. Brainstorm—Develop ideas & decide on art direction.
In the brainstorm step, based on the discovery and research performed, I simply start outlining my strategy for generating logo ideas .
Brainstorming is about thinking through all possible design directions that would steer creativity in the right direction.
So here is where I seek out a look or a style that could convey my client’s brand persona (the third part of my strategy framework).

I use the brand personality and tone of voice exercises to help me brainstorm ideas and create moodboards .
And here I also use the mind map (9th exercise of my strategy framework) to start searching for visual representation of the most important keywords distilled from previous steps.
As a result I put together three different mood boards that are basically a collection of visuals that capture the strategic insights.
I simply look at the strategy to distill some keywords and then I browse websites like Behance , Dribble or Pinterest to find some visuals that would make for a great art direction.
I search for the font, color, style etc. and consider all aspects of visual langue that would embody our brand strategy.
For Medihuanna I created three mood boards: Credible , Innovative (below), and Natural and then I review them together with my client.
Next, we discuss those possible solutions and we make some decision on what direction should we proceed with.
By narrowing our focus with mood boards we try to stay objective , so that we can base our sketches in the next phase on solid strategic understanding.
PS. Learn more about moodboards in this article .
4. Sketch—Create logo concepts based on the strategy.
Sketching logos is where real creativity comes into play, but since I’ve done my homework I’m able to judge my sketches against clearly defined criteria .
The goal of sketching is to find a connection between an idea and the creation of a form.
Some designers use a sketchbook while others start right away on the computer, but most professional logo designers sketch logos by hand, using pen on paper.

This is because sketching by hand gives you an immediacy of artistic expression and I believe that very logo designer should absolutely start this way.
It’s also important to decide whether we need a symbol or simply a memorable typographic treatment of the brand name (wordmark).
In case of my client, the name, Medihuanna, is pretty self-explanatory (Medical + Marijuanna), so we’ve decided to go on with a distinctive wordmark.
We also decided that we need a symbol that can act as a visual shorthand, so that It can be used in small sizes where the full name would become illegible.
Now, sketching logos might be time-consuming, so it’s important to take breaks and let your ideas mature and develop in the back of your head.

So that when you get back to your project after a break, then you can have a fresh look, renewed enthusiasm, and therefore you can be much more effective.
You’ve probably also heard about the fact that the best ideas usually come about in the least expected moments.
While your conscious mind is consumed by other tasks (like driving a car, or exercising), then your unconsciousness comes up with some really great ideas.
That’s why I always recommend designers to carry something that you can sketch on.
This step usually takes a few days as you really need to go for quantity here and sketch a ton of logos .
And this is because we need to have many great ideas, so that in the next step we can pick a few strong ones and execute them digitally on computer.
5. Design—Select best logos & execute them digitally.
So once you have a ton of sketches, then you can judge them against the strategy and select the most promising concepts to execute them digitally.
Now, design part is all about translating your sketches into digital form and then further testing viability of each concept.
So don’t rush here to execute every single logo idea that you have, but rather focus only on concepts that you think can work effectively for your client.

By now, you should have a lot of criteria for what could and what could not work for your client.
If you feel like all of your sketches are weak, then you can go back and forth between sketching and designing until you got some pretty exciting logo concepts.
Once you have a few strong logo ideas, then you just need to use Adobe Illustrator to design vector graphics.
Here I simply recreate those sketches on computer and then design multiple variations of each idea in order to arrive on the best option.
The design part can take a very long time (a few days to a few weeks) before you actually execute your ideas in a way that is aesthetically pleasing.
I tweak the designs and test different colors, fonts, spacing, alignment and so on—always making a new copy so that I can always go back to the previous version of my logo.
This step is simply about testing many different ways in which you can execute your logo sketches in order to arrive on the best aesthetics .
Now if you do this the right way (and don’t rush this step) your logo concepts will improve and become stronger very quickly.
6. Present—Show logo concepts & get client's approval.
Once I’m done with designing my logo concepts (and I’m pretty happy with the outcome), then I just need to show them to my client in the form of a presentation.
Show the client your three strongest brand identity concepts on relevant applications.
Remember to share with your client only those solutions that can work for them effectively —don’t make a mistake of showing something that you’re not really proud of.

Each of these three logo concepts is the result of the disciplined but creatively open process I describe here.
While each of those concepts are different, they all revolve around the strategy .
I selected a few applications relevant to the client : a business card, a book cover and a bag in order to show my client how these logo will look like in real life.
How do I know what kind of mockups should I create?—In the exercise six of my strategy framework I list all the key marketing initiatives my client would be interested in, so that now I can use these findings to pick 3 to 5 mockups.
And again, as with other steps in my logo design process, you might need to go back and forth between designing your logo and testing it on applications until you arrive on a great solution.
You simply need to test the viability of each logo concept by creating beautiful mockups to see how it will work in real life.
Learn more about logo presentation (together with my template) in my other article.
If you followed my steps, then your client should be very impressed with the accuracy of your presentation at this point.
My client liked the first concept, so we just tweaked a few details like for example: the leaf alignment, so that the logo looks more balanced.
Sometimes clients can be skeptical about your logo design concepts, but this is simply because all new logos tend to feel foreign at first.
You need to remind your client that only after a logo is officially adopted, we can really embrace it and attach a meaning to it.
In this step you might still want to tweak a few things, combine elements of different concepts and polish the designs before the final approval .
So together with my client we review the advantages and disadvantages of each solution and arrive at a preferred logo design.
7. Delivery—Export logo files & create a style guide.
Once you have your client’s approval, then it’s time to deliver the brand identity package including logo artwork and a style guide.
The delivery package should include logo source files and a style guide that describes on how to use that logo.
And again, you will know exactly what kind of files you should deliver based on the applications outlined in the strategy part ( 5th exercise ).

However, in general make sure to include basic variations of the logo , such as full color, black, white and monochrome.
You should also save logo files for different use both in print and digital (vector & raster) e.g. AI, ESP, PNG, JPG etc.
Remember to inform the client about any commercial fonts being used in the logo or brand identity, just in case they want to design other applications in the future.
Finally, you need to work on a style guide that would show all the logo variations and how to use them (like safe space, placement on dark vs. bright background and so on).
In your style guide you also should specify on other brand identity elements like: color palette, typography system, photography style, perhaps illustrations, animations and other elements.
Depending on the client’s needs and of course on their budget, you can go from a very basic one page style sheet to a more comprehensive brand guideline .
Final word about delivery— remember to always underpromise and overdeliver —I’ve done so by providing my client with an extra logo animation .
PS. Learn more about preparing logo files and creating a style guide on my YouTube channel.
Conclusions
Great logos do not happen by accident—they are the result of strategic thinking, exploring, failing and designing again.
Each aspect of your logo, whether it is shape, font or colors—can help you influence people’s perception of your brand.
When it comes to logo design, you have to be very intentional with the design choices you make.
Ultimately it is all about creativity and skillset , but you also must stay focused and base your concepts on solid strategic understanding.
That’s why I would urge you to NOT skip the initial phases of preparation as it will immensely benefit you later on in your logo design process.
Just see what my client said:

You will stay focused , have more clarity , make less revisions and get there much faster as you normally would if you jumped straight into the design part.
If you follow my process, you will also go beyond your personal preferences or client’s subjective opinion for that matter.
This process will help you defend your work without being defensive —If you’re a logo designer.
And it will help you feel confident when choosing the perfect logo for your brand—if you’re a business owner.
Don't forget to check out my strategy guide if you want to learn how to run discovery sessions with you clients.

Is your logo design process very different from mine?—I'd love to hear from you in the comment below.
Looking for a custom logo for your business?—Just schedule a call to discuss your project.
Also check out my web design process .
As an Amazon Associate, I earn from qualifying purchases.

I'm a branding expert and graphic designer based in NY. I specialize in the development of brands: brand strategy, identity & web design. Need help with your project?— Get in touch

Learn branding
My top branding resources.

Pre-order now

The Brand Naming Guide

The One-Page Style Guide Template
Start your project, good design is good business..
We use essential cookies to make Venngage work. By clicking “Accept All Cookies”, you agree to the storing of cookies on your device to enhance site navigation, analyze site usage, and assist in our marketing efforts.
Manage Cookies
Cookies and similar technologies collect certain information about how you’re using our website. Some of them are essential, and without them you wouldn’t be able to use Venngage. But others are optional, and you get to choose whether we use them or not.
Strictly Necessary Cookies
These cookies are always on, as they’re essential for making Venngage work, and making it safe. Without these cookies, services you’ve asked for can’t be provided.
Show cookie providers
- Google Login
Functionality Cookies
These cookies help us provide enhanced functionality and personalisation, and remember your settings. They may be set by us or by third party providers.
Performance Cookies
These cookies help us analyze how many people are using Venngage, where they come from and how they're using it. If you opt out of these cookies, we can’t get feedback to make Venngage better for you and all our users.
- Google Analytics
Targeting Cookies
These cookies are set by our advertising partners to track your activity and show you relevant Venngage ads on other sites as you browse the internet.
- Google Tag Manager
- Infographics
- Daily Infographics
- Popular Templates
- Accessibility
- Graphic Design
- Graphs and Charts
- Data Visualization
- Human Resources
- Beginner Guides
Blog Beginner Guides How To Make a Good Presentation [A Complete Guide]
How To Make a Good Presentation [A Complete Guide]
Written by: Krystle Wong Jul 20, 2023

A top-notch presentation possesses the power to drive action. From winning stakeholders over and conveying a powerful message to securing funding — your secret weapon lies within the realm of creating an effective presentation .
Being an excellent presenter isn’t confined to the boardroom. Whether you’re delivering a presentation at work, pursuing an academic career, involved in a non-profit organization or even a student, nailing the presentation game is a game-changer.
In this article, I’ll cover the top qualities of compelling presentations and walk you through a step-by-step guide on how to give a good presentation. Here’s a little tip to kick things off: for a headstart, check out Venngage’s collection of free presentation templates . They are fully customizable, and the best part is you don’t need professional design skills to make them shine!
These valuable presentation tips cater to individuals from diverse professional backgrounds, encompassing business professionals, sales and marketing teams, educators, trainers, students, researchers, non-profit organizations, public speakers and presenters.
No matter your field or role, these tips for presenting will equip you with the skills to deliver effective presentations that leave a lasting impression on any audience.
Click to jump ahead:
What are the 10 qualities of a good presentation?
Step-by-step guide on how to prepare an effective presentation, 9 effective techniques to deliver a memorable presentation, faqs on making a good presentation, how to create a presentation with venngage in 5 steps.
When it comes to giving an engaging presentation that leaves a lasting impression, it’s not just about the content — it’s also about how you deliver it. Wondering what makes a good presentation? Well, the best presentations I’ve seen consistently exhibit these 10 qualities:
1. Clear structure
No one likes to get lost in a maze of information. Organize your thoughts into a logical flow, complete with an introduction, main points and a solid conclusion. A structured presentation helps your audience follow along effortlessly, leaving them with a sense of satisfaction at the end.
Regardless of your presentation style , a quality presentation starts with a clear roadmap. Browse through Venngage’s template library and select a presentation template that aligns with your content and presentation goals. Here’s a good presentation example template with a logical layout that includes sections for the introduction, main points, supporting information and a conclusion:

2. Engaging opening
Hook your audience right from the start with an attention-grabbing statement, a fascinating question or maybe even a captivating anecdote. Set the stage for a killer presentation!
The opening moments of your presentation hold immense power – check out these 15 ways to start a presentation to set the stage and captivate your audience.
3. Relevant content
Make sure your content aligns with their interests and needs. Your audience is there for a reason, and that’s to get valuable insights. Avoid fluff and get straight to the point, your audience will be genuinely excited.
4. Effective visual aids
Picture this: a slide with walls of text and tiny charts, yawn! Visual aids should be just that—aiding your presentation. Opt for clear and visually appealing slides, engaging images and informative charts that add value and help reinforce your message.
With Venngage, visualizing data takes no effort at all. You can import data from CSV or Google Sheets seamlessly and create stunning charts, graphs and icon stories effortlessly to showcase your data in a captivating and impactful way.

5. Clear and concise communication
Keep your language simple, and avoid jargon or complicated terms. Communicate your ideas clearly, so your audience can easily grasp and retain the information being conveyed. This can prevent confusion and enhance the overall effectiveness of the message.
6. Engaging delivery
Spice up your presentation with a sprinkle of enthusiasm! Maintain eye contact, use expressive gestures and vary your tone of voice to keep your audience glued to the edge of their seats. A touch of charisma goes a long way!
7. Interaction and audience engagement
Turn your presentation into an interactive experience — encourage questions, foster discussions and maybe even throw in a fun activity. Engaged audiences are more likely to remember and embrace your message.
Transform your slides into an interactive presentation with Venngage’s dynamic features like pop-ups, clickable icons and animated elements. Engage your audience with interactive content that lets them explore and interact with your presentation for a truly immersive experience.

8. Effective storytelling
Who doesn’t love a good story? Weaving relevant anecdotes, case studies or even a personal story into your presentation can captivate your audience and create a lasting impact. Stories build connections and make your message memorable.
A great presentation background is also essential as it sets the tone, creates visual interest and reinforces your message. Enhance the overall aesthetics of your presentation with these 15 presentation background examples and captivate your audience’s attention.
9. Well-timed pacing
Pace your presentation thoughtfully with well-designed presentation slides, neither rushing through nor dragging it out. Respect your audience’s time and ensure you cover all the essential points without losing their interest.
10. Strong conclusion
Last impressions linger! Summarize your main points and leave your audience with a clear takeaway. End your presentation with a bang , a call to action or an inspiring thought that resonates long after the conclusion.
In-person presentations aside, acing a virtual presentation is of paramount importance in today’s digital world. Check out this guide to learn how you can adapt your in-person presentations into virtual presentations .

Preparing an effective presentation starts with laying a strong foundation that goes beyond just creating slides and notes. One of the quickest and best ways to make a presentation would be with the help of a good presentation software .
Otherwise, let me walk you to how to prepare for a presentation step by step and unlock the secrets of crafting a professional presentation that sets you apart.
1. Understand the audience and their needs
Before you dive into preparing your masterpiece, take a moment to get to know your target audience. Tailor your presentation to meet their needs and expectations , and you’ll have them hooked from the start!
2. Conduct thorough research on the topic
Time to hit the books (or the internet)! Don’t skimp on the research with your presentation materials — dive deep into the subject matter and gather valuable insights . The more you know, the more confident you’ll feel in delivering your presentation.
3. Organize the content with a clear structure
No one wants to stumble through a chaotic mess of information. Outline your presentation with a clear and logical flow. Start with a captivating introduction, follow up with main points that build on each other and wrap it up with a powerful conclusion that leaves a lasting impression.
Delivering an effective business presentation hinges on captivating your audience, and Venngage’s professionally designed business presentation templates are tailor-made for this purpose. With thoughtfully structured layouts, these templates enhance your message’s clarity and coherence, ensuring a memorable and engaging experience for your audience members.
Don’t want to build your presentation layout from scratch? pick from these 5 foolproof presentation layout ideas that won’t go wrong.

4. Develop visually appealing and supportive visual aids
Spice up your presentation with eye-catching visuals! Create slides that complement your message, not overshadow it. Remember, a picture is worth a thousand words, but that doesn’t mean you need to overload your slides with text.
Well-chosen designs create a cohesive and professional look, capturing your audience’s attention and enhancing the overall effectiveness of your message. Here’s a list of carefully curated PowerPoint presentation templates and great background graphics that will significantly influence the visual appeal and engagement of your presentation.
5. Practice, practice and practice
Practice makes perfect — rehearse your presentation and arrive early to your presentation to help overcome stage fright. Familiarity with your material will boost your presentation skills and help you handle curveballs with ease.
6. Seek feedback and make necessary adjustments
Don’t be afraid to ask for help and seek feedback from friends and colleagues. Constructive criticism can help you identify blind spots and fine-tune your presentation to perfection.
With Venngage’s real-time collaboration feature , receiving feedback and editing your presentation is a seamless process. Group members can access and work on the presentation simultaneously and edit content side by side in real-time. Changes will be reflected immediately to the entire team, promoting seamless teamwork.

7. Prepare for potential technical or logistical issues
Prepare for the unexpected by checking your equipment, internet connection and any other potential hiccups. If you’re worried that you’ll miss out on any important points, you could always have note cards prepared. Remember to remain focused and rehearse potential answers to anticipated questions.
8. Fine-tune and polish your presentation
As the big day approaches, give your presentation one last shine. Review your talking points, practice how to present a presentation and make any final tweaks. Deep breaths — you’re on the brink of delivering a successful presentation!
In competitive environments, persuasive presentations set individuals and organizations apart. To brush up on your presentation skills, read these guides on how to make a persuasive presentation and tips to presenting effectively .

Whether you’re an experienced presenter or a novice, the right techniques will let your presentation skills soar to new heights!
From public speaking hacks to interactive elements and storytelling prowess, these 9 effective presentation techniques will empower you to leave a lasting impression on your audience and make your presentations unforgettable.
1. Confidence and positive body language
Positive body language instantly captivates your audience, making them believe in your message as much as you do. Strengthen your stage presence and own that stage like it’s your second home! Stand tall, shoulders back and exude confidence.
2. Eye contact with the audience
Break down that invisible barrier and connect with your audience through their eyes. Maintaining eye contact when giving a presentation builds trust and shows that you’re present and engaged with them.
3. Effective use of hand gestures and movement
A little movement goes a long way! Emphasize key points with purposeful gestures and don’t be afraid to walk around the stage. Your energy will be contagious!
4. Utilize storytelling techniques
Weave the magic of storytelling into your presentation. Share relatable anecdotes, inspiring success stories or even personal experiences that tug at the heartstrings of your audience. Adjust your pitch, pace and volume to match the emotions and intensity of the story. Varying your speaking voice adds depth and enhances your stage presence.

5. Incorporate multimedia elements
Spice up your presentation with a dash of visual pizzazz! Use slides, images and video clips to add depth and clarity to your message. Just remember, less is more—don’t overwhelm them with information overload.
Turn your presentations into an interactive party! Involve your audience with questions, polls or group activities. When they actively participate, they become invested in your presentation’s success. Bring your design to life with animated elements. Venngage allows you to apply animations to icons, images and text to create dynamic and engaging visual content.
6. Utilize humor strategically
Laughter is the best medicine—and a fantastic presentation enhancer! A well-placed joke or lighthearted moment can break the ice and create a warm atmosphere , making your audience more receptive to your message.
7. Practice active listening and respond to feedback
Be attentive to your audience’s reactions and feedback. If they have questions or concerns, address them with genuine interest and respect. Your responsiveness builds rapport and shows that you genuinely care about their experience.

8. Apply the 10-20-30 rule
Apply the 10-20-30 presentation rule and keep it short, sweet and impactful! Stick to ten slides, deliver your presentation within 20 minutes and use a 30-point font to ensure clarity and focus. Less is more, and your audience will thank you for it!
9. Implement the 5-5-5 rule
Simplicity is key. Limit each slide to five bullet points, with only five words per bullet point and allow each slide to remain visible for about five seconds. This rule keeps your presentation concise and prevents information overload.
Simple presentations are more engaging because they are easier to follow. Summarize your presentations and keep them simple with Venngage’s gallery of simple presentation templates and ensure that your message is delivered effectively across your audience.

1. How to start a presentation?
To kick off your presentation effectively, begin with an attention-grabbing statement or a powerful quote. Introduce yourself, establish credibility and clearly state the purpose and relevance of your presentation.
2. How to end a presentation?
For a strong conclusion, summarize your talking points and key takeaways. End with a compelling call to action or a thought-provoking question and remember to thank your audience and invite any final questions or interactions.
3. How to make a presentation interactive?
To make your presentation interactive, encourage questions and discussion throughout your talk. Utilize multimedia elements like videos or images and consider including polls, quizzes or group activities to actively involve your audience.
In need of inspiration for your next presentation? I’ve got your back! Pick from these 120+ presentation ideas, topics and examples to get started.
Creating a stunning presentation with Venngage is a breeze with our user-friendly drag-and-drop editor and professionally designed templates for all your communication needs.
Here’s how to make a presentation in just 5 simple steps with the help of Venngage:
Step 1: Sign up for Venngage for free using your email, Gmail or Facebook account or simply log in to access your account.
Step 2: Pick a design from our selection of free presentation templates (they’re all created by our expert in-house designers).
Step 3: Make the template your own by customizing it to fit your content and branding. With Venngage’s intuitive drag-and-drop editor, you can easily modify text, change colors and adjust the layout to create a unique and eye-catching design.
Step 4: Elevate your presentation by incorporating captivating visuals. You can upload your images or choose from Venngage’s vast library of high-quality photos, icons and illustrations.
Step 5: Upgrade to a premium or business account to export your presentation in PDF and print it for in-person presentations or share it digitally for free!
By following these five simple steps, you’ll have a professionally designed and visually engaging presentation ready in no time. With Venngage’s user-friendly platform, your presentation is sure to make a lasting impression. So, let your creativity flow and get ready to shine in your next presentation!
Discover popular designs

Infographic maker

Brochure maker

White paper online

Newsletter creator

Flyer maker

Timeline maker

Letterhead maker

Mind map maker

Ebook maker
Professional Logo Design Process: How To Make Logos
A logo is often the first impression a company makes on potential customers. It's an iconic representation of your brand, encapsulating your vision, personality, and values into a single graphic design . At Inkbot Design , we understand the importance of getting your logo right from the start. Over the years, we've developed a proven logo design process, allowing us to create logos our clients love consistently.
In this blog post, I'll walk you through our logo design process from start to finish. I'll explain the critical steps and best practices we follow to develop distinctive, meaningful, and memorable logos . Whether you're looking to create a logo for your company or simply interested in how the logo design process works, you'll get an inside look at our team's methods to craft logos our clients are proud to put on their products, websites and marketing materials.
Developing an effective logo requires skill, experience, and thoughtful collaboration with the client. Our process facilitates this collaboration and ensures we create tailored logo solutions that capture the heart of our clients' brands. We're excited to provide insight into how we bring logos to life.
- A well-designed logo is crucial for a business: A logo represents the brand identity and serves as a visual representation. It creates a lasting impression on consumers and helps differentiate a company from its competitors.
- The logo design process involves various steps: Gathering information and understanding the brief allows designers to meet client expectations. Researching and understanding the target audience helps create a logo that resonates with them. Sketching, conceptualising, refining, and selecting the final design are essential to creating an impactful logo.
- Colour , typography , and shape play significant roles in logo design. Choosing the right colour palette evokes emotions and establishes brand recognition. Selecting appropriate typography ensures readability and reflects the brand's personality . Creating meaningful shapes and symbols adds visual interest and communicates the brand message effectively.
- Logo design file formats and guidelines are essential considerations: Using vector file formats ensures scalability and maintains design integrity. Considering different file formats for various use cases, such as print or digital, provides versatility and compatibility.
- Challenges can arise during the logo design process: Overcoming challenges and ensuring a successful logo design process requires effective communication, understanding client goals, and adapting to changing requirements. Collaboration and feedback play a vital role in achieving the desired outcome.
Table of Contents
The Importance of a Well-Designed Logo
A well-designed logo is crucial for any business or organisation as it serves as a visual representation and the face of the brand. It is essential to create a logo that accurately conveys the identity and values of the company.
A well-designed logo helps establish brand recognition . When customers see a symbol associated with a particular brand , it triggers their memory and creates a connection. This connection builds trust and loyalty , making customers more likely to choose that brand. For example, the golden arches of McDonald's or the bitten apple of Apple Inc. are instantly recognisable logos that have become synonymous with their respective brands.
A well-designed logo also helps differentiate a business from competitors in a crowded marketplace. A unique and eye-catching logo can capture the attention of potential customers and set the brand apart from others offering similar products or services. A prime example is the Nike swoosh, which distinguishes the brand in the athletic apparel industry.
Moreover, a well-designed logo can evoke emotions and create a lasting impression. The colours, font, and imagery used in a logo can communicate the brand's personality and values. For instance, bright and playful colours may convey a fun and energetic brand, while muted tones indicate sophistication and elegance. This emotional connection formed through the logo can influence customers' perceptions and attitudes towards the brand.
In addition, a well-designed logo enhances brand credibility and professionalism . Customers are more likely to trust a business with a polished and professional logo, as it gives the impression that the brand is established, reliable, and pays attention to detail.
To illustrate the importance of a well-designed logo, let's consider the case of a small bakery in a crowded city. The bakery had a generic logo that blended in with the rest of the competition. However, after investing in a professional designer to create a new logo that incorporated elements of their handcrafted products, the bakery saw a significant increase in customer traffic. The new logo helped differentiate the bakery from its competitors and communicated its commitment to quality and authenticity. Within a few months, the bakery experienced a 25% increase in sales, proving the power of a well-designed logo.
Understanding the Logo Design Process
Let's dive into the fascinating world of logo design and understand the step-by-step process behind it. We'll explore various aspects, such as gathering information, researching the target audience, sketching ideas, refining designs, and selecting the final masterpiece. Along the way, we'll discover how designers creatively combine meaningful shapes, symbols, and typography to leave a lasting impact on viewers. So, join me as we embark on a journey to unravel the intricacies of the logo design process from start to finish.
Professional Logo Design Process

1.0 – Construct the Creative Design Brief
Gathering information and understanding the brief is essential when starting the logo design process. This step is crucial in creating a successful logo design that aligns with the client's vision and goals. Here are the critical steps involved in gathering information and understanding the brief:
1. Communication with the client: Begin by having a detailed discussion with the client to comprehend their business, industry, and target audience. Gather insights into their values, mission, and unique selling proposition .
2. Identify the scope and requirements: Determine the specific deliverables and conditions for the logo design project. Clarify the desired style, format, colour preferences, and any particular imagery or symbolism the client wants to incorporate.
3. Research the competition: Analyse the client's competitors to understand the market landscape better. Identify common design elements and visualise ways to differentiate the client's logo from the competition.
4. Research the target audience: Conduct thorough research on the client's target audience. Understand their demographics, preferences, and values. This insight will help create a logo that resonates with the target audience and effectively communicates the client's message.
5. Define design objectives: Based on the gathered information, establish clear design objectives for the logo. These objectives should align with the client's brand identity, positioning, and desired message.
6. Set project timelines and constraints: Discuss project timelines, budget, and any other limitations with the client. This will ensure the design process stays on track and within the defined parameters.
Pro-tip: During the initial meeting, ask open-ended questions to encourage clients to share their thoughts and ideas freely. This will help you better understand their requirements and facilitate a more collaborative approach to the logo design process.
1.1 – What is a Creative Design Brief?
A creative design brief is a document for a design or development project created during a consultation between the client and the designer.
In our case, it is a set of around 20 questions and takes approximately one hour to complete.
The more complete the answers, the better we can communicate through the design concepts – so we advise clients to spend time completing it.
1.2 – What Questions do we ask Clients?
The logo and branding questionnaire we use is broken down into several key areas:
– About Your Business – What does your business/product do? What problem do you solve for your customers? What about your background, product, or service sets you apart from your competitors?
– About Your Customers – Describe your ideal client; what is the primary message you want to convey to your customers?
– About the Project – If you have an existing brand/identity, why isn’t it working for you? Please share three links to Brands/Logos that inspire you. What do you like best about them? Describe your brand’s desired look and feel using five adjectives or short phrases.
2.0 – Research & Discovery Phase
Once the answers to the questionnaire are complete, we will go through and build up a solid base to work from moving forward.
Further questions may arise, which can be discussed so we can best understand the project before getting started.
2.1 – Client Discovery
We look into the existing business (unless it is a brand new startup ) and uncover where they are currently regarding Branding overall.
There may be facets of their business that had not been mentioned in the initial consultation. Still, the critical point to client discovery is understanding their issues further to provide the best solution possible.
Often, the client may not know ‘why’ their brand is struggling, but to an expert brand consultant , looking at their current setup may provide meaningful answers in the logo design process.
2.2 – Industry Discovery
Working in many industries, learning about the particular ’niche’ the client resides in is always important.
We look at their competitors to see what they are doing – if they are doing well, we consider what they are doing right.
If they are doing things badly, we can quickly know what to avoid to help our clients succeed.
2.3 – Qualitative Research & Quantitative Research
For a more comprehensive Brand Identity design process, we delve deeper into the Brand in question research levels through Qualitative and Quantitative research methods.
Naturally, this takes a lot of time, so the lower-priced logo design packages will tend to skip over this part.
Qualitative Research is primarily exploratory research.
We use it to discover reasons, opinions, and motivations – it provides insights into the overall problem.
Qualitative Research is also used to uncover trends in thought and opinion.
Quantitative Research is used to quantify the problem by way of generating numerical data that can be formatted into usable statistics.
It is used to quantify attitude, opinion, behaviour, and other defined variables – and generalise results from a larger sample population.
Quantitative Research uses measurable data to formulate facts and uncover patterns in research.
2.4 – Researching the Target Audience
Researching and understanding the target audience is crucial in the logo design process. It helps designers create a logo that effectively appeals to the intended audience and aligns with their preferences and values.
- Demographics : Analysing the demographic factors of the target audience, such as age, gender, location, and income level, provides insights into their characteristics and preferences. For example, a logo targeting young adults in urban areas may use vibrant colours and modern typography.
- Psychographics : Understanding the psychographic traits of the target audience, including their interests, lifestyle, and values, helps designers create a logo that resonates with their emotions and aspirations. Incorporating nature-inspired elements for a logo targeting environmentally conscious consumers can evoke a sense of sustainability and eco-friendliness.
- Competitor Analysis : Researching competitors' logos and branding strategies within the same industry or niche helps designers identify unique visual elements and establish differentiation. By analysing the target audience's response to competitor logos, designers can create a logo that stands out and appeals to their desires and expectations.
- Feedback and Testing : Gathering feedback from the target audience through surveys, focus groups, or online platforms allows designers to understand their preferences and make necessary adjustments to the logo design. This iterative process ensures the final logo effectively communicates the intended message to the target audience.
A true story that reflects the importance of researching and understanding the target audience involves a small local bakery. The bakery had a logo that was designed without considering its target audience. The logo featured bold and vibrant colours, modern typography, and abstract shapes, which appealed more to a younger, urban demographic. The core customer base of the bakery was primarily older individuals from the local community who preferred traditional and nostalgic elements.
After conducting market research and understanding the target audience, the bakery redesigned its logo by incorporating classic visuals and a softer colour palette. As a result, the redesigned logo resonated better with the target audience, leading to increased brand recognition and customer loyalty.

3.0 – Logo Sketches & Brainstorming
When sketching and conceptualising ideas for a logo, it's essential to start by gathering all relevant information and understanding the brief provided by the client. This involves understanding their business, target audience, and design preferences. Once you have a clear understanding of the client's requirements, you can proceed with the following steps:
- Research and analyse the target audience to understand their preferences, interests, and expectations. This will help you create a logo that resonates with them.
- Brainstorm and sketch out different ideas and concepts for the logo. Explore various design styles, typography options, and symbols that align with the brand's identity and objectives.
- Experiment with different logo design variations , using different layouts, colours, and shapes. This stage allows for exploration and creativity to bring the initial ideas to life.
- Share the sketches and conceptualised ideas with the client for feedback and input. This collaboration ensures the design aligns with their vision and meets their expectations.
- Based on the client's feedback , refine and iterate on the design. Make necessary adjustments and enhancements to improve the concept and visual appeal of the logo.
- Repeat the feedback and iteration process until a final design is selected. This involves multiple revisions to ensure the client's satisfaction and the logo's effectiveness.
During one of my experiences sketching and conceptualising ideas for a client's logo, I had a unique encounter. The client was a small, eco-friendly skincare brand that wanted a logo that reflected their commitment to sustainability and natural ingredients. As brainstorming ideas, I stumbled upon using leaves as a prominent element in the logo design.
I started sketching different variations of leaves, exploring different shapes and arrangements. The client loved the idea and was particularly drawn to the simplicity and elegance of a single leaf. We discussed the symbolism of the leaf, representing growth, renewal, and the natural elements that the brand emphasised.
Inspired by this concept, I further refined the design by incorporating subtle curves and lines to depict the intricate details of the leaf. I experimented with different colour schemes, finally settling on earthy tones to reinforce the brand's connection to nature.
The client was thrilled with the final logo design, as it beautifully captured their brand values and connected with their target audience. It was a rewarding experience to see how a simple idea and sketch evolved into a meaningful and impactful logo that accurately represented their brand identity.
3.1 – Mood boards and Reference Imagery
Mood boards and reference imagery are collected from the start, occasionally with assistance from the client who has sent over images that portray the look or feel of what they want to communicate in the logo design.
It can be hard to describe ’themes’ or colours in words, so we recommend the client send us some visual inspiration if they can.
3.2 – Quick Sketches and Basic Forms
From the first sketch in the notepad, visual iconography or shapes may be appealing and worthy of development.
At this stage, we may move to the grid or dotted paper, redrawing and enlarging the original design and refining it with a pen for the next step.
3.3 – Refining the Logo with Gridlines
Further development of the logo sketches may include grids and lines drawn to balance and align things correctly.
Even organic shapes can be improved with a constructed grid, be it how the logomark could sit alongside the logotype.
4.0 – Conceptualisation
Although conceptualisation can be defined as ’the forming of a concept’, at this point in the logo design process for clients, it is more a case of refining an idea further by getting onto a computer.
The ‘idea’ is given a new viewpoint when it can be viewed on a screen, allowing us to observe any immediate concerns that may have been overlooked in the sketch.
4.1 – Creating Digital Versions of the Sketchbook
When it comes to logo design, creating initial digital designs is an essential step in the logo design process. Here are the steps involved:
- Review the gathered information and brief: Before starting the digital design process, thoroughly reviewing the collected data and the logo design brief is crucial. This will give a clear understanding of the client's requirements and expectations.
- Brainstorm ideas and concepts: Next, brainstorm various ideas and concepts for the logo design. This can be done through sketching, mind mapping, or any other creative technique that helps generate initial design concepts.
- Choose the appropriate design software: Select the proper design software based on the project's requirements. Popular graphic design software options include Adobe Illustrator , CorelDRAW, or Sketch.
- Create initial design concepts: Utilising the chosen design software, start creating the initial digital design concepts. Begin by exploring different typography options, shapes, and symbols that align with the client's brand identity and values.
- Experiment with colour schemes: Explore different colour schemes to enhance the visual appeal of the logo design. Consider the psychology of colours and their impact on the target audience. Remember to choose colours that resonate with the brand's personality and evoke the desired emotional response.
- Iterate and refine the designs: Once the initial digital designs are created, iterate and refine them based on client or design team feedback. This involves making necessary adjustments and improvements to create a more polished and visually cohesive logo design.
- Consider scalability and versatility: During the initial digital design phase, it is essential to ensure that the logo design is scalable and versatile. The design should maintain its visual integrity and legibility across different sizes and mediums.
Creating initial digital designs is a crucial step in the logo design process as it sets the foundation for the final design. Following these steps, designers can create visually compelling logos that accurately represent the client's brand.
4.2 – Exploration in Monotone
Before colours are applied to any design, consideration of the logo design process must be taken in monotone black and white shades.
These are the extremes of colour, light and tone.
We see a lot of poorly created logo designs where the designer did not worry about how the logo would look in black and white.
Even though ‘fax’ as a medium is dying out, a great logo design must have the ability to look good in any format, in any output.
4.3 – Creating a Logotype
Once we have some rough ideas for the logomark, we will start thinking about how the company name will be represented through the logotype.
We will have a general idea of the style of typeface we are looking for, such as a contemporary sans-serif or old-style serif. Still, finding the perfect font for the job involves browsing through an extensive library we have collected.
If we want to be communicated to find anything that fits the bill, a stylistically ‘close’ font may be customised to fit the project's needs.
This can be advantageous, as it creates a unique quality for the Brand; however, expanding this to a bespoke font may add to the costs involved.
4.4 – Pulling it all together
Once we have a handful of typefaces appropriate to the Brand, we will explore how they look side-by-side with the logomark symbols created previously.
Several chosen colour palettes will be integrated into the design to see what feels like the most assertive approach.
Ultimately, this part of the logo design process involves many comparison prints that can be considered on one page.

5.0 – Refinement & Client Presentation
The strongest logo concepts will be collated into a client presentation document at this juncture.
We will show how the logo looks on various background colours, at different scales and alongside some logo mockups , such as a design rendering on a uniform or vehicle wraps.
This helps the client visualise their logo in a ‘real world’ setting rather than just central on a page.
5.1 – Colour Scheme Exploration
Again, alternative colour schemes may be presented to the client at this stage to help visualise the concept's potential.
As we said before, colour is subjective, and a simple hue shift can make a difference.
Maybe one of the red tones is quite vivid or a tone too light; we can show some quick alternatives to suit every eye.
5.2 – Future-proofing Adaptability
Consideration of ‘how’ the logo may know in future is taken, for we believe a logo should be timeless rather than create issues down the line or appear dated in just a few years.
5.3 – Creating Digital Mockups
For example, showing how a concept could look if the client uses it on a shirt can help them see the idea over the visual aesthetic.
It always impresses, too, so we ensure appropriate mockups are included.
5.4 – Logo Design Presentation to Client
The initial logo design presentation is exported to a secure PDF format, allowing them to view it on screen or print it out.
Printing is always recommended as their monitor may not show colours accurately, and the embedded print profiles allow for a more accurate representation.
Each concept has its PDF, ranging from 5-10+ pages depending on the project's scope.
6.0 – Feedback & Consultation
We advise clients to at least spend a few days to a week with the initial concepts, although first impressions are always worth noting.
Print them out, stick them around the house or office and let the eye be drawn to them randomly and naturally, as any real-life viewer may do when encountering the Brand.
Get feedback from trusted friends and family, including current employees who will understand the Brand through their involvement.
Even if there are mixed opinions, all are valid and provide direction that allows us to improve anything that may be needed.
Afterwards, a meeting can be arranged, or feedback can be provided via email to move forward.
Occasionally, we will have more questions at this stage to further extract detailed feedback from the client.
6.1 – Discuss Logo Concepts with the Client
We will discuss the concepts with the customer to gauge feedback.
The discussion may take no time if the client has found one of the concepts perfect for several hours if they have any uncertainties or questions that need clarifying.
It is all part of a professional logo design process!
6.2 – Advise and Provide Guidance on Selection
When selecting the final design for a logo, there are several vital steps to consider. These steps ensure the chosen method is visually appealing and effectively communicates the desired brand identity. Here is a list of steps to follow:
- Review the design brief: Before making a final decision, carefully review the design brief provided by the client. This document outlines the specific requirements and preferences for the logo design.
- Gather feedback: Seek feedback from stakeholders, such as the client or team members, to gather different perspectives and insights on the design options. This helps ensure a well-rounded evaluation process.
- Consider the target audience: Evaluate how the final design aligns with the expectations and preferences of the target audience. A logo must resonate with the intended audience to be effective.
- Assess scalability: Examine how the final design will appear in various sizes and formats. A logo must be scalable to maintain its visual integrity across different mediums, such as print and digital.
- Test for versatility: Test the flexibility of the final design by applying it to different applications, such as business cards , websites, and social media profiles. The design should work well and convey the desired message across various platforms.
- Evaluate simplicity and memorability: Assess whether the final design is simple yet memorable. Simple logos are often more versatile and have a greater chance of being easily recognised and remembered by the audience.
- Consider colour and typography: Analyse how the chosen colour palette and typography enhance or detract from the overall design. Colours and fonts should align with the brand's identity and convey the desired message.
- Solicit final feedback: Seek the client's last input and approval on the design. Ensure that any requested revisions or adjustments are incorporated into the final version.
- Ensure the design aligns with brand values: Evaluate whether the final design accurately represents the brand's values , personality, and positioning. The logo serves as a visual representation of the brand and should convey the desired image.
- Make a final decision: Based on the feedback, evaluation, and alignment with brand values, make an informed decision on the final design. Ensure the chosen method meets all the criteria and effectively communicates the desired message.
By following these steps, you can confidently select the final design for a logo that will effectively represent the brand and resonate with the target audience.
6.3 – Discuss Potential Developments the Client would like to see
Development varies considerably between projects, but overall, it is easier to develop the aesthetic side than the conceptual.
Aspects such as an alternate colour scheme or typeface can change the ‘look’, but the significance or meaning of a logo is much harder to modify.
7.0 – Concept Development
Based on the feedback and discussion with the client, we will look into developing and tweaking a chosen concept.
This may be minor changes to the colour scheme, looking at different layouts, or presenting some alternative typefaces for consideration.
In almost every case, one concept will be perfect for the client, but occasionally, we have had to go down two chosen routes where a client cannot decide.
Usually, at this point, only one or two development cycles are needed, as it comes down to a colour or style element.
8.0 – Completed Graphic Design Presentation
Like the initial concept presentation, this stage involves a more focused approach, where one concept has been fully fleshed out.
Further mockups and realised stationery or business cards could be presented as the next logical step.
The Branding Process Steps

9.0 – Expansion of Brand Collateral
Once the final logo design has been signed off, providing that it is not the end of the project based on the client’s needs.
We can move to expand the logo onto the further branding process steps.
As mentioned before, a typical example is company stationery.
Everything from letterheads to business cards or marketing materials can be created.
9.1 – Create Branded Stationery based on the Final Logo Design
Based on the client's physical location, the local stationery dimensions must be considered.
A UK printer's letterhead differs significantly from a US-based printer's.
We have created several templates that suit the global location of the customer, so it is just a case of working to build the specific layouts.
9.2 – Expand the Branding onto Social Media Elements
From the social network profile images to the banners and headers, current dimensions ensure everything looks perfect for the big reveal of the new Brand Identity to the world.
9.3 – Provide any Further Brand Collateral Required – Vehicle Wraps, Signage, etc.
This step in the logo design process is always individual to the client, as not every business would need external signage .
If you run a gym, you may need to be Branded with uniforms, or if you own a car salesroom, vehicle wraps may be the better fit.

10.0 – Final Files, Delivery & Support
Everything is created in vector format in Adobe Illustrator and can be exported to any format required.
The standard files consist of AI (for future editing if desired), .EPS / .PDF (for printing), .JPEG (for viewing) and PNG (with a transparent background for web use).
The Vector file formats allow maximum output range because you can scale the size without losing quality or sharpness.
This means the logo design on a business card will also look perfect on a billboard.
10.1 – Export all Final Files and Organise
The final files for a project will be neatly arranged so that the files are clear where they will be used.
All appropriate formats and layouts and monotone black-and-white versions for varied usage backgrounds are included.
If there is any ‘layout’ design, such as brochures or marketing flyers, files will be packaged in InDesign to include the images and fonts used, where applicable.
10.2 – Create Brand Guidelines Document
Brand Guidelines are just the ‘rules’ of how the Brand will be presented to the world.
They can be passed along to a web developer who can quickly see the exact colour values to use on the website and what fonts to utilise in the content.
Similarly, these guidelines can be sent to a printer to ensure maximum accuracy when the documents are printed through Pantone colour values.
10.3 – Send ZIP to Client and Permanently Archive
Everything is zipped up and emailed to the customer, CC’ing any additional employees needing access to the original files.
We then permanently archive the ZIP file into our cloud archive, allowing the client to have a backup should they misplace the designs.
10.4 – Ensure the Client Understands all Final Files and give Usage Instructions
We want to ensure the client knows how to use the designs they have paid us for so we can provide immediate assistance or answer any questions they may have at any point in the future.
The Role of Colour, Typography, and Shape in Logo Design
The Role of Colour, Typography, and Shape in Logo Design cannot be underestimated. This section will explore the importance of choosing the right colour palette, examine the differences between vector and raster file formats, and how they impact logo scalability and versatility. We'll also discuss the importance of using the appropriate file formats for different use cases. So, let's unravel the power of colour, typography, and shape in creating impactful logos!
Choosing the Right Colour Palette

Choosing the Right Colour Palette is an essential aspect of logo design as it contributes to creating a visually appealing and practical design. Here are some factors to consider when selecting the colour palette for your logo:
- Brand Identity: The colours you choose should align with your brand identity and the message you want to convey. Each colour has psychological associations, so consider the emotions and values you want your logo to evoke.
- Colour Theory: Understanding colour theory can help create harmonious and visually appealing combinations. Consider factors such as complementary colours, analogous colours, and the use of warm or cool tones to create balance and contrast in your logo.
- Target Audience: Consider the preferences and cultural associations of your target audience. Different colours have different meanings in different cultures, so choosing colours that resonate with your audience and are appropriate for your industry is essential.
- Contrast and Legibility: Ensure that your chosen colour palette allows for clear contrast and legibility of your logo. Avoid using colours that may blend or make reading or recognising your logo difficult.
- Versatility: Your logo will be used across various mediums, from small digital screens to print materials. Consider how your chosen colours will appear in different sizes and formats to ensure they maintain their impact and legibility.
- Competitor Analysis: Research your industry and competitors to understand the colour palettes commonly used. This will help you differentiate your brand while still maintaining visual appeal.
Remember, the right colour palette can significantly impact the success and recognition of your logo . Take the time to carefully consider these factors and choose a colour palette that aligns with your brand and effectively communicates your message.
Selecting Appropriate Typography

Choosing the right typography is a crucial aspect of logo design. It helps to convey the brand's personality, set the tone, and enhance the logo's message. When selecting appropriate typography, several factors need to be considered.
The font style should align with the brand's identity and target audience. A clean and elegant serif font could suit a professional and sophisticated brand. On the other hand, a bold and modern sans-serif font may be more appropriate for a tech-savvy or edgy brand. Understanding the brand's values and the target audience's preferences is essential in making the right choice.
Legibility is of utmost importance. The chosen typography should be easily readable, even at small sizes or from a distance. Avoiding intricate or overly decorative fonts can ensure the logo is easily understandable and recognisable. The contrast between the text and the background is necessary to maintain readability.
Consistency across different platforms and applications is vital. The selected typography should be available in various formats and have a range of weights and styles. This consistency ensures the logo remains cohesive and visually appealing across print, digital, or signage mediums.
The typography should have the potential for customisation and adaptability. It should be flexible enough to accommodate alterations without losing its essence, allowing for variations in marketing materials or future brand iterations.
Appropriate typography for a logo requires careful consideration of the brand's identity, legibility, consistency, and adaptability. By understanding the brand's values and target audience, designers can make informed choices to create an impactful and visually striking logo . History shows us that the evolution of typography has played a significant role in shaping design and communication. From ancient hieroglyphics to the invention of movable type by Johannes Gutenberg, typography has evolved to become a complex art form. It continues to grow with modern digital platforms, offering designers an extensive array of choices and possibilities. Selecting appropriate typography remains central to creating visually stunning and impactful logos.
Creating Meaningful Shapes and Symbols
When creating shapes and symbols for a logo, it is essential to have a deep understanding of the brand or company. This includes knowing its values, mission, target audience, and overall aesthetic.
Start by brainstorming various shapes and symbols that align with the brand's values and message. Consider the emotions or associations that different shapes and symbols can evoke.
Research cultural and historical symbols that may be relevant to the brand. Look for symbols that have meanings aligning with the brand's values or characteristics.
Begin sketching rough ideas for shapes and symbols based on brainstorming and research. Explore different variations and combinations to find the most effective and meaningful design.
Review the initial sketches and identify areas where simplification and refinement can improve the design. Avoid overcrowding the logo with excessive details and ensure the shapes and symbols are easily recognisable.
Transfer the refined sketches into digital design software to create clean and polished versions of the shapes and symbols. Pay attention to details such as symmetry, proportions, and consistency.
Test the shapes and symbols at different sizes to ensure they maintain clarity and legibility. A meaningful design should be recognisable even when scaled down to small sizes or used in other contexts.
Assess how the shapes and symbols can be adapted and used across various applications. They should work well in large-scale and small-scale formats like signage and social media avatars.
Share the designs with clients, peers, or focus groups to gather feedback and perspectives. This can help identify any improvements or adjustments that could enhance the effectiveness of the shapes and symbols.
Based on the feedback received, make necessary iterations to the shapes and symbols. Continually refine and fine-tune until the final design is achieved, capturing the desired essence and meaning.
Creating meaningful shapes and symbols for a logo is thoughtful and iterative , aligning with the brand's values and resonating with its target audience.
Logo Design File Formats and Guidelines

When it comes to logo design, it is crucial to understand the various file formats and guidelines to ensure the best results. Here is a list of important considerations:
Vector format: Logos should always be created and saved in a vector format such as .AI (Adobe Illustrator) or .EPS (Encapsulated PostScript) . This allows for scalability without losing quality and ensures that the logo can be resized for different applications.
Raster format: While vector files are preferred, there may be situations where a raster format is required. The logo should be saved as a high-resolution .PNG or .JPEG file to maintain clarity and sharpness.
Colour modes: Logos should be designed and saved in the CMYK colour mode , suitable for print materials. The RGB colour mode should be used for digital applications like websites or social media. This ensures accurate colour representation across different mediums.
Clear space: Creating clear space around the logo is essential to maintain visibility and legibility. This refers to the area that must be held around the logo, free from other design elements or text.
Minimum size: Consider the minimum size at which your logo remains recognisable and legible. This is especially important for applications such as small icons or favicons. Ensure that your logo retains its integrity and visual impact even at smaller sizes.
File naming: Consistent and organised conventions are crucial for efficient file management. Use descriptive names that indicate the logo's purpose and version number, such as “CompanyName_Logo_FinalVersion.ai”.
Usage guidelines: Provide guidelines for the correct usage of the logo. This includes specifications for resizing, colour variations, and any additional graphic elements that can be used with the logo.
By keeping these logo design file formats and guidelines in mind, you can ensure that your logo is versatile, visually appealing, and consistently represents your brand across different platforms and mediums.
Vector vs Raster File Formats

| Vector file formats consist of mathematical equations and lines. | Raster file formats consist of pixels. |
| They allow for unlimited scalability without any loss of quality. | They have a fixed resolution, which can cause pixelation when scaled up. |
| Standard vector file formats include AI (Adobe Illustrator), EPS (Encapsulated PostScript), and SVG (Scalable Vector Graphics). | Standard raster file formats include , , and . |
| Vector files are smaller in size compared to raster files. | Raster files can be larger due to the information stored in each pixel. |
| They are widely used in logo design, allowing effortless editing, resizing, and manipulation. | They are commonly used for photographs and complex images where detail is essential. |
| Vector file formats are best for creating logos and other graphics that need to be scaled to different sizes. | Raster file formats are suitable for images viewed on screen or in print at a fixed size. |
| Vector files are resolution-independent and can be easily converted to raster files. | Raster files are resolution-dependent and cannot be easily converted to vector files without losing quality. |
| Vector files are essential for professional printing as they ensure sharp and clean images. | Raster files can sometimes lead to blurry or pixelated prints if not used at the appropriate resolution. |
Ensuring Scalability and Versatility
Ensuring scalability and versatility is essential in logo design as it enables the logo to be used seamlessly across different platforms and applications. There are several factors to consider when ensuring scalability and versatility in a logo design.
Vector file format: Using vector graphics ensures scalability. Vector files, such as SVG ( Scalable Vector Graphics ), allow the logo to be scaled up or down without losing quality or appearing pixelated. This ensures the logo can be used on various mediums, from small business cards to giant billboards.
Simplified design : A logo with a simplified and clean design is more likely to be easily adaptable to different sizes and formats. Complex details or intricate patterns may translate poorly when scaled down, reducing readability and impact. It is vital to ensure that the logo remains recognisable and legible even in smaller sizes.
Variations for different applications : Creating different logo variations to suit various applications can increase versatility. This includes variations for other colour schemes, backgrounds, or layouts. For example, horizontal and stacked logo versions allow for flexibility in placement and structure in various design contexts.
Scalable typography : Choosing a legible typeface that can be scaled without losing quality is crucial when selecting typography for a logo. Some typefaces may have delicate details that become difficult to read at smaller sizes. Opting for a versatile typeface ensures that the logo maintains its readability regardless of size.
Black and white compatibility : A logo design should work effectively in black and white and in colour. This ensures the logo can be reproduced when colour is limited or unavailable, such as in newspaper advertisements or black-and-white printing.
By considering these factors and incorporating them into the logo design process, designers can ensure that the logo remains scalable and versatile , maintaining its impact and effectiveness across various mediums and applications.
File Formats for Different Use Cases
When it comes to logo design, it is crucial to select the correct file formats for different use cases. Other formats offer varying levels of quality, compatibility, and scalability. It is essential to choose the appropriate format to ensure that your logo can be used effectively across different platforms and mediums.
| , supports transparent backgrounds | |||
Each file format has its strengths and weaknesses, and choosing the right one depends on the specific use case of your logo. For print media and large-scale signage, vector formats such as AI, EPS, or PDF provide the necessary scalability and high resolution. Raster formats like JPEG, PNG, or TIFF are more suitable for digital display and web applications due to their compatibility and smaller file sizes. SVG is ideal for responsive websites and interactive media where scalability and interactivity are essential. ICO format is designed for icons and is commonly used for favicons and mobile app icons.
When considering file formats for different use cases, it is crucial to understand the requirements of each medium and choose the format that best meets those requirements. Selecting the correct format ensures your logo looks professional and consistent across various platforms and mediums.
Potential Challenges and Tips for a Successful Logo Design Process
The logo design process can be both exciting and challenging . To ensure a successful outcome, it is crucial to be aware of potential challenges and follow some helpful tips. Here is a list of key considerations:
- Client's Vision: One challenge is aligning the client's vision with your creative ideas . It is crucial to have a thorough discussion and gain a deep understanding of their brand values, target audience, and design preferences.
- Research and Inspiration: Conducting research and gathering inspiration from various sources is essential. Explore the industry, competitors, and current design trends to create a unique and impactful logo.
- Simplicity and Versatility: A successful logo should be simple, memorable, and versatile. Avoid overcrowding with excessive details or complex elements. Ensure the logo works well across different mediums and sizes.
- Colour Selection: Colour plays a significant role in logo design. Consider the psychology of colours and choose a palette that effectively represents the brand's personality and resonates with the target audience.
- Typography: Selecting appropriate typography is crucial in logo design. Ensure the font choice complements the brand's image and effectively communicates its message. Pay attention to legibility and scalability.
- Feedback and Revisions: Collaboration with the client is essential throughout the design process. Seek regular feedback and provide revisions based on their input. This iterative approach ensures the final logo meets their expectations.
- Scalability and Adaptability: The logo should be scalable without losing its visual impact. It should look cohesive and recognisable across different platforms, including print, digital, and social media.
Throughout history, logo design has played a significant role in brand recognition and communication. Take the iconic Coca-Cola logo , for example. The design, featuring a distinctive cursive script, was introduced in 1887 and has remained relatively unchanged. Its timeless nature has contributed to its recognition and success.
A successful logo design process requires addressing potential challenges and following these helpful tips. By understanding the client's vision, conducting thorough research, and focusing on simplicity, versatility, and adaptability, you can create a logo that effectively represents a brand and resonates with its target audience.
Some Facts About The Logo Design Process
✅ Good logos effectively communicate the core tenets and purpose of an organisation.
✅ Professional logo designers conduct industry and client research, brainstorm ideas, and create sketches in collaboration with their clients.
✅ Logos serve as the most recognisable representation of a company or organisation.
✅ Many brands choose to hire external assistance for logo design.
✅ Great logo design principles include simplicity, memorability, timelessness, versatility, and appropriateness.
What is the process of designing a logo?
The process of designing a logo is long and complicated. We start by researching the client and their needs. Then, we start brainstorming ideas. We start with the concept and then work through the development process. We design the logo, prototype it, and present it to the client.
What are some essential steps in the design process?
In the beginning, you'll need to know your client's budget. You'll also need to determine how you want your logo to look. Then, you'll need to create a style guide that defines your logo's typeface, colours, and other elements. After this, you will need to begin creating concepts. You'll need to research the client and their company. You'll need to design a logo appropriate for the client's industry. After you've designed the logo, you'll need to create a prototype.
How many revisions are typically required during the design process?
There are usually several revisions required. You'll be asked to change the logo during the first round of revisions. You'll be asked to change the font, colour, and style during the second round of revisions.
How long does a logo design project usually take?
The length of a logo design project depends on many factors, including the size and complexity of the project. Some projects can take a few hours, while others can take months.
What do I need to do before starting the logo design process?
Before you start the design process, you'll need to think about what the final result will look like. Will it be two-dimensional, three-dimensional, or both? Will it be a flat, raised, or something else? Once you've decided on the type of logo, you'll need to decide what colours you want. Think about the colours that will work with your brand.
What is the most critical part of a logo design process?
An essential part of the logo design process is communication. You will understand the project if you and the designer are on the same page.
What do I need to know about the design process?
The process of designing a logo requires patience. You will spend a lot of time thinking and planning before you develop a good logo.
What are the benefits of working with a professional designer?
Working with a professional designer can be beneficial because they have the experience to ensure the design is unique and compelling.
What's the difference between a logo design and a brand identity?
A brand identity is a visual image representing your company and giving it a personality. It is meant to be used as a symbol of your company's product or service. A logo, on the other hand, is used to represent your company more personally.
Related Posts
- 1930s Fonts & Typography: Art Deco & Beyond
- Graphic Design Ethics: Copycats, Clients, and Copyrights
- The 7 Different Types Of Logos & How To Use Them
- Sensory Branding: Engaging All 5 Senses
- Personalisation in Marketing: Why it Matters

Stuart Crawford
Need help building your brand.
Let’s talk about your logo, branding or web development project today! Get in touch for a free quote.
Leave a Comment Cancel reply
Trusted by businesses worldwide to create impactful and memorable brands.
At Inkbot Design, we understand the importance of brand identity in today's competitive marketplace. With our team of experienced designers and marketing professionals, we are dedicated to creating custom solutions that elevate your brand and leave a lasting impression on your target audience.
COMMENTS
Create a new board to display your concepts. Drag a board out from the toolbar. Give it a name, then double click to open it. Drag files from your computer. Click the "Upload" button or just drag a file onto your board. You can add images, logos, documents, videos, audio and much more. 2.
Sponsored Become a sponsor. 3. Tell a compelling story about the logo. Learning how to present a logo to a client is as much about storytelling as it is about professional presenting skills. In fact, a story will often get you much further with a client than a stiff, executive-style presentation ever will.
A logo presentation is more than just showing a design; it's an art of storytelling.Crafting a compelling narrative around your logo design involves weaving together visual identity, brand guidelines, and logo variations to communicate the brand's essence.. Throughout this article, we've explored how to create an engaging logo presentation that captivates and informs.
1. Prepare your client. First, before you show any of you logo work, you need to prepare your client for what's coming. You must put your client in the right state of mind before you show them anything. I like to remind my client about two things: what a logo is and what makes a good logo.
How To Present Logo Concepts
1 - Follow the right logo design process. As with every other essential aspect of planning your business, you should also follow the step by step process of logo design. The logo design process is as follows: Design brief. Research. Reference. Sketching and conceptualising, with some reflection in between. Revisions. Presentation.
1. Logo Presentation PowerPoint Template. An all-in-one solution that lists the tools required to create a captivating logo presentation. In a clear timeline format, this logo presentation deck can help us structure the story that backs up the logo creation process - ideal for those who prefer to omit hand-drawn illustrations and stick to the final digital files.
Rule #5 - Use the right tools. Even if designers are ambitious about logo presentation, they make it manually in Illustrator or Photoshop, spending hours. At first, you need to modify each logo alternative manually. Then, you have to put all these modifications together on a single page.
The Ultimate Brand Identity Presentation Guide
Logo Design Presentation Template - Milanote
Add a brand icon to your logo presentation. Logos often tend to be pretty big. You need to fit in the name of the brand or incorporate several visual elements. Obviously, a large-format logo doesn't fit to all advertising formats, websites favicons, and other mediums. This is why you absolutely need to include an icon into your logo presentation.
Logo design process: how professionals do it -
Here Are The Few Tips On How To Structure Your Logo Presentation. 01. Explain The Story Behind Your Logo. Logos are designed after analyzing the brand thoroughly. The main objective is to give a visual identity to the brand and communicate the brand's message effectively. Therefore, before starting with your logo presentation using ...
Grab this template: https://www.abiconnick.co.uk/product-page/brand-presentation-templateHow I can help you ⬇️👉 Wow your clients with easy-to-customize temp...
Never present the logo alone. Be sure to use some outline mockup. Show your customers how exactly a logo would look like being applied to some product. Make some card samples. Come up with a ...
10 Examples of a Professional Logo Presentation
In this online course, he walks you through all the steps so that you can create a striking and powerful logo of your own for a brand or company. Throughout the course, learn to strategically develop your design starting from the client brief and analysis, moving on to some conceptualization tools and your first sketches, and finishing up with ...
How to Design a Logo [Step-by-Step Guide]
10 Logo Design Tips & How to Make a Good One ...
1.Holding Business Card. Take a picture of your hand holding a card with your logo design on it. You can always use the same picture for other logos in the future. Place your logo into the card in Photoshop. Ctrl+T to distort and skew the logo to fit the perspective of the card and scale the logo into the right size.
Logo Design Process From Start To Finish
How To Make a Good Presentation [A Complete Guide]
The initial logo design presentation is exported to a secure PDF format, allowing them to view it on screen or print it out. ... Ensure the chosen method meets all the criteria and effectively communicates the desired message. By following these steps, you can confidently select the final design for a logo that will effectively represent the ...